Hello everyone, today I want to look at how to turn on and off the low and high beam lights on a Lada Granta car. The GRANTA headlight control unit is located on the left under the air duct.
To activate the size, you need to set the switch to the middle position. The size will work whether you have the ignition on or off.
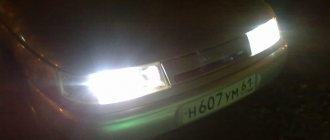
To turn on the low beam headlights on the Lada Granta, you need to move the switch to the extreme right position; it works when the ignition is on. If you turn off the ignition in this state, only the side lights will remain on.
The high beam control on the Grant is located to the left of the steering wheel; the steering column switch is responsible for this.
To turn on the high beam, you need to press yourself under the steering lever, and it is worth remembering that the high beam will turn on only if the low beam is on. To turn on the high beams, you press the switch as if it were operating on its own, regardless of whether you have the ignition on or not.
It is worth noting that after turning on the low or high beam lights, special warning icons light up on the instrument cluster. Well, that's all, we looked at turning on and off the high and low beam dimensions on a Lada Granta car. Goodbye everyone.
For complete or partial copies of information, a link to the site is required. All materials on the site are presented for informational purposes only. The user is responsible for all risks associated with using the site. Site age category 16+
Adjusting the Lada Granta headlights is necessary if you do not have enough factory lighting settings. Do you need to turn the hydraulic corrector as far as possible? It's time to adjust the headlights. We’ll tell you how later.
Do-it-yourself adjustment of Lada Granta headlights
Let's look at what you need to quickly and smoothly adjust the headlights on a VAZ 2190:
- a room with a flat wall at a distance of at least five meters from the machine;
- Phillips or hex screwdriver;
- tape measure or long ruler;
- Place a weight equal to yours on the driver's seat (a person of your height or 2-3 bags of plaster - cement - nearby).
Step-by-step adjustment of low beam headlights on Grant
First, let's place the car in front of a flat wall at a distance of 5 meters from the headlight to the wall. Only on a flat surface.
Second, we measure the height from the low beam bulbs to the ground. We mark it on the wall in front of each lighthouse - this is the upper limit of the light beam.
Third: move 35 mm and make another sign. For what is shown in the picture.
Grant's Lighthouse falls into this mold. The upper edge of the beam has a bend - its upper edge should be equal to the height of the headlights from the ground. The bottom edge of the crack is at the same height minus 35 millimeters
Fourthly, we close the projector so that the light does not block the near beam. We turn on the neighbor.
Fifth: Use the lamb to adjust the light, adjust the height of the light. The goal is to have the top edge line up with the marks on the wall. See the example in the photo above.
Access to adjusting the headlights on the Grant is easy. This connector only adjusts the height of the light
Sixth: close the other beacon and configure the second one.
Seventh: if you need to correct the left-right light, use the long valves located on the headlights themselves.
Rotate these knobs to adjust the light horizontally - left/right
Rare guest
- We first check the tire pressure, place a load (75.0 kg) on the front seat, squeeze the parking brake lever;
- On the wall (obstacle) we draw a horizontal line at a distance of 550 mm. from the earth. This will be the level of visibility of the driver’s pupils at a distance of three meters from the front bumper;
- We draw a line perpendicularly passing through the center of the light beam for each of the headlights: line 1 and 2.
- A vertical line is drawn down the center.
Useful tips Connection diagrams Principles of operation of devices Main concepts Meters from Energomer Precautions Incandescent lamps Video instructions for the master Testing with a multimeter
When do you need to adjust headlights on a Grant?
The main reason for working with headlights is insufficient street lighting. There are many reasons for this:
- The car comes from the factory with a driver weight setting of 75 kg. This is a universal setting - if you have a different weight, you need to adjust it immediately after purchase;
- the hydraulic corrector has failed: when it fails, the headlights light up incorrectly or are not adjusted at all;
- movement over unevenness and potholes over time leads to changes in the settings of the light beam;
- I’ll buy a car second-hand - it’s not known exactly how the light was installed by the previous owner.
How to turn on near or far
The light switch on the Grant is located at the bottom left of the steering wheel, like the 10th family.
Switching the knob clockwise provides sidelight and low beam modes.
To turn on long range:
- turn the lantern handle to the extreme right position clockwise - the adjacent one will light up;
- move forward the switch on the left steering column (responsible for the turn signals);
- your high beam will light up - and a blue headlight icon will appear on the dash - keep an eye on it so you don't leave the car with your high beam on when you no longer need it.
This icon indicates that the far
What devices are used during the day?
Despite the listed conditions, which may seem too many to you, everything is very simple and logical. Below we will consider each case of using a particular lighting device in accordance with the traffic rules relevant for March 2022.
The first thing to start with is, of course, the operating time of the machine. Let's look at each of them, as well as common questions that car owners sometimes have.
It is prohibited, according to traffic rules, to switch to high beams during the day, and it is also prohibited to drive with only one fog lights located at the rear turned on. It's simply not logical.
What kind of lighting do you prefer?
Built-in Chandelier
What is a hydraulic corrector and how does it work?
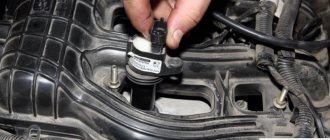
The hydrocorrector of the headlights on the Grant starts up. This device adjusts the headlights up and down depending on the vehicle's load.
You will have to configure it yourself - there is no automatic adjustment.
The corrector control is located under the light switch. Position 0 corresponds to a car with one person: the driver.
Operating principle:
- the handle controls the corrector hydraulic cylinder;
- the cylinder regulates the pressure in the hoses going to the pushers;
- buttons are installed in the headlights - the higher the pressure in the pipes, the stronger the liquid inside the pusher presses on the rod;
- The position of the deepest/furthest rod controls the adjustment of the highest/lowest headlight.
The operating principle of the hydraulic corrector is shown below:
Visual representation of the hydraulic headlight leveling system
What to do if the hydraulic corrector is broken
Have both headlights or one of them stopped responding to the corrector at the same time? Most likely your pushrod is broken.
If you want to secure the pushrod, there are two ways.
Table 1. Repair options for the headlight depth adjustment button.
Option 1 is barbaric.
No additional settings.
Link to a detailed description of the second method with comments here.
A set of concealer costs about 700 rubles - it may be easier to replace it
How to replace a hydraulic corrector with an electromechanical one
Do you want to replace the hydraulic corrector with an electric corrector (EMKF)? The process is simple, as there are ready-made solutions from the factory.
Replacement requires only straight arms, depending on the EMCF manufacturer:
- disassemble the old hydraulic corrector;
- instead of the cylinder, we install a new control unit from the corrector - we transfer the wiring according to the instructions;
- we pull the threads through the elastic band through which the plumbing pipes passed;
- We put the regulators in the regular places in the headlights.
Here the process is described step by step, based on personal experience.
External lighting control unit and headlight beam direction controller
In accordance with paragraph 19.5 of the Road Traffic Rules, “During daylight hours, low beam headlights or daytime running lights must be turned on on all moving vehicles for the purpose of identifying them.”
Daytime running lights do not blind drivers in the oncoming lane and significantly reduce energy consumption in the vehicle. Daytime running lights on a LADA GRANTA car light up when the ignition is turned on and continue to burn while the car is moving. External lighting control unit and headlight beam direction regulator: 1 – external lighting switch; 2 – key for turning on the fog light lamp in the left rear light; 3 – regulator of the direction of the headlight beams. The block is located on the instrument panel, to the left of the steering column. External lighting switch 1 has three fixed positions (or four in a variant). In the extreme left position of the switch handle, the external lighting is turned off. When the handle is moved to the middle position, the side lights, instrument panel lights and license plate lights are turned on. At the same time, the daytime running lights are lit. When you turn the handle to the right, in addition to the above-mentioned lamps, the low or high beam headlights are turned on, depending on the position of the left steering column switch (daytime running lights do not light up in this position of the handle). The headlight beam direction regulator 3 is designed to adjust the angle of the headlight beam in the vertical plane depending on the vehicle load. Combining the mark on the switch handle and the number on the unit body ensures headlight adjustment for the following vehicle loading options: 0 – one driver or a driver with a passenger in the front seat; 1 – driver plus four passengers or driver plus cargo in the luggage compartment; 2 – driver, four passengers plus cargo in the luggage compartment. The fog lamp in the left rear light is turned on by pressing key 2 when the headlights are on. The fog light in the rear light is turned off by pressing the button again.
Let's summarize
- To adjust the headlights of the Lada Granta, you need five meters of space, a machine, a Phillips screwdriver and a tape measure;
- to turn on the light in the trunk, turn on the adjacent one and open the trunk;
- You can repair the hydraulic corrector yourself, or you can buy a new one for up to a thousand rubles.
More articles on renovations and maintenance grants here.
Having driven a VAZ2109 for 9 years and gotten used to its dim headlights (high beam is the same as other models), I was surprised by the quality of the Lada Granta headlights. It should probably be of this standard, but I came out of the trees recently and for me it was a nice bonus for such a good car.
How to improve the quality of work done
In order to improve the productivity of road surface lighting, the elements of the body should be examined, that is, inspected for deformation, defects, etc. By ignoring the curvatures present on the body, it will not be possible to achieve maximum concentration of the light beam.
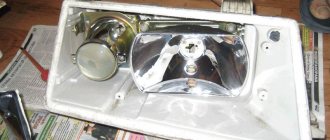
It is important to check the integrity of the headlight glass on Grant and the tightness of the sealing components. If dirt and dust have accumulated in the optics module, it means that the seal is weak. The rubber seal needs to be replaced and the silicone sealant updated. If the reflector or mirror surface is damaged, the optics must be replaced, since such a defect cannot be restored.
Your task as a car owner is to notice all faults in a timely manner, and this applies not only to headlights. Any knocking, grinding, clanging, tight pedal, rough movement and much more should alert you. Take care of your car and it will serve you for many years!
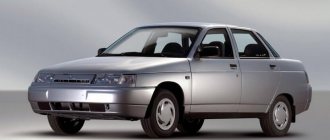
Lada Granta has become one of the most affordable cars of our time. This is what made him so popular. The situation is also improved by the fact that it has good technical characteristics, including high-quality optics, regardless of configuration (standard, standard, luxury).
Turning on the headlights
As in foreign cars, the headlights of the Lada Granta immediately light up when the key is inserted into the ignition. Since Russia has a law against driving with headlights on everywhere, this is a nice bonus since the headlights turn on automatically when you are about to drive somewhere. It also solves the problem of forgotten headlights: when the key is removed from the ignition, the headlights go out. You've probably already seen cars abandoned by their owners with low beams on and the battery quietly discharging.
By the way, it was noticed that when the starter is moved, the headlights go out so as not to torment the battery.
To turn on the headlights yourself, switch from high to low, you need to find the switch (in the image below it is marked in yellow):
Grant instrument lighting fuse
- In place of the blown fuse, you can insert several cores from a stranded wire (one core can withstand 1 Ampere). The veins are inserted either into the socket or wrapped around the fuse itself, while the contact surface should be pressed tightly against the homemade fuse element; You can replace a faulty relay with an analogue, which is used to turn on other high-voltage circuits (you can use an element for turning on the power window circuit or an element for turning on additional equipment, heated seats). Many vehicles have a dedicated backup socket with an unused relay.
- To turn on the headlights, bypassing faulty elements of the power circuit, use wires of the required length and required cross-section (the ends of the wires are stripped of insulation and connected to a car socket for a portable lamp). You can also use a car cigarette lighter, connecting from the back of the power point, while the wires are connected directly to the terminals, the other ends of the wire are connected directly to the low beam lamp.
Adjusting the angle of incidence of light from the headlights
There is also a special switch for adjusting the headlight angle (marked with a red arrow in the picture). It has many positions and is very tightly adjustable (in theory, it doesn't need to be adjusted very often, once set and forgotten).
When adjusting, I set the angle as large as possible so that there is more illuminated space. While this may blind oncoming cars, other foreign cars have an even more brash attitude towards other drivers.
Related posts:
- DIY wing stealth
- Wiper connection diagram gas 31 10
- Chevrolet Niva brake system with abs
- UAZ seat heating does not work
| |
| Option 2 is human. We return the corrector to fully working condition. |
|