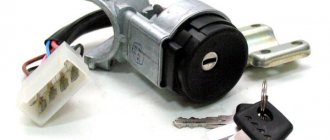
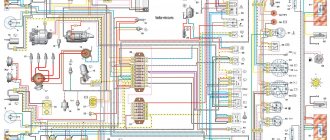
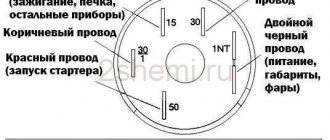
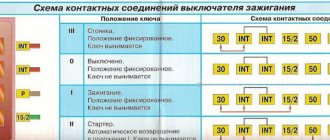
But there are also versions of the car in which the wiring is directly connected to the contacts, and when installing a new element with this type of wiring connection on a VAZ-2101, an ignition switch circuit will be required.
If the lock assembly is replaced, then you can connect the wiring to the new one, install it in place, secure it and cover it with a decorative panel.
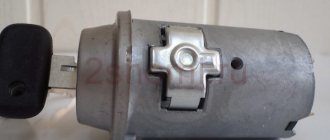
If only the contact group is changed, then the removed lock is disassembled. The contact group is fixed using a locking ring, which must be pryed off with an awl or screwdriver and removed. After this you can remove the group. A new one is installed in its place and secured with the same retaining ring. After this, everything is put in place and the VAZ-2101 ignition switch is connected.
The principle of operation of the immobilizer and its design
The immobilizer works as follows: before starting the car’s ignition system, the owner must either enter an identification “PIN code”, consisting of a series of presses on the function keys of the dashboard, or activate the immobilizer using a microchip that is sewn into the key, car key fob and even plastic card.
Otherwise, the car may be blocked when you try to start it. Some models of immobilizers allow you to start a car and even drive it for a short distance. After the car stalls, the attacker has no choice but to leave the vehicle. The owner of the car has the opportunity to immediately find the car. The immobilizer consists of three parts:
- Control block.
- Electromagnetic relay.
- Key.
Each of these elements has its own purpose. So, the control unit activates the device after sending the appropriate signal. Relays immobilize the vehicle by interrupting electrical networks. Well, the key is a control element that can deactivate the security system and start the vehicle.
However, an immobilizer does not provide 100% protection for a car. An attacker can use the device's diagnostic connector to deactivate it. The connector is located in an easily accessible place, through which a car thief can register another key and put the control unit into emergency mode (when this mode is activated, the immobilizer does not respond to attempts to start the car).
Additionally, by using the CAN bus, an attacker can use capital keys for emulation. There are often cases when a winder is inserted into the connector; literally in half a minute it breaks the standard security system and adds a key that can be used by an attacker during theft.
A car thief can also replace the ECU and immobilizer unit, rendering this device useless in the fight against theft. Also, attackers can relay the immobilizer key code, or simply steal the latter.
Typical faults
Since the ignition switch on the VAZ 2109 performs two functions, the nature of the faults can be divided into mechanical and electrical, although most often the lock breaks down in starter mode:
- A mechanical malfunction includes jamming of the core in any position: it is physically impossible to turn the key. In this case, you can inject a little silicone lubricant inside. If this does not help, you will have to remove the ignition switch and replace it with a new one.
- Electrical faults can occur at a certain position of the key when the integrity of the electrical network in the switch is broken. If there is no contact, all system components will not work. If there is contact, but the circuit does not occur where it is needed, this is fraught with a short circuit and overheating of the circuit breaker. It may melt and a specific smell will appear (video author - MAQS MAC).
The operating principle of the VAZ ignition switch: features and nuances
The easiest way to consider the algorithm for the operation of the protection system is on the basis of our beloved domestic automobile industry. The operating principle of the ignition switch of a VAZ 2110 or any other model of the Volzhsky Automobile Plant is identical, only the design of the device changes, and not radically.
As a rule, the key can be in three positions:
- 0 – almost all electricity consumers in the car are turned off, only in this position can the key be removed and inserted;
- I – in this position, various devices are connected to the battery, for example, you can turn on the headlights, radio, windshield wipers, etc., the key can be fixed in this position and cannot be removed;
- II is probably the most important position, as it activates the engine starter. When translated to this position, the key then returns to I on its own.
In older models, the so-called “classics”, there may be another lock position, marked as “III”. It mechanically locks the steering column.
As we have already said, the algorithm for the operation of the protection system in VAZ cars is very similar. So, for example, the operating principle of the Kalina ignition switch is almost no different from the VAZ 2110, VAZ-2111, VAZ-2112 and others.
We recommend: Which brake discs are better?
It would not be amiss to mention such an interesting feature of the above-mentioned models as blocking the restart of the starter when the engine is running.
Moreover, the operating principle of this ignition switch function is implemented in such a way that even if an attempt to spin up the engine fails, additional manipulations must be performed - move the lock to position 0 and only then can it be switched back to II.
So, our dear readers, you probably already understood that the function of the ignition switch is reduced to fairly simple actions - switching various groups of electrical contacts that are responsible for their consumers in the car.
Of course, this brief overview of this unit does not pretend to be a comprehensive technical treatise, but it still allows us to understand the essence of its design.
Differences from the base model
The choice of the “five” was not accidental - in those years it was a more modern solution to the car’s design in technical terms. This was presented in every possible way in the videos of those years. But even having decided to produce a station wagon based on it, the engineers had to make changes to some components.
- Instrument panels;
- Rear blocks of side lights and brake lights;
- Injection fuel supply system for a model with a VAZ 21067 engine.
Accordingly, the VAZ 2104 engine compartment wiring diagram for the injector had design differences from the standard carburetor version.
Dashboard
An experimental panel with combined instruments was installed on a VAZ 2104 car.
In particular, a single device (in the diagram under No. 7) consisted of:
- Low battery level indicator;
- Fuel level indicator in the gas tank, combined with a warning lamp;
- Engine oil pressure warning lamp;
- Coolant temperature gauge with level indicator lamp in the expansion tank.
Other reasons
Another reason for poor performance may be a faulty relay. It is almost always located in the mounting block and switches the voltage supply to the solenoid relay. If it malfunctions, the starter will not show signs of life if all other components are in full working order. To check, just listen to his work. When triggered, it always clearly clicks (the contacts inside it close). If it is silent, it means it needs to be replaced.
The operation can be blocked by an immobilizer or a security alarm installed on the car. They can be connected to the ignition or starter circuits and, when arming, simply open the starting circuit so that the starter does not respond to turning the key. To check, you should try to bypass it by connecting it directly to the battery. If it works, then the reason may be precisely these security systems.
Thus, there are quite a few reasons why the starter does not respond to the ignition key or clicks, but all of them can be diagnosed and identified using a comprehensive and consistent approach.
Help out) VAZ 21124 16kl, 1.6. The power goes out, you turn the key, nothing happens. The terminals are cleaned, the cigarette lighter and other electrical appliances do not work, only the backlight on the ignition switch (diode) lights up. It all started when the car stalled, I moved the terminals and tightened everything up. then the next time the engine starts, the same story repeats, only the terminals no longer help, I cleaned the ground anyway, looked at the ignition switches (which are in the passenger’s feet), changed them, it didn’t help. In the morning I started trying to start the device, it lit up and immediately went out, I heard that the relay was clicking when I turned the key in the fuse block, I found the relay, I changed it, everything worked. I drove for half a day, turned off the car, checked the ignition, and again the story repeated itself. Only the ignition switch illumination is no longer lit, the relay does not click. There seems to be no food, what could it be?
21 comments on “Power loss, turn the key, nothing happens”
First, check all the fuses, and only then which one burns according to the circuit diagram and find out the short one
Damn, it’s interesting, try disconnecting the wires from the ignition switch and start running through them, don’t be afraid, you can wrap everything in a bunch and it won’t short-circuit anything. Maybe you have a lock on your head...
Look at the mass on the body and engine
There was such a problem, only turning the starter once was enough, but the whole tidy went out. Then my previous owner changed the fuse box, he didn’t install it carefully, so he changed the wire and shorted
Unscrew the panel at the front passenger's feet on the left, there will be three fuses there, look at them.
I had the same problem, I changed the retractor on the starter and it disappeared.
Everything was on, the fuel pump was working, the key was turned and there was silence, it started 2 times out of 3 times. I would look at the battery for your symptoms.
Look, the fuse is where the brains are
Looks like there was a fuse under your hood and it burned out.
Alexey, but when it didn’t start, it started the next day)
Look at the pin on the generator... sometimes it rusts, there is no contact... just unscrew the terminal with the battery, throw it off
Mikhail, what kind of hairpin?
Stepan, I have an email. Devices that were working without ignition do not work
There is a positive wire on the generator...the positive wire goes to it...I had this happen...I removed the wire...cleaned the contacts...and everything worked
Mikhail, maybe I’ll check now, they also advised me)
During the operation of vehicles, regardless of the type of engine installed, a common malfunction is starter failure, as a result of which it is not possible to start the engine after turning on the ignition. In other words, the car starter does not respond to turning the key in the ignition switch. In such situations, after turning the key, instead of cranking the engine crankshaft, the starter is completely silent, buzzes or makes clicks, but does not turn the engine. Next, we will look at the main malfunctions when the starter does not respond in any way to turning the key in the ignition, as well as other reasons that may cause the starter to not work.
Installing the "Start" button
Some VAZ 2106 owners install a button for ease of starting the engine. It is connected via the starter power circuit to the break in the red wire, which goes to terminal 50 of the ignition switch. In this case, the engine starts as follows:
- The key is inserted into the lock.
- Turn it to position I.
- The starter is started by pressing the button.
- When the engine starts, the button is released.
To stop the power unit, you must turn the key counterclockwise. A slightly different option for connecting the button is also possible, so that with its help you can not only start the engine, but also turn it off. For these purposes you will need the following parts:
- headlight relay RS 711;
- starter relay 113.3747–10 or 90.3747–10.
In order to turn off the engine, the button must be connected in a slightly different way.
According to the diagram, when the button is pressed, power is supplied to the headlight relay, and after the contacts are closed, to the starter. When starting the power unit, the button is released, thereby opening the contacts of the starter relay and breaking its power circuit. If you press the button again, the contacts of the switching device open, the ignition circuit is broken and engine operation stops. The second option for using the button is called “Start-Stop”.
Even a car owner who is encountering such a problem for the first time can replace or repair the ignition switch on a VAZ 2106. To carry out the work you will need a minimum of tools and following step-by-step instructions. The main thing is to connect the wiring to the lock in accordance with the diagram.
Replacing the ignition switch
Indeed, completely replacing an element can solve many problems at once
It is important to note that the features of replacing a lock differ in some ways depending on the brand of car
The most common causes of failure
First, you need to figure out in which cases this procedure is really necessary (It is worth mentioning that replacement is often made when the owner’s keys have been lost).
The most likely causes of failure are:
- Wear of contact group components;
- The problem with the secretion: moisture causes corrosion, which prevents normal operation;
- Burning of contacts;
- Installation of new or additional devices with increased power;
- Malfunction of the ignition lock cylinder.
You should pay attention to the features of some foreign brands. For example, in a Toyota car, the key sign of a malfunction is the inability to turn the key, which is caused by wear of the code windows, which need to be replaced during repairs.
If the driver is sure that a serious malfunction really exists, the lock is replaced. Doing this is not as difficult as it might seem at first glance; the main thing in this matter is attentiveness and accuracy.
Replacing the ignition switch
The sequence of actions when replacing a lock is quite simple. All you need to do:
- Remove the cover from the steering wheel and unscrew the screws.
- Place the key in position “0”.
- Press the lock with a screwdriver (through the hole in the bracket), and then pull out the core and remove the key from the lock.
- Make sure that after disconnecting the wires do not get mixed up (take a photo of the original position).
- Replace the lock with a new one.
Replacing the contact group
As stated earlier, most problems with multiple device failures can be resolved by replacing the contact group. This can be done in several steps (the first steps are practically no different from the steps of completely replacing the lock).
Step One: Theory
The driver needs to familiarize himself with the structure of the ignition switch to avoid making mistakes. Even if there are instructions, they should be read immediately, and not as you proceed.
Step two: Preparing for work
To make a replacement, you must first disconnect the battery. To do this, you need to remove the negative terminal. It is also worth preparing the tools in advance (usually a Phillips screwdriver or a regular awl is enough).
Step Three: Gaining Access to the Lock
The driver must remove the plastic steering wheel cover, which usually consists of an upper and lower part
To do this, you need to unscrew all the fixing bolts, and then carefully remove the plastic protection of the mechanism
It is also important to disconnect the cable connector and the backlight bulb socket
Step Four: Removing the Lock Cover
At this stage it is necessary to disconnect all accessible fasteners
After removing the main cover, it is also important to remove the remaining two clips in order to disassemble the part
Step Four: Troubleshooting
Here it is important to pay attention to the convex contact elements that are located on the light source. You can try to remove corrosion or carbon deposits using sandpaper, but you should understand that this measure is a last resort. A more rational solution is to replace the contact group
A more rational solution is to replace the contact group.
Thus, each driver independently decides whether it is worth replacing the ignition switch completely
Indeed, replacing a single and most important connecting part can solve most of the problems encountered, but complete replacement still remains the leading universal solution
Correct operation and repair of the ignition switch
The operation of the ignition switch has several subtleties that especially need to be taken into account in older cars.
It is important to remember the following:
- The key must be turned smoothly and without jerking, and the key must not jam or slip (if this happens, the lock must be checked and repaired);
- Do not turn the key to the “Stater” position when the engine is running, as this may lead to damage to the starter. Many modern locks have a function to block the key from turning when the engine is running;
- Do not leave the ignition key in the “ON” position when the engine is stopped, as this will discharge the battery;
- To lock the steering wheel, you must first remove the key and then turn the steering wheel in one direction or another until it stops.
Some cars have other features of the ignition switch; they must be indicated in the operating instructions.
The ignition switch is one of the most reliable parts of a car, but over time it can also fail. The most common problems encountered are jamming of the cylinder, wear of the cylinder, wear and corrosion of contacts, or mechanical damage to the contact unit. If the cylinder fails, the lock is replaced completely; if the contact unit breaks, only it can be replaced without touching the cylinder. However, today, in case of any malfunction, the lock is most often replaced completely, since this is easier and cheaper than disassembling and repairing the old lock.
It should be noted that some problems can be solved without replacing the lock. For example, if the lock jams, especially on domestic cars, you can try treating the cylinder with graphite lubricant. And damage to contacts or conductors in a contact assembly can be repaired by soldering or replacing these parts.
In general, the ignition switch usually does not cause problems for the car owner; in good condition, it provides easy operation and protection against theft, and lasts for many years.
Changing the contact group
Exploded view of the lock
Based on price considerations, replacing one contact group is less expensive:
- All our actions are repeated in principle, as in the case described above with removing the lock, you will have to remove the casing, and so on
- To avoid the widespread problem associated with mixing up contacts, it is recommended to number them before disconnecting (or mark them in some other way)
- This measure will save your nerves and time.
- Some models of locks have a locking ring in their contact group, and here we need an awl to pull it out
- It’s important not to forget to stick it in place later
- Then everything is put back together and screwed to the control column
Removing and disassembling the ignition switch
We remove the ignition switch to replace its assembly, as well as to replace the contact group of the switch or the APS coil. Disconnect the wire terminal from the negative terminal of the battery. We remove the steering column switches (see “Removing the steering column switches”). The heads of the ignition switch mounting bolts are cut off. Therefore... we unscrew them with a chisel. Loose bolts can be removed using pliers. Remove the bracket from the steering column.
. and the ignition switch. Use a slotted screwdriver to pry up the clamp of the APS coil wire block.
. and disconnect the coil wire block from the APS block wire block.
Using a Phillips screwdriver, unscrew the three screws.
. and remove the ignition switch bracket.
. and remove the locking rod drive. Remove the rod spring from the drive.
. and a stopper with a spring. Push the cylinder out of the switch body.
. and remove the locking ball.
Remove the cylinder from the switch body.
We remove the locking ball spring from the hole in the cylinder.
Prying it with a screwdriver. ..we disengage the two plastic latches of the wire block cover.
. and open the lid. We mark the wires located in the block.
. and remove the wires from the block.
Remove the insulating tube from the wires.
Squeeze the three plastic latches with a screwdriver. ..remove the contact group from the body.
. and bring the wires out through the holes in the housing.
Prying it with a screwdriver. . disengage the three plastic latches.
. and disconnect the contact group.
Remove the moving part of the contact group.
. remove it from the body.
Remove the contact spring.
. remove the APS coil. We assemble and install the ignition switch in the reverse order. We install the moving part of the contact group as follows.
. so that the wide protrusion of the moving contact is located opposite the protrusion on the cover with the fixed contact. . and the protrusion on the lock cylinder should fit.
. into the recess on the body of the moving part of the contact group.
Tool:
- Multimeter
- Chisel
- Large hammer
- Narrow nose pliers
- Straight box spanner 10 mm
Parts and consumables:
Tear-off bolts (4 pcs.)
In the power supply circuit for most of the vehicle's electrical equipment, except for the emergency, sound and light alarms, the canopy lighting, side lights, the brake signal, the security alarm and the electric door locks, voltage is supplied through the ignition switch.
To increase the car's anti-theft properties, the switch is combined with a lock, which is why this device is more often called an ignition switch. The lock body is attached to the steering column with four special bolts with break-away heads.
At a certain tightening torque, the bolt heads come off, and after that it becomes impossible to unscrew the bolts with wrenches.
Location
For most domestic and foreign cars, the ignition switch is structurally located in the steering column housing or under the panel of technical sensors. The contact group is located behind the plane of the ignition key cylinder.
It is typical for many vehicles to install the ignition switch on the right or left side of the steering column. Sometimes there are foreign car models where the lock and key are located on the car's dashboard or navigation panel.
This is interesting: 2 methods of cylinder block liner: features of repair work
Ignition switch device
The design of the ignition switch depends on the car model. There are two types: with a key and without a key. When cars first began their development, their ignition locks did not have keys. Similar designs were used until the mid-twentieth century, and then they were replaced by conventional models that use a key.
Despite the fact that now there is a revival of push-button ignition locks, the most common type of design remains where the use of a key is required. The most convenient variation of the model is considered to be a flip key.
The design of ignition switches is similar for most passenger cars. The part consists of two main parts. The mechanical one has a cylinder into which the car owner inserts the ignition key. It provides protection against theft. The electrical one comes from the contact unit.
The key has a cylindrical lock, which is responsible for both turning the contact unit and locking the steering wheel. All parts are sequentially connected to each other.
Larva
The part is the part into which the key is inserted to select the desired circuit connection. It is installed in a cylindrical spring, one of the ends of which is fixed to the lock body. The cylinder lock assumes automatic return of the lock in case of unsuccessful start. The part is connected to the leash.
Leash
The part resembles a wide cylinder with a through channel. There are balls at the ends of the radial channel, and a spring is placed between them. The design of the part assumes that the spring allows the balls to fall into the holes on the lock body. Thus, the leash allows you to rotate the contact unit disk and also guarantees the lock’s fixation.
Contact node
The part consists of a contact disk with plates (through which current passes), as well as a stationary block. The last element has about six contacts with leads on the reverse side. Typically, contact plates with a single connector are used.
contact Group
This mechanism is one of the most important parts of the ignition switch, since it is the connecting link between all other components. The mechanism closes the contacts of the electrical wires in the sequence required for a certain operating mode, which ensures the distribution of current between the devices of the machine. The position of the rotating parts of the contact group corresponds to the position of the key in the lock.
The contact group is necessary for more convenient connection and grouping of vehicle electrical networks. The part is indispensable in terms of practicality: using a contact group saves the car owner time and money. The fact is that connecting all contacts directly is extremely inconvenient. If it was necessary to replace any element, the driver would have to climb into the lock body and separately solder each contact. The contact group solves this problem, and its replacement is cheaper.
The key circuit is closed while turning, and electricity rapidly moves from the negative terminal through the wire system, and then from the lock contacts to the induction coil. It generates additional voltage and transmits it to the spark plug. The current then returns to the positive terminal of the battery.
As a result of many years of friction, the elements of the group can wear down, which leads to overheating and burnt contacts. Due to such malfunctions, interruptions in the operation of a variety of vehicle systems are possible. Often, replacing a contact group successfully solves the problem of failure of several systems at once.
How it works
The group of contacts in the ignition switch is a system for connecting wires in the required sequence and order, for this there is a start, ignition and parking position. This ensures correct distribution of on-board voltage from the current source, which in a car is the battery, to consumers. There are many of them in a modern vehicle, these include ignition and engine starting systems, lighting, alarm systems, control, monitoring, and security systems.
The contact group works together with the ignition switch; in some cases, when the ignition switch cylinder is broken, there are options for it to work independently, or an additional start button is installed. Below is shown how the ignition switch of a VAZ 2101-2107 works.
1. Anti-theft rod; 2. Product body; 3. Shaft with splines for turning the contact group; 4. Disk with contacts; 5. Bushing with contacts; 6. Contact connector.
The letter “a” shows the guide for correct assembly of the lock components. As can be seen from the figure, the device circuit is compared with a conventional electrical contact breaker. The key in it acts as a kind of regulator of the order of commutation of certain circuits. The first ignition switching devices were made as one piece, this simplified and reduced the cost of their production, but there was one significant drawback. If the contacts suddenly burned, broke, or oxidized, the lock had to be completely replaced. Therefore, a design for an easily replaceable contact group was developed.
Gazelle ignition switch pinout 5 pins
The quality of the ignition system of foreign and domestic cars affects the performance of cars. Obvious problems result in frequent failures or the inability to start the engine in a timely manner. In most cases, the problem is caused by the electrical part of the ignition switch.
Trucks of the GAZ family and buses can fail their owners due to burnt or oxidized contacts. To restore the functionality of the unit, we recommend studying what the Gazelle ignition switch circuit looks like.
How does the ignition system work?
The system for models with a 402 engine functions similarly to those systems installed on cars with a 406 engine or in a five-seater vehicle. The main tasks performed by the installation are based on the accumulation and subsequent transformation of voltage from low voltage to high voltage. Coils are used for this.
The voltage converted from the coil is sent to the spark plugs screwed into the block. A spark is formed between the spark plug electrodes, which ignites the combustible mixture. The main stages for the Gazelle ignition system are:
- formation of sufficient charge with low voltage;
- raising the charge to high values;
- redistribution of impulse between candles in the sequence specified by the manufacturer;
- sparking at the tips of spark plug electrodes;
- timely ignition of the air-fuel mixture.
To start the rotation of the engine crankshaft, a starter built under the hood is used. Voltage begins to be supplied to it after turning the key to its extreme position.
Repair work with lock
The driver may encounter a situation in which the motor does not respond after turning the key. One of the probable reasons is a poor connection in the contacts or the connection diagram of the Gazelle ignition switch has been broken. You can carry out repairs yourself in a garage.
With each new start of the engine, the starter may not start the first time, but after 3-4 attempts. Blaming the battery is not always correct. You should look for the cause in the ignition switch, where its switch is located.
How to extend service life
This is easy to do on those cars where there are no relays for the start or stop position. Installing auxiliary relays yourself helps with this.
The figure shows the connection diagram. Typically, such relays are mounted in circuits “30” and “15” of the lock, which is almost the same for all models. The exception will be the Moskvich and Volga cars, the switches of which are designed slightly differently. 30 Amp relays from the VAZ 2108 or 50 Amp relays from the VAZ 2110 are suitable as auxiliary relays. In “old” models, start buttons are mainly used. In a similar way, the circuit is unloaded along the circuit “30” - “50”. There are options for homemade modernization, when instead of one relay, two devices are installed in a parallel circuit. The circuit becomes somewhat more complicated, but the service life of the relay is extended.
Causes of breakdowns
Faulty contacts are a common cause of ignition switch failure.
Being an electromechanical device, the ignition switch of the Lada Kalina most often fails for the following reasons:
- Due to sudden surges in voltage, contacts burn out. At the moment the unit is started, there is a sharp increase in temperature in the system, which leads to burnout of the insulating layer.
- Oxidation of contacts due to increased dampness in the interior can lead to breakdown.
- Mechanical damage. Exposure to dust and dirt, manufacturing defects and careless operation lead to increased wear of the unit.
Signs of breakdown
Another common malfunction is a broken return spring (sometimes it just flies off).
In this case, the “symptoms” depend on the cause of the malfunction:
- If there is a mechanical breakdown, it becomes more difficult to turn the key. This indicates a malfunction of the lock cylinder.
- Oxidation or burnout is manifested by a lack of response from the system when the key is turned. In this case, troubleshooting can be reduced to cleaning or replacing the contacts.
Problems with the contact group manifest themselves as follows. The driver wants to start the car, but first the ignition must be turned on. A person turns the key and that’s it. The devices show no signs of life. In this case, it is possible to repair the ignition switch yourself, because the problem is not in the mechanism of the unit.
VAZ 2104 car platform
At first, the VAZ 2102, which was an “extended” version of the classic “penny”, was assembled as a universal model with increased capacity in factory buildings. However, having identified a number of design flaws, the engineers decided to use a different platform for the station wagon.
At its core, the VAZ 2104:
- It was an extended modification of the VAZ 2105;
- Most of the parts were unified with the entire model range of the Zhiguli family;
- The rear of the car received a full-size door equipped with heated glass and a windshield wiper;
- An additional center console with function keys has appeared in the cabin.
For reference: The factory instructions offered for the new car did not always reflect the changes made during the production and modernization of the VAZ 2104.
