For the domestic small car Lada Kalina with an 8-valve and 16-valve engine, the manufacturer has provided the possibility of installing two variations of generator sets: “5132.3771” and “9402.3701-06” (as an analogue). The factory unit is a three-phase electrical device operating on alternating current. The design of this generator contains a rectifier module and a regulator of the generated voltage.
If we touch on the quality of the generators used by AvtoVAZ, then you can find a wide variety of opinions on the Internet. The design of the unit is not complicated, so if it breaks, you can fix it yourself. And in this article we will talk about how to remove the generator.
About the principle of operation of a car generator
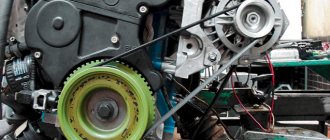
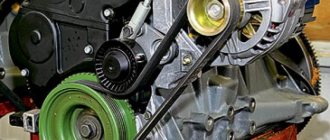
The operation of the Lada Kalina generator unit is based on the following principle: an alternating current is induced in the stator winding, which is subsequently transformed into direct current through a rectifier module located on the body of the unit. The generator cover is also equipped with an electronic voltage regulator and a brush holder. The rotor of the device receives torque from the crankshaft pulley. The transmission link is a poly V-belt.
The basic characteristics of the generator set include the following parameters:
- maximum generated current – 85-90 Amperes;
- operating range of on-board voltage – 14.4-15.1 Volts;
- rotation ratio of the motor and rotor – 1:2.4;
- right-hand direction of rotation.
The housing of the unit is held together by pins that tighten the stator with the covers. The mounting sockets of the indicated covers contain bearings, which ensure the ability of the rotor to rotate. The rear bearing is installed inside the cover with a minimum gap. The front element is equipped with the ability to slide along the surface of the rotor shaft. It is fixed inside the front cover with a slight interference fit, and a pressure plate covers it from the outside. The back of the device is protected by a plastic casing.
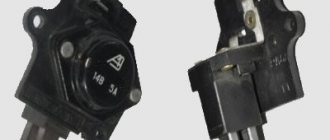
Let's move on to the switching diagram of the generator with the on-board network. The connection diagram is very simple. After turning on the ignition, power begins to flow to the voltage regulator through the battery discharge lamp circuit. When the motor starts, the excitation winding is supplied with supply voltage from three diodes mounted in the rectifier unit.
Using the indicated signal lamp, the generator unit can be checked. If the device is working properly, the lamp lights up when the ignition is on. It goes out when the engine starts. When this phenomenon is not observed and the lamp continues to shine, the generator set should be diagnosed for the presence of malfunctions. In some cases, replacement is required, and many are interested in how to remove the generator?
Checking the voltage regulator for serviceability:
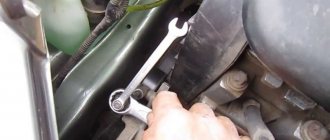
1) First of all, you will need to find where the generator itself is located and after you find it, move your hand aside the rubber cover, which is indicated by a reddish arrow, this cover covers terminal “B” in more ordinary words this is the positive terminal and it goes from the generator, to this terminal (by the way, it is also indicated by a blue arrow) you will need to connect the positive wire of the voltmeter and after connecting it, throw another wire (minus wire) going all the way from the same voltmeter to ground (the places where you need to connect wire, indicated by a green arrow), after the operation has been completed, a constant current voltmeter will show you the voltage in the vehicle’s on-board network.
We change bearings in Lada Kalina
The rectifier units present in the designs of generator sets of the AvtoVAZ model range have received a considerable number of negative reviews during operation. This statement is also true for the Lada Kalina we are considering. These modules can break down even after a mileage of 10 thousand km, which requires repair or replacement of the device. It has also been revealed in practice that the cause of most malfunctions is the generator set bracket. However, bearings can also fail prematurely. It is gratifying that the owners are able to cope with such a problem on their own.
To repair the generator module, it will require preliminary disassembly. For this purpose, we “grab” the tips of the stator cables with a screwdriver and slightly pull them out of the springs present in the diode bridge. Next, you need to unscrew the bolts holding the bridge itself. In addition, unscrew the connecting bolt.
Having disassembled the body of the LADA Kalina generator set, we resorted to checking the integrity of the rear bearing. Here you will need to twist its outer ring. If it rotates without noticeable difficulties or sounds, and is not inclined to emit play, then we ascertain the serviceability of the bearing. When the slightest signs of wear are evident, we change it without hesitation.
The next step is to dismantle the generator unit bracket. Using the same screwdriver, we pry up the stator and remove it from the casing. The bracket design contains a bearing, which is also subject to inspection and replacement (if necessary).
The bearing of the front part of the LADA Kalina generator is rolled inside the casing. The manufacturer does not recommend replacing it. However, experts still advise performing this procedure, since if it breaks down, you will have to replace the entire generator, which is very expensive.
Replacing rear pads Kalina
Idle air control Kalina
Kalina torpedo
This bearing can be removed, but you will first have to remove the pulley and the plug present here. Next, using a hammer with a rubber striker, we excavate the rotor. Note that the front lining of the product will have to be clamped with a vice. We remove the bearing with special care.
How to remove brushes from a generator located on a car
If the previous owner installed a brush block with a relay regulator in the generator, then the question of how to change the brushes on the generator without removing it from the car is much easier to solve than replacing individual brushes. If there is sufficient space in the engine compartment, it is also possible to replace the brushes separately without having to remove the generator.
All work on the vehicle's electrical equipment should begin by disconnecting the battery.
- The voltage regulator is removed;
- The production of brushes is measured;
- Old brushes are unsoldered;
- Contacts are cleaned;
- New brushes are soldered;
- The free movement of the generator brushes is checked;
- The regulator is installed in place;
- We connect the battery and start the car.
If everything went without errors, you won’t have to worry about how to check the generator brushes for a long time. Now, knowing perfectly the structure of the generator after disassembling it, it will not be difficult for you to fix other generator malfunctions with your own hands.
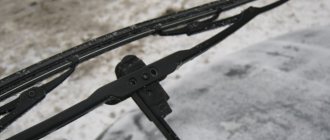
If you need to replace the roller or brushes?
When, during operation of the engine, the owner of a Lada Kalina hears a distinct “rustle” coming from the rotating roller of the tension unit, then a detailed inspection of this element will be required and, if necessary, replaced.
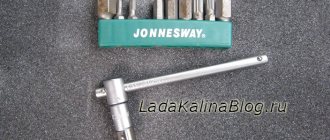
To carry out this repair operation, it is recommended to stock up with ordinary keys and a screwdriver with a flat-tipped tip. All replacement procedures do not cause any difficulties, so we act with confidence.
- First, we resort to loosening the degree of belt tension. To do this, unscrew the stem.
- Using the designated screwdriver, carefully pry up the protective cap of the roller and unscrew the bolt holding the bearing.
- From the worn-out roller we remove the bushing together with the washer (they are necessary for installation in conjunction with a new product).
- The entire assembly is mounted in its proper place and secured with a bolt.
- We tighten the belt and start the engine. We make sure that the new product functions correctly.
One of the factors characterizing weak battery charging is wear on the brushes of the generator set. In order to eliminate this negative aspect, the generator brushes will need to be replaced. To monitor their condition, they will need to be dismantled. Replacing generator brushes is available both on a removed generator set and on one installed on a Lada Kalina car.
In order to achieve safety of work and eliminate the risk of a short circuit in the circuit, before repair work it will be necessary to disconnect the network from the battery (remove the terminals). Now you need to dismantle the protective cover and remove the plug. This can be done conveniently using the previously designated screwdriver.
At the final stage of the process, unscrew the bolts, after which we remove the regulator itself with the brushes present on it. Replacement of generator brushes is complete. Brush wear is assessed by measuring their height. This parameter should not be less than 5 mm. If the brushes are worn out, then replace them and the regulator included.
Signs that it's time to change the alternator brushes:
- The car's electrical appliances suddenly turn off (even while driving);
- Headlights, dimensions and even interior lighting dim and flicker;
- A sharp decrease in the voltage of the vehicle's on-board network;
- A sharp discharge of the battery, which will be very difficult to recharge in the future.
Each of these points may indicate wear on the generator brushes, which are located inside this unit. Many people wonder how to check brushes. In order to check the remaining length of the generator brushes, it is enough to disconnect the generator from the battery and remove the voltage regulator. After this procedure, you can determine by eye how worn out any of the generator brushes are. If the length is less than 0.5 centimeters, the brushes definitely need to be changed. Checking the brushes should be carried out during routine inspection of the generator.
How to replace a generator set?
How to remove the generator? In some cases, repairing the generator unit is impractical or cannot restore the functionality of the device.
Replacement is required here. The process itself is not an intricate undertaking, so it will not take much time from the owner of the Lada Kalina.
For a successful replacement operation we will need:
- Remove the belt, first loosening the tension element.
- Disconnect the plug together with the cable terminals.
- Unscrew the nut securing the upper section of the unit and remove the bolt.
- Use the same method to remove the bolt at the bottom of the device.
- Remove the generator unit from the engine compartment.
Replacement and installation of a new device is carried out using the reverse algorithm.
Causes of malfunction
There are several reasons for the failure of the regulator relay on a car. Let's consider the main ones :
- A short circuit in the on-board network, which led to the failure of the regulator relay. This happens quite often because the generator itself serves as the power source and there is no fuse between it and the current produced to protect it.
- Wear . Like any part in a car, the regulator relay can wear out.
- The brushes are worn out.
How to determine that the regulator relay has failed?
Let's consider the main options:
- Insufficient battery charge means that after the ignition is turned off, the car has difficulty starting or may not start at all.
- The light shines normally at 2000 rpm, but dims at idle.
Once the root causes have been sorted out, you can move on to the replacement process.
The process of replacing the generator regulator relay
So, the process of replacing the generator regulator relay will require dismantling the product itself, but it will not require a pit, and all operations can be carried out from the engine compartment. Let's take a step-by-step look at how to replace the generator regulator relay on a Lada Kalina:
- We remove the “minus terminal”.
- To replace the relay, you will have to dismantle the generator.
- Having loosened the generator mounts, let it loose a little and remove the belt.
- Remove the wire block from the connector.
- We unscrew the nut that holds the contact group of wires and dismantle it.
- We unscrew the bolts of the upper and lower fastenings and take them out.
- We dismantle the generator.
- When the generator is removed, you can proceed to replacing the relay.
- We unclip the three plastic latches of the back cover and remove it.
- Disconnect the diode bridge.
- Unscrew the nut and remove the bushing on the contact group bolt.
- Unscrew the two screws that hold the regulator relay in place.
- We dismantle the relay.
- Assembly is carried out in reverse order.
Thus, the Lada Kalina generator regulator relay was replaced.
Choice for Kalina
Selecting a Lada Kalina relay regulator is quite easy. There are no original analogues, but it fits with VAZ 2110, Priora or Grants.
Therefore, as experience and practice show, car enthusiasts, as a rule, install the original, if they do not change the generator to a more powerful one.
Let's sum it up
As it turned out, repairing or replacing the generator in a LADA Kalina car does not require much effort, so such manipulations are accessible even to inexperienced owners; a connection diagram is used to make the task easier. An important point in operation is periodic diagnosis of the condition of both the unit itself and its component elements, including the tension system. Timely prevention will significantly extend the life of the unit, and the owner of LADA Kalina will have considerable savings.
Detailed description of replacement
First, you need to disconnect the negative terminal of the battery to prevent a short circuit. After this, remove the protective plastic cover by slightly pressing the three latches on it, as shown in the photo:
Then you need to pry up the small power plug with a screwdriver and pull it up with the force necessary to remove it. Personally, in my case, the wire was very tight on the contact, so I had to try hard before removing it. It is better to do everything carefully so as not to tear the solder off the voltage regulator.
After this, you can unscrew two small bolts, as shown in the photo:
And the last one will be a large bolt, which does not need to be turned out completely, you can just loosen it slightly:
And freely remove the voltage regulator along with the brushes, as clearly shown below: