A huge hello to everyone who reads me)))
In general, I’m crawling around reading forums about injectors and their interchangeability, I didn’t find much information about their interchangeability, I decided to make a small note here for myself, and it might be useful for everyone, not everyone knows)))
In general, there is the following information on injectors:
BOSCH injectors 0 280 158 996 are used with ECU January 5.1, MP 7.0 (V8, V16, 1.5 engines) are replaced with BOSCH 0 280 158 110 or SIEMENS DEKA 1D VAZ 6238.
BOSCH injectors 0 280 158 502 are used with the January 7.2 M 7.9.7 ECU (V8, V16, 1.6 engines) and are replaced with SIEMENS DEKA 1D VAZ 6393.
BOSCH injectors 0 280 158 017 are used with the January 7.2 M 7.9.7 computer and are replaced with SIEMENS DEKA 20734.
BOSCH injectors 0 280 158 022 are used with the January 7.2 M 7.9.7 computer and are replaced with SIEMENS DEKA 20735.
Recently, AvtoVAZ has significantly expanded the range of injectors installed on the assembly line. Currently, 4 types of Siemens Deka injectors are “seen” on VAZs: “thin” 20734 (orange) / 20735 (blue) and “thick” 6393 (beige) / 20734 (yellow). The situation with the same number of injectors of different design is incomprehensible, but it is a fact.
BOSCH injectors with catalog numbers 0 280 158 502 and 0 280 158 022 are also installed.
Bosch 0 280 158 022
Bosch 0 280 158 502
Bosch 0 280 158 017
These injectors have so far been encountered only once on the Kalina car.
“Thin” Siemens differ in the location of the nozzles, in 20734 all 4 nozzles are located in the same plane in a cone-shaped recess, and in 20735 they are spaced apart in pairs in two different planes (see photo). Such injectors are called “double-flare”, each torch pours fuel onto “its own” inlet valve, and not onto the partition between them.
“Thick” Siemens Deka nozzles are available in two types: 6393 (beige) and 20734 (yellow). It is unclear what caused the use of the same code (20734) for structurally different injectors. I don’t want to think that there weren’t enough numbers or imagination :). There is an assumption that the “thin” nozzles for some reason did not suit Siemens-Deka and they were replaced with ordinary ones.
No clear relationship has been found at this time between engine type and installed injectors. At this time, statistics are being collected on installed injectors on different engines. At the moment, the generalized table looks like this:
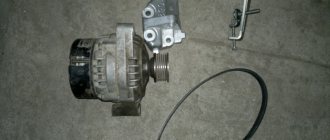
The injector is an important element of the fuel injection system. The performance of the part determines the nature of the car’s movement, the power and throttle response of the engine, and environmental parameters. How to maintain them and replace them if necessary on VAZ 2110–2112 cars?
Selecting injectors for VAZ engines.
Table of interchangeability of injectors from Siemens and BOSCH:
| Siemens | BOSCH |
| Injector DEKA VAZ 6238 | 0 280 150 996 0 280 158 110 |
| Injector DEKA VAZ 6393 | 0 280 158 502 |
| Injector DEKA VAZ 20734 | 0 280 158 017 |
| Injector DEKA VAZ 20735 | 0 280 158 022 |
What if you can't buy the injectors that were installed on your engine? They can be replaced with other nozzles. For example, BOSCH 0 280 150 996 injectors are no longer available, but they can be replaced with BOSCH 0 280 158 110 or 0 280 158 502.
Table of applicability of injectors for VAZ engines:
| VAZ 20734 yellow (thick) | VAZ 20734 orange (thin) | VAZ 20735 blue (thin) | VAZ 20735 pink (thick) | VAZ 6393 beige (thick) | Bosch 0280158 502 | Bosch 0280158 022 | Bosch 0280158 017 |
| VAZ 21124 1.6 16V | X | X | X | ||||
| VAZ 21114 1.6 8V | X | X | |||||
| VAZ 2113-2115 1.5 8V | X | X | |||||
| VAZ 2170-2172 Priora | X | ||||||
| VAZ 2121-21214 Niva | X | X | |||||
| VAZ 2101-2107 Classic | X | ||||||
| VAZ 1118-1119 Kalina | X | X | X |
Source
Replacing injectors (full technology)
Before replacing injectors on a VAZ-2114 of any generation, it is necessary to relieve the pressure in the power system.
To do this, remove the rear seat cushion, open the hatch and remove the contact block from the fuel pump. Now it is de-energized and will not build up pressure.
We start the engine and wait a few minutes until all the fuel in the system is used up. The pressure has been relieved, now you can safely remove the old injectors and replace them with new ones. We proceed according to the following algorithm:
- We de-energize the car by removing the negative terminal from the battery.
Disconnect the negative terminal from the battery
Remove the hose from the pressure regulator
Disconnect the electrical connector of the throttle position sensor
Disconnect the connector from the idle air regulator
Disconnect the connector block from the injector wires
Unscrew the fuel rail mounting bolts
We dismantle the fuel rail with injectors
Squeeze the spring clip and disconnect the electrical connector of the injector.
Rock the injector and remove it from the fuel rail.
Installation of injectors is carried out in the reverse order. Before installation, it is advisable to check the integrity of the o-rings ; if they have lost their elasticity, it is better to replace them with new ones. The injectors are installed and ready for further use. Good luck to everyone!
Video about removing and cleaning injectors on a VAZ-2114
It may be leaking, you forgot to check it, if you inflate the ramp with forces up to 3 bar and the forces get wet from the side of the mesh, then your cleaning is a “dead poultice”, and therefore, without further disassembling, you put the ramp in place and go buy a new injector.
It may be leaking, you forgot to check it, if you inflate the ramp with forces up to 3 bar and the forces get wet from the side of the mesh, then your cleaning is a “dead poultice”, and therefore, without further disassembling, you put the ramp in place and go buy a new injector!
Injectors for VAZ 2110–2112 cars
Cars of the “tenth” family are equipped with various injection engines, each of which is designed to work with a specific model of injectors. Despite the fact that they have their own “names,” motorists usually use a “folk” classification based on color and thickness. For example: black thin ones.
This simplification usually works, but does not fully guarantee the compatibility of the injector with the engine. To avoid having to contact the chip tuner once again to correct the firmware of the electronic injection control unit, check the part number before purchasing.
Table: compatibility of injectors and engines of VAZ 2110–2112 cars
| Engine | Volume (l) | Number of valves | Controller (ECU) | Firmware | Injectors | |
| Siemens | Bosch | |||||
| VAZ-2111 | 1,5 | 8 | M1.5.4 | January-5.1 | VAZ6238 (thick gray) | 0 280 150 996 (turquoise thick) |
| VAZ-2111 | 1,5 | 8 | M7.9.7 | January-7.2 | VAZ6393 (beige thick) | 0 280 158 502 (black thin) |
| VAZ-21114 | 1,6 | 8 | M7.9.7 | January-7.2 | VAZ20734 (orange thin) VAZ20734 (yellow thick) | 0 280 158 017 (black thin) |
| VAZ-2112 | 1,5 | 16 | M1.5.4 | January-5.1 | VAZ6238 (thick gray) | 0 280 150 996 (turquoise thick) |
| VAZ-21124 | 1,6 | 16 | M7.9.7 | January-7.2 | VAZ20735 (blue thin) VAZ20735 (pink thick) | 0 280 158 022 (black thin) |
Do-it-yourself: Cleaning VAZ-2107i injectors with Laurel ML101
Hello everyone, this fall I decided to replace the fuel filter during off-season maintenance, and at the same time wash the injectors, which I have never cleaned since the purchase, fortunately an acquaintance brought me a bottle of Lavra from work, the same brand had previously decoked the rings when changing the oil.
So, there were no special comments on the operation of the injectors, only the tachometer needle moved a little at idle, I filled up with gasoline at a proven network of gas stations, but I decided to clean it as a preventive measure. The previous owner also cleaned them regularly, using an old pump that was connected under the hood to a pipeline; I don’t have one, so I decided to make do with the standard one from the gas tank. Since the wash cannot be diluted, I had to disassemble the tank and pull out the pump, dip it in the product and let the motor run on it.
It looks like a greenish liquid with ammonia odor. The smoke from the exhaust was a little smoky, but the engine ran smoothly as usual.
Everything was done according to the instructions.
The remainder of the product was then poured into the gas tank.
At the same time, I checked the mesh on the pump - it was as clean as it was when I cleaned the gas tank a year earlier.
Then I put everything back together and replaced the fuel filter with a new one, since all the crap from the fuel lines should have accumulated in it.
I also replaced the air filter - I change it once a year before winter. Old and new.
So, after washing, the oscillation of the needle did not change much, it also “walks” a little + -50 rpm.
But the low-end thrust and engine response have noticeably increased, acceleration has become more dynamic, in 4-5 gears this is no longer so noticeable. Perhaps this was also influenced by the replacement of filters, or the catalyst was also cleaned), I don’t know. But there is an effect from this procedure.
Also, apparently, the float was slightly bent during assembly and disassembly - the fuel level light began to light up only when there were already 2-3 liters left in the tank, because of this, then it almost stopped on the road.
But over time, everything seemed to return to normal and it started blinking at about 5-7 liters, but this kind of devilry happened the last time I cleaned the tank, only then it initially came on at half the tank). Once again I decided not to go there again.
The injector nozzle operates on the principle of a spray, dispensing the mixture into the working chamber of the engine. The duration of the injection cycle and the amount of fuel supplied are set in the program of the internal combustion engine control unit. For each of the injectors these parameters are the same. The fuel injector is located inside the intake manifold. The air flow passes through the manifold and carries the fuel particles ejected by the injector into the combustion chamber. The diagram of the "Seven" fuel system is shown in the picture below.
Repair
Before removing the injectors from the dismantled rack, it is advisable to check their functionality. To check you will need:
Functionality check
Place the rack over the measuring cups
The shape of the cloud should be approximately the same for all nozzles
After the war, Germany received a ban on the development of injectors for aircraft engines. And engineers began adapting direct injection systems for passenger cars, discovering another important advantage compared to carburetors - efficiency.
Vladimir Berestenev
bvy.su
Replacement or flushing?
Some problems can be eliminated by cleaning and flushing. Others are “treated” only by replacement.
Table: problems with injectors
| Malfunction | Remedy |
| reduced performance | flushing, replacement if flushing fails |
| leakage | flushing, replacement if flushing fails |
| increased productivity | replacement |
| valve sticking | replacement |
| unstable valve sticking | flushing, replacement if flushing fails |
| overestimated or underestimated winding resistance | replacement |
In these cases, flushing is not a panacea. This method should be used taking into account the mileage and quality of service during operation.
During operation, the injector nozzles inevitably become coked and clogged with resinous deposits. The picture is aggravated by low-quality fuel, which can introduce additional pollutants.
For some time, fuel atomizers continue to operate without any visible changes, but sooner or later contaminants accumulate, changing the shape of the spray and reducing performance.
Injector life expectancy is limited even when using the cleanest fuel. Manufacturers recommend changing them every 100–120 thousand kilometers. Due to the fact that motorists use imperfect gasoline, and the one that can be bought at gas stations, the part has to be changed after 80-100 thousand km.
There is an opinion among motorists that “there is no need to interfere if everything works fine.” This opinion is justified, but only if the owner is ready to replace the nozzles with new ones approximately every 50 thousand kilometers.
The fact is that by getting rid of minor deposits as they accumulate, the owner extends the life of the consumable, since pollutants do not have time to cause irreparable damage.
Clogged injectors begin to interfere with normal operation after 30–50 thousand km. Initially, negative processes manifest themselves only in increased fuel consumption. Owners do not always associate the increased “appetite” of the engine with injectors, since there are many reasons for this phenomenon.
In the range of 50–80 thousand km, pollution, having accumulated, can cause interruptions in engine operation, which is no longer undetectable. It becomes clear that “you have to get into the injectors,” but cleaning them at this stage may be useless. When a clogged part is used for a long time, the diameter of the nozzle often increases. Flushing will remove contaminants, but the original parameters will not be restored.
When to change: self-diagnosis
The fuel system of an injection engine has a fairly extensive architecture and faults can only be identified after an accurate diagnosis of each of the system elements. For example, a drop in engine power may be the result of either a malfunction of the injectors, insufficient performance of the fuel pump or a clogged fuel filter.
In addition, jerks and dips, unstable idle and difficult starting, increased consumption, can occur when the injector is simply clogged.
You can check the injectors themselves directly on the engine without removing them. To do this, just start the engine and remove the wires from the connector one by one. If the stability of the engine changes at the same time, the engine starts to oscillate, then the injector is in order. If, when removing the wires from the connector, the stability of the motor does not change, the injector needs to be cleaned or replaced.
Technical characteristics of VAZ 21074
The VAZ 21074 injector has its own technical characteristics that determine its operation. The car body type is a sedan with 4 doors and 5 seats. The vehicle's load capacity is 400 kg. The weight of luggage on the roof should not exceed 50 kg. The average ground clearance of a car is 16.4 cm. But its minimum value is 9 cm to the neutralizer, which must be taken into account when driving on poor-quality roads. The maximum speed of this car is up to 150 km/h. Acceleration to 100 km/h is carried out in 16-19 seconds.
The basis of malfunctions of VAZ carburetors
Stopping or unstable idle speed
The first signs of a carburetor malfunction may be the engine turning off immediately after starting or unstable operation at idle speed. The causes of these problems are:
violation of the tightness of the hose or the vacuum brake booster system itself;
The car accelerates poorly or with dips
If the engine speed in idling mode is stable, but the car has dips or picks up speed rather slowly, malfunctions of the VAZ-2109 carburetor can be caused by the following problems:
When to replace
According to the manufacturer's instructions, replacement should be carried out after traveling 10 thousand km when driving long distances and every 6 thousand km if trips were carried out mainly over short distances.
Also, the moment of replacement can be determined by the oil pressure sensor. Long service life dilutes the oil, so a cold engine shows high pressure, but after warming up the indicator drops significantly. Such differences signal the need for maintenance.
Source: avtodvigateli.com
Let me start by saying that with the advent of frost, this winter became a problem for me. Due to the fact that the car began to have difficulty starting in the morning, I was using buckets of gasoline and at the same time had trouble driving. Since the car has already done 210 thousand, I immediately thought about the boost. I didn’t put this matter off, I drove the car into the garage and heated the stove. And forward.
So, first, I’ll list what you’ll need if you want to repeat this procedure. 1. Hi-Gear carb flush 2. 5 mg syringe. 3. Set of keys 4. Wires 1m 5. Tea, beer, cigarettes (optional)
Twist everything without exception until it looks like this. Then we unscrew the receiver itself, it is held on by 5 nuts. Two on top and three on bottom. After removing the receiver, the picture no longer pleased me. The tube directing the air flow to the center of the receiver had fallen off and its walls were dirty yellow jelly.
I filled it with cleaner and set it aside. I set to work on the ramp. It is held on by two hexagon bolts. We remove the fuel supply and return with the same hexagon, and disconnect the power supply to the injectors. And we pull out the entire ramp assembly.
Unfortunately, there are no further photos showing how to hook everything up, but it’s a no brainer. We pull the forces out of the ramp. We attach the injectors to the Akum through a button and put the syringe on the butt of the injector. We press the button, power is supplied, the force opens and we spray the cleaner. So, with all 4, place the injectors in order just in case.
As a result, instead of a clear liquid, I got this dark crap. Next, we collect everything, put it in place and rejoice at our crazy hands.
I was extremely surprised by the result. The car started better, revved the engine faster, and throttle response increased noticeably. I concluded for myself that now I will wash the engines in any incomprehensible situation)))) I won’t say anything about the quality of gasoline for crazy money, so it’s clear to everyone that the whole country drives like poop))))
Thank you for reading my article, I hope it will be useful to someone. Press the buttons if necessary. Love, kindness, dough and quality gasoline to everyone!
Source www.drive2.ru
The VAZ 2107 injector has a number of advantages, but also several significant disadvantages that you should know about in advance. If you have this car model at your disposal, it is worth familiarizing yourself with the maintenance features of its injection system. But first we need to discuss the design of the VAZ fuel system.
Video on setting up VAZ carburetors
The engine jerks at speeds above 90 km/h or does not develop the required power
Engine won't start
A cold engine may not start as a result of the following problems:
A hot engine does not start or starts poorly
Damage or wear of the float device valve leads to flooding of the secondary chamber. When the gas pedal is fully pressed and the starter rotates for a long time, the engine starts. To resolve this issue, install a new valve and seat.
If the engine overheats, you should allow it to cool. Then try starting again with the choke closed and the damper slightly open.
At high temperatures, the fuel pump may fail due to overheating. It is also possible for gases to form when gasoline boils in the pipeline, in the area from the pump to the carburetor. In this case, it is recommended to wrap the pump with a cold, wet cloth.
Comprehensive diagnostics of the operation of injectors on the ramp
For such a check, the fuel rail will need to be removed from the engine along with the injectors attached to it. After this, you need to connect all electrical contacts to the ramp and injectors if they were disconnected before removal. It is also necessary to return the negative terminal of the battery to its place.
- The ramp must be placed in the engine compartment so that a measuring container with a scale can be placed under each of the injectors.
- It is necessary to connect the fuel supply pipes to the ramp and additionally check the reliability of their fastening.
- The next step is to turn on the ignition, after which you need to crank the engine a little with the starter. This operation is best performed with an assistant.
- While an assistant rotates the engine, check the efficiency of all injectors. The fuel supply must be the same on all injectors.
- The final step will be to turn off the ignition and check the fuel level in the containers. The specified level must be equal in each container.
In addition to self-checking, you can use the injector diagnostic service at a car service center. This operation is performed on a special testing stand. Testing an injector on a bench allows you to accurately determine not only the efficiency of fuel supply, but also the shape of the torch during fuel spraying.