Most car enthusiasts believe that an oil filter puller is a useless tool that, if anyone should have it, only car service workers should have it. Drivers who have already encountered a problem when changing the engine oil themselves, when it is impossible to unscrew the filter manually, have already acquired a suitable puller. Selecting this tool is not so easy: there are many modifications offered on the market, but not all of them will be suitable for servicing a specific car model.
- 2 Design and method of use of the cup puller
- 3 Details about the universal “crab”
- 4 What do you need to know about other pullers?
- 5 Do-it-yourself belt puller - nothing could be easier
- 6 If the belt option does not justify itself, we make a chain one
Types of industrially manufactured pullers
Depending on the design features and size of the filter, pullers of one type or another are used to unscrew it. Their body or base is usually made of steel and is protected with a matte or silver chrome finish. A number of products, if provided for by the design, have plastic linings on the handles, which greatly simplifies the work with such a tool.
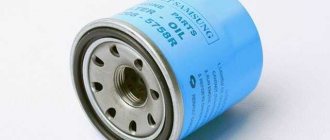
Oil filter loosening tool
Almost all pullers allow you to unscrew both oil purifiers (hereinafter referred to as cleaners) and oil cups - filter casings with a replaceable insert. All pullers can first of all be divided into universal ones and those designed for unscrewing filters of only one diameter or type.
Among the first, the following main types are distinguished:
- crab;
- belt;
- chain;
- tape;
- sickle-shaped and tick-shaped;
- with 2 adjustable grips.
Puller with 2 adjustable jaws
Their versatility is relative - not every filter can be unscrewed with them. Firstly, because they are designed for a certain range of diameters of cleaners, and for some pullers it is quite wide, while for others it is not very wide, and secondly, because of their own design features and dimensions. After all, the location of the filter, as well as the accessibility of the filter, differs on different cars, and therefore it will be easy and simple to work with any tool in one engine compartment, but perhaps completely impossible in another.
Only one type of tool is classified as narrow-profile - cup oil filter pullers. They received this name for their appearance, reminiscent of the kitchen appliance of the same name.
Powerful screwdriver
Modern oil filters installed on car engines are mostly disposable. Therefore, after the first use, they are useless. This means there is nothing to feel sorry for them. Hence the last “barbaric” method of unscrewing the oil filter using a strong and preferably long screwdriver with a sharp tip and a strong handle. We point the tip of the screwdriver towards the filter generatrix, as close as possible to the bottom of the removable part. Holding the screwdriver perpendicular to the surface of the case, we strike the end of the handle with a hammer until we break through the upper and opposite walls. The tip of the screwdriver should come out. Thus, we created an improvised lever to which it is enough to apply a slight counterclockwise force, and the filter will be easily unscrewed. Moreover, the longer the screwdriver, the less force required to unscrew it. The disadvantage is the same as in the previous case: a lot of space is required.
Design and method of use of the cup puller
This type of puller is available for filters of all sizes, but each individual tool is designed to unscrew filters of only one diameter. Therefore, when buying a cup you need to be especially careful. This key should ideally match the filters installed on the car engine. Even a difference of a few millimeters will turn the cup into a useless accessory.
Auto repair shop owners immediately purchase entire sets of these pullers, including up to 30 wrenches for filters of various diameters. Such sets are supplied with a suitcase in which the cups are conveniently arranged by size numbers.
Set of cup wrenches for removing oil cleaners
The “cup” oil filter pullers have a square hole in their “bottom” for the tip of a socket wrench. Some manufacturers additionally make a hexagonal “bottom” - for a spanning tool. Many pullers, primarily their sets, are supplied with a tip for the “cup” hole, onto which the key is placed, and some are complete with all the necessary tools, including a socket and socket.
The “cup” puller is placed on the ribbed top of the filter with a wide open part, on the inner circumference of which there are edges. They must match in number and size with those available on the purifier. Otherwise, the puller will not fit tightly, and unscrewing the filter will be difficult or impossible. The “cup” is considered the most convenient tool. It itself is compact and, as a rule, it is easier to “crawl” into the filter. Moreover, a correctly selected “cup” never slips relative to the circumference of the filter housing, which sometimes happens with some other types of pullers.
Why do you need a filter puller?
The design and technology for replacing the filter is extremely well thought out and, it would seem, quite simple. With the advent of filters in a non-separable housing, you can change the oil and filter and not even get your hands dirty. But not everything is so smooth. It often happens that the sealing gasket sticks tightly to both the filter housing and the cylinder block. Then it is impossible to firmly grasp the filter with your bare hands, especially in those cars in which there is a lack of free space under the hood.
And so it begins - broken fingers, two hours of wasted time, the oil change celebration collapsed. To do this, or rather, to make the car bring joy when replacing consumables, many use branded pullers for the filter element, and some try to make an oil filter puller with their own hands.
Details about the universal “crab”
The “crab” puller consists of two plates, which are the body, and 3 grippers installed between them. There are notches on the working surface of the paws that prevent them from sliding over the surface of the filter. The grips are controlled by a clamping mechanism located in the middle of the crab body and between the rotary mounts of the legs.
The mechanism itself, like the puller as a whole, is activated by a special key supplied - this is one of the design types - or by an end or cap tool, for which a corresponding tip is provided, extending from the body. The scheme of working with the “crab” is identical to the process of unscrewing the filter with a “cup” puller. You must first attach it to the end of the cleaner. It is in this part of the work that the “crab” is fundamentally different from the cup, which makes it universal. In the initial position, its paws are spread apart and are able to cover the filter with the maximum diameter allowed for its design.
Universal “crab” for removing the filter element
After placing the grips on the smaller cleaner, the clamping mechanism is activated. In this case, the “crab” will be able to grab a filter whose diameter corresponds to the minimum allowable for the puller design. After the paws grab the cleaner, you must continue to work with the key placed on the drive of the clamping mechanism. This will unscrew the filter. Moreover, the stronger the applied force, the more reliable the grip of the “crab” paws will be - slippage is excluded.
Depending on the “crab” model, it can be used to remove and install filters with a diameter ranging from 60–125 mm. This puller, like the “cup”, is very good when working in narrow and confined spaces.
How did you experience it?
We tested each tool for the maximum torque that it is capable of transmitting to a cylindrical steel blank simulating an oil filter. If it can “grab” a smooth surface, it can easily grab onto a real filter. Only the polyhedral puller escaped these tests, which, even if it wanted to, would not be able to unscrew the cylinder.
We also assessed the mechanical strength of the pullers, manufacturing standards, and ease of use—the final rating was given on a five-point scale.
Of all the tested pullers, we will single out one best representative from different groups.
What do you need to know about other pullers?
The chain oil filter puller, depending on the design, allows you to unscrew and tighten filters with diameters ranging from 60–140 mm. It consists of a handle and a chain attached to it at one end, which serves as an adjustable grip. Most pullers are equipped with a single-row chain, but there are also models with a double-row chain. The second end of the grip, depending on the design, can be free or passed through a special groove located in the handle and having a lock.
During the first execution of the puller, before unscrewing the filter, the chain is tightly wound around its body, almost to the end. The remaining section of the grip is attached to the hook on the handle. After this, the puller rests on the filter and acts like a lever. The second version of the tool already has a loop made of chain, which has adjustable dimensions and is immediately thrown onto the filter. After this, pulling the end of the gripper passed through the groove, tighten the loop and press on the tool handle in the desired direction. At the same time, the groove lock securely holds the chain, preventing it from loosening its grip.
Grab with chain loop
Belt pullers have a working diameter range of 25–160 mm. They have a special belt that forms a loop to hold the filter. It can be fixed at both ends in a square steel rod. A belt is wound around it after the loop is thrown over the filter. Then a suitable key is placed on the rod and the cleaner is unscrewed. Another type of puller is similar in design and use to the second type of chain tool.
The operating range of belt filters is one of the narrowest - the difference between the minimum and maximum permissible filter diameters can reach only 30 mm. They use a strip of steel or plastic, fixed at both ends to the handle and forming a loop, the size of which can be slightly adjusted in some designs. After throwing the grip on, force is applied to the handle and it acts like a lever. The tightness of the filter coverage is achieved in some designs by a screw on the handle, and in others - due to natural tension when unscrewing. Most pullers of this type often fail to cope with filters that are too tight.
Belt filter part remover
The tools are sickle-shaped and pliers-shaped and have 2 working curved jaws with notches and 1 or 2 handles. Their working range of grip is also small; in some designs it is adjustable. Work with these pullers as with ordinary pliers - grab the filter, squeeze and unscrew.
A puller with 2 adjustable jaws consists of a thick narrow base plate, a screw and paws with notches on the working part. The threaded ends of the grippers are moved in the longitudinal slots of the base and secured in the desired position with a nut. When you tighten the screw passing along the thread of the hole in the center of the plate, after it is pressed tightly against the filter, the latter is unscrewed.
Chain assembly[edit]
When assembling the chain, it is necessary to overcome the tension of the rear derailleur spring, so an assistant will be appropriate here to hold the derailleur (or remove the chain from the system).
Place the chain so that the protruding pin faces your direction.
Grasp the link that does not have a pin protruding from it and guide the chain from right to left through the front and rear derailleurs. The rear derailleur has 2 “holes” next to the rollers that you need to thread the chain through. Connect the ends of the chain at the bottom against the resistance of the rear derailleur spring. Have an assistant hold the switch.
Place the link to be connected in the squeeze, on the stop that is closest to the fixing screw.
When adjusting the position of the chain, move the pin to the clamped pin so that they are coaxial.
Tighten the link with the fixing screw
Attention! Skipping this step may result in broken squeezer. Rotate the handle to press the pin into the link
Constantly monitor the degree of immersion of the pin in the adjacent ones - it should not be completely flush with the cheek, but stick out a fraction of a millimeter
Rotate the handle to press the pin into the link. Constantly monitor the degree of immersion of the pin in the adjacent ones - it should not be completely flush with the cheek, but stick out a fraction of a millimeter.
Remove the chain from the squeezer, check how symmetrically the pin fits
If necessary, adjust its position.
Check the mobility of the assembled link. If it bends tightly, then you need to grab the chain on both sides of the assembled link and forcefully bend it in the transverse direction.
Do-it-yourself belt puller - nothing could be easier
To make this key with your own hands, you will need a steel hexagon. Its standard size can be 19 or 17 - for the appropriate key, whichever is more convenient for you. We cut a piece approximately 150 mm long or another size from the hexagon rod. This must be determined by trying it on in the engine compartment of your own car, so that the puller made makes it as convenient as possible to unscrew the filter.
Then along the hexagon in the middle we make a cut with a grinder 55–60 mm long and 5–6 mm wide, which should pass through the opposite corners of the section and parallel to the side edges of the rod. After this, we process the workpiece with sandpaper - remove sharp edges and burrs. Taking an old but undamaged car seat belt, cut off a piece of it to the required length, depending on the diameter of the installed filter. The longer the belt section is, the more universal the puller will be, but it will also become less convenient to work with when unscrewing small cleaners. In general, a piece of 500–550 mm is sufficient.
Making a puller from a car seat belt
We insert the belt into the slot of the workpiece, align and center it. Then, on the hexagon opposite the belt, we make markings at equal distances from each other for drilling 3 holes. We remove the belt from the cut. We drill through holes with a diameter of 5.5 mm. After this, on one side we expand the holes to 6.5 mm. Drilling is carried out only up to the slot. In holes with a diameter of 5.5 mm, use a tap to cut an M6 thread.
We melt both ends of the belt with a lighter so that they do not unravel, and then we put them together and thread them into the cut of the hexagonal blank opposite the holes. The result is a loop. The ends of the belt opposite it should protrude from the slot by about 10 mm. We take a nail, or better yet, a steel rod 6 mm in diameter, heat it well and, pushing it alternately through 3 openings of the hexagon, burn holes in the tape with it. It is necessary to burn through, and not make holes, so that the belt in these places does not delaminate and does not fluff.
Steel rod for homemade tools
Carefully, so as not to displace the loop, place the future puller on the anvil and use a hammer to clamp the belt into the slot. Then screw 3 bolts into the hexagon holes. They must have M6 thread. The DIY oil filter belt puller is ready for use. The procedure for using this key is as follows. We put the loop on the filter, and then begin to wind the belt around the hexagon. To unscrew, this should be done counterclockwise. When the belt is completely wound, you need to take a key (17 or 19), throw it on the hexagon and unscrew the filter.
When should you change your bicycle chain?
A good bicycle chain lubrication can significantly increase the service life of the entire system responsible for movement. At the same time, you need to be able to notice the moments when it begins to need maintenance or repair.
Excessive wear on a bicycle chain not only causes constant discomfort while riding, but also causes active deformation of the chainrings. If a worn chain is left unattended for a long period of time, it is guaranteed to lead to the need to replace a whole set of expensive mechanisms.
In order to assess its condition as objectively as possible, it is necessary to look not at the mileage, but first of all to measure the length of all its links. The chain length in normal condition is approximately 305 mm. The reason for its replacement is its stretching to 308 mm or more.
Making a universal wrench: minimum words and maximum photos
To make this fantastically simple tool you will need:
- unnecessary bicycle chain;
- a wooden block of such thickness that you can easily grasp it with your hand;
- a sufficiently long screw with a nut;
- drill with a diameter corresponding to the size of the screw.
From a wooden block we measure a piece with a length slightly exceeding the width of the palm.
Carefully cut off the measured piece.
2-3 cm from the edge we mark a place for attaching the chain.
We select a drill with a diameter corresponding to the size of the screw.
We drill a through hole into which the screw will fit freely and insert it there. Then we take the chain from which our universal wrench will be made, and find a collapsible link in it that allows us to open it.
Use an awl to remove the locking pad, disassemble the collapsible link, and then open the chain.
We put one of the outer links of the open chain on the tail of the screw.
We fix the link with a nut, which we then tighten thoroughly.
And now our universal wrench, which we just intended to buy, is ready. Now let's see how our miracle tool works and how to use it.
Complete set of bicycle repair tools
An avid cyclist will not get by with a standard repair kit. It is necessary to add more tools to the kit, allowing you to completely repair any breakdowns yourself, as well as improve the quality of the bike. Additional tools include:
- extended set of keys;
- pullers;
- mounting blades;
- wire cutters;
- hydraulic set;
- strain gauge;
- caliber;
- stands.
Now in more detail about each element.
Additional keys
If your bike model has ball bearings, cone wrenches will be a must-have. They are needed for timely cleaning of bushings.
To remove the pedal, a specially shaped wrench is used. It is ideal for road bike models with little clearance between pedal and crank.
Flat and Phillips screwdrivers that are universal for various jobs are also useful.
Bicycle pullers
In order to remove the connecting rod, it is worth purchasing a square puller. Before buying a tool, make sure that the connecting rod is attached using the “square” system. Typically, higher-end bikes may have a different mount and not require a special puller.
Carriage pullers are used to remove the cups that secure the carriage to the bike. Depending on the bicycle model, you need to select a carriage puller with a different spline head diameter.
An important purchase will be a ratchet remover. This is a must-have tool, since disconnecting the ratchet using other methods is quite problematic. The tool is a splined head
The tool is a splined head.
There is also a special cassette remover. To make working with it easier, it is recommended to buy a special whip in the kit.
Wire cutters
Wire cutters are used to repair gear shift cables. Wire cutters have a special advantage over a knife or other tools in the set that can be used for this purpose. They can be used to gently cut through the cable without deforming it. The edges will not be fluffy and the cable will last for a long time.
Stands
In order to independently and easily repair bicycles, it is worth acquiring two stands. You need to take care of buying a rack on which you can put the bike
It will also be important to purchase a special small stand for wheels, which is convenient for straightening the spokes
Bicycle chain parts and necessary tools
Chain wear indicator
: A typical chain wear indicator hooks onto a pin in the chain while the other end is inserted between two pins or rollers. The numbers on the tool will show how worn the chain is and whether it is time to change it.
New chain
: The type of chain depends on the number of speeds of the bicycle. So, for example, if the bike is 9-speed, you need to buy a 9-speed chain. More advanced chains include a special coating that will delay the appearance of rust, or they are already made of stainless steel.
Replacing pins or connecting link
: New chains immediately come with a new pin or special link called a connecting link that connects the 2 ends of the chain together. If you are repairing an existing chain, you will need to buy replacement pins or connecting links separately - they must be compatible with the chain speed and brand.
Squeeze
: If you have a standard link chain, you will need a compatible puller that will allow you to easily remove the old pin and install the new one when disconnecting and joining the chain.
Pliers:
If you have a chain that connects to a connecting link, you will need pliers to make the process of disconnecting and connecting the connecting link easier.
If the belt option does not justify itself, we make a chain one
To make your own chain puller, you will need a piece of half-inch or inch used pipe with uncorroded, undamaged walls and a thread at one end. The length of the piece must be no less than the height of the filter. We select a suitable plug for the pipe so that it screws onto its thread. You'll also need a bicycle chain.
Bicycle chain and pipe
We drill a hole with a diameter of 9 mm in the center of the plug. Using a triangular file, we give it a square shape with our own hands. We carry out the processing until the dimensions of the hole are suitable for the ratchet wrench, or more precisely, for its end. The latter should fit into the resulting opening of the plug quite tightly, with almost no play. Screw the plug onto the end of the pipe and tighten it very tightly. To prevent it from unscrewing when using the puller, it is recommended to attach it to the pipe by welding.
As a last resort, you can try to crush the metal at the end of the thread using a dull chisel and hammer, but only carefully so as not to deform the pipe. We make markings on the pipe for drilling holes for the chain. To securely grip the filter, 2 pieces of it installed on the puller opposite the opposite ends of the cleaner are enough. But you can also make a 3rd hole, between the 2 outer ones, for another 1st chain. In this case, the puller will become more versatile, as it will allow you to unscrew filters with different height sizes.
Homemade device for securely grasping the filter
Having threaded a chain through one of the drilled holes in the pipe, we loop it around the filter, trying out how long the pieces will be needed. We measure out enough so that the puller, when unclamped, fits freely onto the cleaner. You can even make some supply of chain length for filters whose diameter is larger than that installed on the car. But we must take into account that it will be less convenient to work with such a puller. Along the measured length, we disassemble the chain into separate fragments - squeeze out the pins and separate the links at this point.
Having threaded the resulting sections through the holes in the pipe, we make loops out of them - we connect the links of the ends and press in the pins. To unscrew the filter, we put the puller loops on it and, if necessary, when the chains are too long, we manually turn the pipe counterclockwise, thereby removing the slack. Then we insert a ratchet wrench into the plug and, with its help, begin to dismantle the purifier.
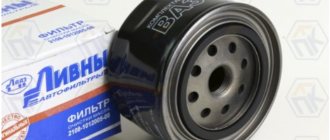
Having decided to change the oil in their car themselves, many car owners are faced with an unexpected obstacle - the oil filter does not want to be unscrewed by hand.
Everything is complicated by the round shape of the filter element housing, which is impossible to grasp properly. It’s good if there is a car store nearby that sells special pullers of different types (they are chain, screw, end, belt, etc.), but what if there is no way to purchase a key, but you desperately need to remove the filter?
In fact, everything is much simpler than it might seem at first glance: there are several simple ways to remove the oil filter without a key. We will talk about them in detail in this article.
Other replacement options
The men used a variety of available tools instead of the usual wrench.
Pliers
Simple and reliable - tested more than once. Using pliers incorrectly is simply impossible! Grab yourself tightly and twist!
adjustable wrench
Of course, if a master finds himself in such a situation, he may well have an adjustable wrench.
You will only need to adjust it so that the fastener being unscrewed is firmly grasped by the jaws of the key.
Files
Two files will do the job. Their canvases at one edge must be securely secured with wire, tape, a suitable ring, etc.
After this, the files are placed on both sides of the fastener. This is done so that the nut is approximately in the middle of the blades. Holding both handles of the file at the same time, they begin to unscrew.
Small vise
An option familiar to handicraft craftsmen who have small vices. The nut is secured in a vice and then unscrewed.
Calipers
Another alternative option is a caliper. They operate similarly to the options already described.
It is important not to forget about your own safety! If the caliper comes off the fastener, it can cause injury. Sometimes men risk performing the necessary action even with the help of large scissors
They clamp the nut with the handles of scissors
Sometimes men risk performing the necessary action even with the help of large scissors. They clamp the nut with the handles of scissors.
We do not think that this operation should be repeated. Especially if you do not have such experience and you do not feel confident in performing the procedure.
Wooden strip and nylon tape
Not the most traditional way, but why not try it if you don’t have anything more suitable at hand.
A nylon rope (at least 15 cm will be needed) is tied tightly in the middle of the wooden plank. The free edge of the nylon begins to be wound around the nut. Twist the rope until it ends. Now unscrew the bar. Together with it and the nylon, the fasteners will move from place.