03/01/2022 11,683 Diagnostics
Author: Victor
Many modern cars have the ability to independently read electrical system problems. Error codes on Kalina, after decoding, can reduce the time required to find a faulty unit in the electrical wiring.
[Hide]
Troubleshooting
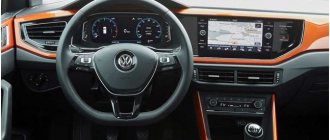
The Lada Kalina has a central control unit for the injection engine and vehicle electrical system. Problems that arise during the operation of electronic and electrical systems are recorded by the unit in the form of errors and stored in memory. If there are such problems, the orange Check Engine light on the panel lights up. Some errors can be displayed on the screen installed on the instrument cluster and deciphered.
Code analysis allows you to accurately determine the incorrectly operating element and repair or replace this unit. You can check for problems more deeply and thoroughly by connecting a special scanner to the diagnostic connector. The diagnostics and list of errors are the same on a 16-valve car and on a car with a simpler 8-valve engine.
Step-by-step self-diagnosis
Checking for errors in the ECU and displaying their numbers on the dashboard is called self-diagnosis. This procedure is not complicated and can be easily done independently.
In this case, the owner of a Lada Kalina 1118 station wagon or sedan must perform the following actions:
- Get behind the wheel of a Lada Kalina car and press the daily mileage reset button on the instrument cluster (Reset).
- Turn on the ignition while holding the button pressed.
- The instrument cluster will switch to test mode, during which the full backlight will turn on, all indicator lamps will turn on, and the device arrows will begin to move smoothly in both directions along the scale.
- Using the button on the right lever of the steering column switch, you can sequentially change menu items, including self-diagnosis of devices, software version (firmware, inscription like Uer x. x) and error codes in the unit’s memory.
- It is necessary to look at the codes recorded in the ECM and determine their meaning.
- To exit the self-diagnosis mode, you need to wait about 30 seconds without performing any actions.
Kalina steering column switch button
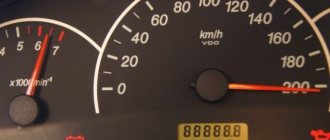
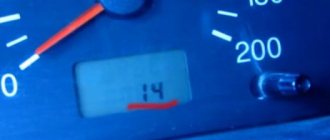
The modernized Kalina 2 has a slightly different instrument panel design. The procedure for displaying errors is similar; codes appear in the top line of the display as a three-digit number. Below the indicator line, information about the vehicle's serial number is displayed (looks like a six-digit number).
It is important to note that sensor problems are recorded in memory only if there is a long-term absence of a communication signal with the device (more than 20 seconds). For short-term breaks there will be no error, although there is a malfunction in the car.
OBD-2 adapters and extensions existing on the market
Using OBD-2 adapters, car diagnostics are available using modern devices without an OBD connector.
The devices are suitable for Audi, Honda, Mercedes Benz, Audi, Opel, Nissan, Mitsubishi, VAZ and others.
The main types of adapters are listed below.
- GM12 pin - OBD2. Suitable for Chevrolet, Daewoo, ZAZ and VAZ cars.
- GAS 12 pin - OBD2. Suitable for UAZ and GAZ cars, 12 contacts are used.
- AutoCom adapter set for passenger cars. For people who are professionally involved in diagnostics, a set of equipment may be useful; it includes the following set - VAG 2 2 pin -> OBD-2 (for Audi, Skoda, Seat and Volkswagen), BENZ 38 pin -> OBD-2 (for Mercedes Benz ), BMW ADS 20 pin -> OBD-2 (for BMW), FIAT 3 pin -> OBD-2 (for Alfa Romeo, Fial and Lancia), OPEL 10 pin -> OBD-2 (for Opel), PSA 2 pin -> OBD2 (for Peugeot and Citroen), PSA 30 pin -> OBD-2 (for Peugeot and Citroen).
- AutoCom adapter set for trucks. The package includes a 7 pin Knorr Wabco Trailer Cable, as well as other components - 12 pin MAN Cable, pin IVECO Cable, 16 pin SCANIA Cable, 12 pin Renault Cable, 8 pin VOLVO Cable, 37 pin MAN Cable, BENZ Cable.
- VAG 2×2 – OBD-2. Suitable for VAG cars manufactured before 1997. The package includes two chips - diagnostic lines K and L, as well as 12 V power supply with ground. Each of the chips is signed and has markings to prevent incorrect connection.
- Kia 20pin – OBD-2. Used for diagnosing Kia cars. Has 20 connectors. The connector itself is located in the engine compartment. In some models you can use the ELM327 scanner, but using the mentioned adapter.
- Ford 7pin - OBD-2 - for diagnosing Ford, Lincoln and Mercury cars. Mainly used for older Ford cars manufactured between 1985 and 1995.
- Mercedes 38 pin – OBD-2 – is intended for diagnosing Mercedes cars that came off the assembly line between 1994 and 2002. Has 38 pins per connector.
- Mercedes 14 pin - OBD-2 - apron with 14 pin connector for OBD-2. Designed to test Volkswagen, Mercedes Benz (Sprinter, Actros and Atego) cars.
- Nissan 14 pin - OBD-2 - a device for diagnosing old Nissan cars with a 14-pin socket.
- Toyota 22 pin Japan - OBD-2 - adapter for diagnosing cars produced on the Japanese market before the advent of the OBD-2 standard.
- Toyota 17 pin – OBD-2 – used for Toyota cars with a 17-pin OBD diagnostic connector.
- BMW 20 pin – OBD-2 – helps in diagnosing BMW cars manufactured before 2022.
- Honda / Acura 3 pin - OBD-2 - adapter for cars from the manufacturer Acura and Honda that have a 3-pin connector. Its purchase allows you to diagnose older models.
- Honda / Acura 5 pin – OBD-2 – used for diagnosing Honda cars of an earlier model range. Suitable for connecting a car with 16 contacts to models with a 5-pin connector.
- Subaru 9 pin - OBD-2 - used for Subaru cars and provides a transition from a 9-slot to a 16-slot group. This type of OBD was installed on Subaru produced in the period 1993-2001.
- Renault 12 pin – OBD-2 is an adapter that allows you to connect a scanner between a car with 12 and 16 pins. Suitable for checking Renault cars.
- Mazda 17 pin – OBD-2 – suitable for diagnosing Mazda cars with a 17-pin connector. With its help, you can safely use modern scanners.
- Mitsubishi / Hyundai 12 pin - used for Hyundai and Mitsubishi cars produced in the period 1989-1998. They have a block with 12 contacts.
- Opel / Vauxhall 10 pin – OBD-2 – designed for diagnosing Vauxhall and Opel. Cars must be produced before 1996. Their peculiarity is the presence of a rectangular connector with 10 contacts.
- Fiat, Lancia, Alfa Romeo 3 pin - OBD-2 - used for cars of the Alfa Romeo, Lancia and Fiat brands that have a 3-pin socket, as well as alligator clips for external power.
- Peugeot, Citroen 30 pin - OBD-2 - designed for diagnosing Citroen and Peugeot that came off the assembly line before 1997.
- Cummins 9 pin (KAMAZ, KAVZ, PAZ) – OBD-2 – used for diagnosing KAVZ, KAMAZ and PAZ vehicles. Provides transition from 9 to 16-pin connector.
- Volvo 8 pin – OBD-2. Adapter for use on Volvo trucks with an 8-pin block.
- Iveco 30 pin – OBD-2 – used to connect equipment from a 30-pin to a 16-pin connector. Used for diagnosing Iveco cars.
- SCANIA / DAF-16 pin is a convenient tool that provides a transition between old Scania or DAF pads to new types of connectors for diagnostic work.
- OBD-2 1.5 meters - a 1.5 m extension cable designed to connect the connector to the scanner.
- OBD2 20 cm is another extension cord designed for use in conditions of limited access to the connector. There is wiring for all 16 contacts.
- Adapter from OBD-2 to RS232 COM.
New Lada: Car Colors. Car enamels/Car paints and car color codes in a convenient catalog. Car colors – ColorScheme.Ru
The list of adapters and extension cords is wide enough to choose the best option and diagnose cars of different brands and years of manufacture with your own hands.
Decoding combinations
Errors read on the standard panel of the on-board computer can be deciphered using the table. It is useful to print out such information and carry it with you in the glove box, since breakdown of car sensors can happen on the road. Many problems can be corrected only during repair work in a car service center. Knowledge of the decoding will allow the owner to control the process of repairing his car.
Self-diagnosis codes
When diagnosing, you can read the fault codes listed in the table from the instrument panel. Please note that several errors may be displayed simultaneously during the verification process.
Below is a complete list of self-diagnosis errors.
| Code on screen | Decoding |
| 2 | Excess voltage in the on-board electrical network |
| 3 | No signal in the circuit from the fuel level sensor |
| 4 | No signal from the internal combustion engine temperature sensor |
| 5 | The signal from the sensor measuring the air temperature outside the car is not detected |
| 6 | Raising the engine temperature above the permissible level |
| 7 | Critically low oil pressure in the engine lubrication system |
| 8 | Brake fluid leak or failure of the system's electronic components |
| 9 | Excessive reduction in battery voltage |
| E | EEPROM data error |
Controller errors
For more complete diagnostics, the car needs to be checked with a KKL VAG-COM for 409.1 scanner. To do this, you need the scanner itself and a laptop with the pre-installed Diagnostic Tool v. 1.3.1., which allows you to view all the vehicle’s operating parameters and find out possible problems. Error codes received by such devices will consist of four numbers and a letter located in front of the numbers.
It should be remembered that each letter is responsible for a certain part of the machine components:
- B - indicates errors in the electronic components of the car body (window lifters, microclimate);
- C - errors in chassis components (power steering);
- P - malfunctions in the engine or automatic transmission control systems.
The video, shot by the author of CompsMaster, clearly demonstrates the connection of a test laptop to the diagnostic connector and shows the functionality of the program.
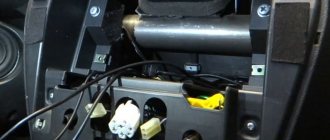
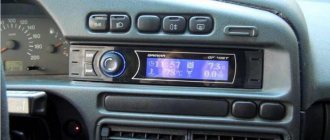
Another way to control the ECM is the additional on-board computer State, which is connected directly to the diagnostic connector and installed on the center console. This device is capable of reading almost all operating parameters of various vehicle systems. There are several types of State computers, which are selected according to the model of the ECM unit.
Basic mistakes
The table below summarizes the main error codes for Kalina category “P” without taking into account the letter prefix.
| Number | Decoding |
| 0030, 0031, 0032 | The heating of the lambda probe installed upstream of the converter is faulty (burnout of the spiral or short circuit) |
| 0036, 0037, 0038 | The heating of the lambda probe installed after the converter is faulty (burnout of the spiral or short circuit) |
| 0101 | Operating parameters of the engine air supply sensor are outside the tolerance range |
| 0102 | The signal level from the engine air supply sensor drops below the permissible level |
| 0103 | Increase in signal level from the air supply sensor to the engine above the permissible level |
| 0112 | The signal level from the air temperature sensor at the engine inlet drops below the permissible level |
| 0113 | Increase in signal level from the air temperature sensor at the engine inlet above the permissible level |
| 0115 or 0116 | Incorrect data from the engine temperature sensor |
| 0117 | The signal level from the engine temperature sensor drops below the permissible level |
| 0118 | Increase in signal level from the engine temperature sensor above the permissible level |
| 0122 | The signal level from the throttle angle sensor drops below the permissible level |
| 0123 | Increase in signal level from the throttle angle sensor above the permissible level |
| 0130, 0131 and 0133, 0134 | Missing or low signal from the first lambda probe |
| 0132 | Crankshaft Position Sensor Error |
| 0135 | Incorrect operation of the heating system of the first lambda probe |
| 0136 | Short circuit of the second lambda probe |
| 0137, 0138 | Missing or low signal from the second lambda probe |
| 0140, 0141 | Incorrect operation of the second lambda probe heating system |
| 0171, 0172 | Excessively lean or rich mixture |
| 0201-0204 | Gap in the injector control wiring (from 1 to 4 cylinders) |
| 0217 | Engine temperature goes beyond the upper limit |
| 0230 | Broken fuel pump drive relay |
| 0261, 0262 | Breakdown to "minus" or "plus" of the wiring for controlling the injector of the first cylinder |
| 0264, 0265 | Likewise for the second cylinder |
| 0267, 0268 | Same for the third cylinder |
| 0270, 0271 | Same for the fourth cylinder |
| 0300 | Numerous misfires on all cylinders |
| 0301-0304 | Problems with ignition in a specific cylinder (from 1 to 4 cylinders) |
| 0326-0328 | Failure of the knock sensor |
| 0335-0338 | Damage to the signal circuit from the crankshaft sensor |
| 0340 | Camshaft position sensor does not work (only for 16 valves) |
| 0342, 0343 and 0346 | Phase sensor (only for 16 valves) |
| 0351-0354 | Coil failure (16 valves only) |
| 0363 | Restriction of fuel supply due to ignition misfires |
| 0422 | Low efficiency of the neutralizer |
| 0441, 0444 and 0445 | Absorber malfunctions |
| 0480, 0481 | Radiator fans do not work |
| 0500 | Speed sensor faulty |
| 0506, 0507 | Failure of the idle control system |
| 0511 | No signal from IAC |
| 0560, 0562 and 0563 | Problems with voltage in the on-board network |
| 0601 | ECM memory error |
| 0615-0617 | Problems with the starter relay |
| 0627-0629 | You need to check the fuel pump relay |
| 0645-0647 | Problems with power supply through the relay to the compressor clutch |
| 0650 | Malfunction warning lamp does not work |
| 0654 | Failure of the tachometer circuit |
| 0685-0687 | Closing the main relay circuits |
| 0691, 0692 | Fan relay shorted |
| 1102, 1115 | Drop in resistance of the lambda probe heating coil |
| 1123, 1124 | Violation of mixture parameters at idle |
| 1127, 1128 | The same, but at medium load |
| 1135 | Short circuit of the first lambda probe heater circuit |
| 1136, 1137 | Violation of mixture parameters at low load |
| 1171, 1172 | Incorrect operating parameters of the CO sensor |
| 1335, 1336 | Throttle Position Error |
| 1386 | Errors in the data transmission circuit from the knock sensor |
| 1410, 1425 and 1426 | Absorber purge failure |
| 1500, 1501 and 1502 | Open or short circuit in the fuel pump relay circuit |
| 1509, 1513 and 1514 | Damage to the idle speed control circuit |
| 1606, 1616 | Rough Road Sensor Errors |
| 1620-1622 | Errors in ECU memory blocks |
| 2070, 2071 | Malfunction of the valve for changing the length of the intake channels |
| 2100, 2101 | Open circuit of the electric throttle valve |
| 2102, 2103 | Electric throttle actuator short circuit |
| 2122, 2123, 2127 and 2128 | Damage to the gas pedal position sensor |
| 2187, 2188 | Violation of the mixture composition at idle |
| 2135, 2138 | Asynchronous operation of throttle position sensors |
| 2176, 2178 | It is necessary to set the throttle valve to zero position |
| 2187, 2188 | Violation of the mixture composition at idle |
| 2301, 2304, 2307 and 2310 | Closing the control circuits of the ignition coils |
| 2500, 2501 | Exit of the operating parameters of the generator excitation circuit beyond the tolerance range |
| 0720 | Automatic transmission output shaft sensor faulty |
| 0717 | Failure of the automatic transmission turbine speed sensor |
| 0706, 0705 | Contacts in the automatic transmission selector are faulty |
| 0962, 0963 | Failure of the pressure regulation solenoid in the automatic transmission |
| 0973, 0974 | Failure of the gear shift solenoid in the automatic transmission |
| 0731-0734 | Transmission errors in automatic transmission |
| 0744, 1744 | Automatic transmission clutch malfunctions |
| 0711-0713 | Failure of the automatic transmission oil temperature sensor |
| 0863 | Automatic transmission unit communication error via CAN bus |
| 1735-1738 | Gear selection lock |
| 062F | Resetting the memory of the automatic transmission control unit |
| 230 | No signal from fuel pump relay |
| 263, 266, 269 and 272 | Failure of the control unit (driver) of the injector nozzles |
| 650 | Burnout of the check indicator or its wiring |
The video, shot by the channel “In Sandro’s Garage,” demonstrates all the functionality of the additional State computer.
CAN bus errors
On the Lada Kalina 2, several specific errors in the CAN bus operation are often encountered.
The main ones include:
- U0001 - general CAN bus malfunction;
- U0009 - short circuit of CAN bus components;
- U0073 - CAN shutdown;
- U0100 - no communication between the ECM and CAN;
- U0155 and U0305 - errors in interaction between cruise control and CAN bus.
EMUR errors
Kalina cars are equipped with an electromechanical power steering (EMPS), during which errors with index C are common.
| Code | Decoding |
| 1011, 1012 | Rotation sensor does not work |
| 1013, 1014 | Supply voltage out of tolerance |
| 1021-1024 | Torque sensor faulty |
| 1031-1033 | No signal from steering shaft position sensor |
| 1041-1045 | The position of the auxiliary motor rotor is not determined |
| 1050-1061 | Opens and short circuits of the motor winding |
| 1070-1079 | Various errors in the EMUR control unit |
ABS errors
In the chassis of modern Kalina and Kalina 2, equipped with an ABS system, the following category C errors are often encountered.
| Code | Decoding |
| 0035, 0040 | Failures of speed sensors on the front wheels |
| 0045, 0050 | Similar, but on the rear |
| 0060, 0065, 0070, 0075, 0080, 0085, 0090 and 0095 | Damage to valves in the anti-lock braking system module |
| 0161 | Stop light doesn't work |
| 0550, 0640 | ABS control unit memory errors |
| 0800 | Low voltage in the ABS block circuit |
Airbag errors
Many Kalinas of recent years of production are equipped with airbags that have their own control units. They are characterized by errors with index B.
| Code | Decoding |
| 9000 | Control unit error |
| 9001, 9002 | Malfunctions in the driver and front passenger seat belts |
| 9003, 9004 | Front airbag failure |
| 9042 | Incorrect power settings |
Errors of light, mirrors and others
In addition to those listed above, we can highlight a number of errors in the light control unit, which is installed on some Kalina cars:
- In 9501 - there is no signal from the raindrop sensor on the glass;
- In 9502 - the sensor sensitivity regulator does not work;
- In 9503, 9505 and 9506 - errors in the functioning of the windshield wiper;
- In 9504 there is a problem with the operation of the headlight relay.
If you have heated and electrically adjustable rear view mirrors, additional errors are possible:
- In 9244, 9246, 9247, 9250 and 9251 - malfunctions of the mirror tilt system;
- B 9230 - error in the mirror control unit;
- In 9252 - sticking of the regulator contacts.
As a separate block, you can consider controller problems related to the operation of electrical equipment on the body and in the cabin. Such errors are indexed B.
| Code | Decoding |
| 0001-0004 | Turn signal lamps do not work |
| 0005-0018 | Various problems in the operation of window motors |
| 0019-0026 | Problems with power supply to mirrors |
| 0027-0028 | Malfunctions of fog lights |
| 0035-0038 | Open circuit or overload |
| 0039-0043 | Breaks in the glass heating circuits, side lights and low beams |
| 0044-0046 | Immobilizer errors |
| 0052 | Error that appears after a power failure |
| 1375-1378 | Air conditioner evaporator sensors do not work |
| 1382-1385 | Open circuit in the interior temperature sensor circuit |
| 1860, 1861 | Power parameters are out of tolerance |
In addition, one of the most common errors on the Lada Kalina is P 0441, indicating an insufficient volume of air supplied to purify the absorber. This problem causes the check lamp to come on after prolonged driving and does not affect the driving performance of the car. Malfunction P 1602 is no less common; it signals a loss of voltage to the ECM and is recorded in memory after the battery is disconnected.
Errors in lambda probes and their heating systems are common. For example, 0036, which indicates a failure of the electrical heating of the sensor. The solution to this problem is to replace the sensor or install a decoy. As changes are made to the design of cars and new options become available, the list of error codes for the Lada Kalina is constantly expanding.
Broken fuel tank seal, catalytic converter failure
If the check persists on the dashboard, the car owner will look for a problem with the engine. But the reason may be different. The check engine light may come on due to problems with the tightness of the fuel system. The fuel filler cap may not be securely closed. Why does this problem occur? The reasons may be the following.
- If the seal of the fuel system is broken, air begins to flow into it.
- Additional fuel consumption appears.
- Air in the fuel system causes engine problems.
- The check engine light comes on on the dashboard.
How to fix the problem? If the check engine light is on and there are no signs of loss of power, knocking, humming or squeaking, then you need to check how tightly the gas tank is sealed. Sometimes, in a hurry, the driver simply forgets to close the lid tightly, or cracks begin to appear on it. If you have fixed the problem, but the check continues to light, then this is not the reason.
What to do if the catalyst fails? A car catalyst is needed to neutralize exhaust gases. The oxide contained in exhaust contains many substances that are harmful to the environment. The catalyst reduces the damage that a running vehicle causes to the environment.
If the check light is on due to a faulty catalyst, you will notice that the engine power has dropped significantly. The car loses acceleration dynamics. What is the reason for catalyst failure? Regular technical inspection of the vehicle will ensure that such a malfunction does not occur.
One of the reasons for catalyst failure is a breakdown of the oxygen sensor. Old spark plugs can cause catalytic converter failure. You should not take this problem lightly. If the oxygen sensor or spark plugs malfunction, the process of neutralizing exhaust gases is disrupted.
As a result, carbon monoxide begins to accumulate in the catalyst, it overheats and may burst. You cannot drive a car with a faulty catalyst. This will lead to improper operation of the engine, which is why the check light will light up. The car will consume more fuel and the engine will not produce traction.
The cost of a new catalyst is quite high, but still cheaper than engine repair. There is one more problem. You are unlikely to be able to replace the catalyst on Kalina yourself, so you need to go to a service center. To avoid this, you should regularly change the oxygen sensors and spark plugs.
If the mass air flow sensor fails, the car begins to consume more fuel. There is a greater emission of carbon monoxide, engine power and the smoothness of the vehicle are reduced. If there is weak dynamics during acceleration, then it makes sense to assume that the sensor is faulty. As a rule, in cold weather the car begins to have trouble starting.
Why does the mass air flow sensor fail? One of the reasons for the failure of this device is incorrect installation of the air filter during its scheduled replacement. Like many consumables, the air sensor needs to be replaced regularly
It is important to change the air filter in a timely manner.
A sensor malfunction has little effect on engine performance. You can drive for some time with a faulty sensor. But this will lead to increased fuel consumption. The cost of a new sensor for Kalina is not very high, and you can do the replacement yourself. If necessary, the sensor can be replaced in service, during a routine inspection.
Photo gallery
Displaying the firmware version
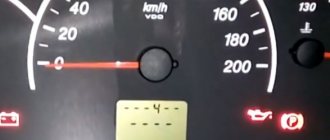
Error display
On-board computer State in diagnostic mode
Diagnostics for Kalina 2
Reset errors
If necessary or after correcting problems, the driver can delete the error from the control unit’s memory. To do this, you need to activate the service mode, enter the error codes menu and press the Reset button, which should be held for at least 3 seconds. After this time, the codes will be discarded. Deletion is indicated by a message like “——” on the instrument cluster screen.
Controller errors can be reset using software. Typically, this procedure is carried out during regular vehicle maintenance.
Video “Diagnostics of errors on VAZ Kalina”
The author of the video, ARBIX, conducts a self-diagnosis of errors on the tidy of his Lada Kalina.
Do you have any questions? Specialists and readers of the AUTODVIG website will help you ask a question
Was this article helpful?
Thank you for your opinion!
The article was useful. Please share the information with your friends.
Yes (92.31%)
No (7.69%)
X
Please write what is wrong and leave recommendations on the article
Cancel reply
Rate this article: ( 14 votes, average: 4.79 out of 5)
Discuss the article:
Replacing light bulbs in the dashboard of Lada Kalina
The instrument panel must always be in good condition. It displays information about the status of important systems and components of the vehicle. The accuracy of the information that the driver receives while driving depends on the serviceability of the devices. Power surges, vibrations, and temperature changes significantly reduce the life of backlight lamps. Therefore, replacing lamps in the instrument panel is a problem that often recurs.
Diagnostics
- Check the panel backlight brightness adjustment slider. It often happens that the brightness adjustment is at a minimum and the backlight is very dim or does not light at all;
- Check the panel hanger fuse. On Kalina, the fuses are located under the cover of the light switch block. In the block you need to check fuse F7, it is responsible for the panel illumination. The fuse location diagram is on the light switch block cover;
- One of the most common problems is a wiring problem that causes the panel backlight to not work. This usually happens when some wire breaks. In this case, only an electrician can help you.
Lamp selection
When choosing lamps, you can go in two ways:
- Install regular incandescent lamps, such as those installed by the manufacturer.
- Install LED lamps.
We recommend installing LED lamps, since their lifespan is longer than standard ones and you can also slightly reduce the load on the generator. Also keep in mind that LED lamps have pros and cons. If you install an LED lamp and it does not light, turn the socket with the lamp 180 degrees.
The instrument panel on Kalina uses a type of lamp with a W1.2W socket. In any auto store you can buy a socket with a lamp or a light bulb separately.
Tools for work:
Step-by-step instruction
- Before starting work, use a ten-point open-end wrench to loosen the nut securing the negative terminal of the battery and remove it. It is worth noting that when the instrument panel is removed, all readings except mileage are reset.
- For ease of operation, position the steering wheel as if driving straight.
Using a small Phillips screwdriver, unscrew the two screws securing the plastic cover of the shield.
Remove the plastic trim of the instrument panel by disengaging the two spring clips at the bottom.
Using a small Phillips screwdriver, remove the two screws securing the instrument panel.
Remove the instrument panel and go to a well-lit area to change light bulbs. It is worth noting that the lower part of the parting shield is inserted into the recess and supported by rollers on the sides.
To replace the lamp, grasp the socket with pliers and turn it counterclockwise. After turning, remove the socket along with the lamp.
Take a new lamp socket, install it in the seat and turn it clockwise until it stops. It is worth noting that if your lampshade is in good condition, the lamp can be replaced separately. You remove the lamp by simply pulling it towards you.
You can see the procedure for replacing light bulbs in the Lada Kalina dashboard in this video: