Properly adjusted headlights on a vehicle are a prerequisite for safe driving at night.
It is not very pleasant, and even unsafe, to move along the road at night, when oncoming traffic blinds you to the point of darkness. But it may happen that your car also causes inconvenience for other road users.
Poor visibility for the driver while driving may also be a reason to check the adjustment. Light problems can make it difficult to pass annual technical inspections. Therefore, such a check should become a rule for all drivers.
To improve road illumination, additional lighting in the form of fog lights is recommended.
Lamp selection
Type
So, if the low beam light on your car does not light up, then most likely the reason for this is its burnout.
Accordingly, before you decide to replace it, you need to select and purchase a new lamp. To do this, first of all, you need to figure out which low beam lamp is installed on the Niva Chevrolet. There are two types:
| Lamp type | Peculiarities |
| H4 | Double-filament (high and low beam combined) |
| H7 | Single strand |
H7 standard halogen bulb
In our case, we will need an H7 low beam lamp - on the Niva Chevrolet, the headlight unit is divided into two compartments, respectively, separate single-filament bulbs are used for low and high beam lighting.
Xenon bulb H7
What to look for when choosing
Of course, in addition to the design type of the lighting element, it is also necessary to pay attention to some of its characteristics. The most important parameter is the luminous flux power
It largely depends on the operating principle of the lighting element.
Below is a comparison of the power of light fluxes per watt of power of different types of lamps:
| Lamp type | Luminous flux power, 12 lm/W |
| Incandescent | 12 |
| Halogen | 16 |
| Halogen with quartz glass | 24 |
| Xenon arc | 91 |
| Light-emitting diode | 132 |
| Sodium gas discharge | Up to 200 |
Not only the power of the luminous flux, but also its price depends on the operating principle of the lighting element. The most affordable are halogen bulbs, and the most expensive are xenon and LED.
In the photo - LED light bulb
It should be noted that in addition to being cheap, they also have other advantages:
- Good light penetration. Therefore, they illuminate the road better than others in bad weather.
- They do not require the installation of additional equipment, unlike LED and xenon ones. Therefore, it is not difficult to replace the light bulb yourself.
Therefore, despite the lower brightness and yellowish color of the light flux, they are the most common.
Headlamp diagram
Replacing low beam lamps on a Chevrolet Niva — Chevrolet Niva, 1.8 l., 2011 on DRIVE2
Hi all!
Yesterday the left low beam bulb burned out. Yes, left again. I don’t know why this happened, but the left lamp is always the first to go out. I always change both at once.
Not because I’m a bourgeois, but so as not to have to explain to the traffic police later “why my headlights are shining differently,” and not have to poke around again, proving that I didn’t “do anything illegal” there.
In addition, the second lamp also has a damaged filament and will not last long anyway.
So I change both. Last time it was Osram Night Breaker. As in the picture below. No complaints, except for the price of 1,700 rubles. They lasted for 2 years despite the fact that I did not install separate running lights.
I always turn on the low beams. I can also note that they shine with white light, which creates a certain comfort when driving at night. Well, the declared brightness of 120% seems to be fulfilled, although this is only “by eye”.
I did not measure with instruments.
Osram Night Breaker
This time I could have bought them too, but I found others on sale: Philips Racing Vision with a declared brightness of 150%. It’s not that I’m a fan of brightness, but it’s always nice when the headlights shine well, it’s easier on the eyes.
They say that this makes the lamps have a shorter lifespan, but judging by the Osrams, they lasted 2 years. I can’t say that the original lamps worked longer. Price for Philips = 1400 rubles.
Let's see how they shine and how long they last.
They look like this:
Full size
Philips Racer Vision
Full size
Philips Racer Vision
For those who are just studying the design of the Chevrolet Niva, I will say that replacing lamps is elementary. No trip to service required.
Remove the rubber boots from the back of the headlights (it’s impossible to make a mistake there), remove the terminals from the lamp (remember the colors of the wires, they are different), press the spring down and to the side and the lamp snaps off. Put the new one back in the same way (do not touch the glass! so as not to get it dirty).
It is inserted into the socket in the only correct way. There is a special “tongue” for this. Don't get confused. Then you snap it on. Put on the wiring. Close the anthers. To replace the right headlight, you will need to unfasten it for a while and move the barrel with the washer. Nothing complicated.
But you will be sure that you will have exactly your good, expensive lamps. And sometimes it happens that at the service they put not what you brought, but something “other”...
Thank you for your attention!
Issue price: 1,400 ₽
About the reasons for violation of regulations
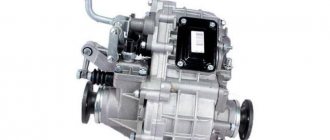
Repair of transfer case on Niva 21213, how to center it, do-it-yourself adjustment.
Cars have correctly adjusted headlights. Unfortunately, these settings are broken. There can be many reasons for this, for example:
- Violation of body geometry;
- Replacing headlights;
- Front suspension repair;
- Installation of other rubber on wheels.
The luminous flux of the headlights will be directed up or down, or even to the sides. Sometimes inappropriate and inept intervention by car owners leads to lighting problems. In any of these cases, you need to adjust the light.
In what cases is adjustment required?
When purchasing, you receive a new Niva with perfectly adjusted lighting - light at one point, without glare. But over time, these settings are violated. Poorly adjusted headlights can create significant interference when driving at night, in rain, fog, and in winter. An unexposed light “illuminates” the space in front of the car, thereby creating a negative effect. The light curtain interferes with the driver's view and blinds oncoming cars. Xenon headlights can cause problems for vehicles ahead.
What can cause a violation of the factory settings:
- damage to headlights followed by replacement;
- part repair;
- changing light bulbs;
- installation of halogen and xenon lamps;
- an accident resulting in a violation of the body geometry;
- installing tires of a different height and width;
- replacing front springs;
- repair of the front part of the Niva.
A check will also be required if such a procedure has not been carried out since the date of purchase. Over time, the position of the light beam gets lost. This is caused by frequent driving on uneven roads. If you have difficulty seeing the roadside at night or your friends complain that the Niva’s optics are blinding, it needs to be adjusted.
Checking the optical adjustment is mandatory when purchasing a used car. The previous owner of the Niva could have had an accident, and then had to level the body with putty or adjust the headlights on his own, without the proper mechanic skills.
To determine if the headlights are not adjusted correctly, place the car in front of a wall and turn on the lights. The light rays will be directed in different directions - up, down, or spread to the sides, but not to one point. Such a simple check will be a signal to urgently adjust the headlights. It is quite possible for the driver to set the Niva’s luminous flux correctly independently.
How to adjust headlights on NIVA 21213
Belt tension on a Chevrolet Niva. tension the alternator belt on the Chevrolet Niva correctly
To adjust the optics on the Niva 2121, you must:
- Understand the design of lighting devices.
- Prepare tools and materials.
- Place the Niva on a flat surface.
- Draw a diagram using a test panel.
You can study the Niva optics using the manual. Instructions are issued when purchasing a car. If you are the owner of a used car, then the manual can be found on one of the thematic sites.
Tools you will need:
- Phillips screwdriver;
- shield to cover the headlight.
It is also recommended to check the tire pressure and fill the car with gasoline to a certain level. Add antifreeze and washer fluid. A load equal to the driver's weight should be placed on the front seat. Remove the spare tire and large, heavy items from the trunk. Those. it is necessary to bring the Niva into full “combat” condition, in which it is most often used.
It is necessary to draw an adjustment diagram on the stand. It is the same for all vehicles.
As already mentioned, the first step is to draw markings on the test bench. This is done like this:
- Draw an axis of symmetry in the middle of the stand.
- Draw two straight lines from the floor to the end of the stand. They should be exactly in the center of the headlights.
- Draw two parallel lines. The height of the first is equal to the level above the floor, the second is 120 mm. If a hydraulic corrector is installed, reduce the height by 65 mm.
- We set the hydraulic corrector handle to the minimum load position.
Now about how to adjust the headlights:
- We place the Niva in front of the stand. Distance – 5 meters.
- We clean the optics with ethyl alcohol.
- We start the car. Otherwise the battery may run out.
- Turn on the low beam.
- Open the hood.
- Covers one of the headlights with a special shield.
- We expose the beams in a vertical direction. Take a Phillips screwdriver and turn the adjusting screw. It is located on the side of the radiator grille. Turn the screws in the same direction by the same number of turns. Error allowed, maximum three clicks.
- Adjusting the horizontal plane. To do this, the same screws are used, only now they need to be rotated in the opposite direction. The first is counterclockwise, the second is clockwise. We make revolutions at the same time.
- During the rotation process, we achieve the effect of placing the light beam no higher than the horizontal line of the shield. The inclined line should intersect with the lines in the vertical direction at the centers of the right and left parts.
- We set the light on the second headlight of the Niva car.
- We check the adjusted elements first on the stand, then on the road.
Even the most accurate manual correction is inferior to automatic adjustment. Using auto-correction, you can achieve better performance. This will also affect the subsequent operation of the Niva. Auto-correction is recommended when xenon or halogen headlights are installed.
The main advantage of an automatic corrector is that the light beam is set and maintained in accordance with road conditions. The nature of the vehicle's movement is taken into account. Namely:
- driving on uneven roads;
- turns right, left;
- braking;
- going uphill.
The automatic corrector consists of:
- 2-3 ride height sensors (installed front and rear);
- electronic unit;
- actuators.
How to install autocorrector on Niva:
- The headlights are removed.
- The old manual corrector is removed.
- The new sensor socket is secured with sealant.
- A headlight corrector is installed in it.
- The ground clearance sensor is attached to the bottom.
- The device wire is pulled through a tunnel with tubes.
No additional adjustments are necessary. The headlights will adjust themselves, taking into account the load of the Niva and the nature of its movement. The installation itself will take no more than 10 minutes. The only drawback of this device is its high cost. The cost of an electromechanical corrector starts from 1,700 rubles, but for installation you only have to buy a sealant.
If the car is equipped with a hydraulic headlight leveler, then they can be adjusted using it without leaving the vehicle interior.
The photo above shows the hydraulic corrector's executive body. The position of the headlight reflector is adjusted by changing the length of the rod, which changes under hydraulic pressure.
If the front suspension elements have been replaced, or the type of tire has been changed, the adjustment can be done on your own.
If you can’t adjust the headlights on NIVA 2121,21213,21214 then watch this video to the end.
How to adjust headlights
Arch extensions in the field
To adjust the optics on the Niva 2121, you must:
- Understand the design of lighting devices.
- Prepare tools and materials.
- Place the Niva on a flat surface.
- Draw a diagram using a test panel.
You can study the Niva optics using the manual. Instructions are issued when purchasing a car. If you are the owner of a used car, then the manual can be found on one of the thematic sites.
Required tools and materials
Tools you will need:
- Phillips screwdriver;
- shield to cover the headlight.
It is also recommended to check the tire pressure and fill the car with gasoline to a certain level. Add antifreeze and washer fluid. A load equal to the driver's weight should be placed on the front seat. Remove the spare tire and large, heavy items from the trunk. Those. it is necessary to bring the Niva into full “combat” condition, in which it is most often used.
In addition to the tools, it is necessary to prepare a site for testing. It will serve as an adjustment stand. She may find herself:
It is necessary to draw an adjustment diagram on the stand. It is the same for all vehicles.
Read more: Preliminary contract for the purchase and sale of a vehicle
Step-by-step instructions and work diagram
As already mentioned, the first step is to draw markings on the test bench. This is done like this:
- Draw an axis of symmetry in the middle of the stand.
- Draw two straight lines from the floor to the end of the stand. They should be exactly in the center of the headlights.
- Draw two parallel lines. The height of the first is equal to the level above the floor, the second is 120 mm. If a hydraulic corrector is installed, reduce the height by 65 mm.
- We set the hydraulic corrector handle to the minimum load position.
Make sure that the surface of the area where the car is located is flat, without slopes or elevations.
Now about how to adjust the headlights:
- We place the Niva in front of the stand. Distance – 5 meters.
- We clean the optics with ethyl alcohol.
- We start the car. Otherwise the battery may run out.
- Turn on the low beam.
- Open the hood.
- Covers one of the headlights with a special shield.
- We expose the beams in a vertical direction. Take a Phillips screwdriver and turn the adjusting screw. It is located on the side of the radiator grille. Turn the screws in the same direction by the same number of turns. Error allowed, maximum three clicks.
- Adjusting the horizontal plane. To do this, the same screws are used, only now they need to be rotated in the opposite direction. The first is counterclockwise, the second is clockwise. We make revolutions at the same time.
- During the rotation process, we achieve the effect of placing the light beam no higher than the horizontal line of the shield. The inclined line should intersect with the lines in the vertical direction at the centers of the right and left parts.
- We set the light on the second headlight of the Niva car.
- We check the adjusted elements first on the stand, then on the road.
Even the most accurate manual correction is inferior to automatic adjustment. Using auto-correction, you can achieve better performance. This will also affect the subsequent operation of the Niva. Auto-correction is recommended when xenon or halogen headlights are installed.
The main advantage of an automatic corrector is that the light beam is set and maintained in accordance with road conditions. The nature of the vehicle's movement is taken into account. Namely:
- driving on uneven roads;
- turns right, left;
- braking;
- going uphill.
The automatic corrector consists of:
- 2-3 ride height sensors (installed front and rear);
- electronic unit;
- actuators.
Using the block, the ground clearance of different axles of the Niva is monitored. Those. it automatically detects body tilt. This data is processed and the headlight angle is adjusted.
How to install autocorrector on Niva:
- The headlights are removed.
- The old manual corrector is removed.
- The new sensor socket is secured with sealant.
- A headlight corrector is installed in it.
- The ground clearance sensor is attached to the bottom.
- The device wire is pulled through a tunnel with tubes.
No additional adjustments are necessary. The headlights will adjust themselves, taking into account the load of the Niva and the nature of its movement. The installation itself will take no more than 10 minutes. The only drawback of this device is its high cost. The cost of an electromechanical corrector starts from 1,700 rubles, but for installation you only have to buy a sealant.
As you can see, Niva owners can independently set the beams of light on the headlights without using improvised means. The main thing is to strictly follow the instructions and prepare the test site correctly.
A little history.
The first Niva was released in the late 70s. Despite its breakthrough design for those years, the Niva inherited optical instruments from the VAZ 2101, and if we delve deeper into the roots, we will come to the first electric headlights!
A headlight with a diameter of 7 inches with a lamp with two incandescent filaments was patented by Bosh in 1919. Of course, it was somewhat modified, but its mountings remained unchanged.
Here is an example of 7-inch headlights on a Willys (one of the first jeeps):
And today, standard 7-inch headlights are still used in the automotive industry... it doesn’t matter whether it’s a tribute to fashion, marketing or a whim...
Here is an example of such headlights on a Jeep Wrangler:
Or on Mercedes Gelendwagen:
All this opens up vast possibilities for us to improve the light of our favorite SUVs. Of course, you could just replace the headlight bulbs with LED ones (and risk your license). But it is much more correct to install modern LED optics because it does not require any modifications, everything is installed with a bolt!
What headlights should I put on my car?
Niva 2121 4x4 headlights, sidelights, and other optics allow you to increase visibility on the road at night. Thanks to internal optics, the car owner has the opportunity to illuminate the interior of the 2121 4x4 and other components of the car. In addition, with the help of headlights, the driver can warn other motorists about what maneuver he plans to make. Accordingly, a lot depends on the quality of the headlights in the 2121 4x4 model, especially since each optical element performs a specific function.
Tuned lights and sidelights for Niva
The 2121 4x4 headlights or taillights can use a variety of bulb types.
As a rule, these are gas-discharge elements, which can be of the following types:
- incandescent or halogen, which today are considered one of the most common options, can be used for both low and high beam lighting;
- xenon - one of the most modern options, can also be used for high or low beam lighting;
- tungsten - the cost of such devices is the lowest, but their quality of light intensity is not high.
Recently, Niv 2121 4x4 car owners have been practicing the use of LED bulbs in crystal headlights. Moreover, they are used not only for signal options, but also as a source of main lighting. In fact, LED elements are brighter, unlike halogen and xenon, and by about 300%. Moreover, the density of light fill in this case is also higher. LED headlights are suitable for those Niva 2121 4x4, the headlight size of which is 7 inches.
Tuning headlight for Niva
Installing modern tuned headlights on a Niva 2121 is not a difficult procedure. Moreover, over time, many car owners of domestic SUVs come to this in order to improve head lighting. Indeed, recently more and more optics manufacturers have appeared on the domestic market, which can boast of high-quality flashlights. There are many options for purchasing from a Niva 2121 car owner - these can be either crystal or tank options; the choice of manufacturer depends solely on the preferences of the motorist and his financial capabilities.
As practice shows, many 21213 owners choose Wesem brand headlights. Such optics can be easily installed instead of standard ones. Such lights are ideal for domestic SUVs - they can be installed in ten minutes, especially since such optics are characterized by good lighting compared to traditional ones. Flashlights of this type are ideal for 21213 and 21214; they are equipped with 12 or 24 volt bulbs.
As for fog optics, the Wesem brand offers car owners such lights. If you believe the reviews, the anti-fog elements are characterized by a clear outline of the lighting boundaries - both lower and upper. Accordingly, thanks to this, the owner of model 21214 has the opportunity to correctly configure and adjust in accordance with GOST. In fact, fog lights practically do not blind drivers of oncoming cars; in combination with low beams, they can provide better lighting.
Niva headlight
Tuning of Niva optical elements
On most modern vehicles, including VAZ 21213 and 21214, optics tuning involves replacing the glass on the lamp or the reflector itself. In the event that the contacts on an optics element, be it a flashlight or sidelight, are burnt out or the optics become cloudy, it will need to be completely replaced. In addition, car owners of 21213 often practice tuning headlights with their own hands. In order to make your car stand out from the rest, you can use tuned tank headlights. By the way, tank lights are one of the most popular tuning options today.
To tune tank lights or sidelights, both rear and front, you need to dismantle the rim and remove the reflector. This should be done very carefully to avoid damaging the device. To perform these steps, you need to unscrew four bolts and three self-tapping screws, after which the case can be removed without any problems. If you think that installing tank elements is not enough, you can improve their appearance. To do this, you can stick a tint film on tank lights; today, many car owners resort to this tuning option (the author of the video is the STELS18 motorcycle service).
Adjusting headlights Niva Chevrolet
Over time, a Chevrolet NIVA car owner may be faced with the need to adjust the high and low beam headlights, as the quality of light reflection gradually becomes worse.
At night, visibility and vehicle control depend on how bright the optics are.
Therefore, the importance of the correct placement of lighting is very important for every driver.
Correct setting
During the operation of the car, over time, a natural misalignment of the headlight unit occurs, and the light begins to shine worse. Adjusting the Niva Chevrolet headlights is carried out in several ways:
- With the help of a specialist;
- Independently, using a special technique;
- Independently by reflective spots on the road.
As a rule, the second option is most often used. Before making adjustments, the car is fully equipped (spare wheel, jack, full tank), the tire pressure is checked, for the Chevrolet NIVA the required value is 1.9 bar. The transmission and springs must also be in good condition. The car is driven onto a flat surface where there is a wall on which special markings are applied.
From inside the car, the light regulator is set to the desired position as follows:
- The optics are thoroughly washed;
- Each headlight is adjusted separately, so one should be closed; this can be done with a piece of dense material;
- The hood opens and, using two adjusting screws located on the headlight block, the beam of light is adjusted in a horizontal position as shown in the figure;
- The other headlight is adjusted in the same way.
At this point, all work can be considered completed.
Dismantling
In some cases, in order to correctly adjust the light beam or as a result of mechanical damage, you need to remove the headlight, this is also due to the fact that over time the lamps become cloudy, as a result the power of the luminous flux deteriorates. If you don’t know how to remove a headlight on a Chevrolet Niva, you need to prepare a standard set of tools and do the following:
- Remove the terminals from the battery;
- The decorative lining of the radiator is removed; to do this, self-tapping screws are unscrewed from its mounting, which is located under the license plate;
- The power wires are disconnected from the light element;
- The wires from the hydraulic light corrector are disconnected;
- The front and right mounting screws are unscrewed from the headlight; for this, a ten key is used;
- The screws that secure the decorative trim of the headlight are unscrewed, after which it is removed;
- Unscrew the screws that are located under the cladding;
- The headlight is removed from the seat; if the fastenings are difficult to press out, you can use a screwdriver.
At this point, all work can be considered completed. Assembly is carried out in reverse order.
You should know that when replacing halogen lamps, it is not advisable to touch the bulb with your fingers, so you need to work with clean gloves, otherwise they will begin to become cloudy; if you do touch it, you need to wipe it with an alcohol rag.
Video “Tuning optics on a Niva car”
The original tuning of the optical components of the domestic SUV is presented in the video below (the author of the video is Vitaliy Zaremba).
Adjusting the light or position of the headlights on a VAZ 2121 and Niva 2131 must be done after they have been removed or when natural misalignment has occurred during operation. It is recommended to adjust the headlights on a special stand with markings, but you can do without it, you just need to follow the recommendations below. Prepare a standard set of tools and perform the following sequence of actions:
- First of all, it is necessary to adjust the weight of the car to its standard configuration. That is, the adjustment is carried out with a fully or ideally half-filled fuel tank, with full equipment - a spare wheel, a jack and the necessary keys. When adjusting, a weight equal to the driver's weight is placed on the driver's seat.
- We drive out onto a flat horizontal surface, place the car in front of the wall of the house and cover one headlight with a piece of dense material.
- We move the hydraulic corrector to the position corresponding to the minimum vehicle load.
- Using a Phillips screwdriver, we rotate the headlight adjustment screws in the horizontal and vertical planes and achieve the desired direction of the glow. For low beams, the recommended optimal range required to monitor the condition of the road at an average speed of 60-80 km/h should be 45-55 meters. It is recommended to direct the luminous flux of the right headlight slightly to the side to capture the side of the road.
- Adjust the second headlight in the same way.
Repair and adjustment of headlights of a VAZ-2121 car
The car has two round headlights. Headlight bulbs are double-filament (H4). The voltage to the lamp filaments is supplied through the low and high beam relay type 113.3747, located under the instrument panel on the left side.
| rice . 1 |
Relay characteristics: switching voltage at a temperature of (20±5)°C – no more than 8 V, winding resistance – (85±8.5) Ohm. Voltage is supplied to the relay windings if the exterior lighting switch key is fully pressed (then the choice between low and high beams depends on the position of the headlight stalk switch) or regardless of the switch position - if the driver pulls the left steering column switch towards himself (the high beam headlights turn on ). Some cars can be equipped with a hydraulic headlight corrector, designed to change the angle of the headlights depending on the vehicle load.
Removing and disassembling the headlight, replacing the lamp
Disconnect the negative cable from the battery. Remove the radiator trim.
| 1. Using a Phillips screwdriver, loosen the three screws securing the rim of the optical element to the headlight body. | 2. Turn the bezel counterclockwise and remove it. |
| 3. Take out the optical element of the headlight and disconnect the block from the lamp. | 4. Unclench the two ears of the wire holder, |
| 5. take out the lamp. We take the lamp, suitable for use or new, only by the base, without touching the glass bulb. | 6. To remove the headlight housing in the engine compartment, disconnect the headlight wire block. |
| 7. Use a screwdriver to pry off the rubber plug of the mudguard, remove it and push the block into the resulting hole. | Disconnect the hydraulic corrector from the headlight. |
| 8. Using a Phillips screwdriver, unscrew the four screws securing the headlight housing to the body. | 9. Remove the headlight housing. After installing the headlight on the car in the reverse order, we adjust it. |
avtomechanic.ru
We install LED headlights - bright light
Watch an interesting video about installing LED headlights on a Niva:
How to properly adjust Chevrolet Niva headlights with your own hands? We will answer this question and tell you how to correctly adjust the low and high beam headlights, as well as fog lights. Most often, Niva owners are interested in this issue, and for good reason. After all, you can do this yourself, without resorting to outside help. The brighter and better the optics shine, the easier it is to keep the road at night, respond to obstacles in a timely manner, etc. For many growers, the issue of lighting quality comes first and can cause irritation in insufficient lighting.
On the one hand, we can agree with this, because what kind of security can we talk about if there is no decent coverage. But on the other hand, some cars have optics installed by the manufacturer themselves, which do not shine with quality and fine-tuning.
This applies to a greater extent to domestic cars. And if the car has a solid mileage, then there is no point in further discussion at all. We know that with every ray of sunlight, optics fade and become duller. The ability to qualitatively reflect the light of lamps in headlights is gradually decreasing.
Moreover, an accident or traffic accident can lead to damage to the body part and the geometry of the frame will be disrupted. Regardless of whether the optics are new or old, they will shine worse.
How to adjust headlights
To adjust the optics on the Niva 2121, you must:
- Understand the design of lighting devices.
- Prepare tools and materials.
- Place the Niva on a flat surface.
- Draw a diagram using a test panel.
You can study the Niva optics using the manual. Instructions are issued when purchasing a car. If you are the owner of a used car, then the manual can be found on one of the thematic sites.
Required tools and materials
Tools you will need:
- Phillips screwdriver;
- shield to cover the headlight.
It is also recommended to check the tire pressure and fill the car with gasoline to a certain level. Add antifreeze and washer fluid. A load equal to the driver's weight should be placed on the front seat. Remove the spare tire and large, heavy items from the trunk. Those. it is necessary to bring the Niva into full “combat” condition, in which it is most often used.
In addition to the tools, it is necessary to prepare a site for testing. It will serve as an adjustment stand. She may find herself:
- house wall;
- garage wall;
- gates;
- flat shield.
It is necessary to draw an adjustment diagram on the stand. It is the same for all vehicles.
Step-by-step instructions and work diagram
As already mentioned, the first step is to draw markings on the test bench. This is done like this:
- Draw an axis of symmetry in the middle of the stand.
- Draw two straight lines from the floor to the end of the stand. They should be exactly in the center of the headlights.
- Draw two parallel lines. The height of the first is equal to the level above the floor, the second is 120 mm. If a hydraulic corrector is installed, reduce the height by 65 mm.
- We set the hydraulic corrector handle to the minimum load position.
Make sure that the surface of the area where the car is located is flat, without slopes or elevations.
Now about how to adjust the headlights:
- We place the Niva in front of the stand. Distance – 5 meters.
- We clean the optics with ethyl alcohol.
- We start the car. Otherwise the battery may run out.
- Turn on the low beam.
- Open the hood.
- Covers one of the headlights with a special shield.
- We expose the beams in a vertical direction. Take a Phillips screwdriver and turn the adjusting screw. It is located on the side of the radiator grille. Turn the screws in the same direction by the same number of turns. Error allowed, maximum three clicks.
- Adjusting the horizontal plane. To do this, the same screws are used, only now they need to be rotated in the opposite direction. The first is counterclockwise, the second is clockwise. We make revolutions at the same time.
- During the rotation process, we achieve the effect of placing the light beam no higher than the horizontal line of the shield. The inclined line should intersect with the lines in the vertical direction at the centers of the right and left parts.
- We set the light on the second headlight of the Niva car.
- We check the adjusted elements first on the stand, then on the road.
If a hydraulic corrector is not installed, the location of the screws will be different. To set the horizontal position, you need to twist the bolt, which is located on the left side. The vertical position is adjusted with a screw; it is located at the top of the headlight.
For anti-fog models, the direction is adjustable only in height. The optics are set so that the upper limit of the light spots coincides with the horizontal line drawn 100 millimeters below the height line of the Niva fog lights.
If the car was in an accident, due to which the geometry of the body was restored, the adjustment must be carried out on a special stand. There is such a device in every service station. It will be difficult to carry out the procedure on your own. The cost of the service is from 300 rubles.
Lighting system
Adjusting the headlights
Note
: The direction of the light beams of the headlights should be such that the road in front of the car is well illuminated, and oncoming drivers are not dazzled when the low beam is turned on.
Note
: Adjustment of headlight beams should only be carried out by qualified personnel at a workshop. Headlight adjustment is carried out using optical instruments. If they are not there, then adjustments can be made using the screen, as shown in the figure below.
- horizontal line corresponding to the centers of the headlights;
- a line passing through the centers of light spots;
- A and B – vertical lines corresponding to the centers of the headlights;
- O – center line;
- h – distance of the centers of the headlights from the floor
1. The headlights are adjusted by rotating screws 1 and 2 shown in the figure below, which rotate the optical element in the vertical and horizontal planes.
- screws for adjusting the headlight beam in the horizontal direction;
- screw for adjusting the headlight beam in the vertical direction
2. Place a fully fueled and equipped car, with a load of 735 N (75 kgf) on the driver’s seat, on a flat horizontal platform 5 m from the screen (plywood panel measuring about 2x1 m, etc.) so that the axis of the car is on it perpendicular. Before marking the screen, make sure that the air pressure in the tires is normal, and then rock the car sideways to install the suspension springs.
3. Draw vertical lines on the screen: center line 0 and lines A, B, C and E passing through the points corresponding to the centers of the headlights. These lines must be symmetrical with respect to the center line of the vehicle. At a height h corresponding to the distance of the centers of the headlights from the floor, draw line 1 and 55 mm below it, line 2 of the centers of the light spots.
4. Set the headlight adjustment control on the instrument panel to a position that corresponds to the load of a car with one driver.
5. Turn on low beam. Sequentially, first for the right headlight (the left one is covered by something or is disconnected from the wiring harness), and then for the left one (the right one is closed), adjust the light beams of the headlights with screws 1 and 2 (see the figure above). In this case, the displacement of the light beam of the headlight should not exceed ±3° in the vertical plane and ±2° in the horizontal plane.
6. For correctly adjusted headlights, the upper boundary of the light spots should coincide with line 2 (see the screen picture above), and the intersection points of the horizontal and inclined sections of the light spots should coincide with lines A and B.
Replacing lamps
Block lights
Note
: Before replacing the lamps in the headlight unit, remove the protective cover 3 (see figure below), which is fixed with a wire holder 2. To replace the low (or high) beam lamp, remove the block 5, remove the antennae of the spring latch 6 from the grooves and remove the lamp 4.
1. Turn cartridge 1 counterclockwise and remove it from the socket.
2. Remove block 5 of the low beam headlights to gain access to the side light lamp.
- turn signal lamp socket;
- holder;
- lid;
- low beam (or high beam) lamp;
- low beam (or high beam) lamp block;
- latch.
Fog lights
High-quality PTFs should illuminate the space in front of the car and on the sides, and the distribution sector is about 60°. Vertical dispersion should not be greater than 5°. The shape of the fog light sources does not matter. To install the optics, use a special bracket for mounting additional Niva headlights. It is placed on the front bumper.
H1 halogen lamps are often installed in fog lights on Niva, but H2, H3 and H7 are also acceptable. It is prohibited to install gas-discharge products in such devices, since they blind drivers of both oncoming and passing cars. In halogen optics, the light source is a static filament, so the light beam is focused. In lamps with xenon light, the electric arc constantly changes its position, which causes focusing to be disrupted and a blinding effect to occur. Special optics must focus such a light flux.
Which ones to choose
The choice of alternative Niva optics depends on the size of the budget that is planned to be spent on updating the car. If it is very limited, it is worth buying Russian-made OSVAR headlights. They shine quite brightly and last a long time. However, such optics cannot be used in water.
Features of choosing headlights for Niva:
- HELLA headlights are often installed as PTF on Niva. They are distinguished by high-quality assembly and high brightness of the light beam.
- Car enthusiasts with an average budget are recommended to purchase Wesem headlights, which have the most optimal price/quality ratio.
- Headlights for Niva Bosch are sold with transparent or yellowish lenses. They are suitable for H3 bulbs. Light from optics spreads widely.
The best headlights for Niva 21214, judging by the reviews of car enthusiasts, are represented by models from these manufacturers.
How to connect
According to GOST 8769-75, the following requirements are imposed on PTF:
- The vehicle must have 2 headlights.
- They must be located no further than 40 cm from the plane of the side dimensions (along the outer edge of the lens or the inner border of the sidelight).
- There should be more than 25 cm from the bottom edge of the optical element to the ground. Fog optics are installed no higher than the low-beam headlights. The PTF visibility angles are +15...-10° vertically and +45...-10° horizontally. On Niva they are installed on the bumper.
This is interesting: Wiring diagram for the VAZ 2106 generator - how to connect it yourself
To connect the fog lights you will need:
- four-contact relay type 90.3747;
- fuse block 16A;
- wiring for power circuits (cross-section from 2.5 mm2) and control circuits (at least 0.75 mm2);
- three position switch.
It is better not to conduct the “mass” of Niva fog lights through the headlight fasteners, since rust gradually forms and contact disappears. The engine compartment is a better location for the relay. The corrugation will protect the wiring from kinks. The three-way button illumination connects to the white and black cable of any illuminated switch in the center panel. Thanks to this connection, the fog lights can be used in 3 lighting modes.
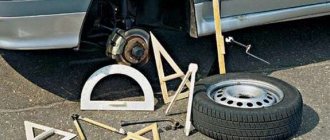
A few words about adjusting the light on the stand
All vehicle operating instructions recommend making such adjustments on a special stand. However, in some cases this operation can be easily performed independently. In cases where body repairs were carried out to restore the geometry of the body, it is best to contact a service center and perform this procedure using a special stand.
The photo shows one of these stands. In the article you will learn how to install fog lights on a VAZ 2110 yourself, as well as how to install xenon lights on the PTF. It is a stand that rotates freely in any direction. A system for laser centering of the light beam, a glass lens with a lux meter, and a mirror for precise positioning are placed on it.
Adjusting the headlights
MORE