A car audio system has long ceased to be a luxury. Nowadays it is difficult to find a car without such a common option. Today, car radios are presented in the widest range. Thus, even the most demanding music lover will not be disappointed.
As soon as the treasured radio is purchased, a completely natural question arises: how to connect it to the car’s electrical system?
Of course, you can always use the services of auto electricians, and the problem will be solved. But not all car enthusiasts are happy with this outcome.
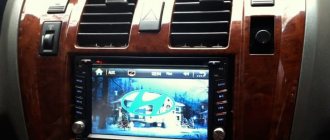
Removing an old car radio
So, the treasured radio is waiting in the wings. It's time to get rid of your old audio system. At first glance, it may seem that this procedure is not complicated. By and large, this is true. However, there are a number of nuances that it is advisable to take into account during dismantling.
Note for you: How to remove a radio without pullers and keys
At the initial stage, in order to avoid damage to the panel elements, it is necessary to find out how the radio is secured in the niche.
Depending on the type of car audio system, there are several mounting methods:
- using flexible metal tongues;
- using plastic clips;
- using a screw connection.
As a rule, if we are talking about a standard radio, there is a last method of fixation. Often, the manufacturer, pursuing an aesthetic goal, masks the heads of screws or screws with plastic caps. Dismantling such a radio should not cause serious difficulties. To do this, it will be enough to unscrew the screws and gently pull it out.
The situation is somewhat different when the radio is located inside a metal casing. In this case, special keys will be required to remove the radio. Hardly anyone remembers their existence when this kind of need arises. However, all radios of the presented type are equipped with them.
The principle of fixing such a radio is not very complicated. Flexible metal tongues with a protruding part are attached to its side walls. On the casing, in a strictly verified place, there are special recesses. The aforementioned tabs go into them, rigidly fixing the radio in the casing.
If you don’t have a key, you can use two thin metal plates to remove it. To do this, you need to insert each of them between the frame and the radio, thereby squeezing out the metal tabs.
After this, you should pull the radio towards you, turning it slightly in different planes. It should be noted that this kind of tricks of manufacturers is nothing more than measures of protection against lovers of easy money.
In addition, radios can be installed in the panel using plastic clips. With this method of fastening, it is important to prevent distortion of the plastic frame. To avoid damage, the clips should be released gradually and evenly, avoiding distortions.
Useful to read: What is a diesel intercooler: principle of operation and causes of failure
With any method of fixing the radio, its dismantling must be done carefully so as not to damage the integrity of the connecting wires and contacts.
Check your equipment for Bluetooth compatibility
To use your mobile phone in a car using a hands-free system, you need to:
- – Bluetooth enabled cell phone
- – Infotainment system or car audio system with Bluetooth support
- – PIN number for infotainment or audio system
In addition, when connecting a phone in a car, it is useful to have the following things:
- – Car phone mount
- – 12 volt charger for cell phone
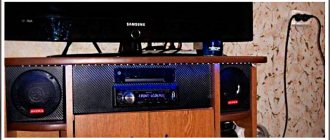
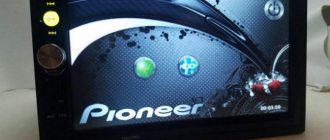
How to install a Pioneer radio
So, the choice fell in favor of the Pioneer car radio. It is worth noting that such audio systems have gained enviable popularity among our compatriots, largely due to their good technical performance and ease of installation.
The presented radio tape recorder meets all the requirements and standards for modern audio systems.
Let us consider in more detail all the features of self-installation of a radio in a car.
Wire marking
In order to simplify the installation of any electrical equipment, the insulation of the wires is painted in a certain color. Thus, each color corresponds to specific functional features of underwater pipelines.
When connecting the radio, you must first of all follow the connection diagram included in the kit.
In addition, the Pioneer radio usually includes 2 contact plugs, commonly referred to as “chips”. Each chip contains 4 pairs of contacts.
One of the chips is designed to supply power, the other is used to connect the speaker system. If the so-called “trick” is missing, do not despair. It can always be purchased at any auto store.
Before you begin directly connecting the radio to the car network, you need to understand the purpose of each wire.
This is interesting: Why does water drip from a car muffler?
For the most part, the color range of the underwater lines of the radio is limited to the following colors:
- red;
- blue;
- yellow;
- black;
- violet;
- white;
- green.
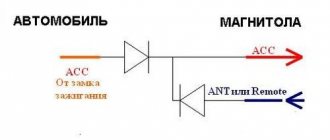
The red wire is usually referred to as the power line that supplies voltage to the radio when the ignition is on.
The blue insulation indicates the positive terminal going to the receiver antenna.
yellow terminal is the power terminal, supplying voltage directly from the battery through the fuse.
Black color indicates a mass hatch.
All other wires, depending on the type of radio, are responsible for powering the speakers. Purple, white, black and green are all feed lines.
A similar color of wires with a black stripe indicates that this wire is negative.
Connection diagram
Connecting the radio yourself should not cause serious difficulties. It is enough to be guided by the diagram presented below and adhere to a number of instructions and recommendations.
Despite the ease of installation, so-called emergency situations often arise when it is not possible to understand the location of the corresponding contacts on the radio plug.
In such cases, it would be most advisable to refer to the visual diagram of the Pioneer plug, where all contacts are sequentially indicated. Each digital pin designation on the diagram corresponds to the color shade of a specific wire.
Note: How to buy a used car second hand
It is important to remember that when fixing the wires, care must be taken to ensure they are properly insulated. Adjacent wires should not touch each other with conductive surfaces.
Connection methods
Various techniques are used to connect external players. The type of connection depends on the Pioneer radio model and the design features of the player or cell phone. Installing additional playback devices expands the capabilities of older models of audio players (for example, cassette type), which are preserved in used cars as an element of the original design.
Which radio do you recommend buying?
- Pioneer 50%, 4618 votes
4618 votes 50%
4618 votes - 50% of all votes
- Alpine 14%, 1342 votes
1342 votes 14%
1342 votes - 14% of all votes
- Kenwood 11%, 1016 votes
1016 votes 11%
1016 votes - 11% of all votes
- Sony 9%, 797 votes
797 votes 9%
797 votes - 9% of all votes
- JVC 7%, 627 votes
627 votes 7%
627 votes - 7% of all votes
- Another... 4%, 356 votes
356 votes 4%
356 votes - 4% of all votes
- Prology 2%, 145 votes
145 votes 2%
145 votes - 2% of all votes
- 142 votes 2%
142 votes - 2% of all votes
- Mystery 2%, 140 votes
140 votes 2%
140 votes - 2% of all votes
- Soundmax 1%, 92 votes
92 votes 1%
92 votes - 1% of all votes
Total votes: 9275
Voted: 7856
13.11.2019
×
You or from your IP have already voted.
Also, to switch equipment, a special emulator is used, which is a block with USB or AUX ports, which is connected to the ISO connector of the radio. Inside the device there is an electronic microprocessor unit that supports the operation of the ports and converts sound into a signal recognized by the head unit. The emulator allows you to connect Android to an old-style radio tape recorder made in the 80-90s.
Via USB
Connecting external players via USB is the most common method. For switching, a standard cord is used, the connectors of which are installed in the socket on the car radio and cell phone. After the phone or storage device is connected to the head unit, it is possible to switch tracks using the buttons located on the steering wheel or front panel.
Are you a car driver?! Then you can take this simple test and find out... Go to the test »
The advantage of the scheme is the stability of operation and the absence of interference during signal transmission. The USB port additionally charges the external device's built-in battery. The disadvantage is the presence of a patch cable, which interferes with the driver while the car is moving. When the connector is placed in the glove box, the wire does not hang in the car, but to answer a call you need to disconnect the phone from the connecting cable.
Via AUX
The round AUX connector appeared on Pioneer cassette players. To connect the radio to the phone, you will need an appropriate cable that transmits only an audio signal. To listen to music, you need to install a program that plays files on your smartphone. The head unit is used only as a signal amplifier, which is then transmitted through the speakers of the speaker system. The port does not allow you to charge your phone battery.
Via Bluetooth
Some Pioneer players use a Bluetooth wireless communication unit, which does not require the use of cables for connecting external equipment. To connect your phone to the radio via Bluetooth, you need to activate the wireless communication units and then pair the devices. Tracks are controlled using the radio menu; the smartphone is located in the owner’s pocket or in a separate niche. When a phone call comes in, the driver can carry on a conversation without putting the handset to his ear.
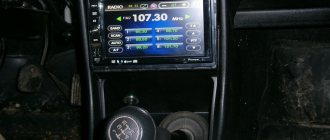
Installation of 1 din radio
Before highlighting the installation features of various car radios, let's take a short historical excursion. The fact is that in the mid-80s, leading companies producing car audio systems came to the conclusion that it was necessary to unify all radios.
In other words, standardize the sizes of the presented devices. Thus, after some time, the so-called DIN appeared, which received the status of an international standard.
The fundamental parameters of this standard are the width and height of the radio. Thus, the 1 din standard corresponds to dimensions of 178×50 mm. 2 din differs only in height, which is already 100 mm.
All of the above information must be taken into account when choosing a radio.
Let's look at a case where there was a need to install a 1 din standard car radio. It is worth noting that this standard is considered the most common. In this regard, difficulties should not arise when installing a new radio. As a rule, the installation of most standard radios is carried out in accordance with the 1 din standard.
On the subject: How to remove a hernia on a car wheel and why it is dangerous
However, a situation may arise when there is a 2 din standard socket in the car console. In this case, when installing a radio that meets the 1 din standard, you will only have to purchase a special adapter frame.
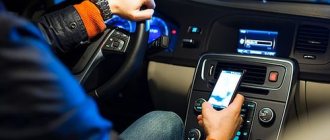
We connect the cell phone via Bluetooth to the car.
Bluetooth is a wireless technology that allows the creation of wireless, secure local area networks, making it ideal for short-range connections between devices such as a phone and an infotainment system, or between a phone and a Bluetooth hands-free system found in cars.
The process of creating a network connecting a phone to a car is called “pairing” or “pairing” (since the network consists of only one pair of devices). Although one Bluetooth device can theoretically be connected to several other systems and gadgets, each connection is secure and unique to one specific pair of devices.
In order to successfully pair a cell phone with a car's infotainment system, both devices must be Bluetooth compatible.
Most car entertainment systems are equipped with Bluetooth wireless technology, which is compatible with most mobile phones on the market.
This allows the driver to create a wireless communication channel in the car, which provides hands-free operation with which you can receive and send calls from a mobile phone without taking your hands off the steering wheel. Also, connecting a phone to a car allows the driver to receive and send SMS messages, listen to favorite music from the phone on the car’s audio system, and even access the Internet using mobile Internet from the car’s screen.
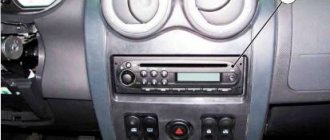
Installation of 2 din radio
The situation is somewhat different in the case when a 2 din standard radio tape recorder claims to replace the old radio. The installation procedure for such a radio will be painless if the old analogue meets the same standard. Otherwise, a number of problems may arise.
Firstly, if you replace the standard 1 din standard configuration with 2 din, you will have to replace a number of elements: the center console, frame, etc.
In addition, during these events you will definitely encounter various undesirable phenomena that will not have the best effect on the aesthetic component of the interior of your car.
Based on all of the above, it is quite reasonable to draw one single conclusion: select an audio system that meets the standards provided by the manufacturer of your car.
Video instructions for connection and setup
To learn more about the intricacies of connecting a Pioneer car radio, follow the link below. The presented video review highlights the main stages, features and recommendations on the topic under consideration.
Sound settings
In order for the radio to play juicily and reproduce low frequencies well, you need to adjust the equalizer curve and adjust the cutoff of low or high frequencies. The equipment supports adjusting the sound balance between speakers; there is a separate function for dynamic bass boost (BASS BOOST).
The sound quality is affected by the bitrate of audio recordings stored on laser discs or removable storage devices. If the recording quality is low, it is impossible to correct the sound picture using the settings.
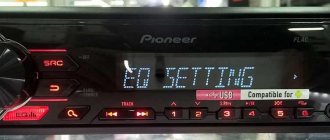
Equalizer
Equalizer curves with standard parameters are stored in memory; to select the required value, use the menu (EQ Settings subsection). Radio tape recorders support creating your own sound picture by recording parameters in a separate memory cell.
High and low pass filter subwoofer
Setting up the slice is done through the menu, where you need to find the Crossover parameter. The function is supported only by some equipment; the setting algorithm depends on the modification of the acoustic device. Some models allow you to set individual characteristics for each speaker. The cutting height is selected from the list of suggested values.
How to connect your phone to Pioneer
The presented type of car radio does not meet all the requirements of its owners. For example, it is not possible to connect a phone to it without carrying out a number of actions. Let us dwell on this in more detail, since the presented topic has not lost its relevance.
To carry out such a procedure, you will first need to make a so-called linear input. The presence of such an analog input will allow you to connect a number of devices to the radio, including a telephone. Let's look at the most common method of installing a linear input.
Transmitters
Another way to connect a phone with a radio is through transmitters, that is, transmitters. There are many types of transmitters, but we will consider only a few.
FM transmitter for mobile phones
The FM transmitter is quite interesting in its essence and easy to use. The principle of its operation is simple: it transforms the data received from the phone into FM radio waves and transmits it to the radio receiver of the radio. Externally, the transmitter is a small device that plugs into the AUX connector of the phone.
After connecting, we launch the player on the phone, and on the transmitter we set the desired wave for broadcast. Then you just need to turn on the receiver on the radio and detect this FM wave - and now music from your mobile phone is already playing from your speakers.
This connection is wireless, and this is already convenient. The transmitter is capable of interacting with absolutely any radio that has a radio receiver. The disadvantage of such a transmitter is low sound quality (radio interference). This is noticeable in cases where the device is inexpensive. You can only manage tracks from your phone.
Bluetooth transmitter
To connect such a transmitter to a radio, you will need an AUX connector on the radio, since the transmitter will be connected to it. As soon as you connect to the radio, launch the player on your phone and set the music signal to be broadcast to a Bluetooth headset, the role of which is played by the transmitter.
Other types of such transmitters can even provide the opportunity to conduct negotiations. For these purposes they have a microphone. However, it is not recommended to use transmitters for communication, since the quality of their reception leaves much to be desired.
Bluetooth devices transmit sound in higher quality than FM transmitters, but they also drain the battery much faster. To prevent your phone from completely discharging, purchase a special charger that runs from the cigarette lighter.
Possible problems and their solutions
During the operation of the presented car radio, various types of problems may occur. Their appearance is often caused by incorrect connection of underwater leads or a malfunction of third-party devices. In addition, malfunctions of the radio may be associated with power outages.
It is worth noting that in most cases, almost every malfunction has certain symptoms, based on which it is possible to determine its cause. With all this, it is worth noting that in order to eliminate a certain number of malfunctions, the owner will need at least minimal knowledge of electrical engineering and the presence of some measuring instruments.
Let's try to highlight the most common cases of problems.
Doesn't turn on
If, after installing the radio, it refuses to show signs of life, the following diagnostic measures should be carried out:
- make sure that the underwater leads are tightly connected;
- check the availability of power;
- make sure there is mass.
If all of the above measures do not lead to the desired result, there is a need to conduct a comprehensive diagnosis, which involves:
- checking the throttle and fuse L951;
- checking the voltage value of the Q952 stabilizer (operating voltage is 5V);
- checking the presence of a key on transistor Q609;
- checking the serviceability of MK/KK quartz oscillators.
If all of the above steps fail to identify the problem, it is highly likely that the problem lies in the IC601/IC901 microcontroller.
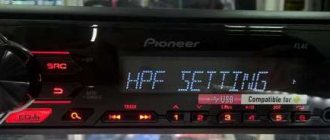
Doesn't turn off
Often, owners of Pioneer radios are faced with the fact that they simply cannot turn off the radio. Solving this problem will not be difficult if you find out some of the features of the devices of the presented type.
The shutdown algorithm looks like this:
- press key 2 and get to the Menu section;
- enable the Sustem tab;
- activate the PW SAVE function;
- turn off the radio by pressing the off button.
After saving the listed settings, to turn off the radio it will be enough to use key 1. When resetting the settings due to disconnecting the battery, etc., the specified algorithm should be repeated.
Wire marking
Before you connect the Pioneer radio, find out what functions each of the wiring performs. Included with the device is a pair of ISO connectors for connection, each of them consists of 8 pins. The 1st is for the power supply, the 2nd is for the sound reproduction system. It happens that the car does not have the required port. In this case, disconnect the ISO, then connect using mechanical twisting. Multi-colored electrical wires are easy to identify. Each of them performs its own functions.
Purpose and connection of wiring
- Yellow. For batteries, supplied through a fuse.
- Red. Connects to the ignition. Red and yellow cannot be connected to each other, as the battery will quickly discharge.
- Black. Negative, it is fixed to the car body.
- White and blue. They come from the antenna, subwoofer and amplifier.
- Gray. For the right column (positive terminal). The gray wire with a black stripe is connected to the same speaker (minus terminal).
- White. It is connected to the positive terminal of the front left speaker, and the white one with a black stripe is connected to the negative terminal.
- Green. It is connected to the positive terminal of the left rear speaker, green with a black stripe - to the negative terminal.
- Violet. For the rear right column (plus), with a strip - minus.
What can and should be configured in the equipment of this company
Depending on the model of the audio recorder, the user has the ability to independently adjust parameters such as:
- equalizer;
- radio stations;
- menu language;
- time;
- enable or disable the Bluetooth wireless protocol (if available) and AUX;
- activation/deactivation of demo mode, etc.
Among all that has been said, special attention should be paid to setting the equalizer, as well as the radio, where the first is useful for those who like to listen to their own music, and the second for car owners who prefer radio stations to music from a disk/flash drive. Special adjustments are also required for the subwoofer.
Clicking noises when the engine is running
Many owners of standard radios experience periodic clicking noises when the engine is running. First of all, it is necessary to understand the reason for the appearance of such a not entirely pleasant phenomenon. We are talking about the fuel system of the car. During operation of the power unit, small voltage surges regularly occur. This leads to interference.
In principle, the radio is protected by this. But a standard noise canceler does not always solve the problem. Sometimes this happens due to his refusal, which is not uncommon. To solve the problem, you can simply connect the power to the radio through a noise filter. This is guaranteed to get rid of acoustic clicks.
Typical faults
Pioneer car radio error
Before we talk about the car radio connection diagram, let's look at the main malfunctions that can occur during its operation:
- The system does not turn on. If such a problem occurs after installation, then first of all the circuit of the Pioneer car radio is checked; it is possible that errors were made during the connection. Also, the reason may be due to a lack of power; you need to check the quality of the connection of the device to the vehicle’s on-board network. If you are using a remote control for a Pioneer radio, it may be using dead batteries or the remote control may simply be out of order. If the power is activated by pressing a button, then there is a possibility that it is the button that is inoperative.
- From time to time, the sound in the speakers disappears and then appears again; in such cases, the reason may be an error in the amplifier. In this case, a characteristic error message may appear on the device display. Typically, the cause is a short circuit or regular operation of the system at maximum volume. A short circuit can occur not only in the wires of the radio connection circuit, but also on the contacts going to the speakers or on the speakers themselves. It is possible that the short circuit is caused by damaged wiring. In this case, it is necessary to measure the voltage at the output of the amplifier, try to connect the speakers bypassing the amplifier, and diagnose the connectors, as well as the safety elements.
- One or more speakers have stopped working. In this case, the Pioneer car radio circuit is also checked; there is a possibility that errors were made when connecting the radio connector. But most likely, the reason should be sought on the speakers themselves, either the speakers are faulty or there is poor contact on them.
- The system does not respond to the remote control. Most likely, the reason lies in a non-functional remote control; this is a common problem for many audio systems.
- Incorrect configuration of the Pioneer radio can lead to incorrect operation of the audio system as a whole, so before operation the device must be configured correctly (author of the video channel Radioblogful. Video blog of a soldering specialist).
Subwoofer doesn't work
In standard stereo systems with a Pioneer head unit, the subwoofer sound sometimes disappears. The problem is a faulty output to the subwoofer. The problem is treated in 2 ways. If the radio is new and under warranty, you can try replacing it. But this does not always work out; more often they repair and return.
Another option is to resell the products yourself. Perhaps the second option is the most optimal. Do-it-yourself repairs are much more reliable than warranty repairs. Moreover, no difficulties should arise there.
Conclusion. Car acoustics often require a lot of attention. It must be configured accordingly to get the most out of its specifications. How to turn off a Pioneer radio is a question that owners of such equipment often ask. In fact, it's made so simple that the manufacturers don't even mention it in the instructions.
Speaker wheezing
Some drivers encountered a situation where the speakers began to wheeze. At the same time, this does not happen all the time, but only from time to time. Of course, the problem could be a faulty speaker. But, often the reason turns out to be unsuccessful configuration of the system itself. Therefore, troubleshooting should begin by viewing the settings. You are interested in the balance menu. Here you can evaluate how the sound is distributed between the speakers. Pay attention to the uniformity of its distribution. Most often, unbalanced low frequencies cause wheezing.
If everything is correct in the settings, then it makes sense to pay attention to the wire connections. There may be a bad connection somewhere. That is why the speaker wheezes. This may be indirectly indicated by the irregularity of wheezing. Especially if the speakers are in the doors. When you open the door, you move the wire, one time the contact may be normal, another time, not so much. The cause of wheezing may be a broken capacitor.
. In this case, you need to check it.
Take a radio component with the same capacity. You need to connect it in parallel with the standard one. After that, turn on the radio and check the result. The absence of wheezing indicates a problem with the capacitor. In this case, the current passed through the additionally installed part. Unsolder the faulty air conditioner and install a new one in its place.