The concept of “Chinese car radio” includes all audio equipment of both local and popular global brands produced in China. Due to the fact that the devices are manufactured under the supervision of specialists from the companies that own the brands, they are certified according to international standards. Therefore, connecting a Chinese 2 din radio according to the diagram in the instructions will not be difficult, and the designation of the terminals does not differ from devices from European or Japanese manufacturers.
Features of Chinese car radios
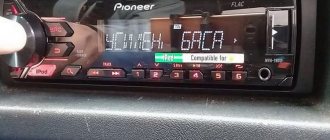
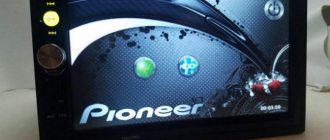
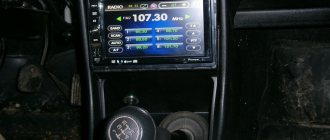
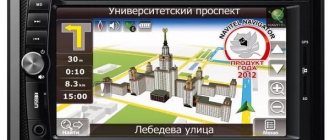
2 din radios differ significantly from smaller devices. These multifunctional modules with a 7-inch diagonal LCD screen allow you not only to listen to music, but also to watch videos. The size of the radio exceeds the dimensions of a 1din device, which immediately catches your eye. Users note their stable operation and high-quality sound.
Most often, Chinese 2 din format radios are equipped with a GPS module. With such a car player, there is no need to purchase a navigator. Additional gadgets can be connected to a Chinese head unit (GU) of this format: multifunction steering wheel, rear view camera, GPS antenna. This slightly modifies the connection diagram of the car radio, because new wires appear that were not on the standard chip.
In most cases, the audio device comes with ISO connectors and wires. Otherwise, you will have to buy an adapter to connect the purchased car player. Switching the device with a source of electricity will not be difficult, since the pinout of radio tape recorders of both formats is identical.
The yellow DC +12V wire is connected directly to the battery through a safety device.
The red control wire is connected to the ignition switch. It is desirable that when the key is turned to the ACC position, there are no other consumers besides the control unit. This will reduce the load on the battery. It is better to connect the black wire (“ground”) to the negative terminal of the battery, and not to the car body, since a 2 din radio is an energy-intensive device.
The GU has the ability to reduce the brightness of the backlight of the buttons and screen when the side lights are turned on. This makes it possible not to blind the driver at night. Power is provided by the wire marked ILL. Terminals KAY1 and KAY2 are responsible for connecting the remote control for the car radio (multi-steering wheel).
How to connect a Chinese 2 din radio according to the diagram yourself
Discussion 2-din media player with GPS 7020G7021G
* Before posting a photo, read the topic
Working with images on the forum * Place images only under a spoiler! * Messages that are not related to the topic of discussion (offtopic) are deleted without warning.
The main question that arises when choosing or after purchasing is what is the difference between the 7020G and 7021G models. As operation has shown, there is nothing in terms of internal content, the only difference is the design of the control buttons on the front panel. Model 7020 has them flat,
7021 are slightly convex.
The main differences are in the chassis (motherboard) used on this platform, regardless of which model 7020 or 7021 it is installed on. Until mid-2022, chassis 7023
, after (and until now)
7026
.
Their main differences are in the software (firmware) and, accordingly, changes in the shell interface (menu). In the review from Gargantua
, the first revision is on the 7023 board, so the interface and menu settings differ from those included in the firmware of the 7026 board. Some “jambs” (not saving the selected backlight, problem with the volume at zero value) inherent in the 7023 chassis (described in the header ) were fixed on the 7026. The only obvious problem on the 7026 was the lack of playback of media content and radio when working with navigation, but this problem was fixed after the release of the updated firmware (available in the header).
Many devices purchased later have this firmware already installed. There are also differences in the VinCE modules (navigation modules) installed on the chassis. On the 7023, a module was used on the SIRF Atlas processor with 128MB of RAM (brand H12-L06-B0374-R00), on the 7026 on the MStar processor in 2 modifications - with 256MB of RAM (quite rare) or with 128MB of RAM (brand G10 -V3 ZSKTEK). The shortcomings of the navimodule on SIRF Atlas (problems with Navitel) were not noticed on MStars. How can I find out which revision of the board is installed in the radio? The easiest way to do this is by looking at the review from Gargantua
, if the interface and settings are similar, then the 1st revision (chassis 7023), if they are different, then the 2nd (chassis 7026).
You can determine with 100% certainty by disassembling the radio, unscrewing 4 screws and looking at the markings on the board. If there are numbers 7023 (full name 7023G TFT V01), then 1st, if 7026 (full name 7026G-C500 V01.1), then 2nd. Since the end of 2022, a new revision of the 7026g-c500 v02
, with new firmware (the dump is in the header).
Since mid-2022, a new revision of the 7026G-C800DM-v01
on the F1C800 processor has appeared.
IMPORTANT!
Firmware for boards 7023 and 7026
are not interchangeable.
Using someone else's firmware will lead to bricking of the device. The rear boards with amplifier and connectors are the same for both models.
Connecting speakers
The following wires are responsible for connecting the speaker system of a Chinese 2 din radio:
- white;
- grey;
- green;
- violet.
The first 2 connect the front speakers, the rest - the rear ones. The speakers have 2 wires - positive and negative. A pure color is “+”, and a similar one with a black stripe is “-“.
It must be remembered that failure to observe polarity when connecting speakers will lead to sound distortion, since the devices will operate in antiphase.
If the standard control unit on a car is being replaced with a “Chinese” one, and the markings of the speaker wires do not correspond to the ISO connectors, then you must remember that a cable with a wide terminal is positive, and a cable with a narrow terminal is negative.
If the speaker outputs on the connected car player have additional “tulip” type connectors, then it is advisable to use them if the same connection is also available on the car speakers.
How to connect a Chinese 2 din radio according to the diagram yourself
The concept of “Chinese car radio” includes all audio equipment of both local and popular global brands produced in China. Due to the fact that the devices are manufactured under the supervision of specialists from the companies that own the brands, they are certified according to international standards. Therefore, connecting a Chinese 2 din radio according to the diagram in the instructions will not be difficult, and the designation of the terminals does not differ from devices from European or Japanese manufacturers.
Connecting the audio system
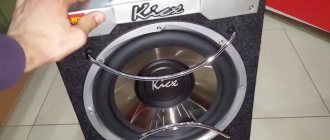
It is not difficult for a person with minimal knowledge of electrical engineering to connect a Chinese 2 din radio. You just need to follow the included instructions exactly. In addition to connecting 4 speakers, it is possible to connect an amplifier or subwoofer. The wire marked AMP-CONT is responsible for this. The line has a built-in fuse, and power is supplied with a time delay of 8-10 seconds to reduce noise that occurs when the car player is turned on.
The acoustics are connected to the 2din radio with special multi-core acoustic wires. Their length should be minimal to reduce line resistance. It is not advisable to twist the wires, as this affects the sound quality. It is better to use special connectors.
The whole process of installing a 2 din radio instead of an outdated 1 din analogue. How to configure the connection of the radio with standard acoustics, antenna and other auxiliary equipment.
How to connect a Chinese 2 DIN radio to a car according to the diagram yourself
A car radio made in China is installed instead of the old built-in music equipment. The advantage of the equipment is its low cost with wide functionality and fairly good build quality. For experienced motorists who have an understanding of the basics of electrical engineering, independently connecting a Chinese 2 DIN radio according to the diagram will not cause any difficulties.
Antenna connection
Having a radio in the car, some car enthusiasts prefer to listen to music or watch videos. But many drivers like to listen to their favorite radio stations while on the road, which is why every car audio system has an FM tuner. An external antenna is required for its normal operation. Experts recommend installing an active module that ensures stable reception of radio stations. The antenna is powered from the car network via the radio.
Chinese audio devices are equipped with a special output labeled ANT. Depending on the settings, power may be supplied to the antenna when the radio is turned on or only to the radio. The antenna cable is connected to a special socket located on the back wall of the device. The receiving part is located on the windshield. The active antenna is connected with 3 wires:
- Weight. It is connected to the car body or to the standard terminal on the GU body.
- Power wire. Connects to the red wire of the device control.
- Antenna wire. Connects to the corresponding socket on the radio.
In the case of installing a simple receiving device, an antenna adapter containing an amplifier is additionally used to improve the quality of the received signal. In radios with a GPS module, an active GPS receiver is used, which ensures stable operation of both the navigator and the radio. Connects similarly to an active antenna for a car radio.
- Universal remote control for car radio on steering wheel
- Radio connector
- How to change the radio in a car
- DIY tablet instead of a 2 din radio
Rear View Camera
There is no need to talk about the usefulness of this equipment. The rear view camera is an invaluable assistant for novice car enthusiasts who, as a rule, experience difficulties when performing parking actions.
Depending on the type (location and method) of installation, there are several types of rear view cameras:
- Standard installed cameras. In places strictly specified by the car manufacturer;
- Universal devices. The location is chosen by the driver himself;
- Wired;
- Wireless rear view cameras.
As an example, we use a universal wired camera and a Chinese 2 din radio.
Select the installation location. License plate frame, luggage compartment handle, etc. It is not recommended to place a camera inside the rear window.
We lay the cable connecting the camera and the GO. A five-meter long wire is included with the device.
Connect the camera to power. Any of the reversing lights acts as a source. Be sure to use a fuse in this circuit.
We connect the camera to the player via a tulip (connector). A separate exit is provided for this. If it is absent, the device is connected via the “video” input.
We adjust the picture and camera location.
Multifunctional steering wheel
This name means connecting a Chinese radio to the steering wheel of a car. That is, it is possible to control the standard player directly from the steering wheel.
To make this connection you will need:
- Steering wheel with built-in control buttons or a niche for their placement;
- Car radio;
- Two ISO adapters;
- Adapter devices for the antenna and combining the steering wheel buttons with the radio.
Let’s say right away that the process of connecting a multimedia system and adapting it with a multifunction steering wheel is not a complicated process, but it is painstaking and requires certain skills. This is explained by the fact that very often the pinouts of such connections between the car radio and the steering wheel do not match, although they are specified in the instructions. And therefore, we advise, if possible, to contact a specialized center that deals with this type of installation.
Fastening Options at a Glance
On sale you can find several options for devices for 1 din and 2 din, including modular modifications that are complete solutions. The most modern, of course, is a robotic elevator, which includes moving elements. This option should not be considered publicly available. In most cases, well-proven methods are used.
Car radios
Installation to the dashboard
In some cars, in order to ensure the reliability of the installation of the audio system and the absence of risks of failure as a result of vibration, the installation is carried out to the dashboard, that is, to the power fittings of the car. The entire dashboard is supported on a pipe, to which it is fixed using specialized corners. This installation option is practiced in a number of premium cars, for example, Toyota, Mazda and others. A well-thought-out power structure, in turn, ensures a quiet interior.
Car radio mount
The version of the “power” mounting of the media system complements the standard shaft, but installers often remove these very “power” corners and install the radio only on the “light” fittings of the shaft. This option cannot be considered reliable and is designed for extreme driving and minor road accidents, which could result in damage to the audio system.
Advantages of the work of Yudu masters
Sizes vary in height. When installing it yourself, you need to route the cables through rubber corrugated sleeves located between the door and the body pillars, and then route the cords under the interior trim to the place where the player is installed.
There is also a simpler option - connect a rear-type surveillance device to a monitor, and connect it to a laptop.
Connection diagram of the camera cable connectors to the car radio. Rear surveillance devices are placed in the base location of the lamp for illuminating license plates. There are several schemes for connecting devices. If the user installs the remote control included with the audio headunit, it is necessary to install patch cables and install an infrared signal receiver. The service center will be able to help you resolve this issue professionally. The button travel is short and clicky. Chinese car radios with this connector size differ from conventional devices with a standard 1 din type.
That is, the radio can be used not only as a music player, but also as a video player, since such systems allow you to work with video files. However, it can also be contained in a multi-pin connector. But the cost of these radio tape recorders is often inadequate.
The former can be installed in almost any car, the latter - only in specific models. The higher the power, the higher the playback quality will be. When installing it yourself, you need to route the cables through rubber corrugated sleeves located between the door and the body pillars, and then route the cords under the interior trim to the place where the player is installed.
The device, which will monitor what is happening behind, is mounted on a rotating bracket located at the rear of the car. On sale you can find not just music systems, but also radios with navigation.
And vice versa. The result is this: We insert the frame into its original place. Large test of navigation and multimedia centers. How to properly connect a rear view camera to the stock radio on Android Junsun? (not for kettle)
Criterias of choice
How to choose the right 2 DIN radio:
- First of all, this is the cost, which is determined in accordance with the financial capabilities of the buyer. Based on the price, you will choose the best device from a certain price segment.
- You should pay attention to the functional features, because the more options there are, the more opportunities the driver will have in terms of control and operation. We wrote more about additional functions above.
- Ability to read information from different media. CD and DVD drives are a thing of the past, so you can’t rely on the availability of only these drives. The device must be equipped with at least a USB output, as well as a slot for connecting an SD card.
- Dimensions in the center console of your car. If you choose a radio whose dimensions do not correspond to the dimensions of the hole in the dashboard, then you will additionally need to purchase a frame.
- If you value good sound quality, then also pay attention to the output power. The higher the power, the higher the playback quality will be. As practice shows, 50 W of power is enough for normal sound quality.
- Backlight. It is important that it has an adjustment function; if it does not, then the backlight should not be bright. Otherwise, it will distract the driver from the road, which directly affects the safety of driving.
- The ability to customize the equalizer allows you to adjust the sound quality to suit your preferences.
- Number of connected speakers. If, in addition to the standard four speakers, you want to install tweeters (tweeters), an amplifier and a subwoofer, be sure to make sure that the radio you buy supports this feature (the author of the video is the Parcels from China channel for CergeyNchina).
Installing a Chinese 2 din radio in a car: how to do it yourself
Hello, dear readers of our site! Today I want to discuss with you such a topic as installing a 2 din radio. This is a fairly common solution among motorists who want to expand the capabilities of their existing audio system.
As practice and reviews from many car owners show, it is not difficult for them to install such equipment with their own hands.
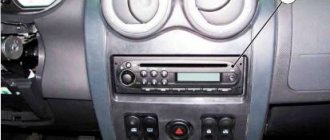
Let me immediately note that the concept of 2 din refers to the standard size of the radio, which is 180 mm or 7 inches in length and 100 mm or 4 inches in height. If the parameters are 180 by 50 mm, then you have a single-dyne system. Don't worry, because putting 1 din instead of 2 din is just as feasible as doing the opposite. You only need a special frame or adapter bracket to install a non-standard radio.