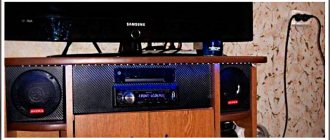
Features of Chinese radios
In general, there is absolutely nothing wrong with a Chinese radio. This can be explained very simply.
Almost all car radios can be considered Chinese. Why? Everything is elementary. Leading manufacturers, including Japanese, European and American brands, prefer to carry out assembly in China. This is due to financial gain. Collecting everything in China, including radios, is very cheap. Hence the conclusion that the majority of radio tape recorders offered on the market are from China.
But here it is also important to determine which Chinese product we are talking about
All car radios can be divided into several categories. Moreover, I advise you to study this issue separately in more detail.
Price is a largely determining factor in choice. When buying a Chinese radio, you actually choose one of 3 options.
- Radio tape recorders manufactured to order from leading manufacturers. These include Sony, Pioneer, Kenwood, etc. There are clear regulations, rules and standards from which the contractor (factory in China) has no right to deviate. This allows you to obtain very high-quality devices at low manufacturing costs for the brand owner;
- Chinese brands. These are well-known companies that offer radios under their own brands on the international market. The quality may be a little lower, but the price is appropriate. In most cases, they copy or make radios as similar as possible to devices from leading radio manufacturers;
- Unknown Chinese brands. These are radio tape recorders with an incomprehensible name and the same origin. If this is your first time hearing about the company and you can’t find anything really about it on the Internet, it’s better not to mess with such a 2 din radio.
Drawing conclusions, I can say that the best solution would be to buy a radio for your car from category 1 or 2.
When installing a car radio, it is useful to know
During the process of installing and connecting a radio in a car, non-standard situations often arise that cannot be foreseen in any instructions.
So, if you use a standard car antenna when installing a car radio, then sometimes the length of its wire may not be enough. Many cars are still equipped with antennas designed to install old-style radios. Their antenna socket is located on a “tail” that is only about fifteen centimeters long.
In this case, you can try to connect the antenna blindly after connecting all other wires to the radio. If this fails, then, most likely, you will have to remove the console and insert the antenna plug by touch after installing the car radio in the container.
By the way, after about half an hour of this “Kama Sutra” you will probably begin to think about buying a new car radio antenna.
If it becomes necessary to remove a car radio with a removable front panel from the container, you will need to insert two flat keys included with the radio onto the sides of it until they stop. But before that, do not forget to remove the front control panel - it is usually detached with the “Release” button.
Connecting a car radio in a VAZ 2109 yourself
Car radio in VAZ
Connecting a car radio to a VAZ 2109 is a short process, but quite painstaking, with several points that you should pay careful attention to. In general, the installation of this equipment can be done directly in your garage, but for this you should be well prepared. Connecting a VAZ 2109 car radio, as a process, has its own main nuances and connection method.
How to connect a radio to a car
Consult an audio equipment store directly with the choice of the radio itself. This device will accompany you the entire time you are in the car, so you must immediately decide what you expect from it in advance.
Having acquired the long-awaited high-quality “sound”, you will find that you now need to install it. Of course, you can go to a car dealership or find another workshop, but after buying a car, not everyone has an extra couple of thousand to work with the craftsmen. Therefore, understanding how to properly connect a radio to a VAZ 2114 with your own hands will come in handy.
To connect you will need:
- Selected radio.
- Tools that are present in any garage.
- Understanding the connection process.
- A certain amount of your time and desire.
If the first and third points are present, let's deal with the second. The first thing you really need to do is make sure there is a niche for the audio system in the torpedo body and check its dimensions. If you select a future radio that matches the size of the special section in the dashboard preinstalled by the manufacturer, there will be no problems at all, and connecting the VAZ 2114 radio will take a minimum of time.
In the fourteenth there is no standard sound, there is only a pre-allocated place at the bottom of the torpedo and acoustic preparation. The latter is the distribution of audio wiring throughout the car interior to four speakers.
Replacing the standard audio system
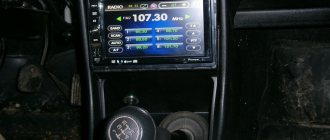
- 7010B and 7023B. Radio tape recorder made in China. The cheapest option will cost about 3 thousand rubles. Equipped with a 7-inch screen with a resolution of up to 800x480 and 1 GB memory. Runs under Windows CE OS.
- 7021G. Operated by Windows CE 6 OS. Seven-inch screen with a resolution of 800x480, F1C500TM processor. Estimated price – 4-5 thousand rubles.
- RK-A701. Chinese radio, 7-inch screen with a resolution of 1028x600, 4-core RK3188 processor, 1 GB of memory, OS – Android 5. Price – up to 8 thousand rubles.
- AD-UNI707. Manufacturer – China, OS – Android 6, seven-inch touch screen resolution – 1024×600, 2 GB of memory, processor – AllWinner Quad Core T3. Cost – up to 13 thousand rubles.
- Prology DNU-2630. The 6.2-inch screen with a resolution of 800x480 has high operating speed and excellent sound. The average price is no more than 13 thousand rubles.
- MEKEDE MKD. Radio tape recorder on the Android operating system, eight-inch touch screen with a resolution of 1024x600, memory capacity - 2 GB, cost - 16 thousand rubles.
- NaviPilot DROID4. 8-inch touch screen, resolution – 1024x600, memory – 2 GB, cost – 28 thousand rubles.
DVM 2117IQ. Equipped with a solid ARM11 600MHz processor, 8-inch touch screen and Windows operating system. At a price of more than 30 thousand rubles - only 256 MB of memory, screen resolution - 800x400.
To install any radio on the Lada Vesta, you will need an adapter frame for a 2DIN radio. You can buy it at any auto store.
Installing a standard radio
The depth of the standard seat for the MMC is 150 mm. If the dimensions of the new radio exceed this figure, then using a hacksaw blade or any other similar tool you will need to cut down the mount in the dashboard. The manufacturer has prepared all the wire blocks for connection in advance.
To install the multimedia system, you need to remove the plastic blanking strip from the dashboard. Immediately behind it are the ISO, USB, AUX connectors, as well as Fakra – connecting the radio antenna. Next, a standard MMC or any 1DIN radio is inserted into the hole. Things are more complicated with the installation of 2DIN media systems - you cannot do without modifications.
Installing an alternative MMC
First you need to carefully inspect the seat. In most cases, the installation of a 2DIN radio on the Lada Vesta will be prevented by a plastic partition in the depth. This partition must be removed.
To do this, you can use a file and sandpaper to level the surface. From the standard plug you may only need a frame with which to adjust the width. For connection, a standard ISO connector is used, which is available on all Vesta trim levels. Next, you need to turn on the radio and check the operation of the modes. In addition to the new audio system, it is recommended to install speakers in the door cards. The process will not take much time.
Installing a radio on a VAZ 2114
You need to know the following if your car is under warranty and you decide to install a radio on it. Then you need to install only radios that have a certificate of conformity. Installation should only be carried out at authorized service centers. And upon completion of the installation, you must make an entry in the “Special Notes” section of your car’s service book. If your car is no longer under warranty, then you can proceed with the installation yourself.
Radio connection diagram
And so we decided to install a 2-din radio tape recorder on a VAZ 2114 car. First, we need to cut out the required hole for the radio tape recorder in the so-called “torpedo”. We need to know that when installing the radio, we will need to move the stove control devices to the place of the radio. And so we cut out the required hole; you can cut it either with an angle grinder using a machine or with a jigsaw. If your hand trembles during the cutting process, then the defects can be corrected by painting, or by soldering plastic to the necessary places.
https://www.youtube.com/watch?v=2C0MqTAi0YA
When installing, you need to know the purpose of the power wires.
- The black wire is always the ground wire.
- Yellow is twelve volt power.
- Blue is the current to the antenna.
- Orange is the backlight of our device.
- Red is power supply at ignition.
So, now we connect the head unit and speakers, as a rule, there are 8 plugs for four speakers, two for each, but sometimes there are 5 plugs, this is for simpler models. Look carefully at the connection diagram of the head unit with the car's power supply; it is always described in detail in the installation and operation manual for the radio. And we connect the wires we need using so-called PPE connectors; these connectors allow us to avoid soldering. As a rule, the wires to the speakers, antenna and amplifier come from the head unit in one stream; it is best to wrap them with electrical tape, for further ease of installation and to avoid unnecessary tension.
Power cablesAfter we have connected the head unit, we check the presence of ground using an indicator screwdriver; if there are “sleds”, then we install them first before inserting them into the car’s power supply system. And so we connected all the wires according to the diagram in the installation instructions, once again checked the presence of power and ground, and installed the radio inside the car panel. After we install the cladding, install the front panel of the head unit and turn on the device. If everything is done correctly, the radio will work perfectly.
Dismantling
First of all, you should remove the negative terminal from the car battery. This procedure serves to ensure that in the process of disconnecting the wires you do not short them and damage the equipment. Of course, you can be extremely careful, but it doesn’t hurt to be on the safe side.
If the car is new, pick it up and look through the car’s operating instructions. It will have a section on removing the standard audio system. But first we need to remove the front panel trim. This is not as difficult to do as it might seem. You only need one flathead screwdriver. Carefully pry up part of the panel - it should give in easily and it will not be difficult to dismantle the rest of the panel. If the cladding does not give in, then most likely it is fixed with glue and for safe removal you will need a hair dryer.
Removing the radio
Next according to the plan is the removal of the radio itself. You will be terribly lucky if you have a special tool at hand for such work. It can be replaced with ordinary screwdrivers or knitting needles - something thin and long - but performing this task with them will be extremely inconvenient.
Feel free to unscrew all installed screws, then insert the removal tool into the special hole. The mechanism will close all the necessary switches in the system and you just have to pull it all towards yourself. The radio has been removed, all that remains is to disconnect the wires. You can see the detailed process of all steps in the photo.
Disconnecting wires
In conclusion
As you can see, installation of the radio is simple and for the most part requires only your desire
The main thing to note is that with any modernization not intended for the design, it is necessary to take care of the insulation of electrical connections and thermal insulation of coolants (corrugated air ducts)
The torpedo of the fourteenth, like most modern cars, is made of synthetic, flammable materials, so the issue of safety is very relevant. If you are not confident in your abilities, contact a professional workshop, because it is much cheaper than a burnt-out car.
voice
Article rating
Some tips
I recommend taking advantage of the opportunity while everything is sorted and carrying out some simple procedures to improve quality. These tips may seem trivial to you, but they will help extend the life of the new audio system for an extra year or two. First, tin the wires and solder them.
This procedure will prevent the sound from losing quality even during prolonged use. Use female/male connectors. This method will be more effective and easier than soldering. Use heat shrink tubing. They will help maintain the quality of wire connections and extend the time it takes to resolder.
How to connect and install
It is recommended to install and configure any musical device on the VAZ-2114 in accordance with generally accepted rules. Only in this case will the equipment work efficiently and perform all its functions.
Connection
To connect a radio to a VAZ-2114, just familiarize yourself with the procedure provided for any similar model (2115, 2109). The only difference will be in the location of one or another wire.
Connect the radio using this method:
- Connect the musical equipment connector to the positive and negative poles of the power source (battery). In this case, the cigarette lighter plug can be used for switching.
- Remove the cables from the speakers and connect them to the corresponding outputs on the device plug.
- As soon as the wiring is connected, all potentially dangerous places are isolated using special tape. You can additionally protect the cable from accidental contact and the negative effects of moisture by using a corrugated tube.
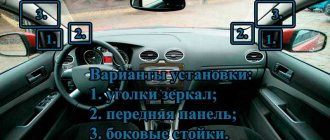
- An antenna is installed on the inside of the windshield or roof of the vehicle.
- The cable running from it to the dashboard is laid under various parts of the car's interior trim.
- The wire is connected to the radio directly or through an adapter.
Scheme
In order to check the correctness of the connection, it is necessary to draw up its diagram. With its help, you can identify mistakes made and correct them as quickly as possible.
The diagram should indicate the location of the following wires:
- Red. It should go from the radio to the ignition switch.
- Yellow. It is connected to the positive terminal of the battery and the corresponding connector on the back panel of the connected device.
- Blue. This cable must be used to connect the speaker system to the antenna.
- Green, purple, gray, white. All these wires should be routed to the two front and rear speakers.
- Black. They connect the radio to the negative pole of the battery.
Installation
Installing a radio on a VAZ-2114 is a difficult task, which is recommended to be performed only after careful preparation. Otherwise, you can easily make a mistake that will not allow the device to function normally.
You can install the radio in the following way:
- Installation on a VAZ-2115 or 2114 begins with removing the dashboard trim.
- After this, disconnect the wire from the negative output of the battery.
- Protective elements are removed from the installed device.
- A mounting clip is installed in the groove and securely fixed.
- At the next stage of work, switching wires and power cables are laid.
- The radio is mounted on a plastic console.
- It is then connected to the vehicle’s on-board network.
- After this, the equipment is mounted in the guide shaft.
- Return the removed decorative panel to its place.
Adapters for ISO connectors
Cutting off a non-standard standard plug and connecting the wires directly is not recommended, because over time the connection will become loose, may oxidize, you will have to solder not only the wiring, additional repairs will be required, replacing blown fuses. Sometimes there are acoustics with three outputs, but they have standardized markings and electrical circuits that allow you to connect standard cables to the device using pinouts. You can buy any type of adapter for ISO connectors from one model to another.
The car may not be equipped with connectors, then you need to connect the radio connector to the cable directly. This is done by twisting, soldering, or using a terminal block that does not require subsequent insulation. When twisting and soldering, heat shrink tubing is used for safe use of the equipment.
Problems with the operation of the radio and cigarette lighter
Car enthusiasts often face the problem of cigarette lighter and radio failure. Here are the main reasons for their refusal:
- Short circuit in the circuit.
- The fuse has blown.
- Contacts often oxidize and burn during operation; this needs to be checked.
- The backlight bulb has burned out.
- failure of fuse contact in the block.
Car radio These are the five main reasons for the failure of the radio and cigarette lighter.
In general, the cigarette lighter is not designed to constantly supply power to external devices. And in most cases, when installing with your own hands, the main mistake is the low strength of the contact assembly and the power supply unit itself; often it is simply impossible to tightly link and connect everything. And subsequently, the natural vibrations of the car and the peculiarities of Russian roads worsen the quality of the already unreliable assembly at the contact points, which leads to their burning and short circuit currents. Therefore, when you undertake to install the radio with your own hands, do not skimp on consumables and the necessary tools for high-quality fastening of your device. Music is an integral part of our lives, it shortens the journey and the wait in the car; without it, any journey seems incredibly long. The musical preferences of their owners are heard from the windows of millions of cars, so why stay away. To enjoy life on the road and fully enjoy it, you need little - purchase and install a radio.
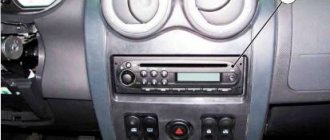
Many car owners who bought a new car for the first time are surprised by the unexpected lack of an audio system in the car, and even if there is one, it is not a radio, but at best a radio.
There are many manufacturers on the market that offer a variety of models with a huge range of capabilities. With the knowledge of how to connect a radio to a VAZ 2114, you can choose any radio, but some will have to suffer, which we’ll talk about.
Connecting the radio
The most popular models and their characteristics
Before connecting the car radio to a VAZ-2114 car, study the rating of the best models based on user reviews.
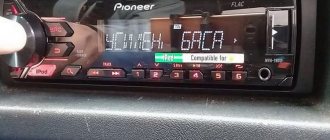
- Sony DSX-A212UI. An inexpensive (up to 3,000 rubles) model with adjustable backlight directly plays tracks from a smartphone. For lovers of rich bass, there is an “EXTRA BASS” key, there is also a USB port for flash cards and mobile phones, and a 10-band tone block that allows you to adjust the pitch and timbre of the sound. Four amplifier channels have 22/50 W of power.
- KENWOOD KMM-304Y. Priced from RUB 6,100. you will get a device with 4x50W at peak power. The radio supports iPhone/iPod and RDS. If desired, you can connect a joystick for control from the steering wheel. The advantages of the device include multi-color adjustable backlight, 11 equalizer programs (tone block).
- Pioneer DEH-S5000BT. For 8,980 rub. The Japanese one offers a car radio with a one-color screen, radio, and playback of tracks using AUX, USB or CD. Device power – 4x50 W. Connecting a car radio in a VAZ-2110 car with your own hands is not difficult - detailed instructions are included. The equipment supports Android and iOS operating systems - you can “talk” with Siri.
- JVC KD-X355. The price of the product on Yandex Market is from 6,100 rubles. For little money you can buy a radio with adjustable backlighting and the ability to charge your phone. The radio supports all modern formats.
- Pioneer SPH-10BT. Install the Smart Sync application on your gadgets (there is a holder for a smartphone) and configure the sound parameters of the car radio you need. The device from the Japanese manufacturer performs voice commands, and it is possible to connect a parking sensor.
Connecting the radio.
There are many cars, and each of them can use its own set of connectors to connect such equipment. Basically, there are three options:
- Option one is the most favorable. You already have a chip in your car to which everything is connected correctly, i.e. All speakers, power wires, antennas are connected to this chip, and everything is connected correctly. This happens but, unfortunately, very rarely. This means that you are lucky, you just connect your brand new radio to this chip, and everything works for you.
- The necessary wires are routed and connected, but the socket on the radio is different from the plug on the car.
- There is no power lead out or it was done incorrectly.
With the first point, everything is almost clear. When the device socket does not match the connector, you will need to use an adapter. Despite the fact that these connectors are most often individual for each model, many companies practice supplying a separate ISO adapter. If there is no adapter or its format is not suitable in this case, you can either purchase such an adapter or twist the wires yourself. Of course, the second step is longer, more complex and riskier. Only technical centers that have experience in such procedures do this, so before you connect the radio in your car in this way, you need to think about everything very carefully.
If you want to do the twisting yourself, you need to check the correspondence of the wires on the radio and the car connector. Only if the colors match can you disconnect the battery and disconnect the car and audio system connectors.
Video instructions for installing and connecting a car radio with your own hands
In most cars, the radio was installed either by the dealership or by the previous owner. If you are unlucky and your car does not have the necessary wiring, then this article is for you. Let's consider connecting the radio from scratch, or after incorrect installation.
Before we start connecting, we will need to purchase (find at home or in the garage):
- two copper wires with a cross section of 2.5-4 sq. mm
- fuse with holder rated 15-20 amperes
- connector for radio connection
Briefly about the history of VAZ
It all started back in 1966, when the ruling, and only at that time, party realized the lack of civilian automotive industry. After collecting and analyzing data, it was decided to build the production and assembly of passenger cars intended for the needs of ordinary citizens; the city of Tolyatti was chosen as the construction site. And already in the winter of 1967, the construction of the plant itself began.
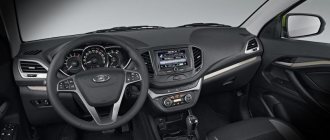
VAZ 2114
The entire construction was designed for a period of six full years. But according to the customs of that time, everything was completed ahead of schedule - in just over three years. Perhaps we are still reaping the fruits of the plant’s early commissioning to this day. At the end of 1970, the first batch of VAZ 2101 cars was formed and sent, which was almost entirely a FIAT-124 car. In the normal place for the radio there was a simple radio receiver operating in HF/VHF format.
Read also: A24 5 1 led
Rules for choosing a radio
Before choosing a car radio, be sure to consider the following details:
Radio settings. They must meet all the parameters of electrical equipment and acoustic systems; Standard size. The width of the basic audio devices is the same - 180 mm, and the height of the device can be 1 DIN (50 mm) and 2 DIN (100 mm); Maximum power
This parameter plays an important role when choosing a radio, but it must be used with extreme caution. When selecting an audio system, you need to take into account the cost of the device and the brand.
Bipolar converter that allows you to increase power. It is not installed on budget models; Number of output channels. It determines the number of speakers that can be connected to the car radio. Four-channel devices are not much more expensive than two-channel devices, which is why such products are very popular among car enthusiasts; Display type. A segment screen is the most budget option, but it can display only minimal information on a musical composition. When choosing an audio system with a segment screen, you need to pay attention to the color of the backlight. Many models provide the ability to select backlight colors. The liquid crystal display is similar to a tablet screen. It is capable of displaying any information. Many car radios are equipped with Bluetooth and can play audio files from a smartphone.
How to polish alloy wheels yourself.
Main functional features of devices
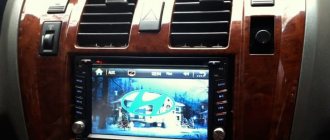
The main characteristic of DIN 2 universal radios is the presence of a display that can be used for different purposes.
In addition, such systems have the following features:
- Most devices today offer users touch controls. In this case, it all depends on the model, since on sale you can find 2 DIN car radios that are controlled using buttons. However, touch technology has proven to be practical and reliable, which is why it is a hit with many consumers.
- Ability to play files in a wide variety of formats. That is, the radio can be used not only as a music player, but also as a video player, since such systems allow you to work with video files. If necessary, the system can be synchronized with a mobile gadget or tablet, which will allow you to read data from third-party devices. It should also be noted that such systems allow you to read files from different media, in particular, CDs and DVDs, USB drives and SD cards.
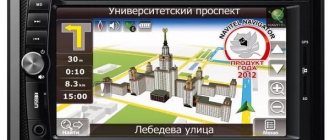
- On sale you can find not just music systems, but also radios with navigation. Thanks to the large display, the driver can easily set up and use the system with a GPS navigator. When purchasing such a device, you should focus on the software on which it runs. For example, many users praise devices with the Navitel platform, since the maps in this software are well adapted to domestic roads.
- Built-in Bluetooth adapter. This function is available in every second 2 DIN car radio today. This option allows you to synchronize any mobile gadget that has a Bluetooth option with the head unit. The driver will be able to add contacts from the phone book to the radio, as well as play tracks from portable gadgets. In addition, if the phone is synchronized with the system, the driver will be able to talk on the phone with other subscribers without being distracted from the road.
- Decent sound quality. As practice shows, usually double radios allow you to provide optimal sound quality, of course, if the car has more or less normal acoustics installed (video author - Dmitry Istomin).
Advantages and disadvantages
Let's look at the pros first:
- ease of control and configuration thanks to the large screen;
- affordable price for most devices - you can choose a model according to your capabilities;
- many different functions used to perform certain purposes;
- convenient platform;
- the ability to connect a rear view camera, but it all depends on the model;
- competitive sound quality, especially if the car has normal acoustics;
- Most radios have a TV tuner function, which allows you to watch television programs;
- ability to read information from different media.
But such car radios also have disadvantages, in particular:
- if you prefer a cheap option, you must understand that it will not work as stably as more expensive analogues;
- As practice shows, the TV tuner in most models is very weak;
- Devices running on the Android platform freeze more often than others.
Transition frames for installation
Adapter frame for audio system
Adapter frames are used to install head units in the center console of a car. Modern car manufacturers are doing everything possible to ensure that non-standard radios cannot be installed in their cars. Accordingly, when purchasing a non-standard car radio, the car owner may encounter difficulties in its further installation. It is necessary to take into account that the frames are different, sometimes they can take up a lot of space on the dashboard.
If you install a multimedia system with a transition frame, you will be able to close any gaps that may appear on the center console as a result of installation. The choice of frame is carried out in accordance with the car model, as well as the year of manufacture. If you are the owner of a new car, then it is quite possible that you will not be able to find a frame on sale, since their production begins some time after the car is released (the author of the video is Alexey Vasiliev).
Radio size for 2108-2115
Multimedia systems are divided according to the German standard DIN 75490 from 1984 according to the size of the mounting socket:
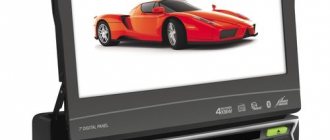
- Type 1Din. The width is the same for all cars – 178 mm, height – 50 mm. The system picks up the radio, plays tracks from discs, and supports DVD format. For the latter function, the car radio is equipped with a 3.5-inch display.
- Type 2Din. The width of the device remains the same, the height is 100 mm, which allows you to install a 7-inch touch display.
The standard does not define the depth of devices, but for audio devices with discs it is 16 cm. Both types are full-fledged multimedia systems with which they can watch movies in the car, listen to tracks, and play information from USB drives and SD cards. Most importantly, the multimedia is equipped with a GPS module.
Possible problems
When installing music devices, vehicle owners face various problems. Because of them, the radio for the VAZ-2114 does not turn on or any of the functions do not work.
Most common problems:
- Burnt fuse. This situation occurs due to connecting additional amplifiers or any other equipment to the radio, as well as listening to music at high volume.
- Network short circuit. It appears due to errors made during wiring.
- Oxidized contacts. During operation of the device, moisture may enter its housing. It will damage the contacts and prevent you from using the radio.
A radio is a useful device that should be in every car. Even a novice car owner can connect it on his own. To do this, he will need patience, the correct implementation of all the provided actions and several hours of free time.
It's no secret that most domestically produced cars are produced by the manufacturer without radios; in the standard place there is a neat plastic plug. And of course, the car enthusiast has a desire to correct this omission of the manufacturer.
Main nuances
- Before connecting the car radio, you must carefully study the instructions, since incorrect actions will lead to equipment breakdown or even fire.
Connecting a VAZ 2109 car radio
- In modern players with automatic tuning, due to the wiring features of domestic cars designed for older models, settings may fail when turning the ignition key.
Note: therefore, it is also necessary to study the features of VAZ cars.