⭐ ⭐ ⭐ ⭐ ⭐ Setting up the Pioneer radio in the car begins with resetting the current settings. As a result, the equalizer filters for the HPF speakers and LPF subwoofer will return to the factory settings. This can be done in two ways: find the corresponding section in the car radio menu or disconnect the ground terminal from the battery. Note that the following method for setting up the radio is designed for an entry-level user, and there is nothing overly complicated in it. But also, the quality of the reproduced sound depends only 33% on the composition and quality of the audio system components. Another third depends on the correct installation of the equipment, and the remaining 33% depends on the correct setup of the audio system.
If your settings are reset when you turn off the ignition, check the radio connection diagram. Most likely the yellow wire is connected to the ignition switch and not directly to the battery.
High pass filter
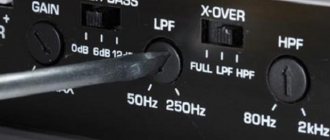
Next we find the HPF (High-passFilter) item. This is a high-pass filter that cuts the frequency of the sound supplied to the speakers below their specified limit value. This is done because it is very difficult for standard speakers (13–16 cm) to reproduce low frequencies due to their small diaphragm diameter and low power. As a result, the sound is reproduced with distortion even at low volumes. By cutting the low frequencies, you can get clear sound over a larger volume range.
You can then exit the menu using the return button and check the result. It is better to do this at a volume of 30.
If the sound quality is not satisfactory, or if you are outdoors and want to have a loud disco, you can raise the lower limit from 80–120 Hz or more. It is recommended to use the same level of boundary cut if you have a subwoofer. These measures will allow you to increase the purity and volume of the reproduced sound.
There is also an adjustment for the frequency attenuation rate. On Pioneer it comes in two positions - 12 and 24 dB per octave. We advise you to set this indicator to 24 dB.
JVC radio device features
How to connect a standard and non-standard radio in a car.
JVC products have been known on the market for a long time. It has established itself as a high-quality and multifunctional equipment. In addition, this manufacturer is known for unusual head units.
So, all JVC car radios have a non-standard appearance. Basically, it is quite simple, but this does not in any way affect the functional capabilities of the device, which can surprise any music lover.
There is one small drawback. It lies in the fact that the buttons on the console are plastic and painted silver. Therefore, some people mistakenly think that they are made of aluminum. In addition, the display shows the file name, but not in Cyrillic. This causes a lot of inconvenience for Russian users. As for the controls, the radio is quite simple. Anyone can cope with this task, even an amateur.
Settings
Geely Emgrand EC7 RV 1.8 Comfort AT Logbook We integrate Bluetooth into the standard radio
The setup work is divided into several different points. It is advisable to go through all the settings, but it all depends on the additional equipment that is in your car. To configure the radio, turn on the volume “30”, this allows you to make the best quality sound adjustment by ear. Often, the speakers begin to wheeze, but don’t be alarmed, this will go away after the setup. When tuning by ear, it is recommended to focus on your feelings, because the perception of sound is different for all people. The work is done using a joystick; it can tilt up, down, to the side, and also retract.
The settings are made in the following order:
- We switch to the “AUDIO” mode
, by rotating the handle we find the balance and fader. This looks like Balanse/Fader. After which, we press the joystick and see: BAL 0, Fad 0. In some cases, the numbers may differ, which means that someone dug into the settings. We translate the “fader” indicator to +15. The signals are transmitted specifically to the front speakers. We return to the main menu; - Setting up the cut
. We are looking for the front amplifier filter settings. This is done by turning the joystick. Find “HIGH PASS FILTER”. After pressing the joystick, you will see HPF OFF. This means that the full spectrum of sound is concentrated on the front speakers. This is the source of distortion, especially on small speakers. We press the joystick and see HPF 50, this is the designation of the lower frequency threshold. Not every amplifier is designed for this. Therefore, we increase the level to 100-150, the smaller the speaker diameter, the higher the threshold should be. We exit the settings and determine the purity of the sound by ear. If you don’t like it, you can go back to the settings and change the indicators; - Next, go to the “advanced settings” panel. To do this, turn off the radio, and then press the power key. This will take you to the additional menu. Turn the joystick and see what functions are there. Usually there is a language setting, a step of searching for radio stations. Find the SW Control function. We recess the control knob and switch the function to SW mode. So the rear speakers will work in subwoofer mode;
- We go to the regular menu and find the Setting 1 mode. On the left there is the SW symbol, and on the right there are 3 operating modes. Choose the most suitable one from your point of view;
- Find the Setting 2 mode
. Here you will see SW 60 Hz 0. First you need to set the frequency, it is recommended to set it to 50 Hz. Next we adjust the sound power. Here you can select a range from -6 to +6. At the same time, we focus on the characteristics of the speakers and our perception of sound. Experiment with sound; - Setting up loudness compensation
. To do this, look for Loudness in the menu and enter this menu. Here it is best to choose the high (HIGT) level. This way, the tone compensation will be audible even at average sound levels.
In general, the setup is completed here. Of course, there are other settings, but they are usually of interest only to music lovers. To extend the life of the speakers, it is recommended to set the level of low frequencies in the Go Setting 1 menu. It is advisable that this indicator does not exceed 1. This will significantly extend the life of the speakers. Conclusion. Nowadays it’s hard to imagine a car without a high-quality audio system
At the same time, it is extremely important to adjust it correctly, otherwise the sound will be very bad. Therefore, it makes sense to wonder how to set up a Pioneer radio in a car
In fact, this is not particularly difficult. The menu is simple and clear, which makes the task much easier. The right combination of different settings will allow you to make the sound in the car most consistent with your perception.
Video: an easy way to make AUX on any car radio with your own hands
Important: entering the function menu can be done by holding down another button, for example, SRC or SOURCE.
Turn on Bluetooth
In order to activate Bluetooth, you need to go to the main settings menu and find the BT AUDIO sub-item there and select ON. After that, turn on Bluetooth on your smartphone/tablet and look for the radio.
After the radio is found, we connect to it, which may require entering the security key - by default “0000”.
How to set the clock
To set the clock, you need to enter the main settings menu, which can be done by turning on the turned off radio by holding down the SRC button or holding down the center button of the joystick. After which we find the CLOCK SET block, where you can set the format and the time itself. There is also a CLOCK OFF block in the menu, by changing the indicator you can enable or disable the time display on the device.
Measures for proper operation of the device
How to properly connect, configure and use the Torque application
After connecting the radio, you need to carry out the setup process, since in its original form at the manufacturer the settings are set to a single position.
When you click on the center of the spin washer, a settings menu with various subsections and sections will appear on the screen. It all depends on the preferences of the owner.
With its help, you can choose the style of music being played, adjust minor sound nuances and create an individual picture of how songs are played in the car.
On the video - how to set up a Pioneer radio in a car:
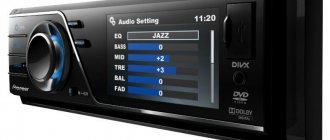
Bass adjustment
An equally important option allows you to adjust the bass frequency in the car. There is a choice from no bass at all to a maximum value at which only the bass will be heard;
The information in this article will help you figure out what a car radio with navigation and rear view camera looks like and how effective it is.
You can learn more about all Pioneer car radio models from this article.
For those who want to learn more about how to connect an amplifier to speakers in a car, it is worth reading the information from this article.
On the video - how to properly configure the pioneer deh ps900mp car radio:
Front and side volume distribution
Depending on the driver’s preferences, he can adjust the sound volume according to these parameters, increasing the sound power, for example, of the front speakers and shifting the emphasis to the left side;
The menu contains a demo mode setting in which the radio is restored to factory settings;
You can tune the selected radio station frequency or use auto-tuning;
You can also change the color of the radio backlight in the menu (most radios have this function).
A wide arsenal of functions allows you to customize the Pioneer radio (even in a budget version) individually for each driver.
What can be improved
Speaking of settings, it is worth clarifying that Pioneer regards the concept of a radio tape recorder not just as a device for listening to radio or recordings. In this device you can see the date, time and much more if they are configured. Information can be presented in several languages - either Japanese (since the brand is Japanese in origin), or, more often, English.
Whether there will be Russian on the menu depends on many factors, but even the English menu is easier to understand than the Japanese one. Some additional features, such as USB ports, will also need to be enabled through the menu. Not to mention the above problem of connecting specific speakers.
Basic sound settings for Pioneer radio
To get to the settings menu, press the round handle of the radio joystick in the center. By rotating the knob to the right or left, we go through the menu items and look for “Audio”; to go to it, click on the round knob in the center again. Once in the “Audio” item, we find the FADER\BALANSE subitem. For a new radio, the indicators of this sub-item should be set to 0. If you see other numbers, then someone has already tried to adjust the settings in the device, and you need to reset them to the previous value. We adjust FADER\BALANSE using the joystick, setting the value in the fader position to +15.
Setting up the front acoustic filter. To do this, rotate the central round joystick button again in search of the HIGH PASS FILTER menu item. When you press the center button, HPF OFF should appear on the radio display, which means the entire range switches to the front speakers. To get rid of distortion, press the joystick until the inscription HPF 50 appears (or another, depending on the radio model). Having set the filter at a frequency of 50 Hz, exit this menu item using the Band button and check the level of distortion by increasing or decreasing the volume. If you are not satisfied with the result, return to the previous menu item again and set the HPF parameter to a different value (from 80 to 125).
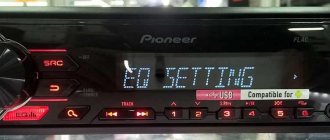
Equalizer
An equalizer allows you to make the sound more even - raise or lower the bass, mid and high frequencies. This is a rather fine adjustment of the audio system. It is not the entire sound range that is regulated at once, as in other menu items, but specific frequency bands. Different models have different numbers of them, depending on the class of equipment. There are five of them in Pioneer radios: 80 Hz, 250 Hz, 800 Hz, 2.5 kHz and 8 kHz.
The equalizer is located in the “Audio” section of the settings menu, EQ item. In it you can select one of the preset standard settings. For those who are not satisfied with these options, there are two sets of user settings (Custom). You can switch between them both from the menu and the EQ button next to the joystick. To make changes to frequency parameters in a custom setting, you need to select it with the wheel and press the joystick. Then turn the wheel to select one of the equalizer frequency bands. Press the joystick again and set the position from -6 (attenuate frequency) to +6 (increase). By doing this you can make some frequencies louder and others quieter.
There is no universal recipe for setting the equalizer on the radio. It is performed by ear depending on the preferences of the consumer. In addition, different adjustment options are selected for a specific genre of music.
We can only give rough recommendations:
- if heavy music is played, it is worth increasing the bass - 80 Hz (but not too much, +2–+3 is enough). Percussion instruments sound around 250 Hz;
- for music with vocals, frequencies of approximately 250-800+ Hz are needed (male voices are lower, female voices are higher);
- for electronic music you will need high frequencies - 2.5-5 kHz.
Setting the equalizer is a very important step. Using this tool, you can improve the sound quality many times over. Even if the acoustics are not very expensive and of high quality.
Review of JVC KD-R90BT car radio
Setting up a jvc car radio
Since the very beginning of its existence, JVC has loved to surprise car owners with unusual head units. This rule also applies to the JVC KD-R90BT. So:
- Compared to its analogues, this device looks very unusual. Despite its simple appearance, the radio will be able to surprise even the most biased music lover.
- The main disadvantage of the console remains the plastic buttons, painted to look like aluminum.
- During playback, the radio easily reads file names.
- The display has the ability to change the color scheme, but the screen brightness could be a little higher.
- Operating the radio is, as always, very simple, which applies to all types of JVC car radios.
Despite its modest size, the JVC KD-R90BT car radio has a very powerful amplifier. Built-in and made with MOS-FET technology, its 24-bit digital converter delivers full sound. The output power of the car radio is 200 W (4x50 W), and the sound first passes through a 5-band equalizer. It is worth noting that the sound compensator completely eliminates wave delays from the head unit to the speaker. The amplifier has the following technical characteristics:
- It is equipped with field effect transistors.
- The maximum power is 4x50 W.
- Rated power is 20 W.
- The sound fluctuates around 40-20,000 Hz.
- 5 - band equalizer.
- Ability to save your own sound settings.
- Sound processor with delay equalization capability.
- Volume control is divided into 3 areas.
- Built-in frequency filters.
- Function for activating maximum sound amplification.
- Fader – the ability to adjust the volume level of the front/rear speakers.
- Additional linear outputs for a subwoofer (see How to connect a subwoofer to a car radio: lessons for amateurs).
Despite the rapidly losing popularity of CDs, manufacturers still decided to install a CD player in the radio. The main feature of the player is reading rewritable discs. The CD player supports MP3 and WMA formats, with sound frequencies ranging from 5-20,000Hz. Playback is carried out both in random order and by repeat method. It is possible to remove the disc even when the power is turned off.
CD player specifications:
- Due to the ADS operating scheme, the player reads both CD-R and CD-RW discs.
- Resistance of the read mechanism to extreme conditions.
- Sound reproduction range 5 – 20,000Hz, noise level 102 dB.
- Play in random and repeat mode.
- Shows the audio file name on the display.
- Eject media even when the power is off.
Additional features
The JVC KD-R90BT car radio has the following features:
- Availability of two linear USB inputs and a Bluetooth adapter.
- Compatible with all mobile device systems.
- Removable front panel with protective plastic case.
- Display a monochrome clock on the main screen.
- Automatically mute the sound if the phone rings.
- Multifunctional remote control.
- The presence of a Passer adapter, with functions for controlling the radio on the steering wheel of the car.
Equipment
The JVC KD-R90BT car radio set comes with the following configuration:
- Directly car radios.
- Microphone.
Microphone for jvc car radio
- Cable set.
- Power wires.
- Remote control.
- Instructions.
- Warranty card.
- Case for the panel.
- Installation tools.
Antenna for car radio jvc
rav />Review and test of the Stinger Car Z3 radar detector – reviews
The stylish radar detector Stinger Car Z3, made in the shape of a sports car, will definitely appeal to those drivers who value style, speed and safety on the road. The device belongs to the middle price category; you can buy it for 4990 rubles. By spending this money you will get the following set of features:
- detection of X, K, Ka bands, as well as Ultra-X, Ultra-K, Short-Pulse, Instant-ON, POP;
- there is protection from detection by VG-2 direction finders;
- detection of laser speed detection systems using an omnidirectional optical lens that receives optical beams in a 360-degree sector;
- definition of "ARROW" from a distance of up to one kilometer.
For ease of use, the Stinger Car Z3 radar detector features an intuitive LED display with intuitive menus. The driver will be informed of the detection of a radar pulse through audible and visual warnings. Also, instead of “car” headlights, miniature strobes are installed.”
To ensure that the driver is not again distracted by false alarms, the device is equipped with a noise filtration and filtration system. Using three sensitivity modes - CITY1, CITY2 and ROAD - you can select the optimal sensitivity of the detector. Reception of unused bands, including VG-2, can be disabled independently.
Despite its good performance, this radar detector is not without the most common problem: false alarms. However, it is possible to distinguish a false signal from a real threat thanks to the received signal level sensor; There is also a “Geiger counter” effect.
The user can independently select the settings that suit him: display brightness, sound volume. All settings made are saved in memory. Beginners will understand the operating principles thanks to the demo mode. The device automatically turns on after power is supplied to the vehicle network and independently scans at all frequencies.
The kit includes all the elements necessary to connect to the network via the cigarette lighter. Installation is carried out on the windshield or dashboard using a magnet.
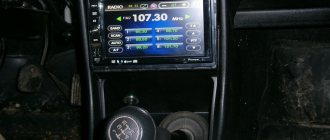
Setting up the Pioneer radio
Pioneer is one of the best manufacturers of car radios. When buying a model from the middle or high price category, you don’t have to worry about the sound quality in your Mazda. Flexible sound settings on the Pioneer radio allow you to “tweak” it to any parameters.
When buying a Pioneer, keep in mind that only car radios starting with model 3100 and higher can be calibrated. Radio tape recorders with names starting with 1 and 2 are the lowest price segment, “economy”. For little money you will get an empty shell with the Pioneer logo, capable of operating only in the ranges preset by the manufacturers. But such radios do not have to be configured.
To configure the Pioneer car radio, go through the following steps:
- Turn the volume up to at least 30 to hear frequencies where the sound crackles.
- Go to the settings menu, then to Audio. Go to FADER\BALANSE. The factory setting is 0 for both parameters. Set FADER to +15.
- Return to Audio. Find the HIGH PASS FILTER setting and click on it until it says HPF OFF. This is the factory setting. Change the value to 50, exit the settings menu and check the sound. If you still hear distortion, go back to HIGH PASS FILTER and raise the value until you get a pleasant sound. If you have a small acoustics (13 cm), then the optimal value will be 110-115. For 16 cm, 80 is enough.
- Turn off the radio. Now hold down the power button and do not release until the display lights up. You are now in Pioneer Presets. You can see what this mode should look like in the photo.
- Find the SW Control option. Switch to REAR SP SW. You have enabled the ability to adjust the rear speakers.
- Turn on Pioneer in normal mode. Go to audio settings, then open SW SETTING1. Select the NORMAL and REV parameters alternately and leave the one that gives the best sound. In Mazda cars, the reverse mode sounds better, but in cars of other brands, the normal mode can give optimal results.
- Go back to Audio and look for the SW SETTING2 parameter. The vast majority of speakers in modern car audio systems have an oval or close to oval shape. The 50 HZ range is suitable for them. This setting allows you to emphasize the bass and give it softness. If you are not happy with the result, you can experiment with the setting.
- Return to Audio and go to the LOUDNESS parameter. It controls frequency levels at minimum volume
After these operations, your Pioneer will be fully prepared to play music in any style. The sound adjustment of the Pioneer radio can be done at a more subtle level. But the difference in additional parameters will be of interest only to music lovers who distinguish the finest nuances of sound.
Video: finding radio stations on Pioneer tape recorders
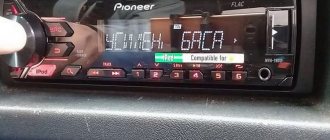
Setting up the equalizer
To configure the equalizer, go to the EQ SETTING1 menu item, where you can set the signal amplitude level for mid, high and low frequencies. In the EQ SETTING2 item, which is also located in the main settings menu, the user can select the center frequency of the signal correction, as well as the width of the adjusted range. All this is available for HF, MF and LF.
To configure the equalizer, go to the corresponding menu
It is necessary to select settings based on the capabilities of the speakers and the personal preferences of the listener.
How to enable AUX
To activate the AUX mode, which is not active by default, you need to turn off the radio, and then turn it on by long pressing the FUNC button, after which we look for the inscription AUX: OFF and use the up/down buttons to select the AUX: ON item.
Set up radio on JVC radio
The presence of a radio in the radio gives many additional opportunities to its user. So, he can listen to new music, news, advertising, etc. Moreover, without time restrictions, at any time of the day or night. The main thing is to take the necessary steps to configure radio stations in the audio device.
To do this, you will need to attach an antenna to the device, as shown in the photo. It can be installed both inside the car and outside. The main thing is that it supports the AM/FM radio signal range. After this, you can proceed to the main setup. To do this, switch the device to radio mode. Use the up and down buttons manually or use the auto search function. Once configured, you can number them. This will simplify their use and reduce the time spent searching for the required radio station.
Setting up bluetooth on a JVC radio
The Bluetooth function allows you to pair with other devices and play information on the radio. The most striking example is the telephone. To configure this function, you must use the config button. In the menu that appears, find the Bluetooth function and turn it on. The menu-tune wheel will help in carrying out these manipulations. After this, you can add new devices to pair. This is done using the appropriate function. You can also search for a new device.
All settings of the car radio are simple, so they can be easily done on the go. But, as practice shows, it is still recommended to stop the car and perform this procedure. After all, it requires attention, which, when traffic is moving, is better directed to the road. This will help avoid a traffic accident
- How to set the clock on a JVC car radio
- Which car radios are good?
- How to choose a car radio
— JVC car radio.
Install the car radio into the dashboard and connect to the car.
The principle of connecting radio tape recorders depends on the model. Some modifications are equipped with additional connectors and wires for connecting additional devices: antennas, amplifiers, acoustic devices. Determine the model of your radio and use the instructions and connection diagram, which are posted on the official JVC website https://www.jvc.ru/download.php?type=6.
The time on the radio is shown on the display. Set by pressing the S/SEL button - enter the menu.
After entering the car radio menu, press the “1” button on the radio control panel, CLOCK H (hour setting) will appear on the display. Press the scroll back/forward buttons or the volume control (by scrolling to one side or the other) to set the “Clock”.
After setting the “Clock”, press the “2” button on the control panel of the radio, after CLOCK M (setting minutes) appears on the display, it will be possible to set the “Minutes”, then proceed in the same way as setting the “Clock”.
The car radio menu provides two time formats 24H/12H (24 or 12 hour).
The 24H format will show the time in 24 hour format, i.e. if the time is 23 hours 15 minutes, then the display will show 23:15, but if the clock format is 12H, then the display will show the same time as 11:15.
Press the “3” button on the control panel, the time format 24H/12H will appear on the display, selection can also be made using the scroll back/forward buttons.
Purchasing an audio system from a well-known manufacturer does not guarantee that you will get high-quality sound in your car. Only the correct settings of the car radio will help you achieve the ideal. All the details and nuances of this process are described below.
How to disable radio startup at startup and start from USB
rodrigez
Newbie
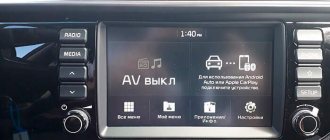
Good afternoon, colleagues on the iron horse. Last week I bought a Sportage 2013 petrol in pre-maximum. I'm very pleased with the car. One thing.
It is very annoying that when starting with the key the radio turns on.
- First when the key is inserted into the ignition
- When the car is started.
I don't really listen to the radio at all. Please help.
- How to disable the radio from starting when the car starts by default?
- Now I have to do 2 times 2 clicks to switch from radio to usb
- How to configure the system at startup so that it automatically starts from USB and not from the radio. Without pressing any buttons at all. Thank you!
michael2000
KIA club member
hello, please accept congratulations, but pre-maximum start button
hmm, strange, the radio should start from the media on which the ignition was turned off, try this:
started it, if the radio turned on, transfer it to USB, then manually turn off the radio. then turn off the ignition, then turn on the ignition (the radio should not turn on), then manually press USB
kukht
KIA club member
rodrigez
Newbie
rodrigez
Newbie
rodrigez
Newbie
hello, please accept congratulations, but pre-maximum start button
hmm, strange, the radio should start from the media on which the ignition was turned off, try this:
started it, if the radio turned on, transfer it to USB, then manually turn off the radio. then turn off the ignition, then turn on the ignition (the radio should not turn on), then manually press USB
Shamilek
KIA club member
Newbie
Good afternoon, colleagues on the iron horse. Last week I bought a Sportage 2013 petrol in pre-maximum. I'm very pleased with the car. One thing.
It is very annoying that when starting with the key the radio turns on.
- First when the key is inserted into the ignition
- When the car is started.
I don't really listen to the radio at all. Please help.
- How to disable the radio from starting when the car starts by default?
- Now I have to do 2 times 2 clicks to switch from radio to usb
- How to configure the system at startup so that it automatically starts from USB and not from the radio. Without pressing any buttons at all. Thank you!
Front and rear speakers
The next step is setting up the rear speakers. This must be done so that they work synchronously with the front ones.
Considering that the driver sits in the front of the car, the car radio equalizer should be adjusted so that the rear speakers work with a slight delay.
Ideally, this should be done by an audio system installer. If you installed the radio yourself, you can achieve clear sound by adjusting the parameters experimentally.
Setting up the car radio is completed by adjusting the sound distribution between the right and left speakers. Without changing these parameters, you will get the feeling that the right speaker is playing quieter than the left. To fix the problem, you need to adjust the radio so that the right speaker plays 10-15% louder.
Experts in the field of installation of automotive systems, giving advice on how to set up a radio, emphasize that after the process is completed, the listener should not determine the direction from which the sound is coming.
As a summary, it should be noted that new acoustics need time to reach normal operation. On average, this takes a month and a half. During this period, it is not recommended to turn on full volume and make fine adjustments. The rubber suspension of the speaker will soften during operation, after which further adjustments can be made.
A poorly tuned car radio will prevent you from enjoying your music. Therefore, it is necessary to know, for example, how to set up a Pioneer car radio or any other before you make your first trip with this speaker system.
First, let's talk about the most important consequences of incorrect settings. Setting the parameters incorrectly often results in the speakers cracking and wheezing. Also, often the sound from the rear speakers interrupts the front, thereby destroying the feeling of integrity of the entire speaker system. Often the left front speaker is heard much better than the right one, resulting in the 3D effect of sound being lost. It is worth noting that different brands of “Pioneers” have menus that may differ slightly from each other, and some items may not be available. However, the general strategy for tuning any car radio should be as follows.
What speakers are best to put in your car for great sound?
Good sound in a car is one of the most important driving criteria for many drivers. Driving without good music can be boring, but the high performance of sound technology will bring real pleasure not only to music lovers, but also to ordinary lovers of good music. The question often arises as to which speakers are best installed in a car to achieve the required sound quality. We are talking not only about power, shape and size, but also about the manufacturer, the technologies used in production and other factors.
Modern speakers allow you to use small reproduction elements, but achieve the ideal atmosphere and sound content of the car interior. It is incredibly difficult to unequivocally answer the question of what speakers are used in a car. It all depends on the car itself, the owner’s preferences and the type of music that will be played in the cabin.
Choosing the right speakers for your car based on different criteria
The first rule of sound quality is the number of speakers in the car. But this does not mean that you need to place three dozen sound sources in the car - everything should be in moderation. It is important to monitor the presence of different frequencies. For example, you can use one or two subwoofers, two tweeters, and seven or nine midrange elements.
The number of sound sources in a car should not exceed reasonable limits. For example, the 11.2 audio system (eleven regular speakers and two subwoofers) is considered the most functional for a regular car. Often a subwoofer is sufficient and its high power is not required. You should also be guided by the following criteria when purchasing speakers for your car:
- absence of unclear frequency inconsistency, large number of high-frequency devices;
- correctness of the kit - it is better to buy ready-made audio systems than to make them yourself;
- the presence of two powerful speakers with low frequencies or a subwoofer;
- the ability to connect the entire system to a small car amplifier;
- reasonable power consumption so as not to drain the battery from the track;
- the presence of fuses built into each audio source, or the correct connection.
It often turns out that the buyer of acoustics is not very versed in electronics, but takes upon himself the installation of the purchased devices. In this case, special attention should be paid to the type of connection. Each speaker or entire sound system needs to be integrated. This will help avoid unpleasant overloads.
Therefore, it is better to immediately take advantage of the offer of ready-made audio systems with fuses in each sound source. This purchase will allow you to simply connect new sound sources and get high-quality sound. With ready-made systems, you can change the sound quality of your car in minutes.
Features of installing speakers in a car
Whatever professional and expensive speakers you choose, you need to take into account the installation features. Otherwise, even the most productive equipment will not work in your car for a long time, and will not allow you to truly enjoy high-quality sound reproduction. Do not rely on the standard instructions supplied with the audio system by the manufacturer.
Instructions often include only safety considerations. They are, of course, important, they need to be read and followed, but such advice will not allow you to achieve the desired results. Therefore, it is necessary to install the audio system as thoughtfully as possible. Following general principles, you can choose the following installation locations for sound elements:
- two or three speakers can be installed on the front panel facing the windshield;
- One speaker should be placed in the boards of the entrance doors - they are often installed at the bottom, but it is better to use the area of the opening handles;
- small speakers at the top of the rear door boards or at the top of the side pillars separating the doors also work great;
- two more speakers should be installed on the rear curtain - they also need to be turned into glass, and not directly into the interior;
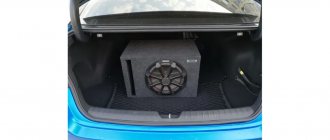
- the subwoofer is most often placed in the trunk, because there is simply no room for it in the cabin;
- with a lot of modification, you can put four more speakers under each seat, turning the sound in the footwell area.
This distribution of sound sources will allow you to get very interesting surround sound. Quite presentable possibilities of using a large number of speakers will clearly be relevant for most drivers, but in some cars such a set of speakers will become redundant. You should always pay attention to the specifications of your speakers and consult with experienced professionals.
Often during the installation process a question arises that specialized or professional forums in the field of car audio will help solve. If you want to achieve excellent results, it is best to buy audio systems in specialized stores. In such a place, the seller will reveal many useful secrets on how to get the most out of your car's speakers.
Car Sound System Add-ons
If you decide to install eleven speakers and two subwoofers, do not forget about the need to purchase a high-quality radio and an excellent car amplifier. The sound reproduction technique should be as close as possible to the selected sound sources.
Only full compliance of all equipment will help to obtain the necessary capabilities. It must be said that the sound quality depends on the radio transmission of the signal, but at the amplifier level serious distortion can occur if the equipment is not aligned. When purchasing audio equipment, check with the seller the following points:
- it is possible to completely combine the purchased equipment with your radio;
- what wires and channels are best used to connect all systems;
- how difficult it will be to perform technical installation and connection work;
- you should contact a specialist and which masters are best to choose;
- How safe is it for the car structure to use such sound?
The answers to these questions allow you to be one hundred percent confident in the quality and suitable parameters of the purchased goods. You should always be careful and ask the seller more questions. The problem for many buyers is the fear of showing their ignorance in certain places, but this is why a lot of unnecessary and expensive purchases occur.
The seller will definitely help you choose the best option for a set of equipment for excellent sound in the car. Just ask him for professional help. Use every method at your disposal to get the perfect sound out of your automotive equipment. We offer a video with professional tips on choosing car audio:
Let's sum it up
Simple audio systems consisting of two or up to four speakers are now a thing of the past. Car manufacturers offer standard music packages with nine or more sound sources. Therefore, when arranging additional equipment, it is worth investing in a large amount of high-quality acoustics.
When choosing which speakers are best to install in your car, be as careful as possible. Sometimes it is better to buy a ready-made set of equipment a little more expensive, but to achieve maximum compatibility and excellent sound effect. Only connect to individual speakers if you are knowledgeable about audio engineering. Have you ever encountered the problem of installing audio equipment on a car?
How to connect a subwoofer
Pioneer head equipment allows the use of active and passive woofers. To connect a subwoofer to a Pioneer radio, use outputs intended for rear speakers. The switching circuit depends on the resistance value of the speaker coil. It is permissible to use equipment with a resistance of 2 or 4 ohms. To ensure a signal is supplied to the device, you need to configure the radio, which is performed through the SP-P/O Mode menu section.
To install a speaker with a resistance of 4 ohms, left channel cables are used that have a protective coating in green and green-black colors. If the owner intends to use a 2-ohm device, then it is connected to the cables of the right rear channel, equipped with purple and violet-black insulation. In this case, the cords of the left channel must be isolated; it is prohibited to connect equipment to them.
When connecting an active subwoofer, a separate power supply line is provided. It is not recommended to connect equipment to standard circuits, since an increase in current consumption leads to overload and failure of standard fuses. The use of products with an increased rating is strictly prohibited, since the protection of standard equipment is not provided. The subwoofer amplifier is connected directly to the battery; a fuse-link of the appropriate rating is provided in the line.
When using an active device, the radio is connected through a separate mono output located on the back of the device. In this case, the load on the built-in amplifier is reduced, which increases the reliability of the equipment and improves sound quality. Subwoofers (regardless of type) are switched using speaker cables that are laid under the carpeted floor or inside the car pillars. The ends of the cord are equipped with plugs that reduce interference during signal transmission.
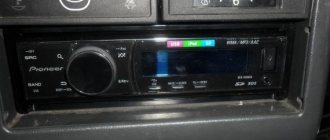
Radio setup
Even your favorite music recorded on a flash drive or USB drive can get boring over time. Therefore, many car enthusiasts like to listen to the radio while driving. Setting up the radio correctly on the Pioneer radio is not difficult and can be done in just a few steps - you just need to select a band, find and save stations.
There are three ways to configure the radio:
- Automatic search for stations. To do this, you need to find the BSM item in the settings menu and run a search. The car radio will find the station with the highest frequency in the radio range and stop - it can be saved by pressing the button with the number 1-6. Next, the search for stations will continue in the direction of decreasing frequency. If nothing is found, in the hidden settings menu you can change the search step from 100 kHz to 50 kHz.
- Semi-automatic search. While in radio mode, you need to hold down the “right” button. A range scan will start and a search will occur, the same as in automatic mode.
- Manual setting. By short pressing the right button in radio mode, you can switch to a specific frequency. The station is then stored in memory.
When all 6 preset stations are full, you can switch to the next memory section. There are 3 of them in total. In this way, you can save up to 18 radio stations.
Turning off Demo mode
Immediately after purchasing and connecting the radio, you should figure out how to disable the demo mode, intended for displaying the device in the store. It is possible to use the radio in this mode, but it is inconvenient, since when you turn it off, the backlight does not go out, and inscriptions with various information run across the display.
Disabling demo mode is very simple:
- We go to the hidden menu by turning off the radio and holding down the SRC button.
- In the menu, turn the wheel to reach the DEMO item.
- Switch demo mode from ON to OFF.
- Exit the menu using the BAND button.
You can also set the date and time in the hidden menu by going to the System section. The time display is switched here (12/24 hour mode). Then open the “Clock Settings” item and turn the wheel to set the time. In the System section there is also a language setting (English/Russian).
Thus, after purchasing a modern Pioneer model, you can easily set up the radio yourself. By correctly adjusting the audio parameters, you can achieve very high-quality sound even from a simple audio system and get a good sound picture at minimal cost.
Features of audio system settings
In most cases, incorrectly setting the playback parameters will lead to the speakers installed inside the car starting to wheeze. The vibrations of the rear speakers overlap with the front speakers, destroying the sound integrity of the speaker system. And too intense work of the subwoofer can completely distort the sound picture.
To avoid the described troubles, you need to know how to properly configure your car radio. In this case it is necessary to adjust:
- low frequency sounds;
- balance of front and rear speakers;
- signal distribution between right and left speakers.
Let's look at each stage in more detail.
Setting up a JVC radio
JVC is an “intermediate” brand, a passing link between the top Sony and Pioneers with their complex settings and Mystery, beloved by the people because there is nothing to configure there. On the one hand, they produce high-quality, deep sound. On the other hand, they are no less user friendly than the aforementioned Mistery.
Getting started with JVC is very easy. You need to decide whether you need a radio with individual settings. The JVC hardware is well made, so in most cases there is no need for deep calibration. Select the "Easy" function and select the size of your speakers. Smart technology will select the necessary parameters itself.
If you still decide to configure the radio yourself, then start with these options:
- DSP. Selection of the structure of the acoustic field. Allows you to adjust the audibility of audio, making the sound available to all passengers in the cabin.
- EQ. Five band equalizer. You can customize the sound to your liking or choose one of the smart settings for different music genres.
- Digital Track Expander. The audio quality of compressed tracks may be low. This parameter allows you to “tighten” them, giving the compositions a surround sound.