Payment for goods and downloading of the book in electronic form (PDF format) is made on the website.
To do this, you need to find the book you are interested in and click on the “Buy” button. The price of the book is indicated on the button.
For convenience, the price on the website for residents of Russia, Belarus and Kazakhstan is presented in rubles.
For residents of Ukraine in hryvnias, and for all other countries - dollars.
After clicking on the “BUY” button, a payment window will open where you can select a payment system with which you can pay for the selected book using any bank card (Visa, MasterCard, MIR, etc.)
When you click on the “Pay by bank card” button, the Portmone payment system will open, which is the easiest way to make a payment.
In addition, the website offers four payment systems for payment:
- Yandex (payment from any bank cards, Yandex Money account, QIWI Wallet, terminals, etc.);
- Portmone (payment from any bank cards, Portmone account);
- PayPal (payment from any bank cards, PayPal account);
- WebMoney (payment from any bank cards, payment from WebMoney wallets).
Payment via Yandex Cashier
After selecting payment via Yandex, the Yandex Cashier payment system will launch, where you need to select a convenient payment method (bank card, QIWI, Yandex Money account, etc.)
After specifying payment details and confirming payment, payment for the goods will occur.
If you have a bank card in a currency other than the ruble, then the money will be debited from the card at the rate of the Central Bank of Russia at the time of the purchase.
This payment method is optimal for residents of Russia, Kazakhstan and Belarus.
Official website of the Yandex Kassa payment system https://kassa.yandex.ru
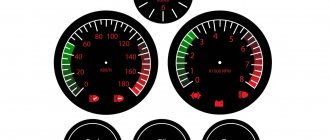
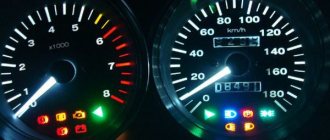
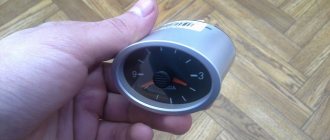
LED panel lighting
The most popular lighting for VAZ 2106 devices is LEDs. The panel looks especially beautiful at night. LED lamps of various colors are used for illumination. At least 2 bulbs are installed on the speedometer and tachometer dials. For small sensors, one LED is sufficient.
LED lighting around the entire perimeter will look more impressive. LEDs must meet the 12-volt voltage of the on-board network. When installing LEDs, be sure to observe polarity. Thanks to tuning, the VAZ 2106 tidy takes on an individual look and becomes more convenient and functional.
Loading …
Payment via Portmone
After selecting payment through Portmone, the payment system will launch, where you need to select the payment method: bank card or Portmone account.
The price in the Portmone payment system is converted into dollars at the exchange rate of the Central Bank of the country where you are located.
If you have a bank card in a currency other than the dollar, then the money will be debited from the card at the rate of the Central Bank of your country at the time of the purchase.
After specifying payment details and confirming payment, payment for the goods will occur.
Official website of the Portmone payment system https://www.portmone.com
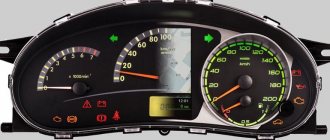
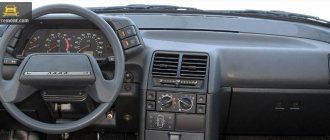
Dashboard
1 — fuel level indicator;
2 - fuel reserve warning lamp. Lights up yellow if there are 4 to 6.5 liters of fuel left in the fuel tank;
3 — liquid temperature indicator in the cooling system.
The transition of the indicator arrow to the red sector of the scale indicates engine overheating. You should stop and eliminate the cause of overheating;
4 — oil pressure indicator;
5 - warning lamp for insufficient oil pressure. When the ignition is turned on, it lights up red and goes out after the engine starts. If the lamp continues to light after starting the engine, this indicates low pressure in the lubrication system. To avoid engine failure, it should be turned off and the cause of the malfunction eliminated;
6 — tachometer.
Indicates the crankshaft speed. The yellow zone of the scale indicates the engine operating mode with a high crankshaft rotation speed, the red zone indicates unacceptable modes. It is prohibited to exceed the maximum permitted engine speed (6000 rpm);
7 — speedometer (vehicle speed indicator);
8—daily trip counter;
9 — odometer (summing counter of the distance traveled);
10 — control lamp for turning on the high beam headlights. Lights up blue when the high beam headlights are turned on;
11 — indicator lamp for direction indicators and hazard warning lights.
Lights up with a pulsating green light when the direction indicator switch is moved to the lower or upper position, as well as when the hazard warning lights are on;
12 — control lamp for turning on external lighting.
Lights up green when the exterior lighting is turned on;
13 — handle for resetting the daily trip meter;
14 - control lamp for covering the carburetor air damper. Lights up orange when the ignition is on and the choke control handle is pulled out;
15 — battery charge indicator lamp (generator malfunction).
When the ignition is turned on, it lights up red and goes out after the engine starts. If the lamp continues to light after starting the engine, this indicates insufficient tension in the generator drive belt, a malfunction of the generator or the warning lamp circuit;
16 — parking brake indicator lamp.
Lights up red when the ignition is on and the parking brake lever is raised;
17 — rear window heating switch.
The heated rear window is activated by pressing the button when the ignition is on. The control lamp in the key lights up orange;
18 — fog light switch in the rear light.
The fog light is turned on by pressing the button when the headlights are on. The control lamp in the key lights up orange;
19 — External lighting switch.
The three-position switch has three fixed positions. In the first, the external lighting is turned off; in the second, external lighting and instrument lighting are turned on; in the third, the low beam headlights are additionally turned on.
Source
Payment via PayPal
After selecting payment via PayPal, the PayPal payment system will launch, where you need to select the payment method: bank card or PayPal account.
If you already have a PayPal account, then you need to log into it and make a payment.
If you do not have a PayPal account and you want to pay using a bank card via PayPal, you need to click on the “Create an Account” button - shown with an arrow in the picture.
PayPal will then prompt you to select your country and provide your credit card information.
After specifying the information required to make the payment, you must click on the “Pay Now” button.
Official website of the PayPal payment system https://www.paypal.com
Encyclopedia
- VAZ 2101
- VAZ 2102
- VAZ 2103
- VAZ 2121
- VAZ 2106
- VAZ E1101
- VAZ 2105
- VAZ 2104
- VAZ 2107
- VAZ 2122
- VAZ 2108
- VAZ 2109
- VAZ 21099
- home
- To the VAZ section
- To the AZLK section
- To the GAZ section
- Search
Years of production: 1976-2006 Dimensions (l x w x h, mm): 4116x1611x1446 Layout: front engine Drive wheels: rear Body: sedan Engine: VAZ-2106 Number of cylinders: 4 Displacement: 1.57 l Number of valves: 8 Location : top Power, hp/kW: 80/58.8 at 5400 rpm Transmission: five-speed manual Brakes front: disc Brakes rear: drum Electrical equipment: 12 V Tire size: 175/70R13
History of creation
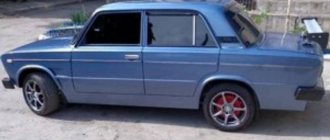
VAZ 2106
- Soviet passenger car developed at the VAZ plant. Serially produced from 1976 to 2006. The Six is based on the Italian model FIAT 124 Speciale from 1972. VAZ 2106 has become one of the most popular VAZ models throughout its production history. The first car of the new model rolled off the assembly line on February 21, 1976. In fact, the VAZ 2106 was a luxury version of the VAZ 2103, with a more powerful engine and different trim. The car was one of the most prestigious models of the late 1970s. The standard equipment was extremely rich: it included new seats with headrests and an instrument panel with a tachometer and clock. The cars were famous for their excellent dynamics and good build quality. Early models were distinguished by good sound insulation.
In the late 1970s, VAZ expanded its model range by releasing less powerful versions of the VAZ 2106. They were equipped with engines from models 21011 and 2103. Although these modifications lost the inherent dynamics of the model, they were quite popular due to the general shortage of VAZ 2106 in the market. domestic market. In 1982, the first serious modernization of the model was carried out: it began to be equipped with a new, 75-horsepower engine, interior trim elements changed, and reflectors disappeared from the rear wings. Since 1990, VAZ launched the production of a “luxury” modification, which received the index 21065. The car was distinguished by a contactless ignition system, a new carburetor, different headlights and new upholstery.
VAZ 2106 was widely exported abroad. The main difference between the export modifications, in addition to minor changes in finishing, were front bumpers with integrated turn signals and side lights. There was a special modification created specifically for L.I. Brezhnev in the late 1970s. It received the name “half past seven” because of the materials used for finishing the VAZ 2107, which was then only at the development stage. This modification was released in a single copy.
By the end of the 1980s, the VAZ 2106 was one of the most popular and mass-produced models of the VAZ plant. With the collapse of the USSR, the build quality and prestige of the model dropped noticeably, which did not prevent the car from existing on the assembly line until 2006. In the last years of production, the model was assembled at a plant in Izhevsk. The 2000s models were equipped with upgraded 2106 engines with a fuel injection system. The last VAZ 2106 rolled off the assembly line in Izhevsk in January 2006.
Design
External appearance of the VAZ 2106
was quite modern for the late 1970s. During the production process, the appearance of the car underwent minor changes. The model differed from the VAZ-2103 with a new radiator grille, different rear lights and interior trim. The original steering wheel, instrument panel and seats were installed on the car.
Engine
During the production of the model, many modifications with different power units appeared. The original modification 2106 was equipped with a 1.6-liter power unit with a power of 80 hp. At that time it was one of the most powerful sedans in the USSR, and the acceleration time to 100 km/h was 16 seconds. The maximum speed was 150 km/h. At the end of the 1970s, modifications of 21061 appeared with an engine from a VAZ 2103 with a power of 74 hp. and 21063 with a 64-horsepower engine from the VAZ 21011. Since 1982, modernized original engines with a power of 75 hp began to be installed on the VAZ 2106.
Payment via WebMoney
After selecting payment via WebMoney, the payment system will launch, where you need to select the payment method: bank card or WebMoney wallet.
If you already have a WebMoney wallet, then you need to log into it and make a payment.
If you do not have a WebMoney wallet and you want to pay in another way, you need to select any of the methods that WebMoney offers and make the payment
After specifying payment details and confirming payment, payment for the goods will occur.
Official website of the WebMoney payment system https://www.webmoney.ru/
Downloading a book
After successfully completing the payment (by any method) and returning to the KrutilVertel store from the payment system website, you will be taken to the successful payment page:
On this page you need to indicate your e-mail, where access to download the book will be sent.
If you are already registered on our website, then simply follow the link to your personal account.
The book you purchased will be in your personal account, from where you can always download it.
Please note that after making the payment, you need to return back from the payment system website to the KrutilVertel website.
If for some reason you did not return back to the site and closed the payment system tab with a message about the successful completion of the payment, please let us know - we will send you a letter indicating access to download the book.
Elements of the VAZ 2106 panel and their purpose
During the trip, the driver must not only monitor the situation on the road, but look at the instruments to control how fast the car is moving, monitor the engine temperature, oil level and the presence of fuel in the gas tank.
The instrument panel is located on the dashboard and contains a large number of elements, each of which is responsible for the operation of a specific component of the car.
The main elements are:
- speedometer;
- tachometer;
- battery charging indicator;
- engine temperature sensor;
- odometer;
- resettable mileage counter;
- oil level sensor;
- oil pressure gauge;
- fuel presence sensor.
In addition to instruments and sensors, the dashboard contains controls for emergency lighting, lights, direction indicators, and windshield wipers. In addition, the tidy also includes other switch levers, which can be seen in the diagram.
Problems when paying with bank cards
Sometimes difficulties may arise when paying with Visa/MasterCard bank cards. The most common of them:
- There is a restriction on the card for paying for online purchases
- A plastic card is not intended for making payments online.
- The plastic card is not activated for making payments online.
- There are not enough funds on the plastic card.
In order to solve these problems, you need to call or write to the technical support of the bank where you are served. Bank specialists will help you resolve them and make payments.
That's basically it. The entire process of paying for a book in PDF format on car repair on our website takes 1-2 minutes.
If you still have any questions, you can ask them using the feedback form, or write us an email at [email protected] .
Dismantling instructions
Removing the VAZ 2106 instrument scale may be necessary when repairing and replacing its elements, tuning and modification. Dismantling is not difficult and will require a small set of tools: wrenches and screwdrivers.
Stages of dismantling the tidy
The removal procedure consists of the following steps:
- First of all, you need to remove the front box from below the tidy.
- Then you need to unscrew all the fasteners and pull out the lower latches.
- Remove the radio plate.
- Next, remove the casing from the steering column.
- The next step is to disconnect the wires. Each one needs to be marked to make assembly easier.
- Now you can dismantle the shield by disconnecting all connectors.
- After removing the sensors, they need to be sorted in order to assemble correctly.
After upgrading the instrument panel, assembly is carried out in the reverse order (the author of the video is Nikolay).