In the Lada Kalina model, as in any other car, with an 8-valve and 16-valve engine, the pump operating in the cooling circuit of the power unit has its own resource. It is advisable to replace it together with the same procedure regarding the timing belt. For this purpose, the manufacturer regulated an interval equal to 60 thousand km of the distance traveled. This kind of approach will allow the owner to avoid the need for additional disassembly of the timing belt assembly in order to replace a cooling circuit pump that has become unusable. Replacing the pump yourself is not a difficult task, so the owner can safely take on the task even with little experience. The main thing is to decide which pump is better.
Changing the pump on a Lada Kalina: diagnostics, replacement, recommendations
Domestic cars are always in constant demand in Russia. On the one hand, these are affordable means of transportation, on the other hand, their ease of maintenance allows you to carry out repairs on your own. One of the most serious breakdowns of the Lada Kalina can be considered pump defects. Indeed, if the pump is out of order, you cannot operate the car - there is a high probability of the motor jamming. Therefore, Kalina owners should pay special attention to the performance of the pump and the engine cooling system as a whole.
Why do you need a pump in a car?
The pump (or water pump) on the Lada Kalina is a device that circulates coolant. The pump starts working together with the power unit, that is, after the moment of ignition, the pump also starts working.
The circulation of antifreeze/antifreeze in the system is ensured by the rotation of the pump shaft on which the impeller is located . The impeller blades create the necessary fluid pressure, due to which the motor is cooled uninterruptedly. However, if there are any defects in the pump, antifreeze stops being supplied to the cylinder blocks, so the engine can “boil” and fail. Therefore, for high-quality and timely cooling of the engine, it is necessary to monitor the condition of the pump.
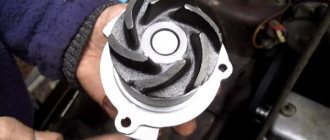
Original pump, which is installed on the Lada Kalina
Let's sum it up
As you can see, replacing a pump is not such a difficult process. The main thing is to strictly follow the instructions and decide in advance which pump is better. We recommend checking the tightness of the system by warming up the LADA Kalina engine until it reaches the operating temperature. If no leaks or noises are detected, then we boldly hit the road.
To avoid being blown up by a mine, it is enough to know where it is laid. Let's play sapper and find out when you really need to change coolant pumps and timing belts on VAZ engines.
Domestic engines for Grant, Kalin, Prior, Vest and Iksreev, with the exception of VAZ-11183, belong to the “plug-in” category. What this means is that when the timing belt breaks, the pistons meet the valves. Read - it exploded and led the engine to destruction, which was expensive to repair.
How to determine if the pump is faulty on Kalina
The first sign that the water pump on a car has started to work incorrectly can be considered extraneous noise in the engine compartment while driving.
Lada Kalina cars are equipped with water pumps with a strictly fixed service life - 60 thousand kilometers or 48 months of operation (whichever comes first). Therefore, when this period approaches, it is recommended to change the pump, even if there are no signs of malfunctions yet.
However, in some cases, the pump may fail earlier than stated. You can check the functionality of the water pump in the simplest way:
Warm up the engine to the optimal temperature. After warming up, use a gloved hand to pinch the upper pipe that comes from the radiator.
If the pump is working properly, you will immediately feel the fluid pressure in the nozzle. Accordingly, the pump works as coolant circulates through the system.
If pressure is felt, but weak, or not at all, it will be necessary to proceed to a detailed inspection of the pump.
You will have to remove the timing case and visually assess the external condition of the pump.
If there is a leak of antifreeze at the landing site, it means that the oil seal (seal) has failed.
If a roar is heard while driving, we can conclude that the pump shaft bearing has worn out. You can pump the drive part of the pump gear by hand. If there is play, the pump will not work correctly.
Loss of pump tightness leads to disruption of fluid circulation in the system
Thus, it is possible to identify pump malfunctions without removing it from the car. The procedure is quite simple and accessible even to a novice driver.
Pump Lubrication Procedure
When drivers talk about lubricating the pump, they mean lubricating the water pump bearings. There are two bearings installed on the shaft, which require a small amount of lubricant to operate correctly. Experienced drivers lubricate the pump without removing it from the car:
Remove the gas distribution casing.
Clean the pump mounting area and the pump housing itself from deposits, dust and dirt.
Apply Litol-24 or VNIINP-207 with your finger to the joints of the housing.
A better lubrication procedure will be carried out during pump repairs, when faulty parts are replaced. However, this procedure can also ensure a normal amount of lubricant in the bearings:
In principle, it is possible, but it is not convenient to remove the oil seal. Remove the oil seal and lubricate the cage with warm lithol, it covers the balls there but there are slots in it, so it will still get on the balls, although there may be lubricant there
https://www.lkforum.ru/showthread.php?t=49205
Engine Cooling Water Pump
Here it is, a mine - a water pump. Refers to the cooling system, but is driven by a timing belt. If the pump wedges due to the death of the bearing, it will cut off the teeth on the belt, and then there will be destruction in the motor. And they “forgot” to mention this detail in the routine maintenance section of all service books. What to do with it? The consumer can only guess. Should we wait for death from natural wear and tear on a plug-in motor? Stupidity. And if changed, then when? It seems that the mine is not even the water pump itself, but the complete disregard for it in all the official VAZ “literature” for the consumer.
New VAZ engines are now equipped with high-quality timing belts from well-known brands. I believe that if no oil gets on it, it will cost 180 thousand. But is the difference in components really so great that on the 8-valve VAZ-11186 for Granta the belt must be changed at the 75th thousand, and on its closest relative VAZ-11189 at the 180th?
Let's continue the research. The pulleys are not demolished at all. Pressure roller bearing up to 180 thousand? Let's admit it, although it's hard to believe. But why change all this equipment at the 180th thousand, if the estimated life of the engine is 220 thousand km? Refresh before demise or major overhaul? If you don’t believe me, look at the photo taken in the workshops where VAZ engines are produced.
Replacing the pump on a Lada Kalina (8 valves)
On an 8-valve Kalina, you can change the water pump yourself. However, if the car owner does not have minimal experience in car maintenance, many questions may arise. For example, which pump to buy, how to choose the right tool, and is it worth draining the antifreeze from the system completely?
Which pump to choose
When the time comes to change the water pump, car owners begin to look at car dealerships for a worthy replacement. But which pump to choose so that it lasts as long as possible and does not cause problems for the owner?
It is important to choose original factory products. This is immediately evident from the packaging - an uncreased box, a warranty card, the date of manufacture and service life are indicated. Original pumps are necessarily packaged in protective film and have holographic stickers.
In contrast, it will not last long - after 10 thousand kilometers the pump will need to be changed again.
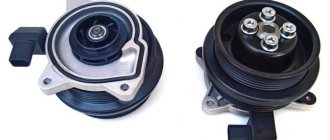
At AVTOVAZ, designers install a TZA water pump on the Kalina. It has a long service life; drivers often change the pump only after 100 thousand kilometers. As an alternative, you can install more expensive German-made Bosch pumps - they are also famous for their quality and durability.
Where is the water pump located on Kalina?
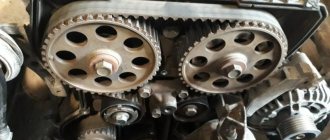
Due to the fact that the pump is driven by the timing belt, it is part of the gas distribution mechanism. That is, you need to look for the water pump on the Lada Kalina from the side of the engine itself. Visually, before removing the belt, you can only see the pump pulley, which is involved in the gas distribution system.
The pump on the VAZ is located in the timing device
Preparing tools
It is recommended to prepare a standard set of tools for removing bolts and unscrewing nuts. You will also need a 6-point hex key. To drain the antifreeze without contamination and inconvenience, it is better to immediately find a container for draining and a rag to blot up any drops that have fallen on the engine elements. To ensure reliable installation of the pump, you can use a sealant with good thermal conductivity properties.
How much coolant to drain/fill when replacing the pump
In any case, before dismantling the old pump, you will need to drain the antifreeze from the system. This is necessary in order to reduce the pressure in the hoses and not be injured during sudden releases of liquid.
If the water pump has not been changed for a long time, then it is advisable to immediately drain the entire volume of antifreeze from the system and replace it with a new one. If the car owner has recently filled in new coolant, then there is no point in completely draining it: just disconnect the hoses from the expansion tank and wait until the antifreeze comes out.
To make it easier to fill a large volume of coolant, drivers usually use funnels
Operating procedure
First of all, you will need to install the machine on a flat surface. You can drive the Kalina into the inspection hole, you can simply lift the front right part on a jack. It is recommended to make sure that the car is securely secured; it is better to place additional supports under the body beam.
When dismantling the pump, you will need to remove the timing belts.
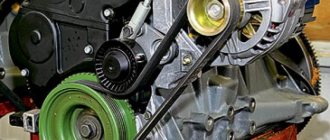
Self-check the condition of the alternator belt
Before replacing an implement belt, drivers should perform a visual inspection to determine if replacement is necessary.
To perform this, it must be placed in a stationary state. To prevent the car from rolling during inspection, clamps should be installed under the wheels. The generator belt is located in the engine compartment, and is tensioned on the pulleys of the attachment. The entire product must be checked. Having examined one area, inspect all the others sequentially, turning the belt. You can make a mark at the place where the inspection began. The following signs indicate the need for replacement:
- cracks and abrasions on the surface, both internal and external;
- frayed, sides;
- peeling of rubber from rubber;
- mechanical damage;
- traces of oil and working fluids are on the surface.
During inspection, you also need to check the belt tension. If it is loosely tensioned, the generator will not work at full capacity. Too much tension causes premature wear of the bearings and strap. To check the tension, press the belt in a place free from equipment. With a force of approximately 10 kg, the deflection should not be more than 7-8 cm.
If the tension is insufficient, then you need to know how to tighten the belt. The tensioner screw acts as a regulator; it is used to perform tension (video author – Remgar).
When replacing a belt, it is advisable to change the tensioner pulley, which should also be inspected. It should be free of scratches, chips, play, and deformation. The roller should rotate freely without delay. You should not neglect regularly checking the condition of the belt drive.
If the belt breaks on the way, further movement is only possible using the battery. But even if it is fully charged, you can move it for no more than one hour. Therefore, it is recommended to have a spare alternator belt in the trunk in case it breaks.
How to connect an additional pump on the Lada Kalina
Most modern cars have two water pumps installed at once. This ensures the highest quality engine cooling in any operating conditions. You can also install a second (additional) pump on the Lada Kalina, and this work takes a little time and effort. The most difficult thing is to get to the place where the pump is fixed, since you will have to disassemble many engine compartment parts.
An additional pump is needed not only for high-quality engine cooling. Mostly, Russian car owners install a second pump to improve the operation of the heater in the cabin during the winter - the car warms up faster.
In order to install the second pump on the Kalina, you will need:
fasteners (depending on where exactly it will be easier and more convenient to screw the pump);
The essence of the work is to organize a small circle of coolant circulation throughout the system.
Doing the work yourself
The first step is to assemble the assembly itself from the materials that are at hand. The pump is connected to two hoses (the short one will provide fluid removal, and the long one will provide supply). The hoses are attached to the two ends of the pump with clamps. Then follow the following procedure:
- The coolant will need to be drained. You can simply empty the expansion tank without draining the entire volume of antifreeze.
- Near the bottom of the car, find two hoses (one leads the antifreeze to the stove, and the other takes it away from it). Disconnect the outlet hose and instead attach the assembled structure with an additional pump.
- After this, attach the pump to the gearbox housing. Depending on the availability of fasteners, you can place the device on brackets or secure the pump with metal clamps.
In this case, the hoses are connected with clamps, and the pump itself is mounted on a metal bracket
At the end of the work, you will need to plug all hoses and plugs and fill in new antifreeze.
Video: second pump - preparation and installation
Thus, on Lada Kalina cars, the owner can independently change the water pump without resorting to the help of service station specialists. This will save money and also allow you to independently control the operation of the pump, taking into account the knowledge about the state of the machine system that was obtained during operation.
Source
How to change license plate lights
Lada Kalina Hatchback UltraViolet Logbook -062- How to drain antifreeze
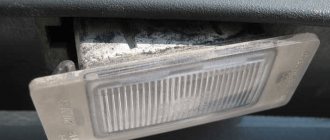
Replacing the license plate light bulbs on the Lada Kalina is a simple task, so you can easily handle it yourself. By changing the lights yourself, you will not only save money on the services of workshop specialists, but you will also be confident in the excellent quality of the work.
Open the trunk of the car and pry the lamp on the left side with a flat-blade screwdriver. This will free him from the latch;
Step #1
Push the light on the right side and move it to the left. After some pressing, it should come out easily;
Step #2
Pull out the lamp along with the power wires. This will make it easier to replace the license plate lamps of the Lada Kalina;
Slightly lift the plastic clip up and remove the power plug;
Step #3
Carefully turn the white housing of the Lada Kalina license plate light bulb counterclockwise and completely pull out the base;
Step #4
Pull out the lamp itself. To do this, simply pull it to the side. After this, remove the lampshade from the base.
Step #5
Install a new lampshade in place of the burnt out bulb. The job is done in the same way as removing a light bulb, but in reverse order. Make sure the new light is lit.
Lada Kalina pump replacement with your own hands
AutoNews / Reviews / Tests
How to Replace the Pump on Kalina
How is the pump replaced on the Lada Kalina?
It is best to replace the pump on Kalina immediately with replacing the timing belt, without waiting for it to leak and cause trouble. According to the manufacturer's advice, the belt is changed every 60 thousand km. This is a fairly long interval, during which time a new water pump will definitely pay for itself. Well, the replacement procedure is completely within the capabilities of the average owner of a Lada Kalina car.
Determining the performance of a part
In a sense, the water pump is a rather tricky part. Without disassembling the timing belt assembly, it is not so easy to find its functionality. But there are some signs of a pump malfunction that call for paying close attention to it:
- At an early stage of wear, bearing noise occurs. Not every auto mechanic can distinguish it, not to mention the average car owner. But if you managed to catch this noise, in other words, a reason to look under the plastic cover of the gas distribution mechanism.
- Wet marks under the timing cover and a belt shiny with water indicate that antifreeze is gradually seeping into the compartment. Naturally, through the pump.
- The belt is not in the center of the camshaft gear, but is shifted to the very edge. This happens when, due to free play in the pump bearing, the gear warps and the belt slides to the side.
- The coolant in the expansion tank of the Lada Kalina gradually decreases, and wet spots are constantly observed under the car directly under the timing mechanism.
Some tips on how to check your pump. If you observe one of the indicated signs, then it is worth taking the time to remove the timing belt from the camshaft gear by releasing the tension roller. Now you can manually check the free play of the bearing and, if such is found, immediately replace the part.
Malfunctions of the water pump are fraught with consequences, right up to half a year of engine repair. A non-functioning unit leads to overheating of the unit, which leads to failure of the piston rings and jamming of the pistons themselves in the liners. Some Kalina , in order to improve the performance of the cooling system, practice installing an additional pump. This is a very effective remedy for airing the system.
Typically, the additional pump is a standard water pump from the Gazelle, equipped with its own electric motor. The device fits into a small circle of cooling water circulation, or more precisely, it is placed on the return pipe of the stove. The electric motor is connected through an additional relay and a button inside the cabin so that the pump can be turned on as needed.
2. Installing a pump on the Lada Kalina engine
This video was processed in YouTube Video Editor ()
Replacement of the water pump, Lada KALINA. Replacing antifreeze (coolant)
The stove in the car does not heat. I changed the thermostat, removed the air locks, but nothing helps. Night car on...
Korean-made coolant pump for VAZ-21179 engine
The owner of any elderly foreign car with a timing belt will confirm that repairmen insist that during a scheduled belt change, they replace both the pump and the pressure rollers with bearing assemblies. And these parts are often sold as a set. Moreover, at a discount - the whole set is cheaper than the belt, rollers, and pump separately.
I don’t want to once again convince you that the stingy pays twice, but over the years I have come to the conclusion that Western manufacturers include in the regulations changing the belt not because of the belt as such, but because of the pump and tensioner bearings. They just needed a reason to reliably replace the entire set of parts associated with the camshaft drive, and they found it.
I propose to do the same with our engines. Why? Formally, at each maintenance it would be necessary to remove the cover and inspect the timing belt and water pump. You can see a tear in the belt, as well as a leak on the pump. In both cases, the part is changed without delay. But this is a malfunction. And if everything is outwardly normal, the ideal option is to include preventive replacement in the regulations.
Preparatory activities
Before changing the pump on Kalina, you will have to partially empty the cooling system. Antifreeze should only be drained from the cylinder block ; there is no need to touch the radiator. Unless you notice fluid leaking on the pipes, then you can change the hoses at the same time. The procedure is performed according to the following algorithm:
- Remove the mudguard that protects the engine from below from dirt. It is held on by bolts with 10 mm socket heads.
- Disconnect the positive terminal from the battery and the high-voltage wires from the ignition coil. Unscrew the coil mount with a 5 mm hexagon and move it to the side, freeing access to the drain plug.
- Empty the cylinder block by placing a special container and unscrewing the drain plug with a 13 mm wrench. In this case, it is necessary to open the cap of the expansion tank.
- If you need to empty the radiator, you should move the container under its drain neck and also unscrew the plug.
Disassembly and installation of a new part
First of all, you need to gain access to the timing mechanism, for which, using a No. 10 key, unscrew the 3 bolts securing the protective plastic cover. If you are disassembling a 16-valve Kalina model, you will have to remove 2 covers by unscrewing 5 bolts with a No. 5 hexagon.
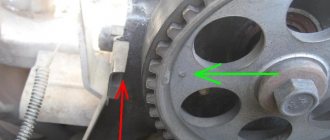
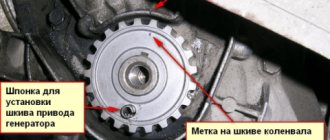
Before further disassembly, you need to align all the marks on the crankshaft flywheel and the camshaft gear.
Otherwise, during the work you can disrupt gas distribution and create a new problem for yourself.
To align the marks, it is best to jack up the 1st front wheel, engage 4th gear and turn the crankshaft by turning the wheel manually. Before doing this, do not forget to remove the plug from the gearbox side that covers the marks on the flywheel. The mark on it should coincide with the groove on the body, and the camshaft gear mark should be vertical at the top opposite the slot. Further disassembly is carried out in this order:
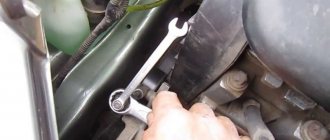
- using wrench No. 17, loosen the roller and remove the timing belt from the camshaft gear (in a 16-valve engine with 2 gears);
- Using the same key, unscrew the bolt holding the gear, wedging it through the holes;
- remove the gear (both in the 16V model) without losing the key;
- dismantle the internal protective plate, in an 8V engine it is held on by 2 bolts, 16V by 5;
- unscrew the 3 bolts securing the pump and pull it out of the socket;
- remove the remains of the old gasket from the cylinder block .
If a cork gasket is supplied with the new pump, then it does not need to be lubricated with anything, but it is better to place a cardboard gasket on the sealant. The new pump must be inserted into the socket in the same position as the old one and secured with bolts. After this, you can put all the parts back, put on and tighten the belt. Double-check that the marks match before replacing the covers.
To prevent air pockets from forming when filling antifreeze, you need to remove the small pipe from the throttle valve heating unit. Filling is carried out until liquid flows out of it. Upon completion of assembly, it is recommended to check the system by starting the engine and warming it up to operating temperature.
Drive 16kl. Kalina is like riding a powder keg, you never know when it will explode! I'm talking about the meeting of valves and pistons...
This can happen for several reasons - the main one is the destruction of the timing belt support (Polish) roller. The pump may also jam and, in very rare cases, the tension (Chinese) roller may fail. The belt is very reliable and can only break if hit by a foreign object.
In general, the plant declares the service life of the entire timing assembly is 200 thousand km. and does not imply replacement and inspection of rollers or timing belt during the warranty period. However, I don’t think that there will be such brave souls who will want to check the declared resource) I periodically looked through the relevant topics on the forums and wondered how to protect myself and avoid expensive engine repairs... And after all, I encountered valves with pistons for everyone at completely different mileages. Some people have 20 thousand km. Some people drive 70, others drive more than 100 and have no problems.
And since no one has any doubts about the belt, everyone is mainly thinking about what to replace the rollers with, there are many options - some fit without modifications, with some you have to put washers in and use special bolts. I didn’t bother to understand all this variety and decided to replace the set with exactly the same one at 60 thousand mileage. At the same time, I decided to replace the pump and the belt and pulley of the generator in order to forget about this problem of belts and rollers for a long time.
I ordered everything from Exist except the pump; I bought it at the Lada retail store, which is now plentiful all over the country.
The kit itself turned out like this:
Manufacturer - Article - Name
— price
1. Gates - K015631XS - Timing belt with rollers, kit
— 2940 rub.
2. Gates - 6PK1018 - V-ribbed belt (alternator)
- 293 RUR.
3. Ina - 531 0760 10 - Tensioner roller (generator)
- 510 rub.
4. TZA - 21126-1307010-20 - Water pump VAZ (1.6 l., 16 cells)
- 750 rub.
Original (factory) Gates rollers and belt are sold only as a set, and the main thing here is not to run into a fake, of which there are apparently quite a few. How to distinguish a fake from an original can be found HERE:
Gates kit - K015631XS consists of:
— timing belt — 5631XS (137 teeth) — Timing belt tensioner roller “Powergripr” (T43147) — Parasitic/drive roller, timing belt “PowerGripR” (T42150)
pump is a pump responsible for circulating water by cooling it. The unit is located in the front part of the cylinder block. If the pump is deficient, the motor overheats, which leads to boiling and breakdowns.
Step-by-step work on replacing the timing belt
Before you begin replacing the timing belt, you need to prepare your work area and all the necessary tools. For work we will need:
- New timing belt.
- The key is "10", "17", "19".
- Flathead screwdriver.
- Tensioner pulley key.
Execution order
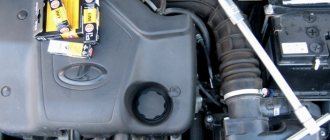
- Open the hood and remove the plastic engine cover.
- We dismantle the belt protection by unscrewing three bolts to “10”.
- Remove the right wheel and protection.
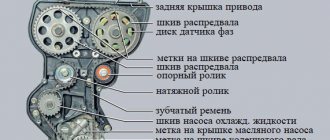
- This is what the timing belt diagram looks like, according to it we set the marks. The location of all marks is shown schematically.
- We turn the crankshaft clockwise by the bolt until the marks on the pulley and the tendril on the timing cover align. Marks "C and D".
- Make sure that the marks on the camshaft and the protective cover also match. Labels "A and B".
- We remove the plug on the upper part of the clutch housing using a screwdriver and make sure that the marks meet there too. The marks are marked with arrows.
- We fix the “crankshaft” from turning, insert a flat-head screwdriver into the hole between the flywheel teeth. We fix the screwdriver where the arrow points.
- We unscrew the generator pulley bolt while holding the screwdriver, then remove the pulley from its place. Using a “17” wrench, unscrew the fixing bolt.
- The next step will be to loosen the idler pulley nut.
- Loosen the nut so that the belt is as free as possible.
- Remove the belt from its seat. We dismantle the weakened belt.
- If you need to remove the tension roller, unscrew the fastening bolt and remove it from its seat.
Installing a new belt
- We put the belt on the crankshaft pulley.
- We begin to tension the two branches of the belt, first fix it on the pump pulley, then wind it by the tension roller.
- Then it drives it onto the camshaft.
- We tighten the belt using a tension roller, while simultaneously fixing the latter using a special key. (Rotate the roller counterclockwise).
- We make sure that all the teeth lie flat on the gears.
- Tighten the generator pulley mounting bolt and turn the crankshaft clockwise by giving one revolution.
- We make sure that all the marks match and remain in place.
Device feature, failure symptoms
This is what the pump for Kalina looks like
The pump works in conjunction with the engine. It ensures uninterrupted operation of the fuel supply and cooling systems. The first one transfers fuel from the tank to the engine. The next reason is the forced pumping of antifreeze, or antifreeze.
The water pump-impeller, located on the shaft, is covered by a housing. The shaft has ball bearings at both ends and rotates due to a rotating moment by means of a belt attached to the engine.
Symptoms of a water pump failure:
- the reddish section of the tachometer indicates the overheating temperature of the car’s engine, this is confirmed by the readings of the device;
- in the cabin of the Kalina car there is a persistent smell from the evaporation of antifreeze;
- a sound similar to a whistle can be heard quite clearly - repair or replacement of the pump is needed;
- there is an option to find drops of water under the car (to identify the problem, leave a sheet of snow-white paper under the car while you sleep).
Restoring the pump to function requires experience and special tools. It is better to entrust the work to 100% specialists, and at the same time replace the pump with the newest one.
Fuel pump: design features
Carburetor cars had mechanical pumps. The drive or dam pushed the diaphragm, during which a vacuum was created and fuel entered the carburetor. Currently, almost all cars have an injection engine and an electronic pump. It delivers hot food at high speed and maintains steady pressure in the system. The electric motor, together with the working rotor, pushes the fuel. The pump is located in the gasoline tank itself. During operation, fuel becomes coolant and lubricant. There are car models that have two pumps: the main one is under the hood, the worker is located in the fuel tank.
- ODS is the main method of protecting a machine. This is a closed-type forced circulation liquid. If the interior heating device supplies cool air, but the Kalina engine overheats, this means that there is a malfunction in the operation of the car. Components of a complex of accounting programs:
- special motor shell;
- heat exchanger with electric fan;
- device for maintaining a constant temperature;
- suction device;
- expansion tank;
- contact tubes.
2. Installing a pump on the Lada Kalina engine
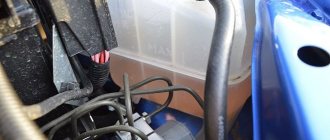
By visiting the plastic expansion tank, you can visually control the amount of antifreeze and antifreeze. There are special marks for the highest and lowest levels of liquids in the tank. Outside the tank, there is a pipe at the top for connecting to the heat exchanger sleeve, and at the bottom - with a filling tube.
- Expansion cap with breathers. Device means inlet and outlet breathers. They are capable of providing systemic impermeability. The intake valve
maintains elevated pressure in the hot engine. As the temperature increases, steam leakage decreases. The reduced pressure facilitates the opening of the released breather as the car engine cools evenly. - The pump pumping antifreeze is a quick discharge blade. The crankshaft wheel drives the pump by means of a toothed belt on the camshaft rod. Its body consists of aluminum. The rotation of the shaft occurs in a double-row ball bearing, in which there is enough fuel oil for the period of warranty operation. The outer ring is tightened with a screw. A gear is pressed in front, an impeller, a retaining ring, and an oil seal are in the back. Antifreeze or antifreeze leakage is monitored through a hole in the pump shell. This method will help identify unit malfunctions. If the pump cannot be repaired, it is replaced with a similar assembly device. The redistribution of antifreeze is corrected by the coolant. System cooling of paired cycles occurs as follows:
- in a larger circulation circle, antifreeze seeps through the engine shell to the radiator battery;
- when moving in a small circle, antifreeze or antifreeze passes only through the cooling shell, without getting into the heat receiver.
The cooling system consists of a radiator battery and a throttle heating unit. The circulation of antifreeze or antifreeze here occurs continuously, regardless of the location of the coolant valve. - Thermostat. The thermal unit and two breathers are components. There is a redistribution of the flow of antifreeze, also called antifreeze. When the engine is cool, the node valve redistributes the direction of water movement. It circulates along the smallest radius without entering the radiator. High temperatures of 85°C allow the valves to open and allow fluid to flow into the radiator. At temperatures above 100° C, the main valve is completely open, the spare valve is closed. Water circulation occurs over a larger radius.
- Antifreeze or antifreeze temperature meter. This device is screwed into the cylinder head for automatic antifreeze control. The sensor is connected to the temperature indicator on the machine's device panel. This information is sent to the controller.
- Heating heat sink. Built into the engine cooling system, it heats the car interior by circulating hot antifreeze.
- The radiator is a 3.2 plastic tank in a vertical position. Some of them have a partition. There are also 4 rows of round aluminum tubes, aligned horizontally, which are passed through cooling plates. The pipes are connected to the tanks through a rubber key. Antifreeze enters through the upper pipe and comes out through the lower pipe. The inlet pipe is located next to the narrow steam exhaust hose. The radiator has a casing with an electric motor. Drain plug at the bottom.
- The fan maintains the temperature inside the car. When the controller receives a signal, the fan is turned on by means of a relay.
Symptoms of damaged water pump
- Motor overheating - the pump
is faulty, the drive belt is not working, the impeller is damaged. - Noisy, smell of antifreeze in the cabin.
- Low antifreeze circulation is the result of pump destruction. Diagnosis is carried out with the engine idling; you must immediately clamp and lower the outer radiator hose. During normal operation of the pump, a push of antifreeze in the hose will be felt.
- Large free play of the ball bearing of the pump - damage to the ball bearings.
The temperature arrow indicator is located closer to the middle. It is necessary to brake to check the radiator. For which the inoperability design is intended, the unit and the pump drive will heat up.
It is necessary to change the water pump if the car's mileage is 90 thousand km.
replacing a pump for a VAZ 8 valve internal combustion engine
If antifreeze begins to leave the expander, it means the pump needs to be replaced. We carry out what remains to be done for our client operations according to the subsequent plan.
- The timing belt protection shell is removed, using a screwdriver, three bolts are pulled out: the left one in the center, two at the rear.
- The Kalina engine has eight valves. The pump pressure guard must be removed, but the camshaft gear must be removed first.
- Unscrew the fastening screws to loosen the strap. The crankshaft and timing gears are aligned according to marks, so you need to try to make sure that the loose belt does not slip a few teeth on both gears.
- The timing gears are removed, then the fastening protection bolts - two middle ones, three lower ones. The bottom bolts hold the pump.
- The protection is dismantled and the pump is pulled out using a screwdriver. The fastener connections are cleaned of dirt and rust.
- Installation of the pump is carried out in reverse order, the gasket is lubricated with sealant.
Source
Snapshot3
...by aligning mark 1 on the crankshaft toothed pulley with rib 2 of the oil pump cover.
...by aligning mark 1 on the crankshaft toothed pulley with rib 2 of the oil pump cover.
If necessary, repeat adjusting the valve timing and tensioning the timing belt. We perform assembly in reverse order. Tighten the generator drive pulley mounting bolt to a torque of 105–110 Nm.
[14 Lada Granta maintenance operations that will help you save]
[How to save money on scheduled maintenance of Lada Granta] [Maintenance of Lada Granta at 2.5 thousand km] [Maintenance of Lada Granta at 15,000 and 105,000 km] [Maintenance of Lada Granta at 30,000 and 60,000 km ] [Maintenance of Lada Granta at 45 thousand km] [Maintenance of Lada Granta at 75 thousand km] [Maintenance of Lada Granta at 90 thousand km] [Carrying out maintenance yourself - general recommendations] [Safety rules for doing it yourself carrying out maintenance] [Tools required for maintenance of Lada Granta] [Lamps used in the Lada Granta car]
