To avoid engine overheating, the owner of a Lada Kalina is recommended to constantly monitor the level of antifreeze in the cooling circuit. For this purpose, there are special marks on the body of the expansion tank. The level should not be below the minimum and above the maximum. If there is a gradual decrease in the amount of antifreeze, then there is a high probability that a fluid leak will appear. In Lada Kalina, such hot spots can be areas connecting pipes to the radiator, tank or thermostat, as well as the pump gasket. In this article we will talk about how to drain antifreeze, as well as how to replace coolant in a car.
Replacing coolant on Kalina
Welcome! Thanks to this liquid, the car engine is cooled - the crankshaft, camshaft, cylinder block and other parts.
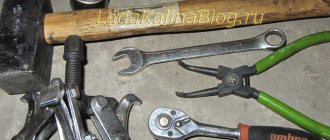
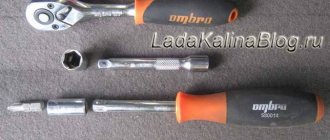
Over time, the liquid becomes unusable and loses its properties: the additives expire, the car begins to overheat much more often, and this leads to rapid engine failure. Note! You will need the following tools: a repair kit, socket wrenches, hex wrenches, wrenches and screwdrivers, a clean rag to remove traces of spilled liquid on the car engine.
Summary:
When to change the fluid?
There are several opinions: some complain about the replacement according to the regulations, others - that it can take longer, who to believe? Recently, many fakes have been produced for auto parts and components, and liquid is no exception. Therefore, when choosing a new liquid, be extremely careful. (The article will help you recognize a fake and buy a quality product: “Detailed information about Antifreeze and Antifreeze”)
The factory recommends changing the fluid every 75 thousand km or 3 years from the moment of filling. Keep in mind, these are deadlines. If possible, replace more often, do not let the additives wear out, because thanks to them the cooling system is protected from premature corrosion and other unfavorable things.
Note! So, we change the fluid either according to the factory’s recommendation or according to its appearance. To do this, unscrew the cap of the expansion tank (indicated by the arrow) and look inside. If the color of the liquid changes - it has acquired shades of rust, has become red-brown, then it is time to change it. An oil film on the surface is also an alarm bell for replacement.
Useful expert advice
If the expansion tank cap leaks and does not hold pressure, it should be replaced
- The lid will expand. tank 2108 2108-1311065 Automatic device price from 130 rub.
- The lid will expand. tank 2108 LUZAR LL 0108 price from 100 rub.
- The lid will expand. tank 2108 Chistopol 2108-1311065 price from 70 rub.
After replacing the antifreeze, check all pipes for signs of leakage. If necessary, replace the pipe clamps.
AVTOVAZ recommends replacing the fluid in the cooling system of the Lada Kalina every 75 thousand km of the vehicle or after five years, whichever comes first. Our illustrated step-by-step instructions will help you complete this procedure yourself.
LADA > Kalina
It is more convenient to replace the coolant when the car is installed on an inspection ditch or overpass.
How to replace coolant on a VAZ 1117-1119?
At engine operating temperature, the fluid heats up to 100 degrees - you can get burned. Sometimes you urgently need to cool the liquid - unscrew the cap of the expansion tank. Act carefully and smoothly, and completely remove the lid only if the hissing sound disappears, otherwise the air inside the tank will knock out the lid and the liquid will flow out in a column - everything around will get dirty, and you can get burned. It is best to work with a cold engine.
Remember! The liquid is highly toxic, pour it into a tightly closed container and throw it away not in a bucket, but in a landfill!
Merging
Drive the car into the inspection hole and ensure that it stands level. If this is not possible, park the car so that the front is higher than the rear.
Note! Securely secure the car using the handbrake, set it to speed, and place stones under the rear wheels. Remove the mudguard from it (the article will be useful for you: “Replacing the engine mudguard”) and, if present, the crankcase protection. If you are 100% sure that the liquid will not get on the mudguard and protection, then you can not remove them from the car!
Unscrew the nut securing the minus terminal to the battery (For more details, see the article: “Replacing the battery in a car”, point 1)
Note! After removing the terminal, remove the ignition module from the car by unscrewing the hex bolts (described in detail in the article: “Replacing the ignition module on a VAZ”!). Applies to 8 valve cars; for 16 valve cars we do not remove the module.
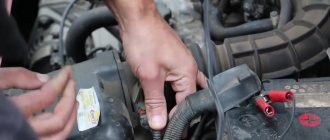
Unscrew the cap of the expansion tank and place some container under the drain plug of the cylinder block (indicated by the arrow). Remove it using a spanner and drain all the liquid from the block into a substitute container. Now repeat the steps for the radiator fluid; there is a plug on it that can be unscrewed by hand.
Note! Liquid from the drain hole will stain the cylinder block. Take a cloth and wipe dry the places where it got in!
Close both plugs and move to the throttle assembly. You will find a hose that goes to drain the coolant (see photo). Loosen the clamp on the hose and disconnect it by hand from the throttle assembly fitting (the fitting is indicated by the arrow).
Note! This operation will help avoid air locks: air entering the pipes does not allow fluid to escape into the expansion tank; instead of the required fluid level, there will be air, which means the engine will overheat. By the way, because of the traffic jams, the stove heats very poorly!
Pouring
Start by yourself or ask an assistant to pour liquid into the expansion tank while holding the drain hose (we disconnected it from the throttle body). As soon as liquid begins to flow out of it, connect it to its place and tighten the fastening clamp thoroughly.
Note! Continue adding fluid until it reaches the MAX mark on the reservoir. Screw the tank cap tightly, the main thing is not to break the thread - we observe the measure everywhere. See the video below for more details, keep in mind that it’s not Kalina!
1449660640_2279_4_9a_02
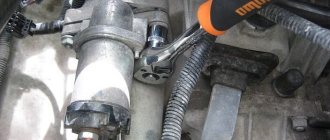
On a vehicle with a 16-valve engine equipped with a cable-driven gearbox, access to the drain hole in the cylinder block is prevented by the starter. In addition, the leaking liquid will inevitably get inside the starter.
Therefore, the starter needs to be removed. Disconnect the wire terminal from the negative terminal of the battery. By pressing the latch of the wire block, disconnect the block from the traction relay connector. Remove the protective cap from the nut securing the tip of the wire connected to the positive cable of the battery.
Which antifreeze to choose and what volume is needed
To completely replace the coolant in a 2nd generation Lada Kalina/Kalina car, you need 7.8 liters of antifreeze or antifreeze, depending on what you choose. Felix red antifreeze is poured from the factory.
To completely replace the coolant (coolant), we will need to purchase either one 10 liter canister or two 5 liter canisters.
Choosing antifreeze to replace
If red antifreeze was added from the factory, then we recommend replacing it with red one.
- AGA 003Z (-40*) red 10l price from 1000 rub.
- Professional Premium G-12 red 10 l price from 700 rub.
- SINTEC LUX G-12 red 10l price from 1000 rub.
- FELIX Carbox-40 (10 l) red price from 950 rub.
- NIAGARA G12 (10 l) red price from 800 rub.
- Arctic Circle G12 (10 l) red price from 700 rub.
All of the above manufacturers have proven themselves, so antifreeze from these manufacturers can be used as a replacement.
What is needed for replacement
- Container for draining old antifreeze for 6-8 liters
- 16mm head
- 13mm socket wrench for removing the starter on the 16 valve version of Kalina
It is better to replace it with a cold engine. Before starting the replacement, you should release the pressure in the system by unscrewing the cap of the expansion tank. In order to freely access the drain plug, it is necessary to remove the middle mud flap.
Features of front and rear wheel brakes
The bolts are placed in the passages of the guide blocks, pressed by the guide spring grooves. A piston with a sealing ring of rectangular cross-section is placed inside the cylinder. This ring provides the most rational distance between the disc and the brake pads. This organization of Kalina's braking system contributes to its efficient functioning.
In addition to the head system, the developers equipped the Lada with a mechanical parking brake, which is driven by the brake mechanisms of the rear wheels.
- adjusting rod;
- lever arm;
- two cables;
- equalizer;
- spacer bars;
- pad drive levers.
Instructions for replacing antifreeze in the cooling system of Kalina/Granta engines
To replace the coolant, you need to drain the old antifreeze, tighten the drain plugs and fill the tank with new liquid. Step by step you need to do the following:
- We unscrew the plastic plug screwed into the drain hole of the radiator tank (circled in Fig. 2);
- Drain the coolant into a suitable container with a volume of 6 liters or more;
- We unscrew the cap of the expansion tank, the one that is used to top up antifreeze;
- Drain the remaining coolant;
- We move the container under the engine;
- We unscrew the drain plug of the cylinder block using a 13mm hex key (see Fig. 2);
- Drain the remaining coolant;
- We wrap both drain plugs.
As you can see, there is nothing complicated here. But it is better to first study the recommendations listed below.
Engine and radiator drain plug
To gain access to the plastic radiator cap, remove the central mudguard of the engine compartment. In Kalina Cross, it may be necessary to remove other parts that make up the off-road body kit. The plug screwed into the engine jacket cannot be unscrewed without removing the ignition coil. And before performing this action, remove the negative terminal of the battery.
Any manipulations are carried out only on a cooled engine. It is recommended to always disconnect the negative terminal of the battery.
After the antifreeze is drained, both plugs should be in their rightful place. Then the system is filled with new coolant, pouring it into the expansion tank up to the “MAX” mark. The tank cap is tightened, and the engine is started, while turning on the heater to “maximum”. As the coolant level decreases, it is brought to normal. Remember that when the engine is running, the plug remains tightened.
Why does it flow
If the level of the recently filled substance began to decrease sharply, then this action may be the consequence of some breakdowns. Now we will look at them.
- The pipe is cracking; in this case, you need to check the clamps and tighten them tighter.
- Mechanical damage in the radiator, the situation can be corrected by welding or gluing the necessary parts.
- The pump has broken down, or rather the pump has worn out; in this situation the pump will have to be replaced.
- The most difficult failure to fix is when the element leaks from under the head. With this breakdown, you will most likely have to contact a service center, where they will disassemble the engine and repair the head.
- The leak occurs directly into the interior of the car, try to look under the carpet on the driver or passenger side, if it is wet or damp, it means that the element is leaking here.
How to find the reason
Start checking with the electric motor. To do this, disconnect the electrical wires from it and connect it directly to the battery, observing the polarity. If the fan does not turn on, that is the problem. If it works, you need to look for another reason.
Check all contacts on the connectors, and then the relay and fuse. They are located in an additional mounting block, which is located to the right of the instrument panel near the lower heater air duct.
The fuse (50 A) can be checked with a tester; it is better to take a relay that is known to be working and install it in the appropriate socket. If the problem is not solved, move on.
Checking the temperature sensor. To do this, warm up the engine to operating temperature, turn it off and disconnect the sensor. It is located on top of the thermostat housing. When the sensor is disabled, the controller must independently start the fan to operate continuously.
Start the engine and wait for the fan to turn on. If the coolant temperature has reached a critical value and the fan does not turn on, you need to look for a break in the electrical wiring.
Do I need to change the fan?
If you have determined that the problem is in the fan itself, or rather in its electric motor, you can try to repair it. Most often, it stops working due to failure of the brushes, or due to problems with the rotor bearings. Less often the collector becomes unusable or a break occurs in the winding.
If the fan cannot be repaired, it must be replaced.
Under no circumstances should you drive a car with a non-functioning fan. Overheating of the engine will inevitably lead to the destruction of the rubber hoses of the cooling system, gaskets, and also threatens the failure of parts of the piston group.
Possible malfunctions of the ODS, diagnostics
Almost always, a breakdown of the cooling function of a car is caused by an antifreeze leak. You should inspect the car under the hood for possible leaks. The cause of the leak may be:
- or a leaky clamp;
- or a radiator failure.
Then in the first case the element is replaced; this is not difficult and does not take long. As for the radiator, it is better to have it repaired. There are also no particular difficulties here: often you just need to solder the holes.
The reasons for overheating of this car can also be:
- thermostat. Its suitability is checked using both pipes: the temperature of the latter should not be sharply different (this is determined on a warm engine). Otherwise, the thermostat is faulty and antifreeze circulates in a small circle;
- clogging of radiator honeycombs. You can solve the problem by cleaning the outside of this element. Often this is not always easy to do, but there are no other methods other than manually cleaning the honeycombs;
- Fan malfunction. When the heating level of the coolant increases, this part should begin to operate. If this does not happen, check the relay, wiring or t° sensor;
- air in the coolant system. Lada Kalina is not insured, among other things, against the so-called air lock inside the system. In general, previous types of breakdowns are eliminated quite quickly and almost everything is clear with them. In the latter case, it is necessary to understand in more detail. The question - how to remove air from the Kalina cooling system - is really very important for the optimal functioning of the totality of the elements of this car.
Airlock
If the cooling system becomes airy, you need to do the following: with the expansion tank cap open, start the power unit, squeezing the gas pedal from time to time, warm it up until the t° sensor “reaches” the red scale. After “starting” the ventilation device, “add up the gas” a little more and then you can turn off the ignition.
If the cooling system is still leaking air and the above measures have not led to anything, you should act more radically. What needs to be done to remove air from the cooling system?
First, remove the power motor screen (dismantling is done in an upward direction).
Loosen the clamp with a screwdriver and remove one of the tubes from the heating fitting of the throttle assembly.
Unscrew the cap of the expansion tank. Cover the neck of the opened container with a clean piece of cloth. Now blow into the tank: coolant should flow from the tube that was removed. If you fail to break through the above container, close the lid and place the tube in its place.
Next, warm up the engine again and turn off the ignition. Then the tube must be removed again, without removing the lid from the tank, and wait until the antifreeze flows.
Since this liquid is very poisonous and dangerous for people, drain the coolant with extreme caution. Remember about safety: get rubber gloves
Monitor the temperature of the tubes. Keep in mind that you only need to drain the coolant when the engine has cooled down.
Now the tube is put on the fitting, the clamps are tightened. At this stage, the problem of how to remove air from the cooling system of the car has been successfully solved. As you can see, it is possible to eliminate faults in the ODS without the participation of professionals.
SOD Lada Kalina in a certain sense requires improvement.
At the moment, there are the following methods to improve it:
- rework. The car is equipped with a new thermostat. Thus, the temperature of the antifreeze will become stable, and the activity of the interior heating elements will return to normal;
- to minimize coolant malfunction, the machine is equipped with a coolant filter;
- an additional pump in the above-mentioned power unit system. This will force the antifreeze to circulate through the appropriate channels faster, which will definitely reduce engine overheating. And a plus - in cold weather you will not freeze in the car.
Types of coolant for Lada Kalina
In Lada Kalina, the coolant must be replaced on a regular basis every 50 thousand kilometers. It is worth remembering that when operating a car in difficult urban or extreme conditions, the coolant should be replaced more often, because the engine operates under increased loads and the antifreeze reaches its potential faster.
In order to choose a high-quality coolant for the Lada Kalina, you must give preference to the original manufacturer, for example, the Cool Stream brand. The car owner should remember that before updating the refrigerant, the used coolant must be drained and the system flushed with a special compound or distilled water. This is, first of all, necessary to remove suspended matter, metal shavings from the bottom of the system and the remains of old liquid.
Replacing antifreeze on Lada Kalina
This is what a used one looks like. Antifreeze, very tired
The entire cooling system of the Lada Kalina engine contains 7.6-7.8 liters of antifreeze, and according to official instructions it should be changed every 60,000 kilometers or five years of operation, whichever comes first.
Advice!
Possible option for replacing standard antifreeze
Lada Kalina cars are filled with Felix Carbox 40 antifreeze, red, from the factory. Therefore, it is up to you to decide what kind of antifreeze to fill in during a complete replacement, the main thing is that your desires coincide with the temperature range in which the car is operated.
Tool for the job
In order to carry out all the work, we will need the following:
- New antifreeze (coolant) in the amount of 8 liters.
- Crosshead screwdriver.
- The key is "13".
- Socket head for “13” and “17” with ratchet.
- Container for draining waste liquid.
- Rags.
Step-by-step process for draining antifreeze
Before you begin work on replacing the fluid, you must place the car on a flat surface or on a slight slope, provided that the front part is higher than the rear. Also take into account the fact that the machine’s engine must be cold to prevent the possibility of getting burned during operation, so it is best to carry out such work in the morning, after the machine has cooled down overnight.
Functional range of elements of a car cooling system
The standard cooling system consists of the following elements:
- sensors – determine t° in certain auto mechanisms; one of the management elements of the system;
- pump – makes it possible to circulate liquid in the SOD; operates in a forced mode;
- pipes – coolant moves through them;
- expansion tank - compensates for the volume of antifreeze, since due to temperature fluctuations it narrows and expands;
- radiator - a device that discharges excess heat into the environment;
- fan – activates the cooling process by forcing air; With its help, the cooling intensity increases;
- Thermostat - although small, is a very important element that regulates the amount of antifreeze; provides a “comfortable” temperature regime throughout the entire system.
Operating principle
The cooling system operates in a self-regulating mode, which is aimed at maintaining optimal temperature in the power unit. If the oil temperature rises significantly, the system does everything to ensure that the temperature inside the engine decreases.
Thus, with the close interaction of the above elements, the system functions. It automatically sets the necessary conditions for the inclusion and operation of structural parts, which ensures effective cooling of the power unit.
And if any problems arise with the functionality of the components of this system, it is necessary to carefully examine the safety of its main components. If the driver is qualified and experienced enough, he can cope with the task independently. Otherwise, it is better for an owner who is not very knowledgeable about cars to seek help from a service station.