There is one big problem - the risk of burning out the electronics unit, which, by the way, happened to many Vesta owners. For example, if you put LEDs in the DRL of a sedan, then after a short time they will simply stop shining. As a rule, in such cases, the fuses are replaced, which are marked in the instructions with the symbols F16 and F17.
However, there are none under the cover that covers the fuse box. In the end, it all ends with a burnt-out electronics unit, which has to be replaced. It's all about the higher resistance of the diodes, which is why Vesta's electronics unit cannot withstand it.
The most unpleasant thing is that this is not a warranty case, so contacting the dealership for a warranty replacement will not help. You have to buy the unit yourself, and it is quite expensive - it is not always possible to find a part even for 8,000 rubles, and sometimes the price tag for an element reaches 19,000 rubles!
Moreover, such a problem can arise not only because of LEDs. If you thoughtlessly select and install components, it is more than possible to end up with a burnt-out unit.
Installing a recorder in a Lada Vesta car: photos, videos | ▼ About Lada ▼
We insert our wire into the standard wire clips. This way we will secure it, it will not dangle inside the rack and create extraneous noise.
Expert opinion
It-Technology, Electrical power and electronics specialist
Ask questions to the “Specialist for modernization of energy generation systems”
Lada Vesta and 4 secret functions in it, which almost no one knows about - 4 WHEELS - March 12 - 43630650421 - MirTesen media platform Press the lock of the working cylinder of the headlight range control and by turning the cylinder counterclockwise until it stops, remove the working cylinder of the headlight range control from the headlight housing . Ask, I'm in touch!
How to remove the interior lamp? 4 probable malfunctions
- Take the necessary measurements;
- Using the obtained parameters, cut out a stencil from available materials (paper, cardboard);
- Disassemble the lampshade, mark the recesses for the bolts on the model;
- On the ceiling of the cabin, select the place where you would like to install the lamp;
- Fix the stencil on the ceiling where the lamp will be installed with adhesive tape;
- Trace the outlines;
- Attach the lamp, make sure the parameters match;
- You need to cut the sheathing with a tool with a very sharp blade to eliminate uneven, torn edges;
- After cutting, reattach the lampshade and correct the contours;
- Where the screws will be screwed in, attach metal clamps;
- Secure the lampshade.
Schematic location in the engine compartment
| Name | Block pinout |
| RP 1 | Lighting, seat heating |
| RP 2 | Responsible for the cigarette lighter |
| RP 3 | Heated rear window |
| RP 4 | Front windows |
| RP 5 | Interior heater (stove) |
| RP 6 | Window lifter for rear doors |
| RP 7 | Gasoline pump |
| RP 8 | Car socket (powered by 12 Volts) |
| RP 9 | Heated windshield |
| RP10 | Heating relay |
| RP11 | Starter |
| RP12 | Cruise control |
What to buy?
- Low beam – LED lamps OPTIMA CL-6 LED HEADLIGHT. Installing such lamps will also require the purchase of universal rubber covers for the headlamp.
- Dimensions and DRLs are MTF W21/5W LEDs. They fully comply with the requirements and match the polarity.
- License plate light – PHILIPS.
Most likely, for some reason the circuit controller saw a parameter perceived by its logic as K/C. Disconnect the negative terminal for 10 minutes.
Any LED lamps that are just the right size may not work with your controller, you need to select them.
Most likely, for some reason the circuit controller saw a parameter perceived by its logic as K/C.
Any LED lamps that are just the right size may not work with your controller, you need to select them.
What kind of lighting do you prefer?
Built-in Chandelier
Causes and solutions
| Cause | Remedy |
| Damage to the insulating layer of the wiring, short to ground | Replace damaged wiring section |
| Loose contact at terminals, end switches | Crimp the terminals, replace with new ones, if necessary, update the lampshade |
| The lamp has burned out. Number plate light does not light up | Replace with new(es), install LED analogue |
| Formation of condensation and moisture inside the lampshade | Wipe dry, replace seal |
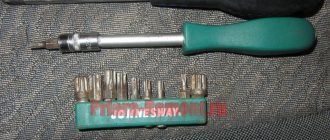
Required Tools
Considering the fact that on some car models the ceiling lamps are secured with spring clips, removal will require a thin slotted screwdriver.
First of all, you need to decide on the mounting method. To do this, you should carefully examine the ceiling. If there are small special grooves on the sides, this means that spring clips are installed.
The lampshade may have one or more spring clips that will need to be released with a thin screwdriver.
Having pressed the latch with a screwdriver, you must carefully pull the lamp down and remove it from its seat. If there are several latches, they should all be sequentially removed from the hook, pulling the lamp down with your fingers.
General scheme
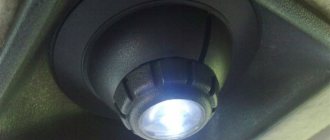
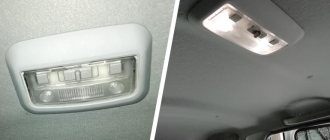
Despite the external differences, all ceiling lamps have almost the same design and electrical connection diagram. The housing contains contacts for installing and connecting one or more lamps. Switching is carried out by a switch that has three positions, allowing you to turn on the light manually or automatically when the doors are opened.
Removal features for various popular car brands
On Suzuki brand models, as well as on many cars from Japanese manufacturers, the lampshade glass is not separated from the body and if the lamp is replaced, the entire lamp is removed. A screwdriver is used to disengage the latches.
On domestic cars Lada Vesta, Lada XRAY and Lada Granta FL, the ceiling lamp is combined with the ERA GLONASS emergency response system; to replace the lamp, you need to remove the decorative cover with the glass of the lampshade using a screwdriver inserted into a special recess.
Expert opinion
It-Technology, Electrical power and electronics specialist
Ask questions to the “Specialist for modernization of energy generation systems”
LADA Granta, removal of the interior lamp, instructions online To independently replace the license plate lamp on a Lada Vesta or other modern LADA car, you can use the guide below. Ask, I'm in touch!
Replacing a burnt-out rear license plate lamp on a Lada Vesta
- For convenience, disconnect the block with wires from the flashlight;
- We remove the socket together with the burnt out lamp (Fig. 13-2, item 2), turning it clockwise;
- To remove the lamp (Fig. 13-2, item 3) from the socket, just pull it towards you; there are no complicated latches on it;
- In reverse order, install the new lamp in the lampshade.
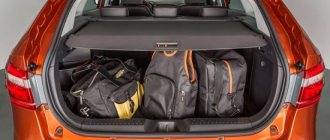
The lamp replacement operation in Vesta does not pose any serious difficulties. On some Lada models, a problem may arise with the length of the wires - if they are too short, they simply will not allow the lamp to be pulled out normally from the mounting location. In this case, it will be necessary to dismantle the trunk lid trim or other elements that prevent the lamp from being removed.
Please note that on our website there are several useful articles on the electrical system of the Lada Vesta model:
Everything about the ABS system - how it works, what problems there may be and how to fix them;
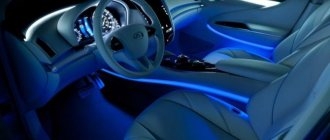
Interior lighting
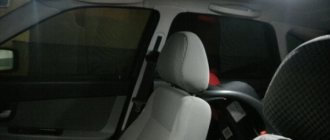
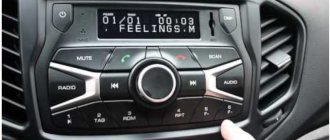
LED lighting of the Lada's interior is represented by lighting in the recess on the front panel, lighting of the driver's foot area and the passenger sitting next to the driver. A special feature of the backlight is its operating mode in light-music mode.
Installing additional lighting for rear passengers on Vesta and Vesta Cross begins with determining the location where the lamp will be located. It is best to do this approximately at the level of the backs of the front seats, so that the light is directed towards the feet:
- Using a pre-prepared stencil (put the lampshade on cardboard and outline its back), transfer the outline to the ceiling upholstery.
- Using a sharp blade, carefully cut along the line.
- Wrap the soldered wires from the rear lamp with a tight seal so that “crickets” do not form during the operation of the car.
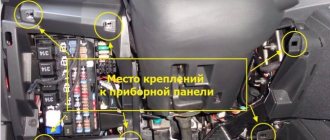
- Wrap their end to the wire, push it into the cut hole to the place where the front lighting unit is located.
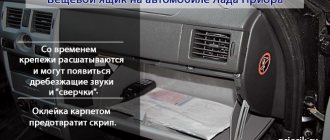
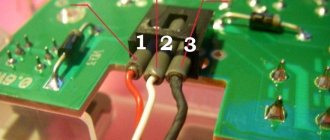
Now remove this block and find the necessary wires in the block:
- White and pink is a plus. It loses power a few minutes after the ignition is turned off (for your safety, turn off the car).
- Blue-black is a constant minus.
- White is a minus for door switches.
There is a standard diagram that clearly shows the connection.
Photo source: https://www.drive2.com/l/494120526596276644/
All that remains is to use self-tapping screws to secure the rear lamp to the upholstery and insert the front lighting unit into place.
You can add lighting to the back row of Vesta and Granta Sport by connecting the lampshade to the trunk lighting:
In order not to confuse the purpose, it is better to ring the wires first.
Expert opinion
It-Technology, Electrical power and electronics specialist
Ask questions to the “Specialist for modernization of energy generation systems”
Fuse box for Lada Vesta: detailed description Considering the fact that on some car models the ceiling lamps are secured with spring clips, removal will require a thin slotted screwdriver. Ask, I'm in touch!
AvtoVAZ prescription (unlocking circuits in EMM)
The EMM unit goes into defense. To unblock channels:
- Without removing the block from the EMM block, connect the connector with the wire to the white block, pin 3 (free).
- Connect the other end of the wire to the glove box illumination block (green wire).
- Turn on the ignition for 2-3 seconds.
- After turning off the ignition, remove the wire connection.
- Use Grade-X to clear errors in the EMM block.
- Check the functioning of the previously blocked circuit in the EMM unit.
Apparently, to unblock the circuits in the EMM block, you should apply 12 V to the 3rd pin of the EMM block for 2-3 seconds. Then reset the errors using a scanner, and this can be not only a Grade-X scanner. The order was posted by one of the users of www.lada-vesta.net.
Why are the lights not on in the Vesta cabin?
In addition to the lack of standard lighting for the rear row (except for the “Lux” configuration), the domestic car has several unpleasant features. One of them manifests itself as follows: the light in the Lada Vesta’s interior does not turn on, regardless of the position of the lighting keys.
This is due to the limit switch located in the doors - the rubber that protects it has different hardness and in some places may not reach the sensor.
It is a misconception that the fuses may blow and therefore the lighting does not work - it is powered directly from the TsKBE.
Way to solve the problem
On a Lada Vesta, when the interior light is not on, do the following:
- Remove the boot from the end cap. A simple option, but you just need to know that if dirt gets in, the sensor may again incorrectly read the door position.
- Replace the limit switch itself if, even with the rubber band removed and the surface clean, the problem with the light remains. Just pull it out, disconnect the terminal and connect a new one.
Photo source: https://www.drive2.com/l/496319000096014965
Useful tips Connection diagrams Principles of operation of devices Main concepts Meters from Energomer Precautions Incandescent lamps Video instructions for the master Testing with a multimeter
Expert advice on self-replacement
The arrangement of fuses in a Lada family car is typical for Lada Kalina, Priora, Vesta, Grant.
In the engine compartment and in the cabin
Where are the fuses on the Lada Vesta:
- the main unit in the car interior, to the left of the steering wheel;
- additional module in the engine compartment, on the right behind the battery.
Total quantity: 12 relays - breakers, 50 fuses.
Rear lighting layout
External lights are those located on the fenders of the car, internal ones are those located on the trunk lid. You can see in more detail in the diagram below, all the component numbers in the table.
| № | detail number | the name of detail |
| 1 | 8450006963 | rear left lamp |
| 2 | 8450006965 | rear inner left lamp |
| 3 | 8450006962 | rear right lamp |
| 4 | 8450006964 | rear inner right lamp |
| 5 | 21910375701001 | rear fog lamp |
| 6 | 7703077469 | clamp |
| 7 | 7703033168 | hex nut with flange m5x0.8 |
| 8 | 7703077469 | clamp |
| 9 | 7703033168 | hex nut with flange m5x0.8 |
| 10 | 7703017138 | Large pan head screw |
How much do the lamps needed for replacement cost and their part numbers?
Stop lamp
- Osram P21/5w O-7528 price from 40-45 rub.
- Philips P21/5w P-12499 price from 45 rub.
- Bosch P21/5w 1987302202 from 45 RUR
Turn signal lamp
Osram WY16W 921NA price from 70 rub.
Reversing lamp
- Osram WY16W
- BOSCH W16W 1987302205 from 50 rub.
- Koito W16W 1781 from 60 RUR
- Philips W16W P-12067 from 55 RUR
Lamp of duplicate dimensions
- Osram W5W O-2825 from 30 rub.
- Philips W5W P-12961 from 30 rub.
- Koito W5W 1583 from 25 RUR
- Bosch W5W 1987302206 price from 30 rub.
Reviews
| № | Positive |
| 1. | Georgy Nikolaevich , 42 years old (drive2.ru): the car has been three years old since purchase, I haven’t made any investments, only scheduled maintenance. The fuses are all standard, nothing has been changed. |
| 2. | Mikhail , 48 years old (prom.ua): in two years I replaced two power modules once. I didn’t contact the service, I limited myself to my experience and skills. |
| 3. | Sasha , 38 years old (autotoday.com): There are no complaints about the standard power modules yet, the car is only a year old, but I heard that you can install a unit from Renault Duster, Logan of the second generation. |
| 4. | Kirill , 45 years old (rozetka.ua): mileage 75,000 km, only recently replaced five power modules with new ones. I believe that a resource of 75,000 km is more than enough for domestic transport. Of course, there is still a long way to go to reach foreign brands, but this is progress. |
| 5. | Petrovich , 44 years old, (avtoflit.com): I bought the car second-hand, good condition, five years old. I didn’t do anything to the power system, the units are operating normally. |
| 6. | Nikolaevich , 45 years old, (autotoday.com): I am satisfied with the quality of manufacturing and assembly of the Lada Vesta, no comments. I fix minor damage myself. |
| 7. | Vasilievich , 41 years old, (drive2.ru): the car is four years old, only recently replaced three relays - breakers in the engine compartment. Good build quality Lada. |
| Negative | |
| 8. | Nikiforovich , 49 years old (prom.ua): problems with the power system began after buying the car. I repeatedly contacted the service station due to burnt-out power modules. The problem is still not resolved. |
| 9. | Nikolai Semenovich , 46 years old, (avtoflit.com): I do not recommend standard fuse blocks for the Lada Vesta. If possible, replace with new ones from Renault Duster, Logan of the second generation. |
| 10. | Vyacheslav Petrovich , 47 years old, (drive2.ru): the car is new, but the weak points are inherited from previous generations. |
| 11. | Stanislav Vasilyevich , 39 years old, (autotoday.com): after two years of operation, the car began to crumble in the literal sense of the word. The build quality is still raw and needs improvement. |
Replacing the fuse
The process of replacing a faulty fuse module is simple. But be careful, insert modules with similar current ratings.
Exceeding or underestimating the amperage range is not permissible, because this can cause equipment to fail prematurely.
Sequence of actions when replacing in the cabin:
- Open the driver's door.
- Under the steering column we snap off the plastic casing; it is secured with six clips.
- Using tweezers, remove the module according to the serial number, which is indicated on the inside of the cover.
- We insert the new module and snap the cover.
How to get to the fuses in the engine compartment:
- Stop the engine and open the hood.
- A plastic case with relay breakers is mounted behind the battery.
- Carefully unclip the cover and replace the relay and power modules.
What fuses are used on Lada Vesta
Cars of the Lada Vesta family use knife-type power modules. The manufacturer abandoned the cylindrical configuration long ago due to the inefficiency of the latter.
Modifications of power modules:
The differences between each type are: shape, size, weight category, seating depth, installation location (interior, engine compartment).
Review of Manufacturer Prices
| Name/article | Price in rubles |
| Housing cover Lada Vesta 8450007436 | From 300 |
| Jcase | From 180 / piece |
| Mini | From 140 / piece |
| EMM-T4 231A03142 (Renault) | From 170 / piece |
| PF895652A2 (Japan) | From 220 / piece |
*price indicated as of March 28, 2019.
Conclusion
Installing new power modules requires careful attention on the part of the technician. It is unacceptable to violate the current range. The exact data for each of the fuses is indicated in the operating instructions for the technical device. If difficulties arise, contact service station specialists for help.