In connection with the installation of the armrest from SW, I completed the work on heating the rear passenger seats. In the first part I described how I installed the elements.
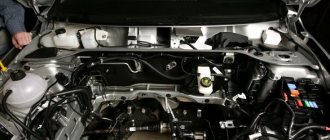
About connecting wires. I took +12V for the load directly from the fuse box in the passenger compartment from F5, the connection point to fuse F5. +12V permissive taken from fuse F27. I took the +12V backlight from the blue wire of the cigarette lighter connector (shown in the photo below).
Winter options in car equipment become relevant in the cold season. This question is especially interesting for those people who want to buy a new AvtoVAZ model - Lada Vesta. After all, no one wants to sit on a frozen seat on a frosty day, especially in a new car. As you probably guessed, we will talk about heated seats on Vesta. You will learn about car configurations equipped with this option, its characteristics and do-it-yourself installation.
How to turn on the heated windshield
The design of the windshield heating on the Lada Vesta is identical to its foreign counterparts. The function is controlled by one power button in the car's interior, which is also responsible for the electric heating of the mirrors and rear window. The maximum configuration of the Lada Vesta is equipped with a “Defrost MAX” button. This function involves simultaneously turning on the high speed of the stove fan, which significantly reduces the warm-up time. The function immediately activates the air conditioner, which is necessary to eliminate the effect of fogging, since this is the reason for the deterioration of visibility and causes unnecessary inconvenience to the driver.
Defrost MAX mode
On luxury Vestas with air conditioning, the “Defrost MAX” mode appears. It allows you to most effectively clean all windows and exterior rear-view mirrors from fogging, freezing or icing. To enable this mode, you need to press the corresponding button (No. 24) on the climate control unit.
When the mode is activated, the air conditioning (if conditions permit), electric heating of the windshield and rear windows, as well as side mirrors will be forcibly turned on. The entire air flow is directed to the blower nozzles of the windshield and front side windows, and the maximum air speed and temperature are also set.
Installation of covers
The new covers are stretched over the old ones, and in most cases there is no need to remove the plastic covers from the outer sides of the front seats - just tuck the side part of the cover under them, pull it on and secure the stretcher with a hook at the bottom. It should be noted that the covers of the right and left front seats differ from each other in the location of the outer side part (from the door side), which is higher than the inner one.
The covers are stretched over the corresponding parts of the seats and smoothed out, their fastening straps are fastened tautly from the bottom, and the zippers of the rear backrest covers are fastened. The seams of new products should be located strictly on top of the old ones, and the holes for the headrests should be located above their mounting sockets at the end of the backrests. After combining these landmarks, a hole is made in the rear part of the driver's seat cover for the lumbar support outlet.
Leather or velor, or maybe jacquard? Choosing material
Materials from which covers for Lada Vesta are made:
- Genuine Leather. Prestigious, solid and expensive. The material is durable and extremely pleasant to the touch.
- Faux leather. Very practical (easy to clean, breathable) and durable material. It looks representative, not much inferior to its natural counterpart. Of course, only high-quality leatherette has these advantages.
- Eco leather. The most modern and technologically advanced of all the materials discussed in this article. The prefix “eco” means the absence of polyvinyl chloride (a type of plastic) in the material for the covers. This unique material perfectly allows air to pass through, but at the same time retains moisture. Eco-leather does not deteriorate when exposed to extreme temperatures and does not have an unpleasant odor. The material feels pleasant and expensive to the touch.
- Jacquard. An interesting material, the result of a clever combination of natural and artificial components. Well ventilated, lasts a long time. Only the high price can push you away from jacquard.
- Velours. The most practical option, and it costs reasonable money. Durable and fits tightly to the seats. There are a lot of color options. The only drawback is the “old-fashioned” look.
- Synthetic polyester. Durable, dense and unpretentious material. A significant disadvantage is mediocre ventilation.
- Plush. Soft, pleasant to the touch material. Unfortunately, it wears out quickly.
- Fur. Fur covers perfectly protect car seats from wear and tear and keep the owner warm in the winter cold. They make the interior of the car more luxurious.
- Combined material (covers of one of the types given above, using various inserts).
Let's take a look at the results of a survey conducted on our website recently, dedicated to the operating features of Lada cars.
Visitors to our resource were asked the question: “What seat covers for Lada Vesta do you recommend?”
“Prize places” were distributed as follows:
- Eco leather.
- Genuine Leather.
- Jacquard.
- Combined material.
- Faux leather.
- Fur, velor.
Based on this rating, compiled by car enthusiasts themselves, we choose covers made from “eco-friendly” leather for today’s consideration.
Heated seats.
These are simple buttons
these are 3 position
In general, an electrician is needed.
Lada Vesta SW Cross 1.8 5MT Luxe Multimedia Mars
How does the morning begin in winter? When others clean the windshield with plastic cards, the windshield heating on Vesta turns on. Snow covering roads and vehicles, coupled with low temperatures, causes inconvenience for motorists - they tried to solve this problem with the Lada Vesta. Russia is famous for its harsh winters. AvtoVAZ tried to adapt the new models to the winter season. The Lada Vesta engine starts even in 30 degree frost, and the design of the locks prevents freezing. Additional options on the luxury model, such as a heated windshield, rearview mirrors and seats, are a bonus for drivers. In cold weather, you don’t need to manually remove snow and ice deposits with a scraper; just turn on the heated windshield. On the Lada Vesta, heating will quickly and easily remove snow and ice. It is also recommended to use this function in a blizzard with snow, to remove excess load from the mechanism driving the wipers. Read the article to the end and find out how to enable it, how it works and what problems are encountered with this function!
Connection diagram
Heated seats on the Lada Vesta are connected by analogy with the Priora car. The figure shows the electrical wiring connection diagram.
On an XRay vehicle, the electrical wiring extends to the fuse box, to which the power is connected. You can also connect the wires to the heated front seats, provided the wires are thick enough. If they are thin and designed only for front heating, then it is better to connect to the fuse box.
The wires must be fixed to the body with plastic ties, and the connections must be soldered. To increase safety, it is necessary to lay electrical wiring in a plastic corrugation. Heating control buttons are placed in any convenient places, at your discretion.
AvtoVAZ tried to make the Lada Vesta sedan as adaptable to winter conditions as possible. The design of the door locks prevents freezing, and the engine can start even in severe frost (down to -30 degrees). In addition, the manufacturer equipped Vesta with heated windshields, mirrors and seats. Let’s check how well these “warm” Vesta options work in practice.
It’s -20 degrees outside, start the engine and turn on the heater (to blow the windshield and side windows), and also press the button on the panel, which is responsible for:
- heated side mirrors (at the beginning of 2016, AvtoVAZ began installing the “Electric drive and electrically heated exterior mirrors” option on all Vesta trim levels);
- heated rear window;
- heated windshield (optional).
The front seats are equipped with electric heaters, which are activated by a button on the tunnel near the gearshift knob.
Standard front seats and rear sofa - article number and price
If for any reason you decide to replace the seats, get ready to look for them by catalog numbers:
For your own convenience, you can replace the standard set with an anatomical one if you spend a lot of time behind the wheel. Orthopedic chairs are a rather individual issue, because if you lack the back support that is in the factory version, you will most likely rush to buy the first orthopedic chair you find.
Be patient and take your time: consult a doctor, describe the nature of the problem that worries you, and ask what it should be. Today the market is full of various offers where you can find “your” option.
Heated front and rear seats
With the start of production of the Lada Vesta, factory designers introduced many functions into Russian cars that had not been available for a long time. One of them is heated front and rear seats.
In Vesta, this option was introduced by engineers from the beginning of its sales in the sedan body. But seat heating was periodically improved. The first models of all trim levels were equipped only with heated seats for the driver and front passenger. Moreover, heating adjustment was carried out according to a two-stage scheme.
The seat heating buttons, which are located on the back of the gearshift knob, had two positions. One of them is on, the other is off. The designers decided to refine the system and added three-level heated seats to expensive car trim levels. This allowed the driver to change the heating temperature.
But this option is not available in the “Classic” package, and car owners still only use two-stage heating. In 2022, AvtoVAZ additionally provided customers with several new options for the Lada Vesta car.
Among them, it is worth noting the functions that are relevant for winter - heated rear seats. This innovation is available in the “Exclusive”, “SV”, and “Cross” configurations in the “Prestige” version. But Lada Vesta with gas equipment does not yet have such a function, even in expensive trim levels.
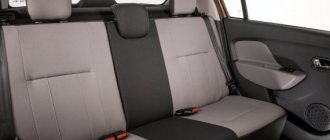
More spacious!
The back seat is like a sedan. We only slightly changed the upholstery, correcting the seams and joints. Accordingly, the seat folds, like that of a sedan, in a ratio of 2:3 - the backrest simply rests on the cushion. There is no perfect loading area, but the small hump will be pressed against the languid things and leveled out.
At the end of the rear tunnel there is a 12-volt socket, a USB port and - a breakthrough for Lada! — buttons for heating the rear seats.
Since the station wagon’s roof is the most flat (this is noticeable by the changed window frames of the rear doors), the distance from the seat to the ceiling has increased by 25 mm, and this is significant! Tall passengers, of which I am one, will feel more comfortable, since the roof does not put pressure.
Should I put covers on the seats or not?
This is the personal choice of the car owner. But generally, cases have more pros than cons. Of course, if you put cheap covers from the market on beautiful seats, the interior of the car will lose a lot in terms of appearance. But more often it’s the other way around - the standard seat upholstery looks so-so, but good covers give it a more expensive, beautiful look. Often already worn out seats are covered with covers.
Another undeniable advantage of covers is in terms of practicality. They can be removed and washed, wiped, vacuumed. And the standard upholstery underneath is like new. Before selling the car, you can remove the covers if they are frayed and sell the car with apparently new seats. The covers can be changed just like that if you get tired of them. Buy and supply a different color, a different material...
Lada Priora Sedan › Logbook › Installation of standard heated seats
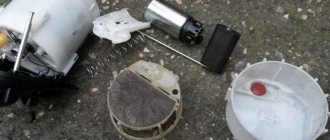
I decided to meet the winter in comfort and installed heated front seats. Since my car is not luxury, there were no heated seats. I have long wanted to install it and now my dream has come true. For this purpose, a heating set was purchased for 1100 rubles, the set of which included: 1) 4 heating elements, 2 for the lower back and 2 for the seats; 2) control unit with wires. But there was not a single piece of paper with a description or a connection diagram.
Additionally, a 4-pin relay 1119-3747210-10 (98.3747-111), 2 bolt terminals, several copper terminals (female) of small and medium size, a 15A fuse and wires were also required.
The process of installing the heating itself turned out to be not difficult, everything turned out to be much simpler than I thought (except for the fact that the car was assembled by miracle-handed engineers...). We remove the seat trim and install the heating elements. Someone sews them on for reliability so that they do not ride up under the trim, I decided to glue them to the seat lip. For convenience, of course, it is better to remove the seats.
Well, the connection process itself: I connected everything through a relay and a fuse, so that there were no unexpected problems. — connect the terminal block to the block of heating buttons — attach the black wire (“ground”) under the bolt near the handbrake — connect the gray-red (and some have it white for some reason) wire (button illumination) to the cigarette lighter illumination — red wire (+12 B) pull it under the panel to the mounting block
To relay 1119-3747210-10 (a mating terminal block is not needed): - connect contact “87” to the red wire from the block of heating buttons - connect contact “86” to ground, a bolt on the body near the mounting block - contact “85” we connect it to the blue-black wire (see photo) going from the ignition switch to the light control unit (+12 V when the ignition is on) - connect contact “30” through the fuse directly to the “+” battery (ideally).
It took me a total of about 6 hours to do everything. There is nothing complicated.
source
Sequencing
- We place the car on a flat platform.
- We provide priority safety measures.
- We move the driver's (passenger) wheel back until it stops, unscrew the two mounting screws to “17”.
- Move it forward until it stops, unscrew two more screws.
- Remove the terminals from the battery and turn off the ignition.
- Disconnect the limit switches.
- We remove the seat from its regular place.
- We disassemble the plastic lining.
- Remove the metal brackets and remove the heating element.
- We carry out troubleshooting of foam rubber, the metal base of the seat, and the electronics control unit. We replace worn parts, elements, and consumables.
- We assemble the structure in reverse order. Self-heating repair is completed.
Related link:
Head unit MMS Lada Vesta.
How heating works on Vesta
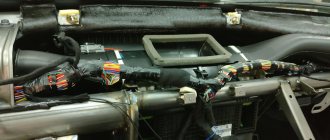
The windshield is pierced with the finest transparent filaments, which directly carry out the main function of incandescence; they are located in layers of glass. They can be seen in bright sunlight and do not cause any inconvenience when driving. The mechanism also includes wires, relays, and a fuse located under the front panel of the car. When turned on, the relay closes the contacts of the grid of filaments, as a result, the current, spreading through the system, heats the windshield
An important part of the design is the electronic control unit, which regulates excess energy costs and, if necessary, turns off the heating
What types of covers are there for Vesta?
Cases are different. There are “shirts” that usually cover only the front seats. There are covers that completely cover all seats.
Car covers come in different materials. And at different prices. From two or three thousand in the nearest market to several tens of thousands. There is also a complete refurbishment of the interior, but that’s a slightly different conversation.
Covers are made from leather, faux leather, synthetic fabric, velor, vinyl, Alcantara and even sheepskin.
Synthetic fabric covers are very comfortable and inexpensive. Easy to remove, wash and put back in place. But there are some disadvantages: they look simple, they slip in the heat, and they don’t absorb moisture well.
Velor covers are pleasant to the touch, beautiful, and do not heat up or cool down very much. It’s quite comfortable with them, but...there are also disadvantages. They wear out, velor is short-lived. Such covers often have to be replaced.
Vinyl covers are cheap, bright, but very uncomfortable. They overheat greatly and become tanned in the cold. No comfort.
Alcantara is artificial suede. Usually quite good quality. Doesn't overheat too much in the sun, holds heat well, and is ideal in winter. Pleasant to the touch. The downside is the high price. Appearance is not for everyone.
One of the newest types is eco-leather covers. Good eco-leather has better properties than leather. The price varies greatly, depending on the quality, density and thickness of the material. In essence, eco-leather is the same leatherette, but new production technologies put it on the same level as the most expensive materials.
Eco-leather allows air and steam to pass through, but does not allow water to pass through. The breathability of eco-leather is tens of times higher than that of genuine leather. The material “breathes”. These properties make it unique for the production of cases. Eco-leather is polyurethane on a cotton base. Do not confuse it with the old leatherette - PVC on fabric. Advantages of eco-leather: fairly affordable prices, does not cause allergies, pleasant to the touch, constant elasticity at plus and minus temperatures, a huge selection of colors, odorless, quite resistant to aggressive influences (cigarette ashes, liquids). Eco-leather is easy to care for - just wipe with a damp cloth.
There are also disadvantages. Eco-leather is easy to cut and scratch. In extreme heat, eco-leather covers can get very hot, just like leather ones. In winter, eco-leather is cooler than other covers, for example, velor or suede. Heated seats take longer to heat up.
Eco leather can be regular or perforated. With perforation they are usually used for the central inserts of covers for better ventilation.
Also, different types of materials are often used in the production of covers, for example, eco-leather is used on the sides and back of the seats, and a velor insert is used in the center.
Single-stage seat heating control unit VESTA, X-Ray 2020 (standard)
Dear customers, in order to avoid errors when sending a standard single-stage control unit for heating the front seats (on / off) for LADA VESTA / LADA Vesta, X-Ray / Xray from 2022. in the “Comment” line, indicate one-stage or three-stage, the model and year of manufacture of your car.
AvtoVAZ's new product - LADA VESTA / LADA Vesta quickly burst into the Russian car market and quickly won the trust of its compatriots. Modern design and a high level of comfort significantly distinguish this car from other models of the concern, but it is not spared the fate of minor malfunctions. Among them is a breakdown of seat heating, which causes discomfort to the owner in winter.
Heated front seats 8450006926 LADA VESTA / LADA Vesta, X-Ray / Xray from 2022 had only one-stage (on / off). Now AvtoVAZ has modified the seat heating control unit 8450031049, which has three gradations: when it reaches the maximum level, it automatically switches to a lower level - down to the minimum. But the rear sofa has single-stage heating, and only the pillows.
The most common causes of heating failure are:
— Fuse blown;
— Broken heating element;
— Failure of the heating switch button.
Consistent diagnostics of this defect will help to identify the cause of the malfunction. First of all, you should make sure that the fuse responsible for the heated seats is intact. To do this, open the fuse box located in the lower left part of the instrument panel. Find fuse F5 15A, remove it and make sure it is intact.
If it is in order, you should make sure the button is working. When the ignition is turned on, the indicator should light up. As a rule, buttons very rarely fail, so if the light comes on, move on.
For the next step, you will need a multimeter and the ability to handle it. Almost all such devices have a function for testing electrical circuits. Now you need to get to the plug that connects the car wiring to the connector.
After disconnecting the plug, you need to make sure that power is supplied to the car wiring wire when you press the button. Then “ring” the connector on the seat if the heating element of the whole device makes a characteristic sound.
If you find a blown fuse, replace it with a new one from the spare set, or buy a similar one. But here it’s worth thinking about why the old one burned out; maybe there’s a short circuit somewhere in the circuit.
If there is no indication when turned on, you should replace the seat heating control unit 8450006926 / 63.3769 with a new one, because this part cannot be repaired. Carefully remove from the seat, disconnect the plug and replace the part.
Mating connector 2172-3709710AX
If checking the seat reveals a malfunction of the heating element, you can handle it yourself. But to do this you will have to disassemble the seat by removing the top trim. Underneath you will find a glued spiral. By visual inspection, try to find the damaged area. Typically, the thread is burned out or broken.
After carefully stripping the ends of the element, twist them together, first extending the soldered parts with another conductor. This could be a piece of thin copper wire.
Be sure to insulate the connection to avoid fire.
If there is no power to the car wiring, the best solution is to contact a service center, since it is quite difficult to find out the reason on your own in this case.
Other article numbers of the product and its analogues in catalogues: 8450006926, 63.3769.
Lada Vesta / Lada Vesta, Lada X Ray / Lada Xray from 2022. single stage.
Any breakdown is not the end of the world, but a completely solvable problem!
How to independently install and replace a single-stage switch block for heated front seats on a Lada Vesta family car.
With the AvtoAzbuka online store, repair costs will be minimal.
Just COMPARE and BE SURE!!!
Don't forget to share the information you find with your friends and acquaintances, because they may also need it - just click one of the social networking buttons located above.
Signs of a malfunctioning heating system
- EPS randomly turns off;
- heating does not turn on when you press the mechanical button;
- the temperature sensor is broken;
- The indicator on the dashboard does not light up.
Checking the operation of the heated windshield
The efficiency of the windshield heating, like other heating systems in the car, depends on the ambient temperature. Vesta owners have noticed that at -3 degrees, only 3.5 minutes are enough for the ice and snow from the windshield to melt. Then we make one sweep of the wipers and all the ice goes away:
At lower temperatures, for example, when it is -20 degrees outside, the windshield heats up more slowly. Thanks to the heater, after 3-4 minutes the first signs of thawing appeared at the bottom of the glass. The main part of the ice disappears only after 7-10 minutes, you can go.
By the way, if the filaments are clearly visible inside the glass and the heating does not work, contact your dealer with this question; it is possible that this option is simply not activated on your car.
On Lada Vesta SW and Lada Vesta SW Cross, the heated windshield is activated with a separate button. Heating efficiency on video:
Inside out. We are changing the interior of the editorial Lada Vesta!
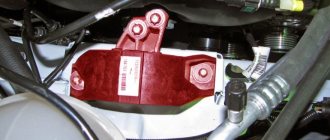
If, after reading the title of the article, you thought that we decided to do interior tuning, then you assumed incorrectly. We just needed to fix an old problem - a non-functioning driver's seat armrest...
X would like to believe that the Vesta’s planned annual mileage has entered its active phase - after all, the car should cover the envisaged 100,000 kilometers by the end of November. Now there are almost 40,000 km on the odometer, and another service visit was supposed to mark the end of the summer lull in the Lada Vesta 100 project.
In general, Vesta is feeling well and has just successfully returned from the Tolyatti-Sochi-Eysk-Togliatti mini-run. But the fact is that the front windows on the car are already quite scratched - so much so that we decided to change them. And besides, the microlift on the front passenger's ceiling handrail stopped working, and I wanted to finally put the armrest, awkwardly folded back, in its place.
We did not even imagine that the latter circumstance would result in the replacement of all seats, and if at first, as we found out, dealers simply repaired or changed the handrail itself (in extreme cases, one front seat), now the delivery package for this defect includes the entire interior – two front seats and a rear sofa.
The dealer himself does not comment on this situation, simply referring to the fact that this is AVTOVAZ’s decision, and we argued among ourselves why this is so. Probably the closest thing to the truth is the assumption that a completely updated interior is free of the risk of “multi-tone”, but the economics of this approach itself raises new questions. Could it be that AVTOVAZ is allowing seat suppliers to make money from this? Like, if we release more, we’ll earn more?
We took a comment from a representative of the company, which is a major supplier of components for one of the Russian automobile plants. It turns out that there is nothing good in such a situation for the supplier: if a set of seats is considered one “part”, and this “part” was replaced under warranty, all costs are borne by its supplier - which, you see, is logical: pick up the damaged set from the service station seats, deliver it to you, repair it or disassemble it for parts and, most importantly, produce a new set of seats, which can be delivered back to the service station completely free of charge.
And besides, there are also standard hours spent on assembling and disassembling the interior at the dealer. Let’s assume that removing and installing seats doesn’t take too much time, but replacing the armrest itself at a service station would be a trifle. In addition, the order for the repair of our Vesta states that the set of seats on the Lada Vesta itself costs almost 105,000 rubles! What to do if your car is no longer under warranty and the armrest on it is broken? That's right, go to private service stations, where they will repair the armrest ratchet mechanism very inexpensively and return it to its place. So who does AVTOVAZ actually let earn money?
How to put on rear covers
First of all, remove the rear sofa cushion. We simply pull the front part of the sofa up. There are latches. Here is the mounting bracket in the photo on the removed pillow, bottom view:
Thanks for subscribing!
And the mount itself. Rear seat strip. It may break when the bracket on the pillow is pulled out of it, then it must be replaced.
Then we move the entire cushion of the back sofa towards the back. There are hooks under the back that hold the pillow.
We spread the pillow cover in a convenient place - on a table or workbench, face down. Place a sofa cushion on top (upside down). We stretch the cover, fasten all the elastic bands, tie the laces.
The rear sofa cushion is ready. Let's put it aside. We take hold of the back of the rear seat.
Remove the three rear head restraints. Immediately put covers on them and put them aside. The smallest headrest is medium. The case on it is also smaller, keep that in mind.
Next up is most of the backrest.
Using a 14mm socket, unscrew the lower fastening of the middle seat belt. The belt remains on the back of the seat.
Unscrew the front two bolts and two more at the back. We use a 13mm head.
Carefully, so as not to hit the car body, we pull out part of the backrest from the car. We place it on the table.
Remove the isofix child seat mount, which is located on the back side of the backrest. To do this, pry up the fasteners with a flat screwdriver and pull the fastener out of the back.
It is better not to remove the cover near the back recline button unless necessary. Very delicate fastenings, can be broken. It's better to just slide the cover under it.
These covers have a flap around the seat belt. After putting on the covers, you just need to fasten it with Velcro.
Then we thread the headrest locks.
We insert the child seat mount back.
Where necessary, we tighten it, tie the laces, and fasten the clasps of the case. The backrest can be replaced. With the second, smaller part of the back, we repeat all the points. We also install it in place, tighten the backrest mounting bolts and fasten the middle seat belt. Place the sofa cushion in place.
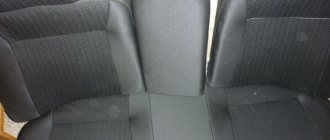
That's it, eco-leather covers on the seats. If small wrinkles have formed, don’t worry; they will smooth out over time. But the more you tighten the covers during installation, the better. This is a relatively budget option. There are covers that are twice as expensive, they need to be tightened, stitched, etc. But these look not bad either, better than the standard non-luxury seat upholstery, although this is also not for everyone.
Now you don't have to worry about getting your seats dirty. By the way, during the installation process, these new covers got dirty with grease like grease, all the bolts were in it. So the grease was wiped off with a damp cloth, not a trace remained, which pleased me.
Here are photos to compare the standard upholstery and seats with covers.
Today we will install eco-leather covers on Vesta.
The central inserts are perforated. Since the car is silver, the covers are gray and black. Cases from the middle price category - without weights.
Let's start with the driver's seat, as it is the most difficult. First you need to remove it. You can put the covers on in place, but it will be more difficult and the result will be worse.
First of all, remove the headrest. We just pull it up.
Then we move the seat as far back as possible to get to the front bolts.
Use a Torx 40 wrench to unscrew these bolts.
After this, move the seat completely forward. Use the same torx to unscrew the two rear bolts.
Don’t forget to disconnect the connectors for heated seats and the passenger sensor (in the case of a passenger seat). The photo shows the connectors (bottom view):
Remove the lumbar support handle (if equipped).
To do this, you need to pull out the retaining bracket.
After this, you can remove the handle itself.
Depending on the weather, the seat can be taken home or to the garage for further action. You can continue to practice outside.
The seat lift handle can now be removed. The cover has a slot for a screwdriver.
We pry up and remove the decorative cover.
Under the cover we find two screws securing the handle.
Using a shaped screwdriver, unscrew them and remove the elevator handle.
The plastic cover on the side of the seat is held in place by latches. Carefully pry them off with a screwdriver and pull them out. Some latches need to be squeezed with pliers.
The casing does not need to be completely removed. Simply unclip the latches and thread the case using a ruler, for example, through the casing. If necessary, the casing can be removed; inside it is held on by a couple of latches.
On the other hand, the backrest reclining handle will interfere with removing the cover. It is held on a metal lever with a single latch. Bend it and remove the handle. Now you can remove this side panel.
We put the cover on the lower seat cushion. We thread, pull, tie and hook all the elastic bands and cords, depending on the model of the covers. Here we simply put rubber bands on the springs of the seat cushion, tightened and tied the main tightening cord of the covers. You can use special hooks from the cover set.
That's it, the bottom pillow is ready.
Assembling the seat. We install and snap back the plastic sides, put the elevator handle and the backrest tilt handle in place.
Next, we put the cover on the back of the seat. In some places, you may have to unfasten the standard seat trim. But there is no need to remove it completely. We tie all the laces and the cover is in place!
Find the location for installing the lumbar support handle.
Cut a hole large enough to fit the handle into place. The base of the handle should fit inside the cut out circle. It is better to cut with a scalpel or a stationery knife.
We thread the headrest locks into the finished holes of the covers. If necessary, we trim the holes or cut them out if they are missing.
Depending on the presence of the armrest and the hole for it in the cover, you may have to cut out this hole. This Vesta did not have an armrest.
So, the driver's seat is ready. We install it in place, tighten the bolts, and put on the connectors.
We carry out the same operations with the front passenger seat. Then we put the covers on the front headrests. We put the head restraints in place and adjust their height. To do this, there are clamps on the headrest locks that must be pressed when adjusting.
The front seats are ready, let's move on to the rear ones.
How to install it yourself
You can install heated seats on the Lada Vesta or XRay yourself. There are no difficulties with removing, installing and connecting wires. This winter option has become standard on the front seats. But it is rarely installed in the rear passenger seats.
In expensive Vesta trim levels, rear passengers will be able to feel pleasant warmth in their seats. But the Lada X-Ray and budget Vesta models do not yet have such equipment. However, you can always install heated seats yourself.
First of all, you need to buy a heating kit. The kit from Priora is quite suitable for this. But with the same success you can get by with other sets, for example, from Renault.
- Heating elements (mats).
- Control buttons.
- 4-pin relay.
- Wiring harness.
Most often, everything listed is included in the set, but it is better to check availability with the seller. You can buy such a kit at car stores or dealerships.
Procedure for removing the lower cushion
Before installing heated seats in the rear seats, remove the soft cushion. There is no need to remove the seat back. The withdrawal procedure for Vesta and XRay is slightly different. For the first car, the airbag must first be pulled up. The clips at the front will come out of their mounting slots. Then you need to move the pillow back towards the trunk and lift it slightly. At the same time, make sure that the pillow loop is released from the body bracket.
If you have an XRay car, then the procedure is different. First, lift the pillow from the back and move it forward. At the same time, it becomes visible how the pillow is attached to the hinges. All that remains is to remove it from its hinges.
What does the seat assembly on a Lada Vesta car consist of?
It consists of a pillow and a backrest, which are supported by a frame. The connection of these parts is made with the possibility of adjusting the position of the backrest, height, and also the distance relative to the steering wheel with pedals. The side pockets on the car are designed for one of these adjustments.
You can, of course, use capes; they will be easier to remove to wash, but they bulge and look untidy; the covers are universal, but cannot be adjusted to fit.
Vest owners are mainly inclined to choose textile covers, among which there are magnificent, practical eco-leather covers that can be given an individual design. Unfortunately, the standard Vesta does not provide upholstery made of natural or artificial leather, so this step is the exclusive right to upgrade the interior to a high level of quality.
In addition, covers made of genuine leather can be ordered, then the master will “adjust” the dimensions exactly to your car.
Down to the smallest detail
But the all-purpose Vesta is not only good for its capacity. The highlight of the trunk is the double floor, divided into two sections.
Each section is a spacious organizer (grayish foam tray) for small things and a hard lid. The trays are of a similar size, and so are the lids. Therefore, they can be swapped, placed on top of each other, either vertically or completely pulled out, configuring the trunk at your own discretion. Underground capacity - 95 l..
I liked the lids the most: solid, strong. If you put one of these on two boxes, you will get a comfortable bench for a picnic.
Under the organizers is another floor, but this time soft. Underneath is a real spare tire, 15 inches in diameter. This means that for the SW Cross version, which has only 17‑inch wheels, such a spare wheel will play a temporary role. On the other hand, it lies freely, with gaps - a 17‑inch wheel will fit here.
The trunk lighting consists of a pair of lamps (one each on the left and right) built into the side panels of the trunk. Just in case, a 12-volt outlet was provided on the right panel.
There are hooks on the sides for securing bags and packages. In addition, there are loops on which three standard nets are hung: a huge square one for securing the load on the floor, a transverse mesh bag and a small mesh along the niche on the left side. Good decision!
A box located in the right wheel arch, closed with a lid, can be used to store a first aid kit or put tools in it. And in the left wing there is a niche for a five-liter canister - it’s comfortable to keep oil or washer fluid here.
Purchase and replacement of rear seat latches Lada Vesta
The luggage compartment of the car is spacious, but sometimes it is not enough to transport oversized cargo. The owners remove the back and dismantle the sofa.
During frequent installation and dismantling, the mountings for fixing the pillow wear out. The material is plastic and will crack if not handled carefully.
| Name / catalog article | Price in rubles |
| Latch 8450006696 (old model) | From 150 |
| 8450030620 (new sample) | From 190 |
| Analogs from General Motors A2656521 | From 170 |
*prices are as of March 1, 2019.
Conclusion
The process of dismantling the front seats and rear sofa is simple. If you follow the described recommendations, installing the covers will take no more than half an hour.
How effective the covers are is up to you to decide individually. Don’t forget that every time you get into the car you rub down the seats, subsequently holes and scuffs form. The service life of the seat is reduced by a third. When selling a car, worn out (damaged) seats serve as the basis for a discount on the price of the car.
Differences between sport and cross version seats
The upholstery on the Lada Vesta SV Cross has changed - now it is combined. The textiles are diluted with eco-leather inserts, which are elegantly emphasized by stitching. On a Lada Vesta SV, removing the seat will also not be difficult, because the procedure is no different from the standard version of the model.
Vesta Sport is equipped with seats manufactured by Daewon from South Korea. True, assembly is carried out at the Izhevsk plant. The fit here is a little lower, and the pillow itself has become longer. The lateral support is insignificant, but here it stands out very much, working properly. To maintain health, a three-stage lumbar support adjustment is installed.
Recommendations for repairs and selection of alternative options
Before dismantling the seat(s), carry out initial diagnostics and identify the source of the breakdown. Based on the analysis of the data obtained, calculate the number of necessary spare parts and consumables.
In order to optimize prevention, check the serviceability of the fuse box and the integrity of the electrical wiring. This can be done without dismantling the seats, which means you save time and money.
Some car enthusiasts, due to the fragility and unreliability of the Lada Vesta heating element, buy covers with a built-in heater. Everyone determines the effectiveness of an accessory individually for themselves.
Results
In severe frost (at -20 degrees), the thawing order will be approximately as follows:
- 1 minute - the ice on the mirrors begins to melt;
- 2.5 minutes - the ice on the mirrors has almost melted, the bottom of the windshield (stove) begins to thaw;
- 4 minutes - the mirror elements are completely dry, the snow on the threads of the rear window will melt;
- 5-6 minutes - the windshield and areas on the side windows near the mirrors noticeably move away from the ice;
- 7-8 minutes - the heating has melted the ice from the main part of all the windows, you can drive.
In warmer weather, you can start driving earlier, as soon as the engine speed drops to operating speed. There are no comments on the operation of Vesta’s heating; one can only find fault with the fact that the seat heating is not adjustable.
Theme Options
Search by topic
Recommendations
Comments 29
Were the connectors for the heating keys already in the armrest or did you install them yourself?
There is no wiring harness for the heating keys. You need to create them yourself. Available only for USB
I’m very interested in where they got the connectors for the keys and the pins for the connector of the unit where the wires from the keys go.
article number of the connector for the heating keys - AX3782 (Block for push-button switches 2113-2115, 2123, 2170-2172, 2190, with wires), cargen.ru/catalog/1_remon...ovoltnykh_provodov/18653/ The control connector is similar to the VAZ immobilizer connector, pins ( 4 pieces) took from it (there is also a CARGEN substitute, I found it on the market, there is no article, look in the catalog) Power connector - you need two pins, these are www.temperatura.by/montaz...eli/?product_id=10825286/ In Minsk I I found them from the air conditioning guys. This pin is called the Lyra type, 2.8 mm, it is used in almost all connectors, you can order it in almost all online stores
Thank you very much, you helped a lot. The car is from April and I was deprived of a heating unit, but I have all the wiring, so I decided to install the unit and immediately create heating for the rear sofa. Don’t you understand, in the prestige option, the heating of the sofa is only on the sides or also in the center?
)))Only two places - there are two keys! Regarding installation, read my blog, you need to connect using the traditional option
I’m very interested in where they got the connectors for the keys and the pins for the connector of the unit where the wires from the keys go.
Immobilizer connector. 4 pins from it are needed
I’m very interested in where they got the connectors for the keys and the pins for the connector of the unit where the wires from the keys go.
Pins type Lyra 2.8. 2 pieces required
Were the connectors for the heating keys already in the armrest or did you install them yourself?
There is no wiring harness for the heating keys. You need to create them yourself. Available only for USB
Keys - yes, the installation space is also standard, see my blog on that topic, part 1
Source: www.drive2.com