So, in this article we will look in detail at how to replace the rear brake pressure regulator on VAZ-2170 Priora, VAZ-1118 Kalina, VAZ-2108, VAZ-2109, VAZ-21099, VAZ-2110, VAZ-2115.
Reasons for replacing the rear brake pressure regulator
The pressure regulator is replaced for several reasons, the main ones being: wear of the cuffs ( when brake fluid leaks), souring of the sorcerer piston.
If you can check the brake fluid leakage by the level of the brake reservoir, then in the second case you will have to use someone's help.
Why do you need a brake force regulator?
The function of the regulator is to temporarily reduce the braking force during heavy braking. The fact is that force evenly distributed on the rear and front axles can lead to a skid of the car. If the rear brakes start working a little later and weaker than the front ones, this does not happen.
Based on the above, we can conclude that the sorcerer is an element of the car’s safety system, partly preserving its stability on the road when the brake pedal is pressed in an emergency. On modern models, this function is performed by ABS. That is why there is no need today to use a technically outdated device in production.
Test results
The optimal adjustment of the “sorcerer” corresponds to the average factory settings, and a few percent can be gained only with individual correction for specific brake pads, tires, vehicle loading and road conditions. But it’s unlikely that anyone will start every trip with a test run.
It would seem that it is possible to reduce the braking distance by increasing the pressure in the rear brakes, but this threatens a loss of stability due to early blocking of the rear wheels. And today only ABS can provide maximum braking efficiency.
On a fully loaded car, depending on the position of the regulator, the spread of the braking distance is 8.3 m. The best results, as on the Niva, are with increasing pressure in the rear brakes. However, on a slippery road, even in smooth turns, early locking of the rear wheels is possible, leading to a skid. And at partial load, with the regulator position different from the base one, the braking distance only increases.
How does a sorcerer work?
The regulator itself consists of a cylinder, valve, spring and rod. The latter is connected to the rear beam, which ensures the operation of the VAZ-2109 sorcerer. Also, brake fluid circuits pass through the rear brake pressure regulator. For their mounting on the device there are 4 threaded entries. » alt=»»> How does the sorcerer regulator work on a VAZ? During emergency braking, the front of the car is pressed to the ground, and the rear is raised. This causes the regulator rod to move, which blocks the flow of fluid to the rear cylinders. A spring located under the valve prevents it from closing completely. Therefore, the rear mechanisms still work, but later and weaker than the front ones.
Normal generator voltage
Good afternoon Priora 2010 lux. The car is under warranty.
Problem: the voltage in the network when driving with consumers turned off is 13.4 V (measured according to the “State”). At idle, when parked with off. consumers, the voltage according to the “State” is 13.4V according to the multimeter, at the battery terminals, the same 13.4V, i.e. The “State” can be trusted.
Question. What should be the voltage at the battery terminals pr XX according to the standards (and what can you refer to, in which documents these standards are prescribed)?
Is the voltage measured only at idle with the consumers turned off, or are there still control measurements?
Can the guarantee providers send me away because they have installed an add-on that is not theirs? equipment if I change the voltage with the music turned off, etc. and so on.?
I watched it in motion - I was driving with the 13.5 consumers turned off, I turned on the headlights. light drops to 13.1. With ventilation, music and dimensions on - 13.4.
Question, is it normal that the headlights are bl. lights drop voltage by 0.4V?
Sorry for the possible off-topic, but in the “Electrical equipment” section I was asked a question: What should be the voltage at the terminals of a XX battery according to the standards (and what can you refer to, in which documents these standards are prescribed)? They don’t give you a manual for the battery when you sell a car, and there isn’t one on Akkom’s official website either. Therefore, a link to documents is needed, so as not to yell, but to convince the IPG that he is wrong.
| Alex357 user menu |
On September 19, I will go to replace the generator, the symptoms were as follows: 1) after the trip, when I parked I heard a short hum. 2) under the hood in the area of the generator there was smoke and the smell of burnt radio elements. 3) the light on the dashboard did not light up. 4) when measuring with the engine running, a decrease in voltage is observed as the speed increases.
After digging around on the forum, I measured the voltage, it was around 12 and a kopeck. I measured it directly on the generator, the same thing. Next was a trip to the IPG.
On my battery it says something like this: charge with voltage from 13.8 to 14.5
09.12.2011, 20:45#2User menu Seregich66I learned about the low voltage problem in Priora last year from my own experience. I was driving in the summer with air conditioning and stopped at the post office, when I returned five minutes later I couldn’t start, it turned out the battery was dead. I contacted the service center and they replaced the generator under warranty and apparently also recharged the battery. Summer is over and I forgot about the problem. However, this year I encountered this problem again and during the 3rd maintenance (at another service) I asked to check everything. And I was shocked
. Without loads, the voltage was about 13.4 - 13.7 Volts. And when the air conditioner was turned on, when the fans on the radiators started working, the voltage dropped to 12.3 Volts and this without turning on the lights, music or anything else. A local electrician actually killed me, he suggested turning off the lights in traffic jams. The IPGeshnik went to the OTKashniks, took out a tolmut and stated that their instructions say that the voltage in the Priora can be from 13.3 to 14-something volts and they say everything is fine with me, but when the air conditioner is turned on, it’s normal as much as 12 volts. In response to my objections that the battery can only be charged at a voltage of more than 12.6 volts, they told me that even at 12 volts the current strength should be greater (I almost fell over from this). Without hesitation, I wrote a complaint to the director just like that. They invited us to check it again, measured everything and again sent it only in writing and also offered to replace the battery (at our own expense, because by that time the density there had dropped very much). Well, everything really boiled over for me and I started looking in stores for the same battery as I had from the factory and I found it in the first battery store. There was a normal guy who sold it and gave me instructions for my battery (many thanks to him). And what do you think is written there, but it clearly says “operation of the battery is allowed with a working voltage regulator relay and an output voltage of 13.8-14.2 Volts”, while the voltage should remain in this range when the high beams and the heater fan are turned on. As a result, I wrote a total of 4 complaints and bought a new battery directly from the service (in order to receive instructions with their stamp), as well as several complaints to the AVTOVAZ hotline with a request to clarify this discrepancy with their technical specifications for the car. There is no result yet, AVTOVAZ is silent (although they promise to respond to any claim within 10 days), and I am waiting for an answer from the service to the 4th claim. He offered the service to reduce the cost of the car by 50 thousand rubles in a pre-trial manner. But I think they will refuse, so I’m preparing for trial.
I think our cause is just, victory will be ours!
Setting the brake force regulator
Adjustment of the sorcerer should be done on an overpass or inspection hole. At the same time, the car is unloaded and driven to the work site. To perform the manipulation you will need:
- Socket wrench 13 or corresponding socket;
- Drill diameter 2 mm.
To adjust the sorcerer, use a wrench to loosen the bolt securing it to the lever bracket. Next, use a screwdriver to move the bracket until the resulting gap allows you to insert a prepared two-millimeter drill into it. After this, the bolt is tightened.
Note: the brake pressure regulator of the VAZ-2110 and previous VAZ models turns sour during operation so that it is not possible to move its bracket. In such a situation, you should pour WD-40 liquid over the rusted area, wait 15-30 minutes, and then use a hammer to move the part to the side using a soft drift.
How to check and adjust the pressure of the Priora fuel pump
Normal pressure of the Priora fuel pump is necessary for the process of supplying the combustible mixture to the carburetor and its normal spraying through the nozzles. The slightest disruption in the operation of this system leads to the fact that either an excessively saturated or lean mixture is supplied to the combustion chamber, which is why the engine operates abnormally. How to check the fuel pump pressure, and what should be done if it is abnormal?
Checking the fuel pump pressure
The first thing to do is to specifically check the operation of the pump. To do this, just turn the ignition key not to the extreme position and listen to whether the electric fuel pump turns on (and this is exactly the variation that is installed in the Lada Priora car). If you hear a noise for a few seconds, followed by a click, everything is fine.
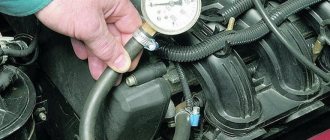
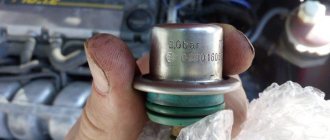
Using a pressure gauge, the check is performed on the ramp - this is where the protective valve cap is hidden, which does not allow air to get in, but presses the fuel out with pressure. The first step is to unscrew the cap and check whether the rubber in it is broken - this may be the main reason for the inoperability of the fuel pump. If it is damaged, it is better to completely replace it; fortunately, it is cheap. Then the spool is twisted. Next, a pressure gauge is connected to the outlet of the safety valve from the pump. Normal pressure is in the range of 380-400 kPa. If it is lower, then either the pump has failed or there is a blockage in the system. If it is more, then it is quite possible that the internal pressure gauge of the fuel pump is faulty and it is simply pumping fuel excessively to the carburetor. Replacing it is easy.
Naturally, before checking the pressure, the ignition is turned on, but the engine itself is not. The pump itself will equalize the pressure to the desired parameter. If this is not done, then the pressure will be at the level of 1 atmosphere with a slight deviation, because pumping is not performed.
It should also be taken into account that all manipulations are carried out at reduced fuel pump pressure. To do this you will need:
- remove the rear seat and gain access to the pump (by removing several screws on the rubberized cover);
- release the lock and let the fuel run out completely (the engine will be in neutral gear and will stall literally after a few seconds);
- Next, you need to turn on the ignition and equalize the pressure;
- It is also recommended to turn on the starter for 2-3 seconds and immediately reset the ignition key to its original position (turn off the ignition).
What happens if the pressure deviates from the norm?
If the pressure in the fuel pump is too high, too much fuel will be supplied to the carburetor.
The air will mix with it through the filter and burn in the cylinder. But if there is a lot of fuel and not enough oxygen, the mixture will not burn completely. At the same time, black smoke comes out of the exhaust pipe, and fuel drips from its end (may even be mixed with soot).
If the pressure in the system is very low, the mixture will be lean. There is too much oxygen. At the same time, the engine power is radically reduced; at idle speed the engine simply stalls, and the choke, of course, will not help, since it only regulates the operation of the throttle valve in the carburetor.
It is interesting that the on-board computer will not report a breakdown of the fuel pump - this is truly a huge mistake by VAZ engineers. In Priora, you can only read indicators when you connect a computer to the EMU unit, but not everyone can do this. And the indicators may not be true if the on-board computer itself is damaged. That's why checking with a pressure gauge on the ramp is the best option for checking pressure.
https://www.youtube.com/watch?v=QaJwthsYi3Q
Replacing the brake pressure regulator
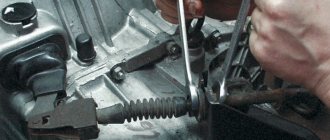
The replacement of the sorcerer on VAZ-2110 cars and other vehicles equipped with an RTD is carried out on an overpass. You need a 13 mm spanner, a powerful screwdriver and a special 10 mm wrench designed for unscrewing brake pipes. Before starting work, the assembly must be cleaned of dirt and rust, doused with WD-40 or another penetrating compound, and then wait half an hour.
Work begins by unscrewing the bolt securing the bracket to the spring. Afterwards, the brake pipes are dismantled, the position of which is recommended to be pre-marked.
You can also unscrew the tube fittings with a regular wrench. However, using a special tool makes the job easier and reduces the likelihood of “licking” the edges. After the fittings, unscrew the two bolts securing the sorcerer to the body and remove the part. » alt=»»> It is necessary to install the new VAZ-2110 sorcerer in strict reverse order. After installing it and before adjusting the RTD, you should bleed the rear brake circuits. Next, the above-described procedure for setting up the sorcerer is performed.
Life hack: removing the generator on a Lada Priora car
Without electricity, nothing will work. So on a car, the voltage in the on-board network is maintained by a generator. You need to understand how many amperes you need in the on-board network.
It all depends on the amount of attachments, air conditioning, heating, etc. Depending on the configuration, a generator is also selected. Read the article to the end and we will cover this topic. Removing and replacing the generator on a Lada Priora car depends on the attachments; if the car does not have air conditioning, then the unit can be removed in 6 steps. If the air conditioner costs 9 steps, we will talk about them in the article. This part on Priora comes in 3 types. Their prices are also different.
- Standard generator on Priora - article number and price, where it is
- Generator for Priora produced by BATE price from 4120 rubles
- Generator for Lada Priora with air conditioning manufactured by Pramo price from 4200 rub.
- Device manufactured by LKD - price from 4400 RUR
- Manufacturer ATE-1 cost from 4000 rub.
- The principle of operation, what it consists of and the main malfunctions
- What it consists of:
- Principle of operation
- Basic faults
- Removing and installing the generator
- How to remove a generator on a Priora with air conditioning:
- Without air conditioning
- Alternator bearings for Lada Priora: diagnostics, signs of malfunction and replacement
- Diagnosis of the malfunction is carried out using the following steps:
- What kind of bearing is needed
- Bearing replacement
- Alternator belt - article price, how to tension
- How to tension the alternator belt
- Reasons for replacing the belt on a Priora and how to change it
- Replacement with standard equipment
- Replacing the drive belt on a car with air conditioning
Examination
The operation of the VAZ-2109, 2110 and other AvtoVAZ models is checked on the move, in closed areas. To do this, accelerate the car to a speed of 40 km/h and sharply press the brake. The rear wheels should lock 1/2 second later than the front wheels.
The wheels are monitored by an assistant located outside the car. If wheel locking occurs noticeably later or does not occur at all, and also if the rear axle is locked simultaneously with the front, the sorcerer adjustment procedure is repeated.
To increase the response time of the rear brakes, the gap between the adjuster and the bracket is increased; to shorten it, it is reduced accordingly.
All the best! I was tormented by the wobbly brakes on the car, although everything is new in a circle, pads, drums, cylinders, springs... I decided to check what it was, the result is that the ass brakes sluggishly, and the rear left one is not at all clear how it is. no way. I thought the problem was in the tubes, but experimentally they determined that the problem was in the sorcerer. We begin to pump the second circuit (rear left, front right) and on the rear left the pedal goes a centimeter and stands as if dug out, although it should be pressed to the floor. My father and I scratched our heads for a long time, and in the end, after looking at the sorcerer’s device, it was decided to bleed the rear left with the valve not fully pressed (actually that
"Chevrolet Niva"
"Chevrolet-Niva"
"Chevrolet-Niva"
The third state - we reduce the influence of the regulator by increasing the gap from the original one by 8 mm, that is, we set it to 24 mm. When there are two people in the car, the braking distance remains virtually unchanged - 34.3 m. However, now the rear wheels are blocked. But at full load the braking is very effective, the deceleration is easy to control and the result is a record: only 30.8 m!
- In the normal position of the regulator, as the vehicle's weight increases, its braking distance decreases - this affects the more complete use of the traction weight by the rear wheels.
- The best braking is at full load, when the regulator minimally limits the pressure in the rear brakes.
- However, at partial load this can lead to skidding. The high center of gravity and short wheelbase of the Shnivy contribute to a significant redistribution of mass during braking, therefore, at partial load, the contribution of the rear axle to braking is small.
Checking the brake pressure regulator for souring:
Have a helper press the brake pedal while you watch the pressure regulator rod (1), which should extend from the regulator body and act on the spring plate (2), pressing it against the drive lever (3). If the following sequence of operation occurs when you press the pedal, then all that remains is to adjust the “sorcerer”. It is advisable to check the adjustment of the sorcerer during each technical inspection, as well as during the replacement of springs and struts, and repair work on the rear beam.
Alternator bearings for Lada Priora: diagnostics, signs of malfunction and replacement
The following circumstances indicate the need to replace the bearing:
Malfunctions of electrical equipment;
Extraneous noises, whistling and humming when starting up;
Slow or insufficient battery charging;
Distinct beating due to uneven rotation of the shaft;
Diagnosis of the malfunction is carried out using the following steps:
- We remove the belt.
- We start the engine and listen carefully. If the extraneous sound disappears, it means the ball bearing was humming.
- We move the pulley. If there is play, the bearing needs to be replaced.
What kind of bearing is needed
Depending on the year of manufacture of the car, the generator can be old or new. They differ in shaft diameter: the new one is 17 mm, and the old one is 15 mm.
- For a 17 mm shaft, bearing No. 303 is suitable.
- Bearing No. 302 is suitable for a 15 mm shaft.
- They have the same rear bearing No.202.
Bearing replacement
For work you will need: Phillips and flathead screwdrivers, 8 and 10 wrenches, 8 and 24 socket wrenches, a hammer. First you will need to remove the generator of the Lada Priora car, and then follow the sequence:
- Remove the voltage regulator.
- Remove the generator cover and remove the stator from it.
- Using a spanner, unscrew the nut holding the shaft from turning.
- Remove the pulley with the spring washer of the generator rotor shaft.
- Press the rotor shaft out of the bearing.
- Remove the 4 screws holding the bearing thrust washer.
- Using a 24mm socket wrench and a hammer, press in the bearing.
Alternator belt - article price, how to tension
In stores you can find 2 types of belts for the Lada Priora 6rk1115 and 6rk1125. To avoid making the wrong choice, inspect the old belt to see if the size is still the same. If there is no size, take 2 belts, taking into account the possibility of returning one of them.
- 6р1115 — approximate price 242 rubles;
- 6р1125 — approximate price 345 rubles;
Signs of a working brake pressure regulator
A working regulator (3) should show no signs of brake fluid leakage, the rod should be movable, and the gap between the drive lever and the plate should be 2 mm.
Malfunctioning Sorcerer
If you find that the gap between the lever and the plate (3) does not match or the sorcerer is immobile, you should replace or adjust it.
Product selection
AvtoVAZ offers an original fuel pump for 4,000 rubles. The original catalog number is 2112-1139009. But many car enthusiasts buy and install cheaper analogues instead of the original.
Analogs
Bosch fuel pump.
A non-original part is often no different in quality from the original. So, if the vehicle owner wants to save money, then you can install a non-original part. Let's consider the main offers of analogue companies:
- Fenox EFM33006O7 - the cost of such a part will be about 3,000 rubles.
- Bosch 0 560 454 035 - as they say, I took BOSCH, and ... (go ahead).
- Ween 192-0262 – the price on the spare parts market will be approximately 3,000 rubles.
- Pekar 2112-1139009 - will cost a little more than the previous two, the average price is 3,500 rubles.
- ATS 53453 - praised, but the price tag is good. We know they put one like this as a replacement for expensive originals on Peugeot.
ATS fuel pump.
