Fans of classic “sixes” periodically have a question: “How to set the ignition on a VAZ 2106?” Of course, in those days they had never heard of automatic adjustment of angle and torque, so everything had to be done by hand. Today you will learn how to set up the ignition on a VAZ 2106 and not make mistakes.
Adjustment or how to set timing marks on a VAZ 2106 yourself
Decoding notes
Without pre-basing the pistons and valves, installing the timing chain on the VAZ 2106 according to the marks is impossible. Therefore, the significance of the marks is not at all conditionally decorative. The signs give an understanding of the position of parts inside the motor:
- The mark on the KV pulley, which coincides with the long line on the front cover, means that the pistons of cylinders 1 and 4 have reached TDC.
- The mark on the RV sprocket, combined with the tide on the bed, informs about the closed valves in cylinder 4 - this is where the compression stroke occurs.
For your information. The numbering of the “pots” starts from the radiator side.
When the marks coincide, the ignition distributor slider is turned towards cylinder 4, and the valves of the latter are closed. By analogy with setting the clutch on a “classic”, the unambiguity of the relative position of the crankshaft and camshaft serves as the basis for adjusting the clearances in the valve mechanism and the ignition setting procedure.
How to restore tag matches
When the chain is pulled out, the marks will go away. The main difficulty is to return them to a position of mutual coincidence. This work is combined with dismantling the old chain. However, there is no need to rush to remove it - misalignment of all factory markers is fraught with danger.
The base is the position of the crankshaft at which the pulley mark coincides with the long line on the front cover. In this case, the drilling hole for the camshaft star should be closer to the high tide. This must be achieved first. It is worth remembering that the transmission is made with a 2:1 ratio - two revolutions of the crankshaft correspond to one revolution of the camshaft.
- Remove the camshaft sprocket, remove all other gears and the chain stopper.
- Take out the chain.
- Put the camshaft sprocket back (without the chain), tighten the bolt, tighten it, securing the part by the teeth with a screwdriver.
- Rotate the camshaft until the marks on the sprocket and bed coincide.
- After fixing the sprocket with a screwdriver, unscrew the bolt and remove it.
- Install a new chain, sprockets, tensioner shoe and damper plate.
Unnecessary fears when dismantling the RV sprocket are not appropriate. The shaft design includes a pin. In addition to transmitting torque, it serves as a fixator of a certain position.
How to put on a chain
Installation of a new chain begins with its attachment to a new crankshaft sprocket. Next, the damper, tensioner shoe, and limiter are mounted. The chain is passed through the drive shaft gear and secured along the way. Afterwards it is mounted on the camshaft sprocket, and its position is adjusted according to the cycle:
- Put it on the shaft.
- Look at the relative position of the drill bit and boss.
- Take off.
- Move one tooth in the desired direction.
2sh.jpg
The VAZ 2106 electrical circuit diagram is a detailed “plan” on the basis of which the entire system of electrical connections of the vehicle operates. It consists of:
1 — front lights; 2 — side direction indicators; 3 - battery; 4 - relay from the battery charge warning lamp; 5 – relay with which the low beam headlights are turned on; 6 — relay for high beam headlights; 7 – car starter; 8 - generator; 9 – high beam lighting devices (headlights); 10 — low beam devices; 11 – sensor with which the fan motor is turned on; 12 — electric motor of the SOD fan (engine cooling system); 13 – horn (sound signal); 14 — ignition coil; 15 – ignition distributor; 16 — spark plugs; 17 – carburetor solenoid valve; 18 – sensor that shows the coolant temperature; 19 — engine compartment lamp; 20 – car reverse light switch; 21 – sensor indicating the oil pressure level; 22 — oil pressure sensor; 23 - sensor from the warning lamp, indicating the brake fluid level; 24 – electric motor, which is used by the windshield wiper; 25 — switch (equipped if a non-contact ignition system is used); 26 – electric motor from the windshield washer; 27 — fan motor relay; 28 – machine voltage regulator; 29 – special relay-breaker for the windshield wiper; 30 – special additional fuse block; 31 — main fuse block; 32 — relay-breaker for car alarms and corresponding direction indicators; 33 – relay with which the rear window heater is turned on; 34 — brake light switch; 35 – special plug socket for a personal transport lamp (not installed since 2000); 36 – special additional resistor of the automobile electric heater motor; 37 – electric motor, without which the heater cannot operate; 38 – mandatory switch for the heater electric motor; 39 – machine clock; 40 – lamp that illuminates the glove box; 41 — car cigarette lighter; 42 — alarm switch; 43 – special regulator for lighting transport devices; 44 - warning lamp, which symbolizes insufficient brake fluid level; 45 – light switch for headlights, sound signals and direction indicators; 46 — car ignition switch; 47 — rear window heater switch; 48 — car rear fog lamp switch; 49 — external lighting switch VAZ 2106; 50 — door lamp switches (A-pillars); 51 — electric window motor (some of the manufactured vehicles are equipped with it); 52 — door lamp switches (rear pillars); 53 — switch for the warning lamp of the car parking brake; 54 – lampshades that provide interior lighting; 55 - fuel level indicator in the car, which has a reserve warning lamp; 56 — coolant temperature indicator; 57 - oil pressure indicator, equipped with a warning lamp for insufficient pressure; 58 – car tachometer; 59 — control lamp (CL) of the parking brake; 60 – battery charge CL; 61 — CL carburetor air damper; 62 — side light CL; 63 — CL turn indicators; 64 — CL main beam headlights; 65 — auto speedometer; 66 — carburetor choke switch CL; 67 – “left-door” switch for the electric window motor; 68 – automotive power window relay; 69 – “true” switch for the electric window motor; 70 — rear transport lights; 71 – lights that illuminate license plates; 72 – sensor showing fuel level and reserve; 73 — rear window heater; 74 – lamp used to illuminate the trunk; 75 — rear traffic fog lamp.
Nuances in installing a timing chain according to factory marks on a VAZ 2106: pitfalls
It is difficult to achieve perfect alignment of two pairs of marks. The main reason is the use of components with dimensions within the maximum limit. By the way, adjusting the VAZ 2106 carburetor with your own hands also never follows the ideal scenario - additional recommendations from experienced craftsmen are almost always used.
Allowable elevation shifts
One of the unwritten norms allows for a discrepancy between the sprocket drilling and the camshaft bearing housing boss within a half-tooth in one direction or another. To be more specific, the installation of the timing chain of the VAZ 2106 engine according to the marks is considered complete when the camshaft sprocket is aligned exactly, and the mark of the crankshaft pulley goes slightly forward. This guarantees stable traction throughout the entire speed range.
If the camshaft star is aligned with the mark, and the knee pulley does not reach the TDC mark, the engine operates stably only up to a speed of 100 km/h. After crossing the border, there is a loss of traction and increased fuel consumption.
Extremes
A discrepancy of one tooth between the timing marks and the camshaft sprocket is unacceptable. This is usually evidence of critical chain stretch. When it is new, it is worth inspecting the seat under the key on the crankshaft - perhaps it is broken, hence the excessive play.
Engines with significant mileage are often prone to arbitrary changes in the location of the RV star mark during the rotation of the HF. This leads to:
- Slicked teeth in engagement of the gear shaft of the oil pump drive with the drive shaft (“fungus” with “pig”).
- Play in the distributor.
- Ellipse of timing sprockets.
For your information. Using a split star helps achieve perfect mark placement. It is installed to replace the standard camshaft gear.
Briefly about the main thing
The technology for setting timing marks on a VAZ 2106 engine is performed with the chain removed. A sprocket mounted on the camshaft without a chain is fixed with a screwdriver and tightened with a wrench. After rotating the camshaft in the desired direction and combining the drilling with the boss on the bed, the gear is again immobilized with a suitable object and dismantled. Next, the new chain is installed.
Perfect alignment of the marks can only be achieved by using a split gear. However, this is not at all necessary to comply with. It is quite possible that the camshaft marks coincide and the crankshaft pulley moves a little forward.
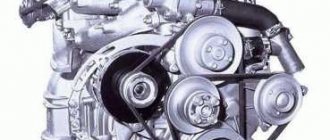
A well-known advantage of carburetor engines of the VAZ family is their ease of maintenance and high maintainability. At the same time, unlike injection models, carburetor “sixes” may require manual ignition setting from time to time.
VAZs are valued primarily for ease of maintenance
What to do if the distributor is removed
Correctly installing the distributor after replacing it or dismantling it in order to further adjust the ignition is not at all difficult.
Even a beginner can install the distributor on a VAZ 2106 correctly
To do this you should:
- Set the first cylinder of the engine to top dead center (TDC).
- You can find TDC without special tools by plugging the spark plug hole with your finger, as described above.
- Next is the mark on the crankshaft pulley. It must be aligned by turning the crankshaft clockwise with the mark on the timing cover (middle mark).
- You need to remove the cover from the distributor and set the slider so that it “looks” directly at the contact in the cover of the first cylinder.
- Insert the distributor housing.
Symptoms of a problem
Adjusting the ignition on a car is required after repairing the engine or removing the distributor. Like any mechanical system, it tends to wear out, and characteristic symptoms appear:
- The engine does not start or runs intermittently. If gasoline enters the carburetor, the reason lies in incorrect setting of the ignition angle or misalignment of the marks on the timing chain.
- Reduced acceleration dynamics and deterioration of motor elasticity. The mixture does not ignite at the optimal time, so efficiency decreases.
- Increased fuel consumption. This happens with late ignition, when in order to obtain the same dynamics you have to press the gas pedal more actively. Some of the gasoline does not have time to burn and flies out into the exhaust pipe.
- Late ignition causes a popping sound in the muffler when the unburnt fuel mixture ignites when the exhaust valve opens.
- Rough operation of the engine is possible with early ignition of gasoline in the cylinders. An explosion at the moment the piston does not reach TDC is the cause of the characteristic rattling sound and ringing.
Attention! Late ignition often causes burnout of the exhaust valves, which at this moment overheat.
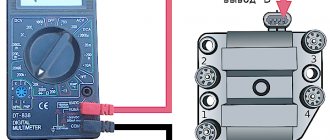
Having discovered a malfunction, you should check whether the ignition is installed correctly on the VAZ 2106, and if necessary, adjust it. To work, you will need a spark plug wrench, a “13” wrench, a light bulb or strobe light, and a plate probe.
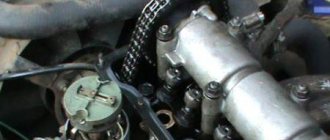
We set the ignition “by ear”
As mentioned above, the best way to set the ignition is only with the help of a strobe light. But you still need to somehow get to the service station.
For such cases, a quick method of setting the ignition “by ear” is perfect:
- First, loosen the ignition distributor mounting nut.
- After warming up the internal combustion engine and without turning it off, rotate the distributor housing alternately in both directions.
- The speed should be approximately 2000 rpm.
- Listen to the engine. The best position is when the maximum possible number of revolutions is produced with smooth operation of the power unit without failures.
- Once this position is found, you can tighten the fastener.
Cold start rules
Compliance with them will help to avoid the negative impact of sub-zero temperatures on the life of the car:
- First, you need to warm up the electrolyte in the battery; to do this, turn on the side lights for 5-10 seconds.
- Next, you should check whether all electrical consumers are turned off (fan, oven, heated seats, etc.) - this is necessary to relieve the battery of unnecessary loads.
- The next step is to turn the starter on for no more than 5 seconds. Operating the starter for more than 5 seconds is dangerous for maintaining battery charge. All subsequent attempts to turn it on should also be made with a break of 10 seconds so that the battery has time to partially restore its charge.
- When, after these manipulations, the engine starts working, under no circumstances should you immediately release the clutch pedal and do it abruptly, because the mechanism needs to gain stable speed. The engine will not stall if the pedal is lowered smoothly and slowly.
- The last rule, failure to comply with which can lead to car damage - if the engine does not start, then there is no need to repeat the entire algorithm until the battery is completely discharged. Three or four unsuccessful attempts are enough, after which you should understand that the culprit for not starting the car is not frost, but some other malfunction.