Hello everyone, I decided to write a short article on how to set the ignition on an Audi 80 b2 from 0 (example: 1.8 engine). Let's start by setting the marks on the motor correctly (Fig. 1).
After all this has been done, we put on the timing belt so as not to knock off the marks. After installing the belt, set the last mark on the distributor
That's it, the engine is ready to start! If everything is done according to the above scheme, then the engine should start with “half a turn”. After starting the engine, we need to adjust the ignition to our engine. There are already many ways, starting from setting it with a strobe light and ending with listening. Since not everyone has a strobe light, many still use guesswork. You can check the ignition using the following scheme: 1. Start the engine and start driving. 2. Accelerate the car to 45 km per hour, then turn on the fourth gear and sharply press the gas. 3. After this, after about 2-3 seconds, detonation will occur (popping, ringing of “fingers”), disappearing as the car accelerates. 4. If detonation occurs and does not disappear as the car accelerates, we can assume that the ignition is “early.” If you do not experience detonation at all, the ignition is “later”. In case of early ignition, turn the distributor clockwise. If it’s the other way around, turn it counterclockwise.
Now how to adjust the carburetor. There is one simple way: 1. Warm up the engine to operating temperature; 2. Find the quality screw and tighten it clockwise until the engine starts to run unstably and harshly; 3. As soon as the engine starts to run hot, stop tightening the propeller, as this will cause the engine to stop. Instead, turn the screw back one turn until the engine runs smoothly.
Well, that’s all, if something is wrong, write in the comments, I will correct and add.
Audi 80 set the ignition
Ignition on Audi 80: how to set it correctly
Updated: 2016-11-22 Author: audi39 Number of comments: 1
Setting the ignition is a problem that car owners will face sooner or later. Setting the Audi 80 ignition is carried out using 3 marks:
- "0" on the flywheel;
- on the crankshaft pulley;
- on the camshaft.
Important! When removing the distributor cap, you must be careful, since not everyone can remember the original position of all parts. The consequences of such “forgetfulness” are disastrous; after putting the cover back in place, the car may not start. Therefore, it is recommended to draw marks in advance.
see also
Comments 38
Citizens who love their cars and the thrill of driving them. If all marks coincide, it is reasonable and to some extent useful to move the camshaft gear one tooth forward in the direction of rotation. torque increases at low and medium speeds. I personally tested it on a Golf -3 1.4ABD, Audi 80 b-2 1.6 DT, gasoline. on engines with one camshaft, and on those where valves and pistons meet (if broken), also 1 tooth forward, no more. Improves purging and filling at low and medium speeds. Maximum speed and consumption are not affected for the worse. I will send a video to especially non-believers. Please.
Tell me, I can’t wrap my head around it, I replaced the belt, set all the timing marks, set the ignition according to the risk on the distributor and the risk on the flywheel, the result! I drove for about three months, 4 days ago the skirts started ringing, fingers, and maybe something else, I forgot the gas on the way, I went to fill up at another gas station, there was no effect, I checked the marks, everything is fine, I threw it forward, the car heats up, howls but does not drive , I put it back, I decided to put it on the strobe light, I put it on and damn all the links, if I put the UOS later than zero (TDC on the flywheel) it doesn’t ring, but it doesn’t work either! What should I do?! My head is already pounding
Perhaps the gear on the camshaft is either loose, or the key is loose. this place must be solid, rigid in connection. Judging by the description, she went for 4 months. everything seemed to work. If we assume that this or that, then it seems to me that there is no rigid connection or camshaft gear under the timing belt or gears on the crankshaft. (maybe the wrong bolt pressed in the wrong direction when tightening, it doesn’t fix it as it should, the connection is loose. I’ve seen this on a hundred 5 cyl. I think you need to start searching with this. On a cold day, of course, the skirts will drum. On a hot one, at least. Otherwise, the pistons/cylinders worked out. What do the candles say about the soot?
The spark plugs are light grey, I put the camshaft timing marks along the cut of the cover, the flywheel to zero, so that half of zero would be visible! And now the most interesting thing, in the cold there is silence, not a bell, as soon as it warms up it rings! I've already checked the timing belt 5 times, pulled out the distributor, set everything a hundred times, checked it a hundred times, the guy at work has the same Audi, got to it, checked it, found a discrepancy, put marks 0 on two cars, marks on the crankshaft (on the pulley) in different positions, On mine it’s about 10 o’clock, and on my sidekick’s mark! The rest all falls down, the ignition, he has a little earlier slider from the distributor to the distributor, I have one for the distributor and it rings
Maybe light gray with an overall lean mixture. It won't stall. will not pull. The oil will overheat, both generally and locally, and engine noise is possible. Still, the candles should have a slightly brick-red tint. I have a color on my page.
And what could be the problem?
Maybe light gray with an overall lean mixture. It won't stall. will not pull. The oil will overheat, both generally and locally, and engine noise is possible. Still, the candles should have a slightly brick-red tint. I have a color on my page.
Well, the car heats up quickly, well, I blame the red antifreeze
Maybe light gray with an overall lean mixture. It won't stall. will not pull. The oil will overheat, both generally and locally, and engine noise is possible. Still, the candles should have a slightly brick-red tint. I have a color on my page.
In general, right now I filled up at the 3rd gas station, drove out onto the highway, and adjusted the ignition by ear, the mark turned out like this, but it gives me pirouettes, I ran to the store and started off as if in third gear! The gas engine slams into the air vent, drove a little normal... Can the lambda endure the brain in this way?
The air slams - the mixture is too lean, the ignition is too early, the valve timing is not set correctly.
The spark plugs are light grey, I put the camshaft timing marks along the cut of the cover, the flywheel to zero, so that half of zero would be visible! And now the most interesting thing, in the cold there is silence, not a bell, as soon as it warms up it rings! I've already checked the timing belt 5 times, pulled out the distributor, set everything a hundred times, checked it a hundred times, the guy at work has the same Audi, got to it, checked it, found a discrepancy, put marks 0 on two cars, marks on the crankshaft (on the pulley) in different positions, On mine it’s about 10 o’clock, and on my sidekick’s mark! The rest all falls down, the ignition, he has a little earlier slider from the distributor to the distributor, I have one for the distributor and it rings
Posts 1 page 30 of 75
Share105.01.2011 05:05
- Author: werden
- Active participant
- From: Novosibirsk 54
- Registered: 06/15/2010
- Invitations: 0
- Posts: 447
- Respect: [+10/-4]
- Positive: [+13/-2]
- Gender: Male
- Time spent on the forum: 14 days 4 hours
- Last visit: 07/26/2017 19:01
Suitable for most Wolksvagen 4 cylinder SOHC (single camshaft) petrol engines.
abbreviations: TDC - top dead center. UOZ - ignition timing angle. Gearbox - gearbox, timing gear - gas distribution mechanism. Cylinder head - cylinder head. STO - technical station. service. )))
ATTENTION: If you don't know whether your engine bends the valves or not. Never crank the engine with the belt disconnected or loose. If the drive belt was removed, check the valve timing. If the engine has a belt, place the first cylinder at TDC.
1. Marks for initial ignition installation
1-1.The crankshaft has 2 TDC marks. one on the V-belt pulley (Fig. 1), the other “0” on the flywheel in the window of the gearbox housing (Fig. 2). There is also a “|” mark on the flywheel. UOZ, more on her later.
ATTENTION: If you purchase a new flywheel, then to make your future life easier, it is advisable to mark the risk of the OZ because. It is not available on the supplied flywheels. Also, with the engine or gearbox removed, it would not be superfluous to check the distance from the “0” mark to the “|” mark. UOZ (Fig. 9). We will use it to set the ignition.
1-2. The camshaft has several marks: on the inside (Fig. 3), and on the outside (Fig. 4). We are interested in the internal mark (Fig. 3).
1-3. There is also a mark on the intermediate shaft (Fig. 1). Many people do not perceive it, but we will take it into account (to do this, you will need to remove the lower, plastic timing case, Fig. 7). Or without removing the lower casing (Fig. 8)
1-4. And the mark on the ignition distributor (in the world of Trambler) directed towards the contact of the first cylinder (Fig. 6)
2. Let's prepare the engine for operation. So we found all the marks. There is nothing easier than combining them. To complete the description, let’s imagine that our engine is semi-disassembled, in particular, the valve cover, camshaft, ignition distributor, crankshaft pulley, and timing belt are removed.
NOTE: On some engine models, the pistons do NOT meet the valves and the camshaft and crankshaft can be turned. If you are not sure, remove the camshaft or contact a service station.
2-1.To avoid damaging the valves, lower the pistons to one level. To do this, unscrew the spark plugs (if they are not already unscrewed) and insert a mild steel rod into cylinders 1 and 2. By turning the crankshaft in the direction of rotation, we equalize the pistons. In this case, 1 piston should move from bottom to top (later it remains to turn 90 degrees). This way we move all the pistons away from the cylinder head. You can fix the crankshaft with a pin in the box through the starter window, but it seems to me that it is enough to turn on speed 3 or 4 and use the handbrake
2-2. We install the camshaft in place (see how to do it in the corresponding section). Place the timing belt on the crankshaft gear. We fasten the crankshaft pulley (without turning or tightening).
3. Set the tags. 3-1. Set the camshaft mark level with the plane of the cylinder head on the side of the spark plugs (Fig. 3). In this case, the cams of the first cylinder are directed symmetrically upward in different directions 3-2. We turn the crankshaft by 90 degrees. until the mark on the flywheel in the window of the gearbox casing aligns with the triangular bead. (Fig. 2) 3-3. Set the mark on the intermediate shaft. It should coincide with the mark on the crankshaft pulley (Fig. 1). 3-4 We place the distributor so that the slider looks at the line of the 1st cylinder (Fig. 6). The marks on the distributor and the intermediate shaft must match. (this is necessary so that later when replacing the timing belt we do not torment ourselves and others with ignition problems) The distributor must have free space for rotation in both directions
Now we are ready to put on the timing belt. We put on a belt and bend it slightly. We check all the marks, and after making two turns, ALL marks should fall into place. If the marks are in place, everything is ok. You can collect further. Don’t forget to put on the cover and tighten the V-belt pulley on the crankshaft. 1-3-4-2 The order of operation of the cylinders is calculated from the timing belt
If everything is correct , everything works. All that remains is to correct it.
<< Help set up the ignition >>
| DocK: Ilya Bratkov Yuzha Posts: 44 Registered: May 10, 2010, 22:04 | #1 Help set up the ignition | 03 Jun 2011, 20:07 |
When you press the gas pedal very sharply, it picks up speed with dips, then it works stably, if you press smoothly it doesn’t falter. In which direction should the distributor be turned clockwise or counterclockwise? and how much?
| griz07rzn: Denis Mishin Ryazan Posts: 1540 Joined: Apr 28, 2010, 7:21 pm | #2 Re: Help setting up the ignition | 03 Jun 2011, 20:14 |
Is there a strobe light?
Or will you determine by ear? There, a millimeter matters a lot. The slider rotates clockwise, which means turning it clockwise means the ignition is later, and counterclockwise is earlier.
And the point here is not only in the ignition, or more precisely not in the position of the distributor itself. It looks like the timing membrane is torn, or there is something wrong with the power system. Or (this happened on the Passat) the high-voltage wire breaks through to the shield of the cap. The solution was simply to remove the shields from all four wires.
| stalkerru: Sasha MO, Klin Messages: 122 Registered: Feb 25, 2011, 11:29 pm | #3 Re: Help setting up the ignition | 03 Jun 2011, 20:51 |
Setting up the ignition is not difficult, I set it up (without a stroboscope) like this: The first stage is to adjust it on the spot; I find a gas slider in the carb (I don’t know what it’s called, the gas pedal cable fits into it), while accelerating the distributor, I look for a position such that when I press the gas sharply my fingers don’t “knock” (if they knock, then the ignition is too early, i.e. must be turned clockwise towards the late ignition stage). Now comes the 2nd stage - on-the-fly tuning. We are looking for a flat road, take a friend for a small load and hit the road. We accelerate to 60 km/h, turn on the 4th gear and press the pedal all the way... listen... 2-3 knocks - this is considered normal. If the “fingers” knock longer, then we stop and turn the distributor a little clockwise. If the car is slow to accelerate and there is a dull sound when accelerating, then we set the ignition earlier. And so on until we set up the ideal option. Z.Y. If it is not adjusted, then we adjust the CO, a lot depends on the incorrect setting of the carb
| nikell23: Yuri Chmirenko Dnepropetrovsk Posts: 4085 Joined: Apr 26, 2010, 8:42 pm | #4 Re: Help setting up the ignition | 03 Jun 2011, 21:06 |
stalkerru
wrote:
:
a lot depends on incorrect carb settings
Well, if it has a RM engine, then it’s probably not a carb, but a Monique. But Sashka described the principle correctly. I've never used a strobe light either. I set it up to XX, then for a day or two, sometimes up to a week, I ride, watch, listen, tweak it here or there, depending on the situation, and ride again. Two or three times and it will work. One thing is true, I focus not on speed (60 km/h), but on revolutions. At 4, if less than 2000 rpm, the engine will not immediately pull when pressed sharply (if pressed gently it will, of course), but from 2000-2200 it should pull. Therefore, make no mistake, don’t do it, but let’s say at 1700 rpm in 4th gear, you won’t get a sharp jerk!!!
| DocK: Ilya Bratkov Yuzha Posts: 44 Registered: May 10, 2010, 22:04 | #5 Re: Help setting up the ignition | 03 Jun 2011, 23:36 |
Thanks for the answers, I'll try it!
| stalkerru: Sasha MO, Klin Messages: 122 Registered: Feb 25, 2011, 11:29 pm | #6 Re: Help setting up the ignition | 04 Jun 2011, 07:23 |
Yur, it’s not a matter of jerks. In 4th, no one accelerates from 60, it’s a matter of detonation. On the 4th at 60 and when the pedal is sharply pressed all the way, the strongest detonation occurs, i.e. If we set it to 60 km, then we shouldn’t hear “fingers” for more than a day, or even if we hear it, it will be the norm. Although, as many people as there are, so many opinions. We don’t set it up using a strobe light (although you can’t set it up perfectly using a strobe light; adjustment is also required), but purely according to the “old-fashioned” method.
| stalkerru: Sasha MO, Klin Messages: 122 Registered: Feb 25, 2011, 11:29 pm | #7 Re: Help setting up the ignition | 04 Jun 2011, 07:36 |
Ilya, I doubt that your problem is with the ignition. If everything was fine before, but now it’s not working, and at the same time you didn’t get into the ignition, then the ignition timing has nothing to do with it. I suspect that the problem is with the vacuum ignition timing corrector. Check if the membrane in it is intact. Is he pushing the slider?
| nikell23: Yuri Chmirenko Dnepropetrovsk Posts: 4085 Joined: Apr 26, 2010, 8:42 pm | #8 Re: Help setting up the ignition | 04 Jun 2011, 07:56 |
stalkerru
wrote:
:
On the 4th at 60 and when the pedal is sharply pressed all the way, the strongest detonation occurs, i.e. If we set it to 60 km, then we shouldn’t hear “fingers” for more than a day, or even if we hear it, it will be the norm.
I agree that this is exactly the case. After the described setup, I still get 2-3-4 knocks and that’s it, silence. True, there is a situation, and even in the 3rd, not to mention the 4th, when you go up a steep hill (in the city, say, 60 km/h), they knock almost continuously until the engine spins up to 2000 rpm.
| stalkerru: Sasha MO, Klin Messages: 122 Registered: Feb 25, 2011, 11:29 pm | #9 Re: Help setting up the ignition | 04 Jun 2011, 08:29 |
Well, you don’t have a v8 with 500 mares. If there is a steep, long hill, then I think there is no need to force the engine at 1700 rpm, at least 2500.
| DocK: Ilya Bratkov Yuzha Posts: 44 Registered: May 10, 2010, 22:04 | #10 Re: Help setting up the ignition | 04 Jun 2011, 09:25 |
stalkerru
wrote:
:
I suspect that the problem is with the vacuum ignition timing corrector. Check if the membrane in it is intact. Is he pushing the slider?
I installed a new distributor. Now I tried to install it earlier, but the casing interferes with me, the vacuum chamber rests on it. It turned out to be about 1mm, starting was a little worse, but the dips became smaller. If you set it later, the car runs smoother at XX, but there are more dips.
| You cannot start topics You cannot reply to messages You cannot edit your messages You cannot delete your messages You cannot add attachments |
How to set the ignition on an Audi 80 B4
Ignition on Audi 80: on the right
Updated: 2016-11-22 Creator: Alexander Category: 80/90/4000 Quantity
Ignition. problem that car owners will face. The Audi 80 is ignited using 3 marks:
- "0" on the flywheel;
- on the crankshaft pulley;
- to the camshaft.
Important! When removing the distributor cap, care must be taken, since not everyone understands the original position of all the parts. The consequences of this “forgetfulness” are disastrous; The car may not start after changing the cap. Therefore, it is recommended to draw labels in advance.
How to draw labels correctly
To do this, in cars with a starting handle, it is possible to crank the engine, and if it does not have one, push the car with the movement passed. Using these manipulations, it is necessary to achieve such a position with the marks on the pulley, the crankshaft on the cylinder block will coincide. Now you can remove the distributor cap without fear of consequences.
In other words, it is important to photograph the position of the runner where the spacer plate is located. Then, of course, remove the ignition distributor. It is not recommended to unscrew the crankshaft immediately after removing the distributor to avoid markings.
To correctly position the slider before restoring the ignition, you need to focus on the first cylinder of the engine. Experienced professionals have the ability to deny what is true to accept
Ignition on the Audi 80 is an option for any cylinder. Indeed, knowing the order of operation of the cylinders of a four-stroke engine, you can simply find in which position to place the slide.
How to install a slider
Four-stroke engines operate in the following modes:
- inlet. when the piston moves from top dead center (TDC), the intake valve opens, the combustible mixture enters the rarefied position of the cylinder;
- compression. the piston moves to TDC, the charge begins to compress the piston, ignition a flammable mixture occurs;
- working stroke. moving the piston to one of the dead centers (BDC) under pressure;
- release. The piston moves in the TDC direction, the cylinder is cleared of the spent mixture.
Checking and dynamically adjusting the start of injection of V6 2.5L TDI engines
The basic operating sequence is suitable for AFB engines; AKN; AKE; A.Y.M.; BAU; BCZ; BDG; BDH; B.F.C.
Engines AFB, AKN, AKE, AYM, BAU, BCZ, BDG, BDH, BFC were installed on the following cars:
Volkswagen Passat B5 / Volkswagen Passat B5 (3B2) 1997 - 2001 Volkswagen Passat Variant B5 / Volkswagen Passat Variant B5 (3B5) 1997 - 2001
Volkswagen Passat B5.5 / Volkswagen Passat B5.5 (3B3) 2001 - 2005 Volkswagen Passat Variant B5.5 / Volkswagen Passat Variant B5.5 (3B6) 2001 - 2005
Audi A6 C5 / Audi A6 (4B2) 1997 - 2005 Audi A6 Avant / Audi A6 Avant (4B5, 4B6) 1998 - 2005 Audi A6 Allroad / Audi A6 Allroad (4BH) 2000 - 2005
Audi A4 B5 / Audi A4 B5 (8D2) 1995 - 2001 Audi A4 Avant B5 / Audi A4 Avant B5 (8D5) 1996 - 2002
Audi A8 (D2) / Audi A8 (4D2) 1994 - 2002
Audi A4 B6 / Audi A4 B6 (8E2) 2001 - 2005 Audi A4 Avant B6 / Audi A4 Avant B6 (8E5) 2001 - 2005
Skoda Superb / Skoda Superb (3U4) 2002 - 2008
Checking and dynamic adjustment of the start of injection Audi A6, 2.5 TDI, V6, 2001. (AKN engine)
The start of injection must be checked after replacing the timing belt, as well as when loosening the tension of the injection pump belt. If the power characteristics of the vehicle change, it is checked and adjusted if necessary.
An error in adjusting the angle can lead to increased fuel consumption, decreased power, burning of valves, problematic starting of a cold engine, smokey exhaust, etc.
CHECK CONDITIONS: — The battery voltage must be at least 12.0 V. — The ground connections on the engine and gearbox are working properly. — Basic timing adjustment was carried out correctly. — The engine is warmed up to a temperature of at least 85 degrees. — All electrical consumers and air conditioning are turned off.
TOOLS: - screwdrivers - 10 mm socket - 6 mm L-shaped hexagon - 27 mm special wrench -T10023-
- diagnostic tool (VAG-COM, VAS.... and others) - diagnostic cable
ORDER OF WORK:
1. Remove the plastic engine protection and air filter duct.
2. Remove the protective covers of the timing belts and injection pump
3. Turn on the diagnostic tool (in our case VAS – 5052A).
4. Connect to the diagnostic connector. It is located to the left of the steering wheel on the bottom bar of the instrument panel, in the area of the clutch pedal.
5. Start the engine.
6. Select the “Vehicle self-diagnosis” field on the display. Select the vehicle system - “01-Engine electronics”.
7. Select the “Poll fault memory” field and check for their presence. Delete all existing errors in block “01 - Engine electronics”. Leave the field.
8.Select the “Measurement results” function and read group 01 or 07. Check the readings in window 4 - coolant temperature. Set value: minimum 85 °C
During warming up, the readings in the 4th window gr. 01 should grow all the time. If they rise and fall in the range of 2-5 degrees, then questions arise for the coolant temperature sensor. Most likely, it does not work correctly and requires verification. If necessary, replace, continue testing after installing a new sensor.
When the coolant temperature has reached 85 degrees, we leave group..01.
9. Go to gr.04, “Measurement Results” function, to check the set injection adjustment.
First of all, we are interested in windows 3 and 4, which need to be checked.
Exit group 04 of the “Measurement results” function.
10. Go to BASIC settings, dial gr.04 and read the readings in window 2,3,4.
In this subgroup we will see that the ECU will independently change the injection angle from the latest to the earliest. Accordingly, the inscriptions will appear: early and late. The engine will change speed, and the vagcom will show:
A). Indications in the LATE, window 3 - should be = 2 ° after TDC ± 2 degrees, with a duty cycle (window 4) 100%.
B) . Indications in EARLY, window 3 - should be about 15 degrees before TDC (BTDC), with a duty cycle (window 4) of 15-20%.
Our goal is the readings of gr.04 in the basic settings.
When it switches to “LATE” and you need to look at the data: IDEAL INJECTION ANGLE 2 degrees after TDC (ATDC) or (n. OT) - this is the guideline for adjustment.
11. In our case, the real values do not coincide with the ideal ones and quite strongly….
12. Let's start adjusting the injection timing.
To do this: – Turn off the ignition. Diagnostics must be enabled. – Recheck the tension of the toothed belt. Adjust if necessary. The alignment marks -1- on the tension roller must match.
13. If the toothed belt tension is normal, then it is necessary:
– Unscrew the nuts -1- of the camshaft gear.
– Place a spanner wrench (27 mm) on the pump shaft and slightly turn the pump pulley in the desired direction:
Direction A (counterclockwise) - Injection start LATE (ATDC) or (n. OT)
Direction B (clockwise) - Start of injection EARLY (BTDC) or (v. OT)
WARNING: Do not unscrew the nut -2- of the injection pump gear. Otherwise, the basic adjustment of the injection pump pump will be changed, and further adjustment in a service station, and especially in a garage, is impossible.
14. We begin to adjust the injection as described above.
TIP: Rotate the pump shaft a fraction of a millimeter; if necessary, make a mark on the gear with a marker for better orientation.
15. After adjusting the injection, retighten the connecting bolts -1- on the camshaft gear. Tightening torque: 22 Nm
16. Start the engine. Check the start of injection for compliance with the specified values. If necessary, make adjustments again, repeat steps 6-10.
17. It took us several attempts to achieve the desired result.
When you are approaching the set injection value, after adjustment you can carry out a test drive to determine the dynamics of the car.
18. See below for different injection settings and the results of our test runs.
I would like to note right away that these adjustment figures are suitable specifically for this particular car, the condition of its engine and components.
This concept means mileage, fuel injection pump wear, cylinder head condition, compression, injectors, cyclic fuel supply, quality of diesel fuel in the region, starting and travel conditions, time of year, etc.
19. After completing the adjustment, check the tightness of the hexagon socket bolts to 6 mm. Install the belt guards on the engine.
20. The injection advance angle has been adjusted. Work time is about an hour.
Having assessed the engine start and the dynamics of the car (sluggishness, agility) in different gears in the “track” mode, we settled on the last option for adjusting the injection.
21. Install air ducts and upper engine protection.
IMPORTANT :
The results of dynamic adjustment will be successful only if EVERYTHING IS OK WITH THE MECHANICAL PART OF THE ENGINE AND THE TIMING MARKS ARE CORRECT.
No adjustments using a computer will correct errors in engine mechanics made when installing timing belts and fuel injection pumps.
If you have not found information on your car, look at the cars built on the platform of your car. Most likely, the information on repair and maintenance will be suitable for your car.
Source
Fog lights
External optics are designated by the letter “L” (lighting itself, fog lights). The wiring diagram for Audi 80 b3 fog lights also displays the location of the switches (marked with the letters “E”). Specifically, switches E7 and E18 are responsible for turning off the foglights of the Audi 80. In the Audi 80 B3 PTF electrical diagram they are connected by one terminal (number 55 - indicated in the figure by the symbols “A47”).
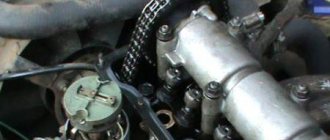
Timing marks audi 80 b3 1.8 carburetor
What marks should you use to set the ignition on an Audi 80 engine 1. Then align the marks on the camshaft and crankshaft pulleys, turning the engine crankshaft.
Next, you need to remove the alternator belt, unscrew the crankshaft pulley bolts and remove the pulley. In addition, you will need to remove the timing belt covers - upper and lower.
After this, loosen the belt tensioner bolt and turn the tensioner counterclockwise.
To install the timing belt, you need to check the marks and put the belt on the crankshaft pulley and on the auxiliary shaft pulley.
Audi 80 › Logbook › Super precise ignition tuning UOZ audi 80 abt
During the struggle for low fuel consumption, I adjusted the ignition according to the manual (using marks and a slider); this method has a slight drawback: the slider itself is located high from the edge of the distributor body.
Therefore, to make precise adjustments, you need to look strictly along the axis of the slider (and in two planes), this is very problematic. To solve this problem, the following device was made:
From plexiglass (you can take any other material) 4 mm thick, I cut out the indicated “feet”. We remove the distributor cover, turn the flywheel so that the slider points to the wire of the 1st cylinder, and tighten it to the mark on the flywheel:
remove the slider, place our super device in the slot and turn the distributor until the mark on the body aligns to the middle of the “feel”
VESKO-TRANS.RU
AutoNews / Reviews / Tests
Audi 80 B3 Ignition Installation
Where is the distributor and its elements located?
Automatic ignition distributor. This is a device responsible for sparking at a certain point. The device is installed on almost all ICE cars, only on some car models it can be placed in different places and has a monotonous operating principle.
Business date, meeting
WARNING! A very common method for reducing fuel consumption has been found! Don't you believe it? An auto mechanic with 15 years of experience also didn’t believe it until he tried it. And now this saves 35,000 rubles a year on gas! More "
First, we will take a closer look at the features of this device. Without this it is impossible to imagine the operation of one modern car power plant
.
The photo below shows the clear location of the distributor.
The ignition system is an important component of an internal combustion engine. The engine will function normally only if the combustion mixture burns in a timely manner. Otherwise, overall progress will be disrupted.
Everything an audio driver needs to know about the ignition system of an iron friend
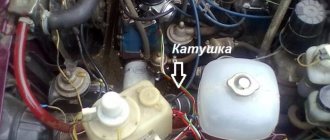
Sooner or later, every car owner is faced with the problem of needing to configure the ignition system (IS) in his car. And Audi owners are no exception. From this article you can find out what the ignition coil of an Audi 80 b3 car is, how to diagnose and how to properly configure the module.
How to check the ignition module?
How to configure and repair SZ on an Audi A6, five or Audi 100 C4? Before removing the distributor cover and contact group for repair, it is necessary to understand the diagnostics of the unit.
First, a visual check of the system is carried out, it is carried out as follows:
- First you need to check whether all contacts and terminals are tightly fixed directly on the coil itself, the ECM, the system and injection control unit, as well as the distributor. Make sure that no contact on the multi-pin plug has come loose and does not need to be cleaned to prevent oxidation.
- Look at the short circuit - perhaps the sealing compound could leak out of it. If this is the case, then most likely the element will have to be changed. In addition, if the device has cracks, other damage, or traces of carbon deposits that appear in the event of a spark, the unit will also need to be replaced.
- It would be a good idea to check the quality of the connection of the main wiring, as well as the high-voltage circuits; in some cases, the problem with the operation of the Audi 80 ignition switch may be due to poor insulation. Repair may also be required if the distributor cap is damaged; you should especially take time to diagnose its inside.
- Most importantly, are all components of the assembly dry and clean? If there is dirt and moisture on the SZ elements, this will cause electrical breakdowns to occur in the operation of the mechanism.
If, when checking the Audi 100 5 cylinders, no malfunctions are identified, but the engine still does not work as it should, then before removing the lock and looking for the cause, you need to check the spark plugs:
- If you don’t know how to remove the spark plug, then to do this you just need to disconnect the high-voltage cable from the spark plug itself, and then unscrew the device from its installation location. After this, the cable is put on it again and the spark plug is placed on the cylinder head so that it has good contact with the head body.
- At this moment, your assistant should try to start the engine by turning the starter.
- If, when you try to start, you notice that a spark jumps between the spark plug and the block head, this will indicate that there is voltage in the network. Therefore, perhaps the cause of the malfunction lies in incorrect ignition adjustment.
- If upon inspection it turns out that there is no spark, then a similar situation must be repeated with the remaining spark plugs. If there is no spark on any of them, the entire SZ should be diagnosed (author - Audi 80 Repair).
Owner reviews of the Audi 80 B3
Review of Audi 80 1.8 S (Audi 80) 1988
I have owned “Bochka” for not a year, not two, or even three or four years. And for 6 whole years. For me this is wow how long. And all because the car is super. Despite the fact that there were hundreds of replacement options. I didn't want anything other than her.
At around 310 thousand, I went through and overhauled the engine with my own hands (I only asked the mechanic to charge the pistons and loop them, he did the rest himself), the work is excellent, although sometimes it shows minor whims, but they are nothing compared to the fact that it is a real lifesaver. Little things in the vagaries of the car, due to low-quality spare parts and nothing more.
I don’t know how some people write that you can’t even drive for an hour in them before your back starts to hurt. Rave. I used it for 3500 on long trips to Almaty, Omsk, and Kurgan. No problem. I didn’t even “sneeze” once.
I will actively describe all the operating details of this car.
Advantages
Mini tank! High ground clearance, excellent cross-country ability for a passenger car. Almost like a crossover. I cut through the snow at once!
The most important thing, remember when buying an Audi 80 on the b3 platform, THIS CAR WILL FORGIVE YOU VERY SERIOUS OPERATING ERRORS! For example, if you fall into a hole on an unfamiliar road, the tire will burst within 150 km. how it happened to me and much more!
Will pull like a mule at any time of the year, in any conditions!
Oil from change to change, fluids do not cry (DO NOT FLOW, ANYWHERE and EVER).
Flaws
Age makes itself felt, but even then it’s just a rare reminder, and doesn’t scream every month.
When to change spark plugs, which ones to install
Spark plugs are changed in two cases:
- planned - according to odometer readings/service life;
- unscheduled - in the event of malfunctions in the ignition system associated with failure/incorrect operation of spark plugs.
The service interval for replacing spark plugs on Audi 80 vehicles is 30,000 km. However, in reality, good candles can last longer.
Many motorists prefer to change spark plugs without reference to a specific mileage and do this annually - before the onset of cold weather. This approach is not without logic, since “fresh” spark plugs are guaranteed to provide much easier starting of the internal combustion engine in cold weather.
Original
Table of original spark plugs for different types of Audi 80 engine:
| Modification, volume | Engine code | Original spark plug number | Main characteristics | |
| B3, 1.6 | PP | 101 000 036 AB, 101 000 050 AB | Gap: 1.0mm | Thread D: 14 mm, Thread L: 19 mm |
| RN | ||||
| B3, 1.8 | RU | |||
| B3, 1.6 | ABB | 101 000 050 AC, 101 000 040 AD | Gap: 0.8mm | |
| B3, 1.8S | SF | |||
| P.M. | ||||
| JN | ||||
| NE | ||||
| B3, 1.8E | DZ | |||
| B4, 2.0 | ABT | |||
| B4, 2.0E | ABK | |||
| B4, 2.0E 16V | ACE | 101 000 033 AB | Gap: 0.8mm | |
| B4, 2.3E | NG | 101 000 026 AA, 101 000 038 AA | Gap: 0.7mm | |
Analogs
Table of analogues of the most famous brands for various markings of Audi 80 engines:
| Modification, volume | Engine code | NGK | Beru | Denso | Bosch | Champion |
| B3, 1.6 | PP | BUR5ET-10 add.: 7264 | Z92, Z93 | W20EPBR-S | 0 242 229 658, 0 241 229 716 | OE027/T10 |
| RN | ||||||
| B3, 1.8 | RU | |||||
| B3, 1.6 | ABB | BUR6ET add.: 3172 | Z91 | W20EPBR-S | 0 241 235 757, 0 242 235 664 | OE025/T10 |
| B3, 1.8S | SF | |||||
| P.M. | ||||||
| JN | ||||||
| NE | ||||||
| B3, 1.8E | DZ | |||||
| B4, 2.0 | ABT | |||||
| B4, 2.0E | ABK | |||||
| B4, 2.0E 16V | ACE | BKUR7ET add.: 7873 | Z89 | K22PBR-S | 0 242 240 618 | OE076/T10 |
| B4, 2.3E | NG | BPR5EKU add.: 5685 | Z75 | W20EVR-ZU | 0 242 229 658 | EON6/286 |