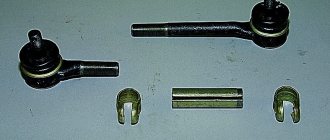
VAZ 2109 cars use a liquid cooling system, which includes a block jacket, a liquid pump (pump), pipes, an expansion tank, a thermostat, a temperature sensor and two radiators - the main one and the interior heating system.
Although this system performs a serious function - maintaining the optimal temperature regime of the power plant, all elements are structurally quite simple.
One of the most common problems with this system is bursting or jumping of pipes and radiator leaks. Less often, but it also happens that the thermostat gets stuck in one position, the temperature sensor malfunctions, and the pump fails.
What is a pump
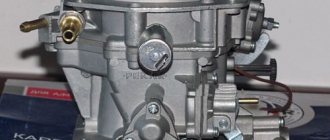
A water pump unit responsible for removing heat from the engine using antifreeze. It is also called a centrifugal pump. If a car can use an injector or fuel injection is carried out by a carburetor, then the pump is always the same in design. With the help of this unit, coolant circulates through the system, removing heat from the vehicle's power plant to the radiator, which is responsible for cooling.
The pump must be changed after every 90,000 kilometers. This way you will have less trouble with the engine of your vehicle. VAZ-2109 models are no longer produced today, so they are all older than seven years, so you need to take care of the car more carefully. Their timing belt is changed after 45,000 kilometers, and the pump should be changed after one installation.
It is convenient to replace the pump when installing a new timing belt, since this pump is located in a casing under the camshaft gear.
Final work
Having finished tensioning the belt, we assemble all the components in the reverse order:
- The drive pulley is installed.
- Securing the alternator belt with tension afterwards.
- Installation of timing belt protection.
After this work is completed, fill the system with coolant, install the wheel and lower the car.
Sources
- https://prometey96.ru/ustrojstvo/pompa-vaz-2109.html
- https://ladaautos.ru/vaz-2109/pompa-na-vaz-2109-kak-ee-zamenit.html
- https://scart-avto.ru/remont/zamena-remnya-grm-na-vaz-2109-kak-pravilno-pomenyat-detal/
- https://motorchina-online.ru/marki/kak-pomenyat-remen-na-vaz.html
- https://portal-mashin.ru/lada/zamena-pompy-lada-2109i-vaz-2109i.html
- https://carnovato.ru/zamena-pompyi-vaz-2109/
- https://luxvaz.ru/vaz-2109/180-zamena-pompy.html
- https://paradiz-nt.ru/karbyurator/zamena-remnya-grm-vaz-2109-karbyurator.html
Where is the VAZ 2109 pump located?
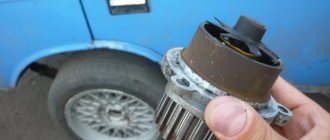
An automobile pump consists of a metal cast body, which is made of aluminum or cast iron, a moving shaft, bearings and an impeller . The tightness of the unit is ensured by a special seal. Under the action of rotation of the impeller, pressure is created in the mechanism, pushing out the antifreeze, which does its useful work by heating up in the channels of the cooling system and cooling in the radiator to again enter the engine cooling jacket. This process is regulated by a special device - a thermostat.
The pump is located under the timing housing, slightly below the camshaft gear.
Assembly Features
When installing the drive belt, you must again make sure that all the marks match, otherwise the gas distribution and ignition system will be disrupted. After installing the tension roller back, it is important to properly tension the belt.
If the car does not start after complete assembly or starts poorly, it means that the belt on the camshaft gear is misaligned by one tooth . To eliminate such a malfunction, you will have to remove the belt from the gear again, turn the gear a little so that it moves relative to the belt by one tooth, and then put the belt back.
Replacing the water pump (Pump) on VAZ 2108, VAZ 2109, VAZ 21099
Welcome! Pump - people called it that, in fact it is a water pump thanks to which the coolant (Let's call it coolant for short) runs through the cooling system and cools the engine. If the pump fails, the liquid will not stop circulating, but a small nuance will appear, it will ring and all this will happen until you change the pump on the car, but if you ignore this sound and continue to drive with it, then soon the pump bearing (When it wears out and this characteristic sound appears) it will simply jam and it will suddenly become stuck (this will, of course, happen when the engine is running), and since the pump is connected by a timing mechanism, the belt will break (If the valves on your car bend, then get ready for expensive repairs).
Note! To replace the water pump, stock up on a number of tools in advance, namely: All kinds of wrenches, screwdrivers, well, empty containers for draining coolant from the car engine, if possible, also stock up on a new good tension roller, because it will still be removed and if it has been in place for a long time yours hasn’t changed and it’s starting to jam, then put a new, working roller in its place!
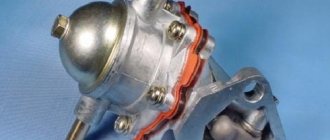
Where is the water pump located? It is hidden under the timing cover (see small photo, it is indicated by a blue arrow), of course you will have to remove it to see the water pump, and even more so, in order to change it, it can be removed very easily, it will be enough to just unscrew three small bolts that on the sides (There are two nuts) and in the middle (There is one nut), attach the cover, and when it is removed, immediately find the water pump (Indicated by the red arrow) and proceed to check it (Read below about how to check it).
When should you replace your water pump? If you hear extraneous sounds in the engine, then first of all understand where they are coming from, for this, of course, you will have to open the hood and listen, if the sounds are heard through the timing mechanism cover, then first of all turn off the engine (This is a must, otherwise you will hit the pulleys with the cover ) and remove this cover, when it is removed, start the car and listen, if the sound comes from the water pump, it means the bearing has failed and the water pump needs to be replaced, then turn off the engine and pump the pump (its pulley) with your hands. , it shouldn’t have any play, it should stand firmly, if it does, then the pump needs to be replaced (By the way, this play can be treated by tightening the locking screw located on the pump, see the photo under number 2 for more details), and finally, the drainage hole inspect (see photo 1, it is indicated by an arrow) not a drop of coolant should flow through it; if it suddenly flows, then again the pump is not working properly and it must be replaced with a new one.
Note! When the timing belt is removed from the upper pulleys, do not under any circumstances turn the pulleys, otherwise you will disrupt the valve timing (In principle, you can install them, but it’s better not to touch them, but they are placed according to marks, you will learn more about these marks when you read one of the articles to which a link is given in this article), well, even if the valve timing can be set again, this does not mean that the pulley can still be turned, there are simply some engines (They were installed on nines) that bend the valves, so if If you sharply turn the pulley on the removed timing belt, the valves will be slightly deformed, and this will cost a lot of money!
We recommend: How to remove the window regulator on a Priora
Removal: The pump is not easy to change, but if you have the skill, then everything is simple, if you don’t have it, then most likely you will be replacing it more than once, in general, let’s start by first removing the minus terminal and then draining the coolant from the engine (How to drain liquid, read the article: “Replacing the coolant on a VAZ”, and about how to remove the minus terminal, read the article: “Replacing the battery on a car”), when this operation is done, remove the timing belt from the tension roller and then the roller from the car (You will find how to remove the roller in the article entitled: “Replacing the tension roller”), then remove the camshaft gear (How to do this, read “here”) and unscrew several bolts and nuts (There are about five of them, all of them on the photos below are shown) that secure the back cover and then separate it from the base so that there is access to the pump (there is no other way to remove it), and as soon as access appears, use a screwdriver to remove the pump by picking up its pulley as shown in the small photo .
Note! If the pump comes out, but the body gets in the way or something else (you can’t remove it completely, for example), then in this case ask an assistant to move the engine a little, to do this, just let him grab a convenient place (It must be made of metal ) and using force, tilt the engine in the desired direction, and at this time you pull the pump out of the hole in the car engine!
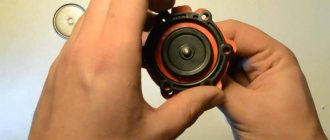
Installation: The new pump is installed in the reverse order of removal, before you buy it, be sure to compare the markings with the old one, we recommend that you take exactly the same one and don’t forget about the gasket that is between the pump and the engine (see small photo), be sure to look at that the place where the pump was adjacent to the engine, if there are pieces of this gasket left there, then you can scrape them off with a screwdriver and buy a new gasket, putting it on the pump instead of the old one.
Note! When you buy a pump, we recommend taking one with an impeller made not of plastic but of metal, look at the top photo in this article, it clearly shows the impeller and you can clearly see that it is made of metal, and by the way, if you suddenly notice that the impeller has changed its color (For example, it has started to rust), then in this case, replace the pump with a new one. When installing, keep in mind that the marking should be directed upward (see photo 1), and the camshaft pulley must be installed with the protruding part towards the car engine (see photo 2) , well, after that, align everything according to the marks, tighten the timing belt (it is tensioned with a tension roller) and pour coolant into the car engine!
- First you need to set the first cylinder to the top dead center position of the compression stroke;
- Unscrew and remove the front timing cover;
- The generator drive belt is removed;
- Unscrew the tension roller;
- Remove the timing belt and camshaft pulley;
- The back cover is secured with a nut and 4 screws. They are unscrewed and the cover is removed;
- The pump is pryed up with a slotted screwdriver and pulled out from its seat;
- The gasket is removed from the pump. It is recommended to replace it regardless of the condition.
- Natural wear and tear. Like any other part, the water pump has its own resource. This figure is usually estimated at 70,000 kilometers;
- Operating the engine at extreme conditions. The pump is driven by the crankshaft. Accordingly, the number of revolutions directly depends on the engine. Those who like to drive at high speeds wear out the pump bearing much faster. If you want to change the pump less often, then it makes sense to stick to a more relaxed driving style;
- Cooling system contamination. During engine operation, salts and rust are deposited in its coolant passages. The same applies to the pump. There were cases when the pump was simply clogged with various dirt and it could not cope with the job. This caused the bearing to break. Also, if the system is clogged, the operation of the pump becomes more difficult, which can lead to problems. To avoid problems, periodically flush the cooling system.
When should you change the oil pump? If the oil pump malfunctions, the following occurs:
• Firstly, the oil pressure in the system decreases, which is indicated by the oil pressure light.
• And secondly, oil consumption in the system will most likely also increase, which will lead to constant addition of engine oil to the engine.
How to replace the oil pump, also known as the oil pump, on a VAZ 2108-VAZ 21099?
Note! Before you get started, stock up on the following list of tools: a set of basic wrenches, sockets, universal joints, and lastly, an extension cord will come in handy!
Removal: 1) First, if you do not have a carburetor but an injection car, then remove the crankshaft position sensor from its engine. (How to remove the sensor, see the article: “Replacing the crankshaft position sensor”)
2) Then drain all the engine oil in the car engine. (How to drain the oil, see the article: “Changing engine oil”)
3) After draining the oil, remove the crankshaft timing belt. (How to remove the timing pulley, read the article: “Replacing the front crankshaft oil seal”, in paragraphs “1-4”)
4) Next, you will need to remove the oil pan and then unscrew several bolts securing the oil receiver, and after unscrewing the bolts, remove the oil receiver from the car. (You can learn how to remove the pan and how to remove the oil receiver from the article: “Replacing the oil receiver on a VAZ”)
Note! There are flat washers under the bolts that secure the oil pump, so unscrew the bolts carefully without losing them!
We recommend: Effective measures to eliminate problems of poor operation of the stove on a VAZ-2114
6) Now, using a thick screwdriver, slightly move the oil pump, inserting it between the main bearing and between the oil pump itself.
7) And as a result, carefully remove the oil pump from the crankshaft.
Installation: 1) Before installing a new oil pump, be sure to remember an important thing: when installing it, the drive gear that is located on it must be turned in this way... (Continued in point “2”)
2) So that it matches the flats that are present on the crankshaft.
3) To install the oil pump, first lubricate the working edge of the crankshaft front oil seal with engine oil.
4) After lubricating the oil seal lip, install the new oil pump on the crankshaft. During installation, carefully, using a wooden stick or the blunt part of a pencil, tuck the working edge of the oil seal inside, and then tighten all six bolts that secure the oil pump.
5) Next, install all the parts that were removed earlier in the reverse order of removal.
Important! When the “Gas Timing Mechanism” belt is removed, try not to rotate the crankshaft and camshaft, otherwise, when turning sharply, the pistons may hit the valves and, as a result, deformation of one or more valves may occur!
Assembly nuances
When returning drive belt 2109 to its place, make sure that all marks on the crankshaft are in the correct position. If they move, you will have to spend additional time adjusting both the ignition and the gas distribution system.
When the tension roller is put in place, do not forget to also make sure that the belt does not dangle on it.
Sometimes, after the reassembly is completed, the car does not want to start or starts poorly. This symptom indicates that the belt is installed incorrectly. To fix the situation:
- remove it from the gear;
- turn it literally a couple of millimeters;
- put the belt back in place.
Signs of pump wear
As for the latter, the main problems with the pump are leakage of working fluid from under the housing and severe wear of the bearing.
And if the presence of leaks only affects the fluid level, in the presence of such a malfunction you will have to constantly monitor the fluid level and periodically top it up. Moreover, over time the leak will increase.
But bearing wear can lead to more serious consequences. With slight wear, at first there will only be increased noise. If you do not pay attention immediately, wear will quickly increase until the bearing fails. In this case, the pump will jam and a strong grinding noise will appear. All this can lead to rupture of the drive belt and damage to the valves.
The design of the pump is such that it is non-repairable, and if any malfunction occurs, it must be replaced.
A positive fact in the design of the power plant of this car is that this element is external equipment, so replacing the VAZ-2109 pump is not a particularly complicated operation and does not require significant disassembly of the engine. Almost no other elements of the power unit, for example, a carburetor or generator, are affected.
Replacing the unit: procedure
Removing the water pump
Replacing a VAZ 21099 pump requires a number of special preparatory manipulations. All actions should be started only when the car engine has cooled down to the optimal temperature. Basically the progress of the work is as follows:
- the first step is to disconnect the negative cable from the battery;
- remove the cooling liquid, and if the procedure for replacing the liquid was carried out not so long ago, then after changing the pump the drained liquid can be reused;
- then all drive belts are removed;
- the next step depends on the engine specification: on a SOHC type mechanism, be sure to block the pump pulley using a special strap wrench, then unscrew the 4 mounting bolts, the timing belt flaps and the inner pulley;
- on a DOHC engine, you first need to remove the special roller bracket for the belt in the drive, then remove the timing plugs and the tensioner cover for the main chain, then turn the crankshaft counterclockwise to loosen the chains on the pump sprockets;
- remove the mounting bolts and remove the pump from the device, then inspect the blades for corrosion;
- clean the bolt holes, remove all debris, corrosion residues, and, if necessary, restore the threads;
- select a new pump strictly according to the required standard sizes;
- remove dirt and outdated dried sealant from all mating surfaces of the engine block, and wipe the entire surface with a rag soaked in gasoline or acetone;
- Apply a new, specially selected sealant or rubber O-ring.
Be sure to pay attention to the location of the pins. If everything is in its correct place, you can begin tightening. It is worth remembering: if you overtighten the fastening, you can damage the pump. The new mechanism is quite expensive, so keep an eye on this point.
After completing the procedure for replacing the VAZ pump, you can proceed to assembling the remaining components in exactly the reverse order. Next, add coolant to the required level into the vehicle’s cooling system. When the replacement of the VAZ pump is completed, you can start the updated engine and carefully check for possible leaks.
Work such as replacing the pump on the VAZ 2109 and 21099 is necessary to maintain the normal technical condition of the power unit. If you do not pay due attention to this problem, there is a risk of overheating the motor. This will lead to problems with the cylinder block and its head. Overhauling these components is not cheap, nor is it always possible. Timely diagnosis and repair of the water pump will allow you to extend the life of your engine. All work can be done in the garage yourself; no special tools are required. This significantly reduces the cost of maintaining a car.
Reasons for failure
A centrifugal pump does not always survive until scheduled replacement, since there are many other reasons for its failure. First of all, the malfunction is a decrease in the level of antifreeze in the system, which often happens when the oil seal is damaged. The reasons for this may be the following:
- sudden changes in temperature;
- contamination, for example, liquid dirt that accidentally gets under the hood;
- rare changes of antifreeze (it may contain a lot of oil and combustion products);
It is possible to detect oil seal leaks by characteristic leaks that are visible during external inspection. If you notice a knocking sound from this unit, this may indicate bearing failure. With this symptom, it is necessary to immediately replace the VAZ-2109 pump, since driving such a car can lead to jamming of the pump or displacement of its shaft.
The following signs may indicate that the pump is faulty:
- traces of antifreeze on the ground after parking the car;
- Howling sounds are heard while the engine is running;
- engine overheating (usually this happens due to rotor failure).
If you are not sure whether to replace the pump, it is advisable to feel the upper hose going to the radiator. If it is warm, then it is necessary to urgently replace the failed part.
When you change the timing hose, remove the casing from the unit and inspect it for integrity. In some cases, the water pump fails due to defects or cracks in the housing.
Self-diagnosis
Based on indirect signs, one can guess whether the pump needs to be replaced, but this issue can only be more accurately understood by removing and inspecting this unit from all sides. You can preliminary judge the condition of the pump only by some indirect signs. For example, when the engine is operating in normal mode, a pump malfunction may be indicated by the temperature of the upper radiator hose and the presence of liquid in it. The hose must be warm. This can be determined by touch.
An external inspection can easily determine the condition of the oil seal. To do this, just remove the timing cover and inspect the oil seal hole. If there were leaks, deposits of a characteristic color will tell you about it.
Signs that the water pump needs to be replaced
The most vulnerable point of a centrifugal pump is the oil seal - the same sealing part that prevents antifreeze from leaking . Over time, the seal wears out and leakage becomes inevitable. There are enough reasons for the oil seal to wear out: these are wild temperature changes, and the ingress of pollution from outside under the hood of the car, plus antifreeze always absorbs some of the combustion products of fuel and engine oil. Such an aggressive environment cannot but affect the tightness of the VAZ-2109 pump.
Water pump bearings often become unusable. At such moments, a characteristic knock appears under the hood of the car. If you do not resort to “surgical” intervention in the engine compartment, it is not far from jamming or distortion of the pump shaft.
We can briefly list the following symptoms of a malfunctioning centrifugal pump:
- Coolant leak.
- Howling sounds that appear when the engine is running.
- In critical situations, if the problem goes unnoticed after the first two signs, the motor may overheat, especially when the pump rotor is damaged.
Basic cooling system malfunctions
The main indicator of the performance of the cooling system is the engine temperature sensor. It is located on the dashboard inside the car.
The engine temperature sensor on the dashboard of the VAZ 2108/09 is located to the right of the fuel sensor
If the engine overheats, the gauge needle is in the red zone. There may be several reasons.
- Insufficient coolant level or leakage in the system.
- Thermostat failure.
- Problems with the water pump.
- Temperature sensor malfunction.
First of all, you should lift the hood and inspect the cooling system. The very fact of a coolant leak is easily determined by the liquid level in the expansion tank. It is much more difficult to find the exact location of the leak. This often requires a thorough inspection of all areas of the engine compartment.
The most unpleasant option is a breakdown of the gasket under the valve head and coolant entering the oil sump. A symptom of this development of events is a change in the color of the oil. It turns dull white with rainbow streaks caused by ethylene glycol.
Sometimes the cooling system hoses leading to the interior heater are damaged. This usually happens after severe frosts or prolonged inactivity of the machine. In this case, the coolant leak should be looked for under the “dashboard”, lifting the floor mats and removing the interior trim. The leaking liquid accumulates under the floor mats or is absorbed by the interior insulation.
Overheating of the engine often occurs due to the fact that the radiator honeycombs become clogged. Dirt, dust and fine sand, falling on the front plane of the radiator while driving, form a dense crust, which prevents engine cooling. In this case, it is enough to clean the radiator with a jet of water under pressure. It is not recommended to use a wire brush.
Replacing the water pump (Pump) on VAZ 2108, VAZ 2109, VAZ 21099
Welcome! Pump - people called it that, in fact it is a water pump thanks to which the coolant (Let's call it coolant for short) runs through the cooling system and cools the engine. If the pump fails, the liquid will not stop circulating, but a small nuance will appear, it will ring and all this will happen until you change the pump on the car, but if you ignore this sound and continue to drive with it, then soon the pump bearing (When it wears out and this characteristic sound appears) it will simply jam and it will suddenly become stuck (this will, of course, happen when the engine is running), and since the pump is connected by a timing mechanism, the belt will break (If the valves on your car bend, then get ready for expensive repairs).
Note! To replace the water pump, stock up on a number of tools in advance, namely: All kinds of wrenches, screwdrivers, well, empty containers for draining coolant from the car engine, if possible, also stock up on a new good tension roller, because it will still be removed and if it has been in place for a long time yours hasn’t changed and it’s starting to jam, then put a new, working roller in its place!
We recommend: Runflat tires: what are they and what are their features
Where is the water pump located? It is hidden under the timing cover (see small photo, it is indicated by a blue arrow), of course you will have to remove it to see the water pump, and even more so, in order to change it, it can be removed very easily, it will be enough to just unscrew three small bolts that on the sides (There are two nuts) and in the middle (There is one nut), attach the cover, and when it is removed, immediately find the water pump (Indicated by the red arrow) and proceed to check it (Read below about how to check it).
When should you replace your water pump? If you hear extraneous sounds in the engine, then first of all understand where they are coming from, to do this, of course, you will have to open the hood and listen, if the sounds are heard through the timing mechanism cover, then first of all turn off the engine (This is necessary, otherwise you will hit the pulleys with the cover ) and remove this cover, when it is removed, start the car and listen, if the sound comes from the water pump, it means the bearing has failed and the water pump needs to be replaced, then turn off the engine and pump the pump (its pulley) with your hands. , it shouldn’t have any play, it should stand firmly, if it does, then the pump needs to be replaced (By the way, this play can be treated by tightening the locking screw located on the pump, see the photo under number 2 for more details), and finally, the drainage hole inspect (see photo 1, it is indicated by an arrow) not a drop of coolant should flow through it; if it suddenly flows, then again the pump is faulty and must be replaced with a new one.
How to replace the water pump on a VAZ 2108-VAZ 21099?
Note! When the timing belt is removed from the upper pulleys, do not under any circumstances turn the pulleys, otherwise you will disrupt the valve timing (In principle, you can install them, but it’s better not to touch them, but they are placed according to marks, you will learn more about these marks when you read one of the articles to which a link is given in this article), well, even if the valve timing can be set again, this does not mean that the pulley can still be turned, there are simply some engines (They were installed on nines) that bend the valves, so if If you sharply turn the pulley on the removed timing belt, the valves will be slightly deformed, and this will cost a lot of money!
Removal: The pump is not easy to change, but if you have the skill, then everything is simple, if you don’t have it, then most likely you will be replacing it more than once, in general, let’s start by first removing the minus terminal and then draining the coolant from the engine (How to drain fluid, read the article: “Replacing the coolant on a VAZ”, and about how to remove the minus terminal, read the article: “Replacing the battery on a car”), when this operation is done, remove the timing belt from the tension roller and then itself roller from the car (How to remove the roller, you will find in the article entitled: “Replacing the tension roller”), then remove the camshaft gear (How to do this, read “here”) and unscrew several bolts and nuts (There are about five of them, all of them on the photos below are shown) that secure the back cover and then separate it from the base so that there is access to the pump (there is no other way to remove it), and as soon as access appears, use a screwdriver to remove the pump by picking up its pulley as shown in the small photo .
Note! If the pump comes out, but the body gets in the way or something else (you can’t remove it completely, for example), then in this case ask an assistant to move the engine a little, to do this, just let him grab a convenient place (It must be made of metal ) and using force, tilt the engine in the desired direction, and at this time you pull the pump out of the hole in the car engine!
Installation: The new pump is installed in the reverse order of removal, before you buy it, be sure to compare the markings with the old one, we recommend that you take exactly the same one and don’t forget about the gasket that is between the pump and the engine (see small photo), be sure to look at that the place where the pump was adjacent to the engine, if there are pieces of this gasket left there, then you can scrape them off with a screwdriver and buy a new gasket, putting it on the pump instead of the old one.
Note! When you buy a pump, we recommend taking one with an impeller made not of plastic but of metal, look at the top photo in this article, it clearly shows the impeller and you can clearly see that it is made of metal, and by the way, if you suddenly notice that the impeller has changed its color (For example, it has started to rust), then in this case, replace the pump with a new one. When installing, keep in mind that the marking should be directed upward (see photo 1), and the camshaft pulley must be installed with the protruding part towards the car engine (see photo 2) , well, after that, align everything according to the marks, tighten the timing belt (it is tensioned with a tension roller) and pour coolant into the car engine!
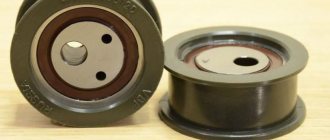
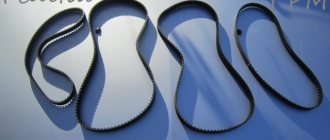
Help in choosing a timing belt and rollers
The reliability, efficiency and operating life of the motor depend on the quality of the rollers and belts chosen for replacement.
Research shows that the cost of a belt is from 450 rubles, and rollers will cost you at least 600 rubles.
When buying spare parts, be guided by the opinions of VAZ 2110 car owners. There are many forums. Also consult with specialists at the service station. They will be able to give professional advice, or even order quality components for you.
Surveys among owners of AvtoVAZ’s creation, namely the VAZ 2110, showed that the most popular belts are products manufactured by the following companies:
- Gates;
- Bosch;
- Kraft;
- Power Grip;
- Dayco;
- Contitech.
As for videos, it’s better to pay attention to the following brands:
- Gates;
- Power Grip;
- VPZ;
- BRT;
- Dayco;
- Marel.
Of course, the choice is purely individual and depends on the financial capabilities and available assortment of a particular store. But if the necessary elements are not available in your city, you can always order them online. Nowadays this is not a problem.
Timing belt price
Separately, a timing belt on a VAZ 2112 costs about 1,000 rubles. However, all drive elements should be replaced at the same time. This will make it more clear what the shared resource is. The cost of a set, including a belt and 2 rollers (tensioner and support) is about 2500-3000 rubles.
At service stations they can charge you from 800 to 1200 rubles for replacing a kit.
To save money, you can replace the timing drive kit on a VAZ 2112 yourself, but first you need to choose the right spare parts. The table below shows several types of kits from trusted manufacturers, indicating catalog numbers
Manufacturer's recommendations
- Your primary task as a car owner is to periodically visually inspect the unit.
- In addition to replacing the element, it is necessary to simultaneously replace the tension rollers.
- VAZ 2110 comes with 8 and 16 valves. The replacement process also depends on this. So, in an 8-valve valve, one tension roller is installed, and in a 16-valve valve, a support and a tension roller are installed.
Replacing the timing belt of a dozen is not difficult. It is not necessary to contact specialists. It is quite possible to do it on your own.
Set of tools
To complete the job of replacing the timing belt you will need:
- A set of spanners and open-end wrenches;
- Mount;
- Screwdriver Set;
- A special key with which to tighten the roller or simple pliers with curved rings;
- Car jack;
- Rags, protective gloves.
Many people ignore the advice on using gloves. Especially in the summer when it's hot. But they are needed to protect you from injury.
There is no need for an inspection hole. You will need to remove the right wheel to remove the timing belt if your Ten is equipped with power steering. So you can't do without a jack.
Visual belt check
Before replacing the timing belt on a VAZ 2110 8 valve, it is necessary to inspect it. It is carried out after a run of 15 thousand km.
Tools are prepared for this:
- keys: overhead and open-end.
- different types of screwdrivers;
- a mount is required;
- pliers with special jaws for proper installation of the roller;
- jack.
The check consists of the following points
- There is a special plug on the front protective timing cover that can be removed.
- The belt is removed from the generator pulley. This is important for ease of use.
- The timing cover is held in place by 6 bolts that need to be unscrewed.
- The belt opens. He is visually inspected.
We recommend: You can find money at a pawnshop
Do-it-yourself replacement of the VAZ 2110 8-valve injector timing belt is carried out in the case when all defects are clearly visible.
Carrying out repairs
So, to make everything clearer, let's break the entire procedure into small points:
- Remove the plastic cover by unscrewing the three bolts with a “10” key.
- Loosen the belt tension with the key set to “17”.
- Remove the belt from the camshaft, pump and roller pulleys.
- Drain the fluid from the system, allowing the engine to cool.
- Using a “10” wrench, unscrew the three bolts securing the liquid pump housing.
- Using a chisel and hammer, carefully press the pump body out of its place.
- Clean the seat in the engine block.
- When installing a new VAZ 2109 pump, you can apply a small amount of silicone sealant to the gasket.
- Tighten the bolts evenly.
- Install and tension the timing belt (check that the marks match).
- Install the protective cover.
- Pour fresh fluid into the system.
That's it, just 12 steps you need to go through to change your pump. There are no tricks to repair; all you need from a special tool is a wrench to adjust the belt tension. But you can do without it, just have a couple of screws and a screwdriver. Place self-tapping screws (or bolts of suitable thickness) into the holes, and a screwdriver between them so that you can turn the roller around the axis.
If you are only replacing the liquid pump of a VAZ 2109, then you do not need to remove the wheel and hang out the entire right side, you just need to open the hood. But if you are carrying out a full repair described above, you will have to lift the right side and remove the generator belt. And most importantly, in order not to damage the pump housing, it is necessary to press it into the engine block using a wooden spacer.
Repairs of all front-wheel drive VAZ cars are carried out similarly, not only the 2109 model. Even on more modern Priors (which have 16-valve engines), the procedure is not much different. Of course, the belt is longer and there are two rollers, but in general the differences are not as significant as they might seem at first glance. Therefore, if you can do this procedure on a VAZ 2109, you can do it on a Priora without difficulty.