The fourteenth VAZ (like the VAZ 2113 and VAZ 2115) is equipped with a five-speed manual gearbox. This gearbox is similar to the units that were installed on the eight, but the main pair has been changed.
From this article you will learn the technical characteristics and design features of the gearbox on the VAZ 2114, how the repair and maintenance of the fourteenth gearbox is carried out, and what is the current cost of used and new units.
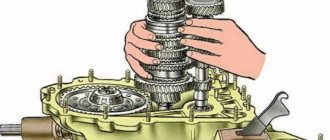
Disassembled gearbox
CONSTRUCTION FEATURES
Structurally, the gearbox device is divided into 3 main parts: gearbox housing, rear cover and clutch housing. The internals of the device can be divided into two groups - the main pair and the differential with gear ratios.
The main pair, also known as the drive shaft of the gearbox, performs the function of reducing the speed transmitted from the engine to the crankshaft. The VAZ 2114 GP gearbox reduces engine speed by almost four times (gear ratio – 3.7).
Manipulations with the main pair, aimed at changing the gear ratio, allow you to change the length of the gears, which makes it possible to influence the acceleration and maximum speed of the fourteenth. However, it is not recommended to interfere with the operation of the box without proper qualifications - you can do irreparable things.
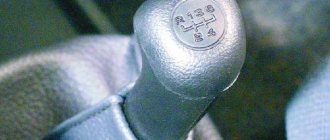
The VAZ 2114 gearbox that comes as standard has the following gear ratios:
- First speed – 3.636;
- Second speed – 1.95;
- Third speed – 1.357;
- Fourth speed – 0.941;
- Fifth speed – 0.784;
- Reverse – 3.53.
As evidenced by the reviews of the owners of the fourteenth, the standard gearbox is not the ideal of engineering thinking - the first speed is too short, the second, on the contrary, is long. Poorly selected gear ratios cause a serious loss of vehicle dynamics during acceleration when switching gears from 1 to 2.
The cost of a new gearbox for a VAZ 2114 is about 16 thousand rubles; used gearboxes can be found at prices ranging from 4 to 10 thousand, their price varies greatly depending on the condition.
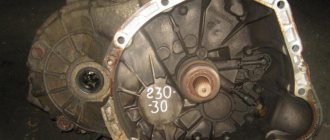
Features of the device and structure of the transmission mechanism
The fourteenth model is equipped with a five-speed gearbox similar to the unit installed on the G8, with the exception of the main pair.
According to consumer reviews, the lack of quality of the fourteenth gearbox includes the selection of gear ratios: a very short first speed and a long second. This drawback leads to a loss of vehicle dynamics when switching from first to second gear during acceleration.
The gearbox housing, rear cover and clutch housing are the main parts of the gearbox design structure.
Internal device groups:
Main couple
The drive shaft functionality reduces the speed transmitted from the engine to the crankshaft. The transmission coefficient is 3.7. Thus, the main pair of the “fourteenth” is capable of reducing the indicated speed by approximately 4 times. The length of the gears can be changed by controlling the main pair mechanism. What affects acceleration and the maximum possible speed limit of the vehicle.
Differential with gear ratios
The differential gear ratios of the stock VAZ 2114 gearbox include: 3.636 (first speed number); 1.95 (second speed number); 1.357 (third speed number); 0.941 (fourth speed number); 0.784 (fifth speed number) and 3.53 (reverse speed number).
Having an idea of the structural features of the gearbox mechanism, it is necessary to begin preparing tools, materials and tools that will be useful during the removal and disassembly of the box.
POSSIBLE FAULTS
Despite the imperfect operation, the VAZ 2114 gearbox, when used correctly, is distinguished by good endurance and durability. If you do not hesitate to prevent and promptly eliminate breakdowns, repairing it is not expensive.
Let's consider the main gearbox malfunctions that the owner of the fourteenth may encounter:
- Lack of speed fixation when switching. If the speeds are out of whack, the cause is most likely worn teeth on the gears and clutch. Accelerated wear of these parts is caused by incorrect gear shifting and non-compliance with the speed limit. The problem is resolved by replacing the gears.
- The gear shift lever is tight. The reasons are mechanical damage to the teeth of the lever fixing on the hinge or wear of the reaction rod; it’s also a good idea to check the integrity of the plastic parts of the gearbox drive;
- The VAZ 2114 gearbox is humming. Most often, the gearbox is humming in neutral gear. First of all, you need to check and, if necessary, add oil (in general, the box may hum due to the use of low-quality lubricants). If the oil is normal, the problem is wear of the bearing on the input shaft, which can only be determined through diagnostics or by disassembling the gearbox;
- Crunching sound when changing speed. Here it is necessary to change the worn out synchronizer, and it must be changed immediately after the problem has been discovered, because if you tighten it, the gear unit will completely fly off;
- Knock. The gearbox on a VAZ 2114 can knock both under load and without it, and in any gear. The cause of the knocking noise is a damaged drive gear of the problematic transmission.
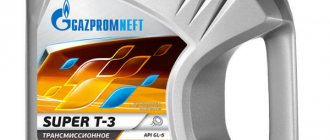
One of the key factors for the trouble-free operation of gearbox number fourteen is the use of high-quality lubricants. The most suitable option is GL-4 mineral oil. It is not cheap, but it does its job at 5+; when using mineral oil, VAZ gearbox repairs are usually required extremely rarely.
Most VAZ 2114 owners agree that the best gearbox oil is 75W90. It is distinguished by greater fluidity than typical gearbox oils, due to which the lubricant better gets into those places of the gearbox, the lubrication of which is provided exclusively by splashing. Good options for 75W90 are Hypoid-Getriebeoil TDL and Liqui Moly Vollsynthetisches Getriebeoil (GL-5).
Checking the oil level should be carried out every three weeks. In the gearbox, the fourteenth gear is placed vertically, the topmost is the fifth, it is the one that is most susceptible to failure due to lack of lubrication, so it is always necessary to fill in oil to the maximum mark, and best of all - 200-250 ml. more than the required norm.
Repair of gearboxes (gearboxes) VAZ, GAZ, NIVA, UAZ
The transmission or gearbox is a very important component of the car; if the gearbox is faulty, in most cases it is almost impossible to drive the car. When switching, jerks and crunches are possible; when moving, the car may jerk, accelerate poorly, some gears simply may not engage, and if 1st gear does not work, then you have to start moving from the second gear, which is also not correct, in a word, if you have If the first signs begin to appear indicating that the transmission is operating abnormally, it is better to immediately contact experienced auto mechanics; we have professionals who can sort out and restore your transmission.
Request a call back
Your message has been received
Our specialist will contact you shortly at the number provided.
We repair gearboxes on VAZ, GAZ, UAZ, Niva cars.
We have qualified specialists who will carry out high-quality repairs, complete restoration of the faulty gearbox, after repair the gearbox will work properly, we give a guarantee for the repairs and if suddenly after the repair something goes wrong, then we are always ready to help you, although in such cases practically no, we approach our work carefully and responsibly.
There are situations when repairs are impractical and we can always offer you an already restored gearbox; this is faster and cheaper than restoring a damaged gearbox. In addition, the price is quite reasonable and we will never charge you too much.
The most common causes of malfunctions:
- Noises in the gearbox, which clearly indicate abnormalities in operation (gears, synchronizers may fail, shafts may shift, etc.);
- Difficulty shifting gears (wear or other malfunction in the clutch, wear of the sliding clutch, wear of the fork, sticking of the gearbox hinge);
- Gears fly out when driving (synchronizer rings are worn out, the synchronizer spring is faulty, the clutch is worn out, the synchronizer ring is worn out);
- Leaking oil and gearbox (caused by oil seals, or wear of the sealing gasket, etc.)
In any case, there can be a whole bunch of reasons for malfunctions, and our specialists will identify the malfunction before carrying out repairs and only after that will agree on the cost of repairs or provide you with an already repaired gearbox, which is much faster.
REMOVAL AND REPAIR
Almost any DIY repair of a VAZ 2114 gearbox - installing new bearings, clutch or gears - involves removing it. To do this, you will need screwdrivers, a set of wrenches, WD-40 and hanging equipment to lift the unit.
Let's figure out how to remove the gearbox of the fourteenth:
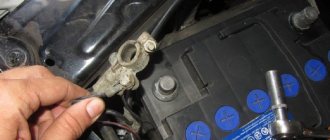
- We drive the car onto an overpass or into a garage with a pit. First of all, we disconnect and remove the battery, then drain the oil from the gearbox and remove the starter. To do this, you need to disconnect the power wires from it, remove the protective jacket, unscrew the two fixing nuts from the bottom (from the pit) and one from the top of the starter;
- Now you need to remove the connecting cable from the clutch release fork and remove it from the bracket on the gearbox;
- Disconnect the wiring to the speed sensor. The wire block is secured by a spring, which must be compressed to disconnect the connection;
- We climb under the fourteenth and disconnect the wiring from the reverse sensor;
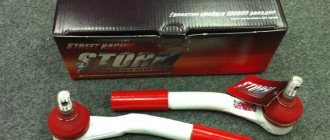
- We tighten the bolts with which the jet thrust bracket is attached to the unit body;
- We remove jet thrust. To do this, you need to loosen the clamp connected to the rod and move it back, which will make it possible to remove it from the hinge;
- Now you need to dismantle the wheel drives: remove the left one completely, and simply unscrew the right one, move it to the side and hang it on the car body;
- We unscrew the bolts from the ball joint (left) that secure it to the steering knuckle;
- We dismantle the gearbox mount to the engine on the lower right side; to do this you need to remove the supporting brackets from the stud;
- Remove the clutch housing cover (it is secured with 3 bolts);
- Unscrew the bolt on the lower left gearbox mount;
- Unscrew the nuts that secure the left and rear engine mount;
- Now we remove the fixing bolts with which the gearbox is attached to the rear engine support. We dismantle the support itself;
- Using a screwdriver as a lever, insert it into the hole between the engine cylinder block and the clutch housing, and move the gearbox off the guides as far back as possible. The rear part of the box body should pass on top of the suspension extension, and the input shaft will be disconnected from the clutch, after which the unit can be removed from under the car.
Now you know how to remove the VAZ 2114 gearbox. Good luck with your driving without any breakdowns!
Removing the gearbox from a VAZ 2113, VAZ 2114, VAZ 2115
Many car owners have a question about how to remove the VAZ 2114 gearbox in order to repair or tune the transmission with their own hands. The design of this unit is common to all cars of the Lada Samara family: the gearbox is mechanical, 5-speed, combined with a differential and final drive.
The input shaft gears are in mesh with the secondary gears of the forward gears. Driven gears are installed on the secondary shaft. Each of those that includes forward gears has a synchronizer. But there is no synchronizer on the reverse gear. The gearbox drive includes a selector rod and gear shift lever, a ball joint and gear mechanisms.
Repair of the VAZ gearbox may be required if, when changing gears, there is a crunching or grinding noise in the gearbox, it hums, moving the lever causes difficulties, some gears switch off spontaneously (the synchronizer is damaged or the drive is incorrectly adjusted). The gearbox is removed if the vehicle's clutch is subject to repair.
General symptoms
Symptoms are manifested by seven signs, which include:
Each of the listed symptoms has its own etymology and an exact picture of its manifestation, which objectively characterizes the root cause of the malfunction.
Crunch in the gearbox
This type of repair requires disassembling the gearbox structure.
The main reasons, a sign of which is a crunching noise during gear shifting:
Knocking at the checkpoint
The sounds of gearbox tapping are ambiguous due to their multiplicity. Therefore, the picture of the malfunction is accurately established by diagnosing the vehicle.
The box starts knocking if:
Oil leakage
If there is an oil leak, the repair task is facilitated by the ability to determine the location of the leak, but most often in practice this is impossible to determine.
Faults that cause oil leakage are the following:
Speeds are flying out
This kind of phenomenon occurs during gear shifting. The main reason for the appearance of such a malfunction is wear of the teeth on the gears and coupling. A factor contributing to the development of weakening speed control is a violation of the rules of gear shifting technique, which occurs when the speed limit is not observed. Replacing the gears of the specified parts eliminates the described problem.
The handle is tight
Factors under the influence of which the movement of the handle is difficult are damage to the locking teeth of the lever itself, wear of the jet thrust, and violation of the integrity of the gearbox drive parts.
The box is humming
This sound appears mainly during neutral transmission. The main reason is the low quality of lubricants. Therefore, the first action that must be performed when this type of technical problem occurs is to check and, if necessary, add oil. If the box continues to hum, then it is necessary to perform diagnostics, since the bearing on the input shaft may be worn out.
Noise in the CP
The box begins to make noise when the oil level is insufficient. This situation can be resolved by adding oil. If the noise does not stop, then it is caused by wear of the seals and mechanisms. This can be eliminated by installing new parts to replace worn ones.
Upon completion of the process of identifying the malfunction, its cause and source, as well as the factors influencing the occurrence of malfunction of the gearbox, it is necessary to become familiar with its structure and the structural features of the mechanism.
Failures that do not require removal of the gearbox
If the reverse gear does not engage, then it is not necessary to remove the box: it does not have a synchronizer installed, the problem can be solved more simply. Before making a decision, you need to check the universal joint and the linkage, as the problem may be caused by a loose clamp. Another reason could be that the mechanism is blocked.
To check, remove the lever between the seats and visually assess whether there is a problem. The same operation must be performed if there is a crunching sound when engaging 2nd gear, since the most likely cause of the malfunction may be a worn synchronizer, which in the Lada Samara family of cars is not very durable.
Do I need to remove the gearbox if the gearshift lever rattles? This question worries many, but most often, removing the gearbox will not be necessary to fix the problem. An unpleasant sound occurs when the bushing that connects the rod and rod touches the wings of the latter. The metal bushing rattles due to frequent impacts on the metal of the wings. The defect of the VAZ 2114 manufacturer can be easily eliminated with your own hands.
- Remove the cover from the gearshift lever. Using a 13 key, unscrew the fastening, remove the bolt and remove the lever. Remove the bushing and remove the plastic parts.
- Clean the metal sleeve, measure 2-3 mm from the edge, put a mark or wrap the sleeve with electrical tape at this level.
- File off the extra millimeters, lubricate the CV joint and bushings and reassemble them. Install the bushing and lever in their original place.
According to reviews from car owners, this simple step eliminates the rattling of the gearshift lever. Handle vibration disappears. It will move stiffly, but it will gradually loosen and work easier.
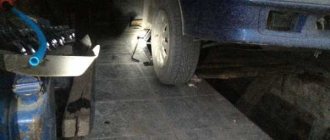
Preparatory work
Before starting work, the car should be placed on an inspection ditch or driven onto an overpass and make sure that the raised hood is secured and the car is on the handbrake. During work, the engine will need to be suspended.
Therefore, you should provide the opportunity to install a hoist or use improvised means, a special device (crossbar to support the engine). To repair a VAZ 2114 gearbox, you need the following tools:
- keys included;
- screwdrivers;
- hanging device;
- capacity about 5 l;
- WD-40 spray or similar product (to facilitate removal of rust-covered nuts).
Transmission device: 1 - input shaft; 2 - secondary shaft; 3 — rod for shifting the third and fourth gears; 4 — fork for shifting third and fourth gears; 5 — differential; 6 — fork for switching first and second gears; 7 — fork rod for shifting first and second gears; 8 — gear shift rod; 9 — fifth gear shift fork rod; 10 — gear shift mechanism; 11 — reverse intermediate gear; 12 — clutch housing
It is more convenient to carry out work on removing the VAZ 2114 gearbox together with an assistant. First you need to disconnect the battery and put it aside. Drain the oil from the gearbox, having previously warmed it up, to do this, drive about 5 km before repairing.
With the car installed on the overpass, unscrew the 3 bolts securing the crankcase protection and remove it, remove the dipstick to check the oil level (in models produced earlier than 2003) or unscrew the oil filler plug. Place a container under the oil drain hole, use a 17mm wrench to unscrew the plug and wait until the oil is completely removed from the gearbox.
Remove the engine starter by sequentially disconnecting the column of wires, unscrewing the fastening nut and removing the wire on the contact bolt of the starter relay under the hood of the car. Go down under the bottom and remove the unit fastenings, then unscrew the last fastening again under the hood. Remove the starter from below.
Disconnect the speed sensor wires under the hood by compressing the spring holding the block. Disconnect the reverse sensor wires from below. Under the hood, unscrew bolts 1-3 connecting the gearbox housing and the ignition module bracket. Disconnect the torque rod bracket, loosen the gear shift rod clamp and remove the speed selector rod hinge rod.
To do this, you need to move it back a little. Remove the left front wheel drive and install a plug in its place. It is enough to disconnect the right wheel drive from the box and move it to the side, securing it in this position. Remove the left ball joint bolts that secure it to the steering knuckle.