The VAZ 2114 throttle valve is an important engine component that provides a dosed supply of purified air to the engine, thereby ensuring the saturation of the fuel with oxygen to ensure its active combustion.
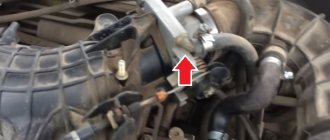
Finding this element is not difficult. To do this, you will need to open the hood of your car, find the air filter and the black pipe for supplying air to the engine. Run your gaze in the direction of air movement (from the filter) closer to the windshield, determine the location of its connection with the metal element with the tubes connected to it. This will be the throttle assembly.
Where is the throttle valve located?
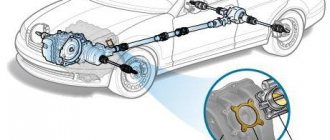
The entire throttle body is located in the engine compartment. It is located between the “intake manifold” and “air filter” ligament. In other words: air enters the air filter, passes through the mass air flow sensor, enters the throttle assembly, and from there it goes into the engine through the intake manifold (receiver). To find out where the throttle valve is located, pay attention to the figure (number 3).
General characteristics
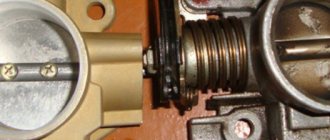
If we consider the throttle assembly as a whole, it will consist of several parts:
- coolant outlet and supply pipes;
- ventilation system tube;
- a sensor that controls the position of the damper;
- RXX;
- the damper itself;
- condensation system pipe.
Knowing the throttle structure and what it looks like is necessary for cleaning. This unit is one of the most important components of the intake system. When the throttle operates correctly, a sufficient amount of air is sent to the engine, which is used to enrich the fuel mixture. The damper is controlled by an electronic gas pedal, which, when pressed, changes the opening angle.
This mechanism is located between the intake manifold and the air filter. Getting to it for preventive cleaning will not be difficult even for someone who has just become a car enthusiast.
To work, you will need to prepare tools and materials for cleaning.
Throttle valve malfunctions VAZ 2114
The mechanism itself is not a complex structure and is designed for the entire service life of the engine. However, some design features of the motor and a number of external negative factors, over time, create obstacles to its normal operation. In most cases, problems with the damper are the result of simple contamination. The reasons for the appearance may be the following:
- untimely replacement of the air filter, resulting in the entry of dusty, unpurified air;
- the presence of defects and cracks in the air system and its elements (for example, a defective air filter, a torn pipe), the result is the same - contamination of the air flow;
- the appearance of carbon deposits and oil residues on the inner walls of the throttle assembly and valve.
The result of the above reasons is the incorrect operation of the unit; the damper may not fully open or close, which directly negatively affects the operation of the engine. Although the filtration and air flow purification process can be controlled, it will not be possible to completely get rid of carbon deposits. Therefore, automakers recommend periodic cleaning of the unit from contamination every 25 thousand kilometers. We believe that this recommendation is completely justified in the conditions of Russian reality, the quality of fuel and the condition of the road surface.
External cleaning
You can clean the throttle valve on a VAZ-2114 without removing the entire assembly. There is one advantage - you will do all the work very quickly, but you will not be able to clean the inside this way. As a result, the channels in the throttle assembly may remain contaminated, but this will not change the situation - all the symptoms will continue to bother you. External dirt can be easily cleaned. For work, it is best to use a special spray for cleaning carburetors. But keep in mind that it is very aggressive, so it is advisable to work in protective equipment - a respirator and gloves. Do not allow liquid to get on plastic elements - it will corrode them.
The cleaning procedure is as follows:
- Remove the corrugation from the throttle assembly.
- Thoroughly spray all surfaces of the throttle body.
- Wait a little so that the liquid destroys as much dirt as possible.
- Use an old toothbrush to clean all surfaces of the throttle body. For maximum efficiency, manually open the damper slightly.
- Spray again and wipe all surfaces dry with a cloth.
- Reinstall the bellows and start the engine.
The method is simple, but it is unlikely to help get rid of serious stains. Therefore, it is best to completely disassemble the entire assembly and wash it.
Troubleshooting
Before taking any action, you need to check the VAZ 2114 throttle valve for possible problems.
In order to accurately diagnose a malfunction or incorrect operation of the throttle, there are characteristic signs inherent to it. These are:
- Instability of engine speed at idle, their unreasonable increase;
- Periodically stalling engine;
- Jerking while moving;
- The discrepancy between the effort when squeezing the gas pedal and the final result (the proper reaction from the engine does not occur, power does not increase, the car does not pick up speed or does it late).
- Noticeable increase in fuel consumption in standard driving mode.
Please note that problems may be caused by:
- The TPS sensor is faulty, resulting in the wrong amount of fuel being supplied to the system.
- Malfunction of the idle speed controller.
Therefore, sometimes it is advisable to check these important elements of the system.
Sensor replacement procedure
The sensor is fastened using two screws. Use a screwdriver to unscrew them and carefully remove them from the axle. When you install a new part, be sure to ensure that the socket is directed towards the partition (toward the driver). The finale is fastening with screws. As you can see, there is nothing complicated, now you will need a simple adjustment of the VAZ 2114 throttle sensor. It is done like this:
- The throttle valve opens fully. If something interferes with movement, then the TPS is set incorrectly. Rotate its body 90 degrees. and re-fasten.
- Before starting the engine, turn off the power to the car for 10-15 minutes. After all these manipulations, the engine should run smoothly.
That's all, this completes the replacement and adjustment of the VAZ 2114 TPS. It is worth noting that in most cases there is no need for adjustments; the device starts working without problems after startup.
When is throttle valve flushing necessary?
Dust, dirt, and soot from the crankcase settle on the body from the inside and outside. The unit becomes contaminated, and along with this, characteristic symptoms of malfunctions appear.
It is extremely important to clean the throttle valve on a VAZ-2114 with an electronic pedal, since such a drive is much weaker than a cable. And even a small amount of dirt can disrupt the normal operation of the system. Symptoms that may indicate that service is required:
- Jerking when driving at low speed (the accelerator pedal does not move).
- The crankshaft speed is either too high or varies over a wide range.
- Unstable engine starting.
- The engine stalls immediately after starting.
Similar symptoms are observed in case of malfunctions of the crankshaft sensors, throttle position sensors, and idle speed control. Therefore, before starting cleaning, it is advisable to perform diagnostics, at least with a simple scanner, in order to identify possible breakdowns.
Signs of a dirty remote control
The most common symptoms associated with a dirty damper:
- Poor engine starting.
- Unstable idling, speed fluctuates.
- The car jerks when driving at low speeds.
- Difficulty idling, engine stalls.
All these signs indicate a dirty remote control. But do not rush to draw conclusions and start cleaning the unit, because they may also indicate a breakdown of some sensors: IAC, TPS - they are located on the throttle assembly and may be faulty. In particular, high-quality washing of the remote control can cure them, but not a fact (by following the link, you can check, clean, replace the IAC, check the TPS, repair and replace it). A faulty mass air flow sensor also has similar symptoms. It is advisable to clean the remote control at intervals of 30 thousand km.
How to clean the throttle valve of a VAZ 2114: two ways
There are two cleaning methods:
- Without removing the unit;
- And accordingly with its dismantling.
Which method should I choose? It all depends on the degree of pollution. If the mileage has been up to 25 thousand since cleaning or replacing the throttle. Then, most likely, it is possible to limit ourselves to superficial cleaning and prevention without removing the part. In other cases, it is recommended to completely dismantle the unit for deep, thorough processing, cleaning and gaining access to hard-to-reach places.
We will describe in detail the process of complete removal after which the first option will not be difficult to complete. So, let's begin:
The first method of cleaning the throttle valve of a VAZ 2114
- To begin, unscrew the cap of the expansion tank with antifreeze. This is necessary in order to “relieve” the pressure and avoid antifreeze leaking out of the hoses.
- Next, we need to unscrew and loosen all the clamps that tighten the hoses attached to the throttle block. The same applies to the air pipe. To carry out the work we will need a 13mm wrench or socket.
- After removing the clamps, disconnect the hoses themselves. We disconnect the pipe from only one side and, for convenience, move it to the side.
- Now remove the throttle cable from the throttle drive selector.
- Turn off the power to the sensors.
- Take the 13mm head, unscrew the two bolts and remove the throttle assembly. Remove the old gasket.
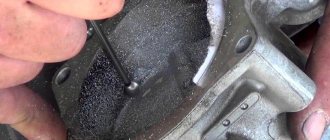
- To treat contamination, you can use carburetor cleaner and a clean rag or rag. If the degree of contamination is very high, then you can use a toothbrush with hard bristles.
- Just before cleaning, disconnect the idle air control. Apply the product to the contaminated surface. Using progressive movements, remove carbon deposits from the metal surface. If you are not satisfied with the result, repeat the operation again until complete cleansing. It is very important to clean or blow out the channels that are in the product. A large amount of dirt accumulates there. It is most convenient to carry out purging using compressed air. To do this, you can use a regular car pump.
- If the sensor socket and the sensor are clogged, be sure to clean them too.
- Do not forget to carefully clean the junction of the throttle assembly and its internal cavity. To do this, apply some cleaning product to a rag. Distribute evenly on the inner walls of the parts. Take a brush and clean the problem areas. After finishing the treatment, wipe the cleaned areas with a damp cloth and remove any remaining dirt.
- After washing the unit, it is recommended to clean and blow out the disconnected pipes.
- We expect a short amount of time.
- We install a new gasket at the junction of the throttle assembly.
- We attach and secure the knot in place.
- We connect the IAC sensor.
- We pull the hoses onto the fittings of the cooling system and connections to the adsorber.
- We put on the throttle body pipe.
- We fix the cable on the drive.
- Tighten the clamps of all attached elements.
- We connect the sensor chips.
- Close the cap of the expansion tank with coolant.
- We start the car and test its operation.
The second method of removing the throttle valve
The non-removal method is somewhat similar to the one we described earlier. The only difference is that we will only remove the air duct pipe and nothing else. The work steps are as follows:
- Remove the pipe;
- We repeat point number 10 of the previous method.
- We connect and secure everything in the reverse order, not forgetting to replace the old gasket with a new one.
Keep in mind that this method is most suitable for preventative, light, superficial cleaning. If malfunctions or incorrect operation of the engine occur, use only the removal method. Now we know how to clean the throttle valve on a VAZ 2114 using two different methods, quickly and without much difficulty.
Step-by-step instruction
Before starting work, purchase a special cleaner for carburetors, and also prepare a set of screwdrivers and a 13mm wrench. If you want to get to the hidden places of the damper, then also take cotton swabs. When disassembling it often turns out that the reservoir o-ring and throttle body gasket are unusable, it is best to replace them at the same time as cleaning, so that later you do not have to waste time disassembling the assembly again. You need to purchase parts based on engine size and number of valves. The gaskets for 1.6 are slightly different than for a motor with other parameters.
- Lift the hood and remove the plastic cover from the engine. If you have not a mechanical, but an electronic damper, which was installed on cars of later years of production, then remove the terminals from the battery and disconnect the electronic damper control chip.
- Disconnect the rubber ventilation hose. This hose is held in place by a clamp, so you will need a screwdriver. If you see dirt in this part of the assembly, wipe the connections and components with a rag.
- To reduce the pressure in the cooling system, remove the liquid supply tubes from the throttle assembly. To do this you will need to loosen the clamps. To prevent dirt from getting into the cooling system, plugs are put on the tubes. There you can do with all the hoses.
- Lastly, remove the fuel tank ventilation hose.
- After this, it is enough to unscrew two bolts and disconnect the accelerator pedal cable to get to the damper.
Examine the part and decide how you will proceed next:
- carry out superficial cleaning without removing the entire assembly;
- completely remove all contaminants, replace the gasket and o-ring.
In the first option, you need to remove a layer of dirt using a rag or cotton pad from the surface of the damper. In this case, do not use specific cleaning agents - wipe the throttle with gasoline or ordinary solvent. When cleaning, manually adjust the flap to remove dirt not only from the outside, but also from the inside.
For complete cleaning, remove the throttle assembly. To do this, it is enough to remove two bolts with a 13mm wrench. In this case, complete cleaning is carried out with special means and consumables are replaced. After you finish work, be sure to blow out the assembly with a stream of compressed air. Thanks to this, you will get rid of excess moisture in the assembly. With complete cleaning, your manipulations take place in a non-confined space, which allows you to put the entire unit in order. This is exactly what is best to do if you are doing routine throttle maintenance. During the complete cleaning, be sure to pay attention to the idle speed sensor - it is best to remove dirt from it using WD40 and cotton swabs.
How to check IAC?
Checking the DXX should begin with a visual inspection. Sometimes you can notice oxidation of the contacts or damage to the wiring or the part itself. And to fix the problem, you will need to clean the contact connections, restore the integrity of the wires, or replace the sensor.
If no external defects are found, diagnostics should be performed with a multimeter. You can make sure that voltage is supplied to the regulator as follows:
- Turn on the car ignition;
- Switch the measuring device to voltmeter mode;
- Install the negative terminal of the voltmeter on the motor housing;
- Connect the positive terminal of the device to contact A of the regulator, and then to D.
The device screen should display a value of approximately 12 Volts. If it is different, then there is a break in the wiring. To check the IAC itself, you need:
- Remove the sensor from the car;
- Set the multimeter to ohmmeter mode;
- Connect the tester terminals to contacts A and B of the part, and then to C and D. If the sensor is working, the device will show 50-53 Ohms;
- Connect an ohmmeter to terminals A and C, B and D. The resistance should approach infinity.
If the tester readings are different, the regulator has failed. If it breaks, it needs to be replaced. You can diagnose and replace the element yourself. There is usually no need to contact a car service center with such a problem.
Cleaning the throttle
Later versions of the VAZ 2114 model could have electronic throttle valves installed, so next we will consider instructions for cleaning both types of throttle: mechanical and electronic. Note that the types of throttles discussed below were installed on the 8-valve VAZ 2114 engine.
Cleaning the mechanical throttle is carried out in several steps:
- Unscrew the cap of the expansion tank to relieve pressure in the cooling system;
- Disconnect all sensor plugs from the throttle;
- Using a Phillips screwdriver, unscrew the coolant pipe clamps on the throttle body;
- Remove the throttle cable (if you do not have an electronic gas pedal);
- Using a 13-mm socket (or a spanner), unscrew the two nuts securing the assembly, not forgetting to remove the old gasket;
- Next, proceed to thoroughly clean the assembly, not forgetting to clean all surfaces adjacent to the damper. To remove dirt from hard-to-reach places, you will need compressed air from a compressor or a regular car pump.
Assembly should be done in reverse order. Cleaning the electronic throttle has several features:
- Because The mechanism of the electronic version contains microsensors; when cleaning them, you should not get carried away with chemicals, because there is a risk of damage;
- To thoroughly clean the mechanisms of the electronic version of the unit, remove the cover secured with 4 bolts;
- Next, after cleaning all the elements, lubricate the gears with lithol;
- Also, when reinstalling the electronic version of the unit, it may need to be adapted.
Owner reviews
Owners of LADA XRAY who independently performed the throttle valve zero adaptation procedure note that the car stopped twitching and acceleration became smooth.
Some reviews from Drive2.ru (link to post):
It really works! This morning I did this operation and the car drove much better, especially at low speed. Why is this not done during pre-sale preparation?
- Throttle sensor Lada Granta 8 valve
I’ve been suffering with this problem for half a year, but here it’s 3 minutes! I even wrote to AvtoVAZ, they sent me... to the dealer.) Now, after carrying out the above mentioned manipulations, I’m driving for the second day without twitching!
In the morning I carried out these manipulations at an ambient temperature of -10 and an engine temperature of 50 degrees. The car is unrecognizable - all the twitching is gone. Acceleration became smooth, and fuel consumption seemed to drop slightly. I rode all day long.
Let us remind you that we previously published an information letter from AVTOVAZ, which tells us what to do in case of vibrations and jerks when starting off a LADA car.
Key words: ECM Lada XRAY | ECM Lada Vesta | ECM Lada Largus | ECM Lada Priora | ECM Lada Granta | ECM Lada Kalina | ECM 4x4 | esud niva | universal article
Share on social networks:
Found an error? Select it and press Ctrl+Enter..
The simplest way to carry out adaptation
Now the question of whether it is necessary to adapt the throttle valve after cleaning should definitely not arise if there were still doubts. The easiest way to carry out the operation is to simply reset the battery terminal. Just to begin with, it is worth warming up the engine well to operating temperature, for which you should take a short trip. Then, turning off the engine, disconnect the negative terminal of the battery and wait. Depending on the brand of car, the waiting time can be 10-30 seconds or 15-20 minutes.
During this period, all ECU parameters should return to the original (factory) settings. Next, all that remains is to connect the terminal and start the engine - the speed should return to normal.
