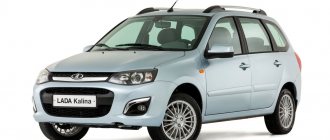
Features of headlights
As standard, Lada Kalina headlights are combined into blocks, which are divided into three sections, providing:
- low beam;
- side and main beam;
- turn indicator.
When turning on the low beam, only low beam bulbs are used. If you turn on the high beam lighting, a complex consisting of high beam and low beam lighting at the same time lights up, each with a power of 55 W. At the front of each section of indicators there are specialized transparent lenses.
The turn signals glow orange and have a power of about 20 watts.
The headlights are adjusted using a specialized corrector. The electric headlight corrector has an electromechanical drive. The standard adjustment system contains a device mounted directly on the dashboard itself and a specialized wire that connects the electrical wires in the headlights. To adjust the electric headlight corrector, you will have to disassemble them.
Replacement or removal of the lighting system occurs for various reasons. Among the most common are:
- headlight tuning;
- installation of a new kit instead of the old one;
- need to adjust the electric headlight leveler.
Before removing a headlight when it needs to be replaced, it is advisable to identify the company that manufactured the part. To do this, you need to carefully examine the glass. If the AL symbols are present on it, this lighting complex was manufactured by Bosch.
Some headlight models from this manufacturer are made of polycarbonate and do not have a low beam lamp cap. If the lamp used for low beam in a polycarbonate headlight is equipped with a cap, it is most likely made.
Which optics is better to choose
While using the machine, the lights are subject to sudden temperature changes, impacts from stones and small grains of sand. These factors negatively affect glass, reducing its transparency, worsening light characteristics.
High-quality headlights that meet safety requirements are installed from the factory. Unofficial replacements are equipped with xenon lenses, “angel eyes” and modified reflector geometry. These lights look beautiful, but wear out faster due to poor quality materials and can fog up in humid weather.
When choosing new optics, it is better to trust the official ones. When purchasing, it is important to clarify the modification of the body and the year of manufacture of Kalina. Depending on the configuration, there are darkened masks or improved lighting characteristics.
Depending on the body type, Kalina has different parts installed:
- sedan, hatchback – standard optics;
- sport, station wagon - are equipped with a more elongated reflector with an increased area to increase the lighting area by 20%.
To connect improved optics to Kalina, you do not need to lay additional wires or change contact connectors. The optics are no different in mounting points and shape.
When purchasing flashlights, you should pay attention to original parts with improved performance. This will improve the characteristics of the beam without interfering with the wiring or altering the standard fasteners.
When buying new PTFs, it is better to choose from original parts. Standard lights are equipped with durable glass and a high-quality reflector that directs the beam in accordance with GOST.
Fog lights for Kalina are produced by:
- Bosch;
- "Kirzhach".
The models differ in the shape of the glass, but there is no difference in quality. The headlights are connected to the standard wiring and installed in the mounts on the bumper. There are no fog lights in the basic trim levels. To connect them, you will have to additionally purchase a button for the interior, a PTF relay, and remove the bumper plugs.
In stores you can find modernized flashlights with lenses for gas-discharge lamps or LED modules. Such products are not certified for use in Kalina because they do not meet transport safety requirements. For such parts you can receive a fine and an order to eliminate the malfunction within 10 working days.
Step-by-step replacement instructions
Each H7 standard bulb has an iron base, which is pressed to the headlamp with a wire clamp. To bend this bracket, just get close to the plane of the headlight from behind. Let's open the hood and see what exactly will bother us.
Engine compartment of Kalina-2 (VAZ-2192, 2194)
Behind the headlight on the right is a washer reservoir. It is dismantled like this: disconnect the electric motor terminals, tighten the plug harder, find one nut and one fastening bolt. The fastening elements are unscrewed with a 10mm wrench, then the tank is placed on the engine. Next we could look at how to remove the headlight on Kalina-2, but in this case this is not required.
Before performing any manipulations with electrical equipment, always disconnect the negative terminal of the battery. It is better to connect this terminal last (before closing the hood). Be careful.
Replacement sequence:
- Remove the rubber cover covering the low beam lamp compartment;
- Disconnect both terminals from the lamp contacts;
- The fastening bracket is removed from the grooves by first pressing on it, then the bracket is moved to the side;
- They take out the lamp, install a new one in its place, and return the bracket to its place.
Next, perform steps “2” and “1” in reverse order. The connection diagram is not important - there are only two contacts, and both go to the filament. Now, if we connected LEDs, then everything would look more complicated.
The bracket presses the cartridge to the plane of the headlight
When installing a halogen light source, you must remember: the surface of the lamp glass must be perfectly clean. Do not allow grease marks to remain on the flask. Installation is carried out using only cotton gloves. The glass of the flask is cleaned with industrial alcohol or Secunda.
Lada Kalina: clear vision
As befits a “people's car,” Lada Kalina is not too labor-intensive to maintain. Its owner is quite capable of independently coping with “basic” regulatory procedures that do not require special skill or special tools. Today our auto mechanic will tell you how to properly change a burnt out light bulb or screw in new spark plugs.
The block headlights on Lada Kalina consist of three sections: low beam, high beam, side beam, and turn signal. You can replace the lamps on Kalina without removing the headlight from the car, but for clarity, the progress of the work is shown on the dismantled headlight.
Before changing any of the lamps, disconnect the wire terminal from the negative terminal of the battery.
Replacing turn signal bulbs
Turn the turn signal socket counterclockwise 45°...
Turn the turn signal socket counterclockwise 45°...
...and remove it from the headlight housing.
...and remove it from the headlight housing.
Pressing the lamp, turn it all the way counterclockwise and remove the lamp from the socket. Install the new turn signal lamp in the reverse order.
Pressing the lamp, turn it all the way counterclockwise and remove the lamp from the socket. Install the new turn signal lamp in the reverse order.
Install the new turn signal lamp in the reverse order.
Replacing low beam lamps
To replace the low beam lamp, pull off the protective rubber cover from the headlamp housing by pulling one of its three petals.
To replace the low beam lamp, pull off the protective rubber cover from the headlamp housing by pulling one of its three petals.
Disconnect the wire tips from the lamp terminals.
Disconnect the wire tips from the lamp terminals.
We remove the spring clamp from engagement with the two hooks... ...and move it away from the lamp.
We remove the spring clamp from engagement with the two hooks... ...and move it away from the lamp.
Remove the lamp from the headlight housing.
Remove the lamp from the headlight housing.
Install the new low beam lamp (H7) in the reverse order.
On a note
The Lada Kalina headlights are equipped with H7 low-beam halogen lamps with a power of 55 W and H1 halogen high-beam lamps with the same power. The direction indicators use PY21W orange lamps with a power of 21 W. The side light lamp is designated W5W and has a power of 5 W.
When changing halogen lamps, do not touch the bulbs with your fingers, as grease stains will cause the lamps to darken when heated. You can remove dirt from the flask with a clean rag soaked in alcohol.
Replacing high beam lamps
To replace the high beam lamp, disconnect the wire block from the lamp.
To replace the high beam lamp, disconnect the wire block from the lamp.
Squeezing the ends of the spring clamp, remove them from engagement with the hooks and remove the clamp from the lamp
Squeezing the ends of the spring clamp, remove them from engagement with the hooks and remove the clamp from the lamp
Remove the lamp from the headlight housing. Install the new high beam lamp (H1) in the reverse order.
Remove the lamp from the headlight housing. Install the new high beam lamp (H1) in the reverse order.
To replace the side beam lamp in the headlight, remove another protective rubber cover in the same way as for the low beam lamp cover and remove the socket with the lamp
To replace the side beam lamp in the headlight, remove another protective rubber cover in the same way as for the low beam lamp cover and remove the socket with the lamp
Remove the lamp from the socket. Install the new side light bulb (W5W) in the reverse order.
Remove the lamp from the socket. Install the new side light bulb (W5W) in the reverse order.
If you need to replace the headlight glass, use a screwdriver to pry...
...and remove the six spring clips that press the lens to the headlight seal.
...and remove the six spring clips that press the lens to the headlight seal.
Remove the headlight glass and glass seal. Install the headlight glass in the reverse order.
Remove the headlight glass and glass seal. Install the headlight glass in the reverse order.
To remove the headlight, press the latches...
...carefully disconnect the wire connectors from the connector on the headlight housing and the turn signal lamp socket. Remove the front bumper.
...carefully disconnect the wire connectors from the connector on the headlight housing and the turn signal lamp socket. Remove the front bumper.
Using a Phillips screwdriver, unscrew the screw for the top fastening of the headlight... ...and with a wrench or socket “8”, unscrew three more bolts securing the headlight (shown by arrows) and remove it.
Using a Phillips screwdriver, unscrew the screw for the top fastening of the headlight... ...and with a wrench or socket “8”, unscrew three more bolts securing the headlight (shown by arrows) and remove it.
The housing of the right headlamp is marked “RE”, and the housing of the left headlamp is marked “LE”. Install the headlight in reverse order.
The housing of the right headlamp is marked “RE”, and the housing of the left headlamp is marked “LE”. Install the headlight in reverse order.
By moving the side turn signal towards the front of the car...
By moving the side turn signal towards the front of the car...
...remove the pointer from the hole in the front fender.
...remove the pointer from the hole in the front fender.
Turn the socket with the lamp counterclockwise and remove it from the pointer housing.
Turn the socket with the lamp counterclockwise and remove it from the pointer housing.
We take out the lamp and replace it with a new one. Install the side turn signal in the reverse order.
We take out the lamp and replace it with a new one. Install the side turn signal in the reverse order.
(on an 8-valve 1.6 VAZ-21114 engine)
Remove the tip of the high-voltage wire from the spark plug. Remove dirt around the spark plug.
Remove the tip of the high-voltage wire from the spark plug. Remove dirt around the spark plug.
Using a high 21" socket with an extension (or a spark plug wrench), unscrew the spark plug.
Using a high 21" socket with an extension (or a spark plug wrench), unscrew the spark plug.
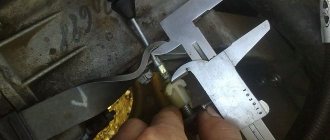
We check the gap between the spark plug electrodes with a round feeler gauge.
How do you remove headlights?
The lighting system in Kalina includes:
- glass or polycarbonate;
- frame;
- lamp plugs;
- the lamps themselves;
- reflectors;
- wiring;
- decorative inserts.
To replace and adjust the headlights, most often you have to remove the front bumper. Only after this all the screws from below, as well as from above, will become more accessible. Once they are dismantled, you can remove the headlight itself, having first removed all the wires and pads.
This is interesting: The trunk lock is jammed - Lada Granta: expert advice on how to get out of an unpleasant situation
But not every car owner has enough experience to dismantle the entire bumper. In addition, a common problem is the lack of time to change the entire lighting system. That is why replacing lighting without complete dismantling is considered more popular.
To disassemble the headlight with your own hands, you need to prepare the following tools:
- one key for 8 and one for 10;
- Phillips and flathead screwdrivers;
- new lighting system component.
To modernize the lighting on Kalina, you need to take the following actions:
- Remove the air filter housing and the special coolant unit.
- Remove the PTF plug using a screwdriver.
- Using a 10mm wrench, unscrew the bolt located underneath the headlight.
- Remove the bolts located on top of the light blocks. They are located near the radiator. In this case, you need to use the key 8.
- Remove the screw that secures the light to the car's fender using a large Phillips screwdriver.
- Rotate the light block so as to move the part near the radiator a little closer to the car engine. This will allow you to remove the fasteners located below from their seats.
- Remove the lower iron fasteners. To do this, you need to unscrew several bolts with a short head.
- Remove the headlight by pulling it towards you. Try not to damage the varnish layer, because the lamp is located next to the wing and bumper.
Knowing how to disassemble a headlight, installing another device with your own hands will not be difficult. Install a new headlight by performing the steps in reverse order. Now all that remains is to figure out how to adjust the headlights so that the light from them is directed correctly and illuminates not only the road, but also shines on the sides of the car.
Headlights
Replacing a headlight yourself will require preparation of the car and tools. To work you will need:
- set of wrenches;
- screwdrivers;
- rag;
- gloves to protect hands.
For ease of work, you need to wash Kalina in advance and clean the space in the garage. To replace the headlights, you need to remove the bumper and unscrew several mounting bolts.
Dismantling
Steps required to remove headlights:
- Open the hood lid.
- Disconnect the battery terminal.
- Pull out the clips from the front of the fender liner.
- Unscrew the radiator grille fasteners and remove it.
- Unclip all the clips along the contour of the bumper and unscrew the screws.
- Remove the bumper without scratching the corners of the fenders and headlights.
- Disconnect the optical power plug.
- Remove the two screws holding the light on top.
- Remove the lower headlight bolts.
- Carefully remove the part.
Before assembling and installing a new headlight, you should check the presence of light bulbs and their functionality. To do this, connect the flashlight to the connector and check all the functionality. When installing a new part, you should not rush; it is important to be careful and not damage the case or glass.
Repair
To disassemble the Kalina headlights, they will need to be dismantled. You can repair the Kalina headlight by polishing the glass, replacing it, washing the internal parts, or restoring the reflector.
To remove the glass you will need:
- Dismantle the part.
- Heat the headlights in the box using a hair dryer.
- Tear off the glass.
- Carry out all the required work and assemble the lantern using a special sealant.
To disassemble the headlight, it will take several hours, depending on the experience of the car owner. Replacing Kalina's headlight glasses will improve the exterior and increase light transmittance.
During operation, it is important to follow safety precautions, do not leave the hair dryer unattended and use gloves.
Fog lights
PTFs for Kalina are installed only on expensive trim levels. However, all wiring is installed from the factory and there are “ears” for mounting on the bumper. To install headlights, you will have to purchase a power button, frames in body color and a relay.
Installation of fog lights:
- Use a screwdriver to remove the plugs under the PTF.
- Screw the lights into the standard recesses.
- Snap frames to hide excess cavity.
Lada Kalina Cross uses matte black plugs that do not require painting. When installing on your own, you should buy bolts for fastening the headlight in advance.
How to connect the electrical part
Connecting the PTF to the standard wiring does not take much time. To search for the braid, you should inspect the area of the spar at the entrance of the main beam. The PTF plug is taped to the wires with electrical tape.
Fog lights Kalina 2 are often equipped with detailed instructions and an additional switch that must be installed instead of the old module to turn on the light. Connecting to pre-laid wiring does not take much time and does not require laying additional contacts.
If there are no power cables in the braid, you will have to independently pull the wires into the cabin, connect them to the connector, fog lights with plus and minus, and connect them through a relay. A detailed description of the connection is included with the part in the form of a diagram.
During the installation process you will need:
- insulating tape;
- copper wires;
- corrugation;
- connectors suitable for lamps.
When installing wiring, disconnect the battery and strictly follow the instructions.
Maintenance and replacement of the rear light
To replace the lamps in the rear light of Kalina 2 station wagon and hatchback, you need to remove the entire headlight unit. To do this you need:
- Unclip the plug next to the seat belt bolt.
- Unscrew the nut.
- Open the seal window and unscrew the remaining fasteners.
- Pull out the flashlight.
- The lamps are pulled out by turning the base counterclockwise.
When replacing lamps in a hatchback body, carefully remove the nuts so that they do not roll under the trim. The missing part will rattle while driving and you will end up having to disassemble the entire luggage compartment.
The Kalina sedan has special compartments in soft upholstery for access to the nuts. There is no need to remove additional plugs.
To keep your car in excellent condition, you need to periodically replace lamps, clean optics, or install new ones. Removing front, rear headlights and foglights in Kalina does not require expensive tools or special knowledge.
We remove the headlight, having previously dismantled the bumper on the Lada Kalina
There are two ways to remove the Kalina headlight and then disassemble it. First, the bumper is removed first, second, the operation is performed without removing it.
In any case, you will need tools such as 8 and 10 mm wrenches, screwdrivers: flat and Phillips. Of course, you need to take care of spare parts in advance when it comes to lighting system components.
Drivers who do some work on their own know that there are open-end, socket and ring wrenches. If space allows, it is best to hold the nut with a socket or cap. Then all its sides are grasped. This ensures that the edges, if difficult to rotate, will not be damaged.
This is interesting: Camshaft oil seal VAZ 2110 8 valves - how to replace it yourself
It is advisable to have heads as well. It is best if you prepare a ratchet. The fact is that in some places it is quite difficult to operate a simple key, since it turns at a small angle.
The first thing you need to do when dismantling the headlight and removing the bumper is to use a Phillips screwdriver to unscrew the four screws that secure the fender liners. After this, you need to find a couple more screws. They are below, one on the right and one on the left. To avoid mistakes and waste time, it is better to use an inspection hole.
If it is not there, then you can perform the operation lying on a pre-prepared mobile plane or on the floor, covering it with improvised material. When these two lower screws are also unscrewed, unscrew the three bolts also located at the bottom.
Now you can easily remove the radiator grille and unscrew the bolts that secure the bumper to the body. The next operation is to remove the decorative grille. It is made of plastic and is located under the license plate. There are two bolts there. They are easy to find. After they are unscrewed, you just need to pull the grill towards you.
You need to pull harder. The fact is that the grille has additional fasteners - clamps. They are quite durable, and therefore there is no need to be afraid that a breakdown will occur.
The last step is to unscrew and remove the two screws under the license plate. Then we grab the edges of the bumper and, pointing it towards ourselves, tear it off the latches. The Kalina bumper is light. You can remove it from the latches and hold it suspended without an assistant.
And now the bumper is removed.
All that remains is to dismantle the headlight. To do this, remove the bumper power beam. Then remove the bolts securing the headlight. To find them, you need to tilt the beam a little to the side. These bolts are best removed using an 8mm socket equipped with a ratchet.
There are two more bolts at the top. We unscrew one with an 8 key, the second with a Phillips screwdriver. After this, disconnect the power plugs. It must be remembered that the fixation of these connectors is ensured by latches. Where they are located can be determined even by touch. The plug can only be disconnected by bending the latch. Now we just grab the headlight housing (take it with both hands) and remove it.
How to remove a headlight without removing the bumper on Kalina
The second way to remove a headlight on a Kalina is when the bumper is not removed. By the way, the first option is considered more difficult. It is recognized that you can only remove the bumper yourself if you have some experience. In addition, this operation takes a lot of time.
To dismantle the headlight without removing the bumper, first remove the device with coolant. It is usually called the expansion tank. You also need to remove the air filter housing. We remove the PTF plugs using a screwdriver.
Now nothing interferes with access to the lighting unit. True, due to the tightness, some things will have to be done by touch. This is how you need to find the lower fastening element of the headlight. There's a bolt there. It's easy to unscrew it. When this is done, we simply stick our hand into the PTF hole. There are bolts at the top of the lighting unit. They are located near the radiator. To unscrew them, you need to use an 8 key.
The headlight is screwed to the fender. He turns it off with a Phillips screwdriver. Condition - these screwdrivers have different sizes, so you need to select one that matches the slots on the screw head.
Next stage
We rotate the headlight unit so that the part of it that is located near the radiator moves closer to the engine.
Care should be taken during this work. Firstly, transparent elements can be damaged. Secondly, one wrong action, and a wrench or screwdriver will damage the paintwork of the body. It can also be damaged by the lighting unit itself, since at this last stage it is literally a few centimeters from the fender and bumper.
When the headlight is deployed and moved closer to the engine, carefully remove the fasteners located below from the seats. Then we take the pre-prepared head. Using it, unscrew the bolts and remove the lower fastenings of the block.
The last operation is to pull out the headlight with a slight movement towards you. A little earlier it was said about the need to be careful. In this case, special attention is required. It is at the last stage that it happens that the driver engaged in repairs damages the paint of the wing. The scratches, however, are small, but still, there is nothing pleasant about it.
Replacing head lamps
Each lamp has its own resource, the value of which depends on many factors. Over time, devices break down and require replacement. And then the question arises: how to disassemble the headlight?
The replacement procedure is simple, but before that you need to choose the right lighting devices from the mass of products offered on today's market. Although sometimes all you need is to replace the headlight glass.
So, if the headlights are purchased, then we change:
- Remove the protective cover from the headlight housing. It's rubber, so it's easy to pull off if you pull on one of the three tags.
- Disconnect the power connector.
- Release the spring clip.
- How to remove the headlight? We take out the lamp and install a new element in its place.
Attention! When replacing a halogen lamp, avoid touching the bulb with your hands. This may damage the device. Over time, greasy fingerprints will cause the glass to darken, causing the lamp to overheat and eventually burn out.
- If contact occurs, it is necessary to wipe the surface of the flask with a cloth moistened with alcohol.
- Changing side lamps
- We also remove the cover and disconnect the corresponding cartridge from the on-board network.
- We remove the lamp and install a new one in its place.
Dismantling and repair of optics
One of the most common malfunctions in the operation of optics, if you do not take into account the failure of lighting sources, is damage to the headlight glass. If the lamp itself is damaged, it will have to be removed and disassembled to change the glass.
How to disassemble the headlight and how to replace the brake light bulb:
- First you need to open the trunk and move the brake light source to the left.
- The Kalina brake light lamp must be pressed and turned to the left, so that the device can be removed from the installation location. The installation procedure is performed in reverse order.
- If you need to replace the glass, you will have to remove the bumper to do this. To do this, you need to unscrew the corresponding fasteners.
- After dismantling the bumper, it is necessary to disconnect all the wiring connectors that are connected to the optics.
- After completing these steps, you can unscrew the lower fasteners of the flashlight; to do this, use a wrench. After this, similar actions are performed with the upper bolts securing the optics. When all the screws are removed, the optics themselves can be removed.
- The next stage will be the glass repair itself. You need to pull the headlight towards you and carefully remove the rubberized seal. It is usually attached to the lantern quite tightly, so most likely you will have to use a utility knife to cut the elastic.
- After the headlight housing and glass are separated from each other, all remaining adhesive and sealant should be removed from the perimeter of the housing. To do this, you will also need to use a utility knife, and if the residues are small, then use sandpaper. Make sure that the surface on the housing is clean and free of sealants and dirt.
- Before installing new glass, the housing around the perimeter of the installation will need to be treated with a solvent. This will allow the surface to be degreased, so that the fit of the new glass will be maximum.
- Next, apply glue to the new seal and connect the glass itself to the body. The tightness of the structure must be optimal, otherwise the problem of fogging of the optical glasses from the inside may arise. Press the headlight on both sides so that the lens is connected to the housing as firmly as possible.
- At this stage, the repair can be considered complete; assembly is carried out in the reverse order. When installing the lights, they will need to be readjusted.
Headlight range control: device and malfunctions
A device that monitors and regulates the position of a car's lighting devices is called a headlight range control. It is possible to adjust the headlights on Kalina using:
- Kalina manual headlight leveler;
- electric headlight corrector.
The principle of operation in both cases is similar, the difference is one. The first option involves making the correction using a regulator installed inside the car. The driver himself changes the tilt of the car lighting. The electric corrector works automatically: depending on the location of the machine, the device changes the angle of inclination of the optics.
In 45% of cases, failure of optical devices is due to the fact that the corrector on the Lada Kalina does not work.
Possible problems:
- Sensor inaccuracy. Failure of the bracket leads to a failure of the tracking element synchronizer performance.
- Souring of contacts. Due to the reduced conductivity of the electrical wire, the device begins to malfunction.
- Factory defect. The regulating element falls out of the electric corrector.
Disassembling lanterns
To disassemble headlights of any brand on a Lada, you will need:
- hair dryer (household or industrial);
- flat screwdriver;
- stationery knife.
To separate glass or polycarbonate, you will need to remove the material's fastening brackets. After this, heat the sealant that holds the glass or polycarbonate in place with a hairdryer. Next, the softened sealant can be cut off. This makes it possible to remove the glass with a flat screwdriver.
Source: okuzove.ru
Reasons for adjusting headlights
Headlight position during final adjustment
Many car enthusiasts do not understand why and how to adjust headlights. According to regulation No. 699 of the “International Automobile Convention” of December 12, 1999, there are basic rules for the use of light at night. It states that car light must fall at a certain angle, offset to the right for left-hand drive cars, and to the left for right-hand drive cars.
It is for this purpose that headlight correctors are installed on the car. If they are not enough for full adjustment, then you need to adjust the light manually by adjusting the headlights using the mounts.
Another reason is the load on the car, the curb weight, as well as the number of passengers who regularly drive the car.
How does the Lada Kalina headlight work and what functions does it perform?
What the Kalina headlight is, what its functions are, how replacement and repair are carried out - such questions arouse the interest of motorists. A machine is a well-coordinated mechanism with thousands of parts. And it is difficult to name the main or secondary one.
In particular, the headlight unit provides directional light and illuminates the route and the surrounding area at night, which is very important for traffic safety.
Adjustment features
Since Lada Kalina is a representative of the budget segment, it is equipped with a minimum of required lighting devices. Here we focus on head optical devices. Headlights allow the driver to have sufficient visibility when driving, and also serve to identify a specific car on the roadway.
This is interesting: Problems with the stove - diagnostics on your own: what to do if the fan does not work
Adjustment of the Lada Kalina headlight beam is carried out using a specialized device during a technical inspection. Mechanics advise owners to periodically check the correct beam and adjust the headlights (if necessary) and if necessary, know how to adjust the headlights yourself. The indicated procedure can be carried out independently.
The settings of the Lada Kalina lighting devices are interconnected with the condition of the load-bearing elements of the chassis, lamps and tire pressure. Before adjusting the lighting devices, it is recommended to check the points indicated here to ensure they are in good condition and that the indicator (pressure) is correct. If there are deviations from standard values, then the identified deficiencies should be eliminated immediately. For example, the pressure parameter should be the same on both sides of the car. Darkened lamps will also need to be replaced with new analogues.
To adjust the optics in the Lada Kalina, the owner will need the following tools:
- cardboard sheet;
- five-meter tape measure;
- "hexagon" (6 mm).
Adjustments should be made in a dark box or at the appropriate time of day. Also one of the main conditions is the presence of a vertical wall. We install the car on a level area five meters from the designated structure. We adjust the corrector to the zero position.
A cardboard sheet is required to periodically block the beam of headlights. The adjustment process itself is carried out using a hex key with a dimension of 6 mm. The light beam of each headlight is individually compared with a special circuit. Here it is necessary to achieve the correct direction of the beam, which will allow the driver not to dazzle oncoming traffic participants in the dark.
Scheme for adjusting headlights on Kalina
If the headlights on Kalina do not shine well, you can act according to different schemes. First, you need to drive up to the wall and stop, maintaining an interval of 2 m. Then mark the center of the car on the wall, place the axial parts of the lamps according to the optimal markings, and mark the distances from the road surface to the necessary lighting fixtures. From the center of the light flux, mark the distance to the center of the car; the line should be made a few centimeters below the first one.
Drive the car away from the wall to 7 m. Connect the points that correspond to the central areas of the headlights using straight lines. Supplement it with several vertical segments. Once the marking work is completed, begin adjustments.
It is best to carry out work against the wall - it will be easier and more accurate.
How to adjust headlights on Kalina in height
To improve the height of the light, you need to measure the distance from the floor to the central areas of the headlights. Then, taking into account the data obtained, a line is drawn on the screen with an indentation of 60 mm, and a second one is made. Additionally, vertically placed line segments are drawn along the centers of the spotlights, and another line is drawn at an equal distance from both of them.
Cover the lamp with a cardboard sheet and turn on the low beam. Start adjusting the directions of the light beams from the open headlights, alternately changing positions (it is convenient to use a Phillips-type screwdriver).
Good high beam is determined by height adjustments
How to adjust the headlights on Kalina horizontally
Deviations of light beams from headlights that occur in horizontal planes are adjusted using crossbar holes located in the longitudinal direction of the car axis. By rotating the screw on the housing, the height of the light beam is adjusted.
The upper area of the spot must clearly coincide with the second line of the screen, the break zone of the light beam must coincide with the centered line of the headlight in the vertical direction. The positions of the spots of the other headlight are set in the same way. Turn on the low beam again and check that the actions are performed correctly.
Adjusting the headlight beam
Correctly adjusting headlights can only be done in a service station. However, let's look at how this operation is performed by experienced craftsmen.
Kalina-2 block headlight, correct adjustment of the beam direction
There are two adjustment screws on the back wall of the unit called the headlight unit. The first of them, located closer to the radiator, allows you to deflect the light beam “up and down”, and the “horizontal” direction is adjusted with the second screw. Ideally, this should happen: when the car is 5 meters from the screen, the border of the light spot touches line “2” (see figure). Line “1” is spaced from the ground at a distance equal to the height of the centers of the headlights. The second line is drawn 65 mm lower.
When making adjustments, the corrector switch is moved to position “0”. Of course, you only need to turn on the low beam. We also note that the headlights are adjusted one by one (the “excess” light source is covered with a cloth).
Here are a couple more tips that will be useful:
- The centers of the beams should be on lines AE, BE;
- Line “0” has the following meaning: it intersects with line “1” at one point, so the border of the spot should pass exactly through this point;
- The caps of the plastic adjustment screws are compatible with a hex screwdriver. However, a Phillips screwdriver will also work.
So, we have fully examined how to adjust the headlights on Kalina-2. Of course, replacing lamps with subsequent adjustment is a less labor-intensive operation than connecting a radio. However, accuracy is important here. And the special equipment used to perform the settings is only available at service stations.
Useful tips
The main and fog headlights are often configured according to a single scheme, although these options have their own characteristics and require an individual approach. For independent adjustments, the help of a second person is desirable and a level surface is required.
Marking a wall is not fun, it is mandatory. Without markings, it is virtually impossible to make precise adjustments. At the end, be sure to check the adjustment screws on the optics.
Sometimes problems in Kalina are caused by the light module - it’s worth checking it