Replacing the CV joint boot on the Lada Priora
If there is no way to change the damaged CV boot, then consider that you will soon need to change the grenade itself.
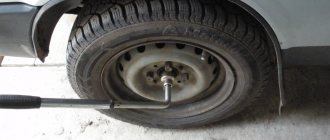
This is most likely to happen if there is not enough lubrication inside the boot or there is not enough of it at all. Even a small amount of water can cause a CV joint failure after a couple of hundred km. As if there’s no point in checking the machine’s repair condition, it would be better to inspect the grenade boots once a week to see if any cracks or holes are showing. Replacing anthers on a Priora is probably a short-term process; we will need the presence of a sight hole, overpass or lift, and we also stock up on a set of keys, a hammer, a vice, a crowbar, a drift, a screwdriver, pliers and a jack. In the shop we need to purchase not only a set of boots, but also the latest clamps and special lubricant. Finally, our car stands above a pit or on an overpass. First, we partially drain the transmission oil from the gearbox. Next we hang it up and remove the front wheel. There is a safety cap on the wheel; in front of it we can see the hub nut. We put the assistant behind the wheel of the Priora, he presses on the brake pedal, and at some point we fix the hub with a stop so as not to suggest any turning. Since everyone has removed the wheel in the same way, it’s worth immediately identifying their summer tires.
After that, we take the spanner wrench and remove the fastenings of the ball-shaped support to the steering knuckle. At this step we will need a small crowbar; with its support we will be able to overcome the resistance of the retaining ring and remove the drive from the hole in the gearbox. We insert a crowbar into the body of the grenade, rest it against the drain plug of the gearbox and begin to operate with it as with a double-armed lever. We pull the transverse suspension arm down and remove the splined end of the inner and outer grenade from the wheel hub. If it is probably impossible to make it by hand, then we use a drift made of a soft alloy; it will act as a spacer, according to which we will begin to beat with a hammer. There are 2 clamps on the boot, we need to reset them. After that, we slightly move the cover and examine the internal cavity. We rest the drift against the CV joint cage and knock on it with a hammer, as a result the entire system comes out of the drive shaft. We completely remove the boot, wash the shaft and grenade in diesel fuel. It is necessary to rinse the fines thoroughly so that there is no trace of the old grease left on it. If the lemon has signs of wear, then it is better to change it right away, so that later again
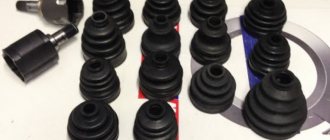
There was no way I could analyze it and remove it from its regular place. We put a fresh cover on the shaft. We insert a cleaned or brand new grenade with the inner clip against the stop. Pour new grease into the boot, place the boot on the body and secure it with 2 clamps. A similar operation is done with the 2nd grenade. The angular velocity joint apparatus passes in the reverse order. If you touch the hub nut, it is recommended to immediately change it to a new one, because the old one loses its characteristics. Small nut tightening - 23-25 kgf m. Which anthers will last longer? Recently they started publishing silicone cases, it is better to take them and install them specifically.
Temporarily update the CV joint boot
The CV joint boot broke. Before replacing it, I wrapped it in film and secured it with electrical tape. I walked more than one thousand kilometers on duct tape until the long-awaited boot arrived and everything was “OK”.
For temporary use, enough to get to a workshop or garage.
You can use a bag or a glove instead of film. This makeshift is used to avoid losing the hub and bearing later.
In theory, if the boot is torn, there is already water and sand there. It is necessary to remove, wash, new grease and a new boot.
In general, the road repair of the boot is described. Only with cling film is it much more convenient, faster and, in principle, really lasts for a long time. Jeepers and ATV riders know.
How to replace a torn boot without removing the CV joint with a new one right in the garage
In general, boots on CV joints can be changed without removing the drive. The main thing is to free the outer end from the hub. And then, the new boot is put on like a condom across the entire shaft, the main thing is to turn it inside out correctly. Next, the old one is cut, the new one is put in place and new clamps are, and filled with fresh lubricant. New CV joint boots are very elastic even in a small hole.
And if it’s technology...
Unscrew the drive nut (you may have to replace it). If there is a MacPherson strut (and it is almost always used on front-wheel drive, and it is also very common on small crossovers), then unscrew the ball nut (if it cannot be removed, then unscrew the nut not completely, then gently tap with a hammer so as not to damage the threads and remove the nut), pull the lever down (using a crowbar or a pry bar is approved).
That's it, pull the hub to the side and pull out the outer part of the drive. Then, using a pry bar (pry bar/friend with a crowbar/jock friend with a large screwdriver), we pry up the inner CV joint and pull out the drive.
Drive on the table. We remove the clamps, remove the retaining ring connecting both drives, and it “splits” (but by the time you find it, everything will be lubricated - so have a good soap with sand - it will come in handy).
You change the boot, connect both halves until a characteristic click is heard, put on the retaining ring, pull the boot into place, tighten the clamps and put everything in place. All OK.
Good luck to you on your journey! No rod - no pits! Follow my new publications - it will be even more interesting!
Installation of new hinges
After disassembling the drive, it is necessary to install new parts and reassemble the transmission in the reverse order. Replacement is done as follows:
- The small clamp is put on the axle shaft first, followed by a new boot. The clamp must be placed around the end of the casing and tightened. It is better to turn the boot in the other direction so as not to interfere with the installation of the hinge.
- Add SHRUS-4 lubricant to the hinge mechanism. According to the instructions, there should be at least 40 cm³ in the outer grenade, and 80 cm³ of thick lubricant in the inner grenade.
- Place the grenade on the shaft, making sure the splines match. Using a wooden adapter, press it as far as possible with gentle hammer blows.
- Pull the boot onto the grenade, apply a large clamp and tighten it. In the same order, the operation is performed on the other side of the axle shaft.
Now the drive assembly can be put into place. In order not to confuse the hinges, you should follow the mark placed on the axle during disassembly. The assembly is mounted into place from the inspection ditch, the splined part of the internal grenade being inserted first. To seat it in the slots all the way, you will have to rest the axle on the lower lever and apply several blows with a hammer through a piece of wood from the other side. Further assembly proceeds in reverse order.
Source: korchim.ru
In what cases is it necessary to replace the inner CV joint?
Replacing the internal CV joint on front-wheel drive VAZ vehicles is required if the following symptoms are present:
- Crunching and knocking noises when driving and accelerating in a straight line;
- Vibration and shock when changing gears;
- Significant play when testing by hand;
- If the “grenade” fails completely, the vehicle cannot move further.
» alt=»»> The main reason for the malfunction of the VAZ “grenade” is the entry of water and dirt through the hole in the torn boot. The second possible cause of failure is a sharp press on the gas with the wheels fully turned, although in this case you risk killing the external rather than the internal grenade.
In addition to the above, replacing the internal CV joint on VAZ-2110 and other models may be necessary if the quality of the previously installed joint is poor.
Reasons for replacing the boot
The service life of CV joints can be reduced very quickly due to damaged boots. Dirt and dust that gets inside the “grenade” act as an abrasive.
And since the hinge elements are heavily loaded and are constantly in contact with each other, the trapped dirt very quickly damages them and the “grenade” fails.
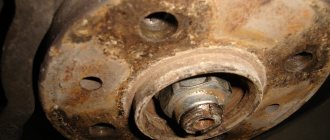
Even if you do not check the condition of the boot, the hinge itself will signal that it is damaged.
For example, as shown in the photo below, the CV joint turned.
When making turns, the CV joint with dirt trapped in it will begin to crack loudly. If the damage is not quickly repaired, the “grenade” will soon simply disintegrate and will have to be completely replaced.
But replacing a CV joint will cost much more than a boot. Therefore, upon discovering damage to the boot, or hearing a cracking sound from the CV joint, it is better to immediately begin troubleshooting the problem.
And such a malfunction is eliminated by replacing the boot, washing the CV joint and adding new lubricant to it.
Next, we will consider the sequence of actions for replacing the external CV joint boot of front-wheel drive VAZs using model 2199 as an example.
Similar work is carried out on the VAZ 2110, 2114 models, so we hope that the owners of these cars will not have any problems after reading the article.
We choose the outer boot because it is damaged much more often than the inner one, since it is located near the wheel hub and the impact on it is more intense, therefore the chance of a crack appearing on it is greater.
Replacing the inner CV joint with your own hands
» alt=»»> The procedure for replacing a “grenade” is the same for the entire front-wheel drive VAZ line, starting with 2108 and ending with VAZ-2115, “Kalina”, “Priora”, “Grant”. Before removing the inner CV joint, the oil is drained from the gearbox. Then proceed according to the following algorithm:
- Unlock and unscrew the hub nut. To make the work easier, a piece of pipe about 1 meter long should be put on the key.
- The desired side of the car is hung on a jack or lift.
- Remove the wheel.
- Remove the washer located under the hub nut installation site.
- Disconnect the steering tip.
- The CV joint is removed from the hub.
- Using a pry bar, remove the drive and internal joint from the gearbox.
How to replace the outer CV joint boot on VAZ cars
For front-wheel drive cars of the VAZ family, from model 2108 to model 2115, as well as more modern Kalina and Priora cars, maintenance of the drive wheels comes down to periodically checking the condition of the CV joint boots, both external and internal.
Otherwise, the ball-type constant velocity joints with guide grooves used on these machines do not require maintenance.
Boot replacement and repair
The boot can be changed without removing the grenade if you have special equipment. His work is demonstrated on video. » alt=»»> If you do not have such a device, to remove and replace it, you must perform the above-described procedure for removing the drive and dismantling the hinge. The procedure is necessary if there is even minor through damage on the boot.
Temporary repairs to the CV joint boot can be made without removing it from the vehicle. To do this, you need to thoroughly clean and degrease the damage, then seal it with a piece of rubber and cyanoacrylate-based glue (superglue).
An alternative repair method is to seal the holes with silicone caulk. It should be remembered that it takes a day to completely polymerize.
Note: express repair is a temporary measure. Replacing the inner joint boot may be delayed for a short time, but not completely cancelled. Typically, these types of repair methods are used to get to the point of repair.
CV joint repair
As mentioned above, the hinge cannot be repaired. Conventionally, one of the repair measures includes washing the “grenade” after driving with a damaged boot.
Washing is carried out at the same time when the damaged boot on the pomegranate is replaced. The hinge is carefully knocked off the shaft, inspected for damage and thoroughly washed to remove any dirt and grease in gasoline or kerosene.
After washing, the assembly is filled with lubricant and mounted in place, having previously installed the boot. The procedure makes sense only if there are no obvious signs of a joint malfunction.
A crunchy or knocking part definitely needs to be replaced, since wear forms on the working surfaces of the inner race, and it is no longer possible to stop the destruction. Continued operation of the vehicle may be dangerous for the driver and other road users.
Disassembling and removing the outer CV joint boot
Drive the car into a viewing hole or overpass and put on the handbrake. Be sure to install chocks under the wheels. For maximum safety, you can set it to first gear.
The next step is to loosen the nuts that tighten the CV joint, and also remove the cap that ensures reliable fastening of the drive. We jack up the car and install supports under the sills. Remove the wheel and press out the tie rod ball assembly. Unscrew the two bolts securing the lower ball joint to the hub.
We assess the condition of the lower support. Remove the hub from the splines on the drive shaft. There are two ways to disassemble the drive, used exclusively in relation to the external CV joint:
The first method is to knock down the outer grenade without pulling out the CV joint located inside:
- Remove the clamps on the boot of the outer hinge, cut and wipe off the excess grease present on the hinge.
- Firmly clamp the shaft with a gas wrench.
- Knock out the CV joint with a hammer.
Disadvantages of this method:
- It is unacceptable to drain oil from the box;
- knocking down a grenade is a very inconvenient operation.
The second method involves completely removing the drive :
- Drive a pry bar between the transmission housings and the inner joint.
- We pull out the shaft, which is part of the gearbox. This is done using simple forward and backward movements.
- We completely remove the drive.
Disassembly procedure
The first operation is not removing the wheel, but unscrewing the large wheel bearing nut. It is caulked, so it will be much more difficult to loosen when the car is raised. After this, the wheel bolts are loosened and the car is raised with a jack.
Do not forget to place reliable supports under the rear wheels to secure the car.
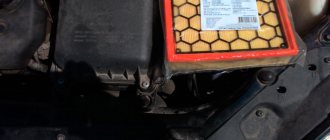
If the Priora has a metal sump protection installed, then it also needs to be removed in advance. In addition, it does not hurt to partially empty the gearbox oil sump to avoid liquid lubricant leaking through the open hole after removing the drive.
Replacing the outer CV joint boot
- Cleaning the outer cover of the drive. To do this, you can use a special metal brush.
- Remove the boot mounts and the boot itself. The boot can be removed with a screwdriver or cut entirely.
- Wipe off the grease from the CV joint and knock it down.
- Thoroughly wash the CV joint with gasoline.
- Put on a new boot and place the washed CV joint on the splines. You can hammer the hinge using a wooden stand and a regular hammer.
- Apply generous amounts of lubricant to the center of the CV joint.
- Place the boot on the grenade and secure it with clamps.
- Place the hub on the splines and carefully tighten the nut to ensure reliable fastening.
- Install the ball joint and put on the wheel.
Carefully check the tightening of the bolts. Screw on the crankcase protection. Check the oil level in the gearbox. You should not remove the drive from both sides at once, to avoid a significant change in the position of the gears.
Removing and replacing the Lada Priora CV joint
Good afternoon, today we will tell you how to remove and replace the Lada Priora CV joint. If, while driving, you begin to hear humming and knocking noises in the area of the front wheels, and a crunching sound when cornering, then it’s time to change the CV joints, that is, constant velocity joints that transmit torque to the wheels. Car enthusiasts also call this part a grenade.
Additional evidence of a grenade failure will be the formation of a backlash, which can be easily determined. In this case, it is enough to shake the front wheel drive shaft joint with your hand. Even its slight movement indicates the need for replacement.
How to independently replace the internal grenade on VAZ cars
CV joint (constant velocity joint) is a mechanism that allows you to transmit torque between misaligned shafts. The device is actively used on front-wheel drive vehicles. On each shaft coming out of the gearbox there are two of them - internal and external. Repair is impossible; if the unit breaks down, it is replaced as an assembly.
- In what cases is it necessary to replace the inner CV joint?
- Boot replacement and repair
- CV joint repair
Replacing the inner CV joint with your own hands
Removing and replacing the Lada Priora CV joint
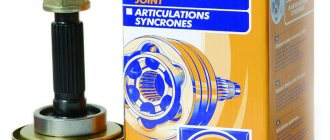
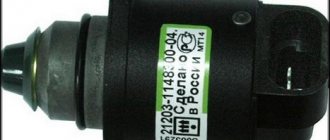
Article: Outer CV joint – 77205S. Inner CV joint – FJ-228.
Tools: To remove and replace the inner and outer CV joints of the Lada Priora, you will need pliers, a hammer and a block or a wooden block.
Removal and replacement of the Lada Priora CV joint is carried out on a lift or inspection pit. In general, this procedure is the same for all domestic front-wheel drive cars, such as VAZ 2108, 2109, 2110, LADA Granta.
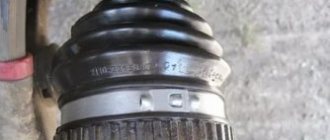
Repair or replacement of the Lada Priora CV joint is carried out with the front wheel drive removed. The first step is to remove the boot from the grenade by holding the removed drive shaft in a vice.
Replacing CV joints on Lada Priora
Using pliers, we bend the inner clamp and open the lock of the dirt cover, and do the same with the outer clamp.
Replacing the outer CV joint of Lada Priora
We move the boot along the shaft towards the center and turn it inside out.
Now you need to knock out the inner CV joint from the shaft. To do this, use a hammer and a soft metal drift. When manipulating with a hammer, forces are applied to the hinge cage.
We knock out the CV joint from the shaft
Installing a new joint will require plenty of lubrication. Drive in the SHARS using a hammer and a wooden plate, which is applied to the outer end of the shank, after which sharp blows are applied with the tool.
After installing a new grenade on the shaft, it is cleaned of dirt and thoroughly lubricated again. The lubricant has excellent sealing properties, which will provide friction units with reliable protection from moisture and dirt. Then put on the boot and secure it with clamps.
The outer or outer joint is replaced after both the outer and inner CV joints are removed. The dirt cover is also turned inside out, the shaft is clamped in a vice and the outer CV joint is knocked out of it.
Replacement of external CV joint of Lada Priora
Its installation is similar to the internal hinge. However, there is one important difference when using lubricant. It should be two times less than in the inner CV joint.
Finally, all removed parts are installed in the reverse order. After installing new grenades, the car goes through any turns smoothly and without unpleasant sounds, and the process of driving on a straight road becomes much quieter.
It is important to know that even minor damage to the drive boot requires its replacement. The fact is that the main and rapid wear of the grenade occurs when dust and dirt enter the drive through cracks in the boot.
To increase the service life of CV joints, it is recommended to periodically inspect the rubber dirt-proof covers on the shaft and replace them as soon as necessary.
How to replace a grenade on a Lada Priora car?
According to the manufacturer's recommendation, replacing a grenade on a Priora means installing a new front wheel drive assembly - 2 CV joints and an axle shaft on each side. Since a new unit costs a lot of money, the cost of the work is too large. Therefore, in practice, only the worn part of a given unit is replaced - the outer or inner grenade, or even both at once. If you know how to change these parts yourself, you can save a lot on car service costs.