In order to inject liquid into a car engine, a device called an injector was created. In technical terms, injectors are electromagnetic valves that are responsible for the metered supply of fuel to the cylinders (in systems where there is continuous injection). Such a feed is carried out after an equal amount of time. Such strict regulation indicates the efficiency and practicality of the operation of such a part.
The relevance of good injector performance is directly proportional to its demand.
However, there is another stumbling block here: the injectors operate under very harsh conditions. When purchasing, you need to pay great attention to the quality of the parts (it is better to purchase from manufacturers). Maintenance of such a part must be carried out very carefully and responsibly - this also applies to cleaning the injectors.
Application of gasoline additive
This procedure is best timed to coincide with replacing fuel filters and here’s why. The detergent additive is poured into the tank, so the cleaning effect extends to the entire fuel supply system.
Any foreign deposits that have been washed off rush into the filter meshes and quickly clog them. If you do not change the filter elements, you will not be able to properly clean the injectors, because dirt will reach them. So, to perform the operation you will need:
- liquid – fuel additive;
- fine and coarse mesh filters.
Before carrying out the procedure, it does not hurt to learn more about engine additives.
The method of use is simple: the chemical composition from the bottle needs to be poured into the tank and continue to operate the car. After 200-300 km, replace the filter elements. An important point: the amount of cleaner in the container is designed for a certain volume of gasoline; their ratio is always indicated on the product packaging. In order not to get a negative result and not to harm the engine, follow the prescribed dose of the composition.
Most often, car enthusiasts use injector flushing fluid from the following manufacturers:
- Hi-Gear;
- Kerry KR-315;
- Liqui Moly;
- Injector Cleaner concentrate from the American brand STP.
When washed, they will not only clog all the filters, but can also damage the fuel pressure regulator.
Signs of clogged injector nozzles
Routine washing of the injector and injectors without removal should be carried out every 10-20 thousand kilometers. If you clean the injectors after a longer distance, there is a risk that this procedure will no longer be useful.
Such neglect can ultimately lead to severe damage not only to this part, but also to other interconnected engine components. In this case, cleaning the injector will no longer solve the problem; the engine will need repair.
Buying new components, including injectors, is labor-intensive and not cheap. Therefore, cleaning the injector should not be put on hold, especially in cases where signs of a malfunction have already appeared.
But the best option is to prevent the problem from occurring by cleaning the injectors from time to time without removing them, for example, before changing the engine oil. Such prevention will help protect your car from unnecessary problems with engine injectors.
About the design of Priora injectors
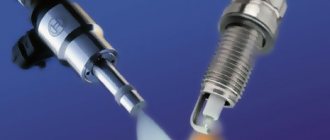
It was these components that gave the common name to the type of car with an ECM. None of the drivers wants to pronounce the full name. They say simply - an injector. So what is a nozzle (injector)? This is a device that allows you to inject fuel, under pressure, directly into the working chamber of the cylinder in strictly metered portions.
The principle of operation of Priora injectors is based on the electromagnetic effect. When the circuit is closed, the coil retracts the core, which opens the channel for supplying fuel accumulated in the fuel frame under pressure. The opening signal comes from the electronic control unit (ECU). The nozzle consists of the following parts:
- Frame.
- Coil.
- Fuel cleaning mesh.
- Nozzle with holes (diffuser).
Main problems of injectors
Malfunctions of these important components of the Lada Priora car can be divided into two categories:
- Electrical part.
- Mechanical component.
The first option includes damage to the coil or connector. A break or interturn short circuit may occur in the coil. One or both contacts in the connector may break. Over time or from an impact they break off. In any case, such a nozzle requires replacement.
Mechanical malfunctions of Priora injectors include various changes in the diameter of the fuel supply channel. Most often with Priora, this is contamination caused by the settling of foreign particles on the walls of the channel and in the diffuser. Or corrosion (increase) in diameter under the influence of additives. Although this happens extremely rarely at Priora. With an increase, there are no options other than replacement. But if they become dirty, you can wash the nozzles. About replacement and flushing, about identifying a breakdown, further.
Injector works perfectly
Perfect combustion of fuel can only be achieved if the injector is fully operational. Translated from English, it is called a motor pump.
To understand how to properly clean, you need to know the operating principles of the mechanism itself. This part is based on one or two channels. The first will receive the sprayed liquid, the second will receive the same steam or gas, which will spray the first liquid. The torch will burn continuously and evenly if the nozzle is of high quality and clean. In gasoline engines like the Lada Priora, an electromagnetic injector is usually used. It is a simple device that operates using an electronic control unit - at the right time it is required to supply voltage to the valve excitation winding. Thus, an electromagnetic field will be created: it will retract the valve with the needle and release the nozzle. The fuel will inject, the voltage will disappear and the needle will return to the seat.
Important nuances
There are a few things to keep in mind when cleaning your injectors. Here they are:
You cannot save on flushing fluid. The injector is a very important part of the engine. And it is extremely sensitive to the quality of the flushing fluid. The optimal choice for cleaning Priora injectors is a product from Wynns, developed specifically for injection engines.
The cost of a liter bottle is 700 rubles; Flushing fluid from Wynns is the best option for Priora injectors
You need to be very careful when removing an empty plastic bottle from the hood. It should be remembered: the pressure in it is enormous, so it can explode literally from one careless poke with a finger, and flying nipples can seriously injure the driver
The plastic bottle must be removed carefully after washing the Priora injectors.
Replacing injectors is a long procedure. Nevertheless, it is quite within the power of a novice driver if he has at least a vague understanding of the structure of an injection engine. When cleaning the injectors, the situation is much simpler: you just need to be able to use a drill and know where the main fuel hose is located.
Cleaning procedure
Cleaning injectors can provide the car owner with the following benefits:
- restoring the original functionality of the device;
- reduction of fuel consumption;
- optimization of motor operation.
That is, in case of contamination (use of low-quality fuel), it is possible to flush and clean the valves in order to restore them to functionality.
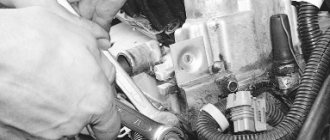
Open the hood and make sure all vehicle systems are working properly
Several cleaning methods
Experienced drivers know that there are several ways to clean injectors on a Lada Priora. Moreover, each of them has both its pros and cons.
The first option is to use a detergent additive - the liquid is added to gasoline and, after entering the gas tank, it enters the injectors. Usually one bottle of the additive (0.5 l) is enough for a whole tank of fuel. In this case, absolutely all parts of the fuel system are washed. However, the disadvantage of this method is the lack of drainage of dirt - it will remain in the system.
The second option involves using a solvent. It is considered the most effective, since flushing is carried out while the engine is running. However, it is necessary to replace the spark plugs immediately after using the solvent, as they may stop functioning.
Ultrasonic cleaning of injectors can be considered the most modern method. However, the average car owner cannot always afford to buy this type of equipment.
The Lada Priora car owner can clean and replace faulty injectors on his own - the main thing is to carefully monitor the progress of the work. The solenoid valve on the Priora is considered a fairly reliable element of the fuel system, so you will rarely have to perform any type of work with it.
Copywriter, needlewoman, traveler
Home →
Maintenance and Repair →
Car injector failure
The main reason for failure or wear of any fuel injector is contamination of the fuel system. The second aggressor is corrosion - it happens when there is moisture in the fuel. If particles as small as 0.01 mm (10 microns) are present in the fuel, this can also cause the injector to fail.
Cleaning injectors is an unavoidable task. Most often, they will need flushing by 40,000 km (in some cases this happens even earlier). Moreover, you can even do this on your own.
Replacing injectors on a 16-valve Lada Priora engine
As mentioned above, symptoms of injector malfunction include unstable engine operation, starting problems and increased gas mileage. To change the nozzle to a new element, you will have to spend a lot of time, since the replacement procedure is quite complicated.
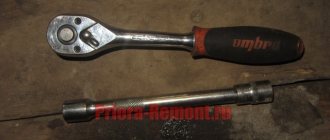
As a working tool, it is recommended to immediately prepare:
set of open-end wrenches;
Phillips-blade screwdriver.
After the car has stood for some time and cooled down, you can start working:
The plastic retainer of the harness must be pressed to the side with your finger to pull the bundle of wires out of the injector.
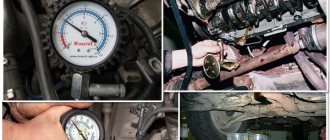
After which you will need to relieve the pressure in the car’s fuel system. The average pressure is approximately 380 kPa, that is, if work is carried out without bleeding, you can get injured due to sudden fuel emissions. To do this, you will need to open the rear door of the car and remove the seat from the back row.
There is a carpet under the seat, and under it there is a hatch to the gas tank.
When to clean injectors
Cleaning of injectors on Lada cars is carried out according to the condition of the car. If there are no problems with your car, then there is no need to clean them. Also, to find out for sure whether the injectors need to be cleaned, you first need to diagnose the fuel system. You can learn more about how to diagnose the fuel system in our article.
The manufacturer recommends cleaning the injectors every 50,000 km. Since the fuel at our gas stations leaves much to be desired, just before this mileage they begin to become clogged and flushing them will be useful. You can wash it at a service station, or you can do it yourself. Next, we will look in detail at how to wash the injectors on a VAZ car at home.
Purification process
Cleaning the nozzles itself should be done on a clean surface - for this you can cover the working surface with a piece of cloth.
Prepare a hose and a can for cleaning the carburetor. To flush, secure a plastic hose clamp at the inlet of the nozzle (make sure the length is at least 20 cm). The nozzle will need to be turned on, and the end of the hose itself will need to be lowered into the liquid that is used to flush the carburetor. Cleaning can be carried out by any of the proposed ones - RunWay, Liqui Moly or Hi-Gear.
You need to watch how the torch changes: it will expand or contract - it all depends on how dirty everything is. Once the jet stops changing, cleaning should also be completed.
But there is no need to add cleaning additives advertised on the market to the fuel: it very often happens that they harm the engine. The acidified dirt itself after such cleaning can create a blockage that will prevent normal access to the fuel-air mixture. Otherwise, fuel access may be blocked.
Cleaning is complete. Now do the installation in reverse order.
Despite the fact that the engine power supply system from the carburetor is a thing of the past, and its place was confidently taken by the injector, the old problems remained “thanks” to the quality of the fuel. Only now you have to clean the injectors from dirt, not the jets. If you go to a car repair shop, they will charge you a decent amount of money for the ultrasonic cleaning procedure along with disassembling the unit. To save on this service, you need to figure out how to wash the injectors with your own hands directly on the car in your own garage, without using expensive equipment.
How to check for faults
The car owner can independently check the performance of the injectors on his car. The procedure is quite simple and does not require special training or expensive equipment. In garage conditions, diagnostics can be performed with a set of open-end wrenches, screwdrivers and a tester with a resistance measurement mode.
Reasons indicating problems
Diagnostics must be performed not after any period of operation or mileage has expired, but in the presence of external manifestations of injector failures. In cases where other vehicle systems are operating normally, the following indicators indicate problems with the injection solenoid valves:
at idle there is instability in engine speed;
starting the engine is difficult - the engine may stall;
when overclocking it is impossible to achieve the same dynamics;
The amount of fuel consumed has noticeably increased.
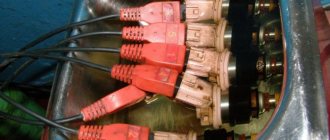
Unclip the plastic clips that secure the valve's power cable. Remove the connector.
Switch the tester to resistance measurement mode and take measurements of the windings of each of the injectors in turn. That is, you need to apply one contact of the tester to each of the five terminals, and the second one to the fifth wire for power.
Optimal resistance values in all cases should be in the range of 11–15 ohms. If at least one pin shows deviations, it will be necessary to change the nozzle.
Cleaning Priora injectors
There are two options for washing injectors: with and without removing them from the car. The removed injectors are washed on special stands using ultrasound, under the influence of which even the oldest contaminants disappear. Ordinary drivers do not have such stands, so below we will consider a more popular option for washing injectors without removing them from the Priora. Here's what you'll need for this:
- liter of special flushing fluid;
- two automobile nipples;
- automobile fuel filter;
- a pair of metal clamps;
- a meter piece of rubber hose with a diameter of 12 mm;
- drill with 13 mm drill bit;
- electric pump;
- two liter plastic bottle.
Flushing sequence
- The bottom and cap are drilled into the plastic bottle. This is done with a “13” drill. Automotive nipples are inserted into the holes.
- The spool is unscrewed from the nipple inserted into the plug. This must be done so that the flushing liquid passes freely into the nozzles.
- Now a rubber hose is put on the nipple inserted into the plug and secured with a metal clamp. The second end of the hose is put on the fuel filter and secured with a second clamp. A piece of rope is screwed to the bottle with tape (so that the bottle can be hung on the hood).
- The car starts. You must wait until the engine warms up to 90 degrees. After warming up the car turns off. The fuel hoses are removed from the fuel pump, the car starts again and runs until it stalls. All this is done in order to completely relieve pressure in the fuel line.
- Now you need to find the fuel hose with a green button on the clamp, connected to the fuel line. To remove it, just press the green button and pull it towards you.
- The hose is put on the fuel filter (the clamp with the green button should make a characteristic click).
- The washing liquid is poured into a plastic bottle.
- An electric pump hose is connected to a nipple inserted into the bottom of the bottle, after which the bottle is suspended on the open hood of the car.
- Using a pump, a pressure of 3 atmospheres is created in the bottle (as the liquid flows out of the bottle, the pump will have to be turned on several more times to maintain this pressure).
- After the required pressure has been created in the bottle, the car starts at idle and runs for 15 minutes.
- After this time, the engine is turned off and cools down for 10 minutes.
- If there is still liquid left in the bottle, the engine starts again and runs until it stalls.
- After this, the flushing system is removed from the car, and the fuel hose is installed in its original place. Injector flushing is complete.
Troubleshooting injector problems
First you should try to wash the Priora injectors. There are three methods for this procedure:
- Flushing during operation.
- Hardware flushing method, without removing it from the Priora engine.
- Ultrasonic cleaning in a special machine.
The most affordable and easiest way is to clean the Priora injectors yourself. This is done by pouring a special liquid into the tank. They are available for sale in a sufficient variety. The most popular of them are the following drugs:
- German "Liqui Molly".
- US "High Gear"
- Russian "Laurel".
To rinse, it is enough to pour liquid into the tank at the time of refueling, according to the instructions on the bottle. And drive quietly until all the fuel is used up. After this, replace the spark plugs.
The other two methods require special equipment and can only be carried out in a service station. Washing the injectors, without removing them from the Priora, is carried out by connecting a special container to the engine fuel frame. The electric fuel pump turns off. The fuel line fitting is disconnected from the frame and the flushing tank is connected. It contains a mixture of gasoline and washing liquid under pressure. The Priora engine starts and runs until the mixture is completely exhausted. After which, the Priora spark plugs are also replaced.
Cleaning injectors using ultrasound
To do this, you will have to remove the injectors from the Priora engine. The operation is performed on a special stand or in an ultrasonic bath. Such equipment costs quite a lot, and not every car service center can afford it. Moreover, it is a risky operation. Sometimes, instead of putting the injectors in order, ultrasonic treatment, on the contrary, completely disables the components. Therefore, you need to treat this process with great caution.
But in any case, the injectors, as when replacing, will have to be dismantled. How to do it?
Removing injectors for cleaning or replacement
This is a serious process that requires attention and patience. To bring it to life you will need:
- Screwdrivers.
- Pliers.
- Head keys for 13 and 10.
- 5mm hex key.
- 2 wrenches for 17.
- Mount.
First of all, of course, the Priora battery is turned off. After this, the connectors are removed from the ignition coils. Using a 10mm wrench, unscrew the fastening bolts and remove the coils. Using a 13mm socket, unscrew the 5 bolts and nuts that secure the intake receiver to the head. Using keys 17, disconnect the fuel line from the pipe going to the injector frame. Using a screwdriver, unscrew the fastener of this pipe to the block head. Unscrew the fasteners and remove the dipstick tube. After removing the clamp, move the rubber pipe from the crankcase to the head. Unscrew and remove the 10mm nuts holding the incoming air air receiver on top. Remove the air filter housing. Using a hexagon, unscrew the two bolts securing the fuel frame. Pull the receiver toward you (towards the radiator) by 3-5 centimeters without removing it completely. Disconnect the injector harness connector. Using a pry bar, carefully pry it up and pull it out of the nozzle holes.
After this, it becomes possible to pull the fuel frame towards the battery. Transfer it to the table and start removing the nozzles. This is no longer difficult. Disconnect the wiring harness from each, remove the fixing bracket from the frame and remove the “injector” from the socket. All. You can install a new one or give the old one for washing. And put everything back together in reverse order. Start and check the effectiveness of replacement or flushing.
There is a useful video for viewing on the topic, removing injectors on a Priora:
5.18.Checking and replacing injectors
Signs of injector malfunction may include: – difficult engine starting; – unstable engine operation; – the engine stalls at idle; – reduced crankshaft rotation speed at idle; – the engine does not develop full power, insufficient engine response; – failures in engine operation when the vehicle is moving; – increased fuel consumption; – increased content of CH in the exhaust gases. You will need: a 5-point hex key, a flat-blade screwdriver, a 17-point key (two), an autotester.
| 1. Disconnect the connecting block of the injector wiring harness and the engine harness by pressing the lock. | 2. Perform an initial check of the injector windings. To do this, connect the ohmmeter to the contacts of the pads one by one. |
Note There are five contacts in the block: four for supplying a control signal to the injectors and one common “+12 V” (a crimson wire with a black stripe is connected to it).
3. In turn, connect the four control contacts to the common contact and measure the resistance in each case. It should be 11–15 ohms. If in one or more measurements the resistance value differs from the specified value, the tested injectors or their wiring harness may be faulty.
4. For a more accurate check and replacement of injectors, remove the fuel rail from the car (see “Removing and installing the fuel rail”).
| 5. Use a screwdriver to pry off the spring retainer of the injector... | 6. ...remove the clamp... |
| 7. ...and remove the injector from the fuel rail. Remove the remaining injectors in the same way. | 8. To identify a faulty injector, connect an ohmmeter to the injector contacts. It should show a resistance of 11-15 ohms. If the winding resistance is not normal, replace the faulty injector, as it cannot be repaired. |
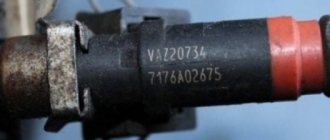
Note Check the injector for the shape of the sprayed fuel spray and for leaks at specialized service stations, since such a check directly on the car is very fire hazardous. Warning The injectors of the VAZ-21126-00 engine of the VAZ-2170 Lada Priora have an original design and are not interchangeable with the injectors of VAZ injection engines of other models. Buy new injectors with exactly the same markings.
| 9. Whenever removing injectors, be sure to replace the O-rings on all injectors on the ramp side. Using a screwdriver, carefully pry the edge of the ring... | 10. ...remove the sealing ring from the injector... |
11. ...and similarly remove the ring from the sprayer side. 12. If you are installing old injectors, carefully wash their nozzles with solvent or carburetor cleaner.
Warning Install new sealing rings carefully, without using any tools, after lubricating them with engine oil. Note The sealing rings on the injectors are identical to other rings installed on early VAZ models with fuel injection systems and are interchangeable with them.
| 13. Before installing the injectors, lubricate the O-rings with engine oil or WD-40. | 14. Install the injectors in the reverse order of removal, securing them to the ramp with clamps, after tightening them a little. |
15. Having installed the fuel rail, connected the fuel line and connected the wiring harness block, secure the minus terminal on the battery, turn the ignition key 3-4 times to position “I” (ignition) at intervals of 2-3 s between turns on and check for leaks pipe connections and injector seals. 16. Install all removed parts in the reverse order of removal.
Do-it-yourself injector cleaning - VAZAuto
Cleaning injectors with your own hands is a very simple process that must be done for prevention, since the “excellent” quality of our fuel quickly contaminates the injectors.
This article will describe a simple method for cleaning (rinsing) injectors.
You can easily determine when it’s time to clean the injectors on your own.
You just need to pay attention to whether symptoms of “dirty” injectors have appeared on your car
Probably one of the most basic symptoms is a decrease in engine power and reaction speed. The next symptoms are engine detonation.
Engine detonation is a process of spontaneous ignition of the combustible mixture in the cylinders, which has the nature of a blast wave.
Most likely, your car will have an unstable idle, possibly difficult starting when hot, and increased exhaust emissions.
These symptoms apply to injectors, provided that the remaining components and assemblies of the car are in good working order.
Injectors can be cleaned by removing them from the engine (ramp) or without removing them. The option without removing the injectors is easier, but in this case it is impossible to determine the quality of cleaning the injectors.
If washing will be carried out with dismantling the injectors, then it is necessary to replace the sealing rings.
There are several ways to clean injectors yourself.
The simplest thing is to add special liquids to the fuel tank.
Using products that are produced by almost all auto chemical manufacturers, you can clean everything from the gas tank to the injectors. But you need to take into account that you risk clogging the injectors even more with the washed dirt. This method will be effective if the fuel line is relatively clean and should be used as a preventive measure.
Injectors removed from the engine are cleaned using special compounds that are passed through the injector. This method is not complicated and can be easily implemented in the garage.
1. We will need to remove the injectors from the engine. This is done slightly differently on different cars.
2. Prepare a “device” for washing the injectors.
We will need a can of liquid for cleaning injectors or carburetor, a syringe (5 ml) and any container.
3. Now you need to connect the injector to the power supply to simulate engine operation.
Cleaning the injector with your own hands occurs when a voltage of 12 V is supplied to the injector, and in order not to burn the injector, we need to connect a 12 volt light bulb to the “+” gap of the injector wire. We need a switch to briefly supply voltage to the injector.
4. The circuit has been assembled, now you can start washing the injectors yourself.
5. Pump up the pressure into the syringe (by spraying from the can a couple of times) and briefly apply 12 volts to the nozzle.
6. Continue until the liquid spray becomes uniform.
7.Assemble everything in reverse order, not forgetting to install new O-rings.
Good luck to everyone on the roads.
My blog is found using the following phrases
to your website.
xn--80aaecx8b1a.xn--p1ai
Payment via PayPal
After selecting payment via PayPal, the PayPal payment system will launch, where you need to select the payment method: bank card or PayPal account.
If you already have a PayPal account, then you need to log into it and make a payment.
If you do not have a PayPal account and you want to pay using a bank card via PayPal, you need to click on the “Create an Account” button - shown with an arrow in the picture.
PayPal will then prompt you to select your country and provide your credit card information.
After specifying the information required to make the payment, you must click on the “Pay Now” button.
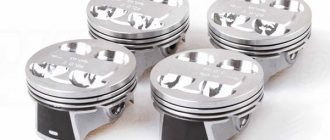
The best injectors for VAZ 2110-12
Injector malfunctions or how to check the injectors: 1. Coking of the outlet holes.
Symptom: increased gas consumption, poor engine starting, deterioration in vehicle dynamics. Otherwise, the engine behaves normally, idle speed is stable and starts normally at positive temperatures; at negative temperatures, starting is difficult.
2. Leaky closing of the nozzle valve.
- Symptom: increased fuel consumption, poor engine starting, tripping or detonation at idle.
- Diagnostics: measure CO (on a normally running engine without a catalyst, CO should not exceed 1% in idle mode. One leaking injector increases CO by approximately 1.0-1.5%).
3. Valve stuck.
- The sign is engine tripping.
- Diagnostics: disconnecting and then connecting the injector electrical connector with the engine running. If the injector is faulty, then there will be no engine response; if the injector is working, then there will be a temporary drop in speed.
4. Unstable valve hanging.
- Symptom: floating idle (a sharp drop in idle speed followed by an increase to 1000 - 1400 revolutions or a complete stop of the engine).
- Diagnostics: as in point No. 3. If one injector hangs unstable, it is guaranteed to be diagnosed as a shutdown. If two or more, then only by replacement.
Example, injectors with a mileage of 198 thousand km. At 40 thousand km, ultrasonic washing was done, and at 170 thousand km. Lavr decarbonizer was poured.
About VAZ injectors of the tenth family: “Dozens” were equipped with Bosch and Siemens injectors. Standard injectors from the factory are mainly Bosch injectors 0 280 158 996 (or 996e).
Interchangeability of VAZ injectors: Injectors come in not only different sizes, but also different in performance. To understand which injectors are suitable for your car, just use the table:
Addition to the table: BOSCH 0 280 150 996 nozzles are no longer produced; their analogue is BOSCH 0 280 158 110 (capacity 170 cc/min). There are some differences, for example, the rubber sealing ring on the 110th is a couple of millimeters higher than on the 996th, and the “tail” (from which it splashes) is longer. But there should not be any difficulties when installing the injectors.
Troubleshooting
To quickly check the injectors without removing them, you will need an indicator screwdriver. It consists of a metal rod and handle on which a switch and a contact are located to create a conductive circuit, clamped by one of the fingers. When moving the switch forward towards the rod, the device becomes less sensitive; when moving to the upper position, its sensitivity increases. In the first case, the red indicator lamp will light up or flicker, in the second case, the green lamp will light up.
Before carrying out the test, the screwdriver switch must be moved forward, towards the working part (rod) until it stops, and your finger must be pressed against the open contact located on the handle of the indicator screwdriver. The hand must remain in this position during the entire test, closing the electrical circuit, otherwise there will be no indication.
The working rod of the screwdriver must be positioned so that it touches the metal bracket on the block holding the nozzle. There is an opinion that it is enough to simply bring the rod to the block for an indication to occur, but this is not so. The metal clamp catches the electromagnetic pulse generated during the operation of the injectors; a potential difference and alternating currents arise in it, which the device records.
This test checks the injector while the engine is running, so it must be started and left at idle. When the rod of the indicator screwdriver comes into contact with the metal bracket on the screwdriver, the red indicator should light up. This checks performance on all cylinders. If the injector of one of the cylinders is not working, the indicator will not light or blink.
Using the indicator does not necessarily indicate that the injector is faulty, it signals that it is not working. The problem may be there, or in the voltage supply system, poor contact, failure in the electronic control unit, etc.
Some models do not have metal pad clamps in which currents are generated; in this case, is it possible to determine the faulty injector without removing it from the engine? Yes, this can be done using the same indicator screwdriver. To do this, you need to set the switch in the uppermost position (this is the highest level of sensitivity of the device) and perform additional manipulations.
After starting the engine, the screwdriver rod is brought to the injector block, and no indication will appear, even if it is working. Therefore, you need to attach a metal bracket to the screwdriver shaft, which will serve as an antenna where electromagnetic oscillations will occur. A paper clip carefully pressed around the rod with pliers is suitable for this.
During the fuel injector test, the switch remains in the highest sensitivity up position. With the engine running at idle speed, you need to bring the bracket as close to the block as possible, it should cover it. A blinking indication should appear on the device due to currents excited by the electromagnetic field that occurs during operation of the nozzle. If there is a non-working injector under the column, there will be no indication. This technique is also suitable for pads equipped with a metal bracket.
Conclusion
Testing with an indicator screwdriver will help you quickly find a problem when the engine is misfiring due to an injector, or other problems from the list above arise. If you have this tool, you can carry out diagnostics in your garage, and having identified a malfunction, fix it, if possible. The proposed test only reveals the fact that the injector is not working, and this can be done without disassembling the engine.
To identify the reasons why the fuel does not ignite in the cylinder, more detailed diagnostics and subsequent repairs will be required. However, it is not always necessary to replace the nozzle; there are other reasons why it does not function or is unstable. Sometimes you just need to seal the pad contact and the problem of stable engine operation is immediately solved; in more complex cases, for example, to clean the injectors, you will need to contact specialists.
Source
Replacing injectors on a Lada Priora car
Before we move on to describing the process of removing the injectors, you need to select everything you need for the job. Here is a list of tools and consumables:
- Phillips screwdriver;
- set of hex keys;
- set of open-end wrenches;
- pliers;
- wrench and set of socket heads;
- flat screwdriver.
Sequence of work
- The block to which the wires of the Priora injectors are connected is manually disconnected and removed. The block with wires on the Priora fuel rail is removed manually
- Now use a Phillips screwdriver to unscrew the screw holding the pressure plate of the fuel pipe. The mounting fuel rail on the Priora can only be unscrewed with a Phillips screwdriver
- Use a 17 wrench to unscrew the fuel pipe fitting. In this case, the tip of the tube must be held with a key at “22”, preventing it from turning. Without this, the fuel rail may break. The Priora fuel fitting should be unscrewed with only two keys
- The fuel pipe is carefully removed from the ramp, and the O-rings are removed from it. The O-rings from the Priora ramp should be removed so as not to lose them
- Use a Phillips screwdriver to loosen the clamp on the crankcase ventilation hose. The hose is then manually disconnected from the cylinder block. The Priora ventilation hose can only be removed after loosening the clamp
- The tube with lubricant level indicators is removed.
- There is a hose on the intake manifold that goes to the vacuum brake booster. The clamp on this hose is loosened with pliers. It is convenient to loosen the Priora brake hose clamp with pliers
- Use a socket head to “10” to unscrew a pair of nuts on the fastenings of the intake pipelines. The Priora intake pipeline is held on top by only two nuts
- Then, using a “13” head, unscrew all the bolts on the lower fastening of the pipelines.
- The pipeline, freed from the fasteners, is slightly lifted up and pulled towards itself. Access to the fuel rail is provided. After unscrewing the fasteners, you can simply pull the Priora pipeline towards you
- The ramp is held on the cylinder block by two screws at “5”. They can only be unscrewed using a hex wrench. Two 5-point screws on the Priora ramp can only be unscrewed with a hexagon
- After this, the ramp is removed from the cylinder block along with the injectors and wires. The Priora fuel rail is removed along with injectors and wires
- Old injectors are unscrewed from the ramp and replaced with new ones. The injector on the Priora can be unscrewed from the ramp manually
- After this, the fuel system is reassembled.
Lubrication system
General information
The lubrication system, by supplying oil to rubbing parts, reduces wear of rubbing parts, increases the mechanical efficiency of the engine, cools the engine with oil and removes wear products.
On cars, the lubrication system is combined - under pressure and by splashing. The main and connecting rod bearings of the crankshaft and camshaft bearings are lubricated under pressure. By spraying oil, the pistons, piston rings, cylinder walls, and camshaft cams are lubricated.
The lubrication system includes: an oil pump with an oil receiver, an oil filter, an oil sump, an oil filler neck with a sealing cap, an oil level indicator and oil supply channels in the cylinder head and block.
The oil pump serves to supply oil to the rubbing parts and to the oil filter for cleaning. The pump is gear-type, with internal gears and a pressure reducing valve. Installed on the front wall of the cylinder block (from the crankshaft side). The drive gear (smaller diameter) is mounted on two flats on the front end of the crankshaft.
The oil filter is designed to clean oil from mechanical impurities. The filter is full-flow, non-separable, screwed onto a fitting and pressed against the collar on the cylinder block. The filter has an anti-drainage valve that prevents oil from draining from the system when the engine is stopped. The filter is also equipped with a bypass valve that is activated when the filter element is clogged. Thus, the oil enters the oil line, bypassing the filter.
Engine crankcase ventilation is forced, closed. Ventilation ensures suction of crankcase gases from the crankcase through an oil separator (in the cylinder head cover).
Changing engine oil and filter
Attention: — It is necessary to fill in engine oil of the same brand and composition that was poured into the engine. — If you replace the engine oil with another brand of oil, after completely draining it is necessary to flush the lubrication system with special flushing oil for 10 minutes
Then replace the oil filter with a new one. — Drain engine oil only into a previously prepared container.
For this operation you will need the following tools: a 17 mm wrench, a container into which the oil will be drained.
1. Place a specially prepared container under the engine crankcase. Then unscrew the drain plug and drain the engine oil.
2. Install and tighten the drain plug.
3. Using a special wrench or by hand, unscrew the oil filter.
4. Wipe the contact surface of the cylinder block with the oil filter with a clean rag.
5. Apply a thin layer of engine oil, which will then be poured into the engine, onto the O-ring of the new oil filter.
Let's sum it up
The choice of method for washing the injector and injectors without removal remains up to the car owner. And each of the methods does its job perfectly. However, several important points should be emphasized once again.
The cleaning agent should be poured into the fuel tank every time the engine oil is changed, and only as a preventative measure to avoid the harmful consequences that arise from malfunctions in the power supply system of gasoline engines. If there are obvious signs of a malfunction, this option can even cause harm, aggravating the problem even more.
The second option is more effective, but it does not always save the driver. Sometimes you still have to spend both time and money on dismantling, cleaning or replacing injectors. Therefore, in order not to let the situation become critical, follow appropriate preventive measures. To ensure your injector has a long and trouble-free service life.
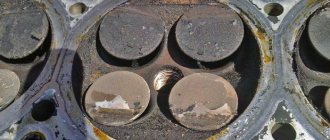
Causes of injector contamination
When a mixture of air and fuel burns, a tar deposit is formed. It is deposited not only in the combustion chamber of the engine, but also on the surface of the nozzles. This leads to their gradual contamination. The shape and diameter of the hole in the nozzle body gradually decreases. The result is insufficient supply, a change in the spraying process. The mixture turns out to be heterogeneous. Instead of the injector delivering a mist of fuel into the engine, it sprays small streams of fuel.
The structure of the mixture changes, and an excessive amount of air or fuel appears in it. Engine performance decreases, the on-board computer tries to adapt the car to new conditions, supplying even more gasoline, which cannot burn completely.
Gasoline injectors work even worse in winter, when fuel evaporates more slowly. This leads to more intense pollution.
How often should you clean the injector, and is it necessary to do it?
Against the background of the above, the conclusion suggests itself about the need to periodically check the condition and efficiency of the injector. The question is in what time frame this work is required.
Let us highlight the following trends:
- 30000 km . If the car owner fills the car with low-quality fuel during the initial period of operation, the injectors gradually become clogged with tarry deposits, which leads to deterioration in engine performance. In such a situation, it is worth figuring out how to clean the injector, and when it needs to be done for preventive purposes.
- 30-50000 km . In the absence of action on the part of the owner, the efficiency of the sprayers decreases by 5-7%, and the “gluttony” of the vehicle increases (on average by 2-3 liters). To eliminate existing contaminants, you cannot do without cleaning the injector.
- 50-80000 km . Further the situation worsens. After this period, the performance of the sprayers decreases by 12-15%, and the power unit itself begins to operate unevenly. Over time, the plunger damages the seat, causing the nozzle diameter to become larger. At the same time, contamination of the system occurs. How to clean the injector in this case? The only solution is considered to be a full-fledged flushing, but due to the increase in the diameter of the nozzles, this is not worth doing. And in general, replacing the part should be preferred over cleaning.
- 80,000 km or more . In this case, the efficiency of the nozzles decreases and the sprayers operate unevenly (deviations reach 30-50%). The issue of cleaning the injector becomes irrelevant, and the optimal solution is to install new parts, regardless of the condition of the latter.
It is worth noting that the nozzle is a consumable item, so you should not be afraid of replacing it. Each product has its own resource, after which a new element must be installed.
Manufacturers of many cars recommend replacing them at intervals of 100-120 thousand kilometers. This is true even with apparently normal operation of the products.
Do injectors need to be cleaned? Given the use of low quality fuel, the sulfur content of which is tens of times higher than EU standards, this is necessary.
The main thing is not to delay this process and do the work from the perspective of prevention, not “treatment.”
Experts recommend performing this work once every 25-30 thousand kilometers, but to get results it is important to understand how to clean the injector, what methods exist, and what their features are.