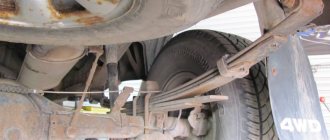
You can often observe situations in which the driver does not know why the silent blocks creak. Sometimes they can even drown out soft music in the cabin, which causes a number of inconveniences. The “groaning” is especially noticeable on uneven roads. Even the most reserved driver’s nerves will not be able to withstand listening to such squeaks for hours, no matter how much you ignore them.
Sometimes many experienced car owners can argue that the creaking of silent blocks does not mean something strategically important: the wheels will not fall off, and the car will not stop moving. But in other cases, even the most inexperienced beginner tries to localize and eliminate the cause of the heartbreaking grinding noise as quickly as possible.
So what should you do to prevent blocks from creaking? Here the sequence of manipulations directly depends on the cause of the sound. There are not many of them, so it is quite easy to install and eliminate the unpleasant factor with your own hands, without resorting to an expensive inspection at a service station. And if you are used to repairing a car yourself, then you will find the process fun and interesting.
Wear of parts
The most likely and obvious cause is wear and tear. What to do in such a situation? First, a little hardware: the silent block is a dense piece of rubber with metal spacers. Rubber dries out over time and this is a normal process. They are also systematically exposed to mechanical and chemical stress. The most critical period is winter , when roads are often thickly sprinkled with reagents that corrode even the thickest rubber.
The creaking is the first sign. The driver can observe a deterioration in handling, coupled with the appearance of vibrations in the cabin. Theoretically, one silent block can withstand about 100 thousand kilometers, but calculations were carried out in the west, where the roads are incomparably better. Considering the condition of our coating, feel free to reduce the resource of the block by half. It is worth changing at the inspection hole, or its equivalent:
- Unscrew all the nuts that secure the front arms;
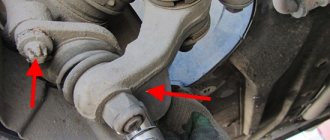
- remove the nut that secures the stabilizer to the lever;
- remove the bolt by gently tapping it with a hammer, since it comes out extremely reluctantly with your hands;
- Loosen all the bolts on the wheel, first jacking up the desired side. Afterwards the wheel is removed completely;
- unscrew the nuts on the braces, but before doing this, thoroughly “blow” them with WD-40;
- the ball is moved away from the steering knuckle, then 2 more bolts are unscrewed and the lever is finally removed from the car;
- Now silent blocks are removed using a puller, which in no case can be replaced with a sledgehammer;
- clean the eyes from any deposits;
- It is necessary to thoroughly lubricate the silent blocks before pressing with any solution with a high soap content. Oil and grease are contraindicated as they will likely corrode the rubber;
- The collection procedure is performed strictly in reverse order.
Causes of silent block creaking
- ü The main causes of squeaking are wear, improper installation, or a design feature.
Wear:
- If, when disassembling the hinge, it is clear that the filler between the bushings is swollen, cracked, or there is other damage, it’s time to replace the block. The service life of this part on Russian roads is on average 50 thousand km.
- Another good way to determine the integrity of the filler in the joint is to lubricate it using the injection method. In the case of diagnostics, the lighter the lubricant (less durable), the better. Therefore, the best option is glycerin. If, after lubrication, the creaking resumes after a couple of days, it most likely has exhausted its service life.
- The third sign of wear: deterioration in the overall handling of the car, poor steering response, increased wear of the tires on the sides and increased vibration of the steering wheel and body.
- ! If the cause of the squeak is wear of the silent block, it is advisable to replace it as soon as possible. The worn out hinge does not absorb the load, transferring it to the levers. As a result, suspension parts or other components attached to the faulty unit may soon fail, and the cost of repairs will increase significantly.
Poorly tightened during installation
In some car services, silent blocks are tightened incorrectly - on a suspended car, which is fundamentally wrong. This needs to be done on the ground, with the car loaded under its own weight, and even better, with 4 people inside the cabin (ideally).
Good car repair shops practice tightening with the car lowered; in some cases, a second person additionally loads and rocks the car.
A poorly tightened block creaks even a new one. Therefore, if possible, control the installation process, or ask to tighten it on the ground.
- ü If the hinge is not fully tightened, lubrication often helps. After some time, the silent gets used to rubbing in and settles down. If this doesn’t help, it’s due to incorrect installation, a defective part, or wheel alignment problems.
Creaks due to design features
Some blocks have cutouts in the rubber for a soft ride (for example, in Chevrolet models). They don’t add much to the smoothness at all, but regular squeaks are present.
This problem can be solved by replacing the parts with similar ones without cutouts (Read our instructions: How to change silent blocks yourself). In the case of a Chevrolet, parts from a 2000 Ford Mondeo are suitable.
- ! A similar approach applies to other cars.
The creaking of new blocks
You can often come across the following point: new components that have just been installed make an unpleasant sound. Perhaps they didn't really fall into place. To speed up the grinding, they must be lubricated. A special silicone grease is provided for silent blocks. But before lubricating, do the following check:
- drive the car into the inspection hole and jack up the problem wheel(s);
- loosen the fasteners on the blocks;
- place reliable wooden stops under the levers and release the jack;
- When the car sinks under its own weight, tighten all the bolts until they stop.
If the creaking is still felt, then the component was originally defective from the manufacturer. In this case, simply lubricating the silent blocks will not work. They will have to be changed completely.
Why does the car squeak on bumps?
Knocking or squeaking
on
bumps
it often appears due to faulty ball joints. In this case, you need to contact a car repair shop immediately, since the car can stop at any moment, and it will be impossible to do anything on the spot; you will have to call a tow truck. ... It's enough to rock the car.
Interesting materials:
Which ultrabook to choose in 2022? Which station wagon is better to choose under 500,000? Which insulation to choose for the facade? Which car is better to choose on a double-decker train? Which car to choose on a double-decker train? Which roller is better to choose? Which roller to choose for whitewashing the ceiling? Which DVR to choose in 2022? Which VR helmet to choose in 2022? Which car to choose under 300 thousand rubles?
Design features
However, the question is “what to lubricate so as not to squeak?” will not help at all if you have a Chevrolet Aveo. The original blocks of the car are made in a cunning way: there are special slots in their rubber part. Theoretically, such a design feature should allow the car to move more smoothly, but in practice there are no significant differences, as the owners of the vehicle note.
These same slots systematically emit an unpleasant creak, which is why dirt constantly gets clogged inside them, preventing the normal operation of the structural element. The only temporary solution is to regularly wash the unit and thoroughly spray the components with WD-40. The effect lasts about 3-4 days if the weather is dry. During rain or snow, the effect disappears almost instantly. The only way to eliminate a factory defect is to completely replace the blocks with analogues without cutouts.
Lubrication Tips
Not every element can be lubricated, and the composition of the lubricant for each part is individual. If the new silent does not have an outer ring, then the use of lubricant is completely justified. Rubber-metal parts can only withstand silicone or soap solution for more convenient pressing into their original place.
Important! Polyurethane products can only come into contact with lithol and other lubricants whose composition is based on lithium.
For rubber components, in a good way, you should use something neutral. This lubricant significantly extends performance. A striking representative can be called ShRB-4, which has a fibrous structure.
The lubricant perfectly resists any kind of scuffing and has good moisture resistance. The operating temperature range ranges from -10 to +130 degrees. The main condition is that the rubber does not swell. It follows from this that lubrication in some cases is not just a good addition, but a natural necessity.
Results
Replacing a worn silent block is not only the elimination of extraneous debilitating squeaks, but also a prerequisite for the fact that something is wrong with the car’s chassis. Wear causes tires to wear improperly, which can lead to premature wear even with ideal driving. Controllability on any part of the highway deteriorates and the risk of causing an emergency increases.
If you have an Aveo, look for analogues from Mondeo. Although General Motors has already officially presented a line of silent blocks of a new type, without holes, so it makes sense to look for original spare parts.
As a rule, most of the floating silent blocks in the rear suspension of a car have a low load-bearing load, so if certain rules are followed, such components can properly serve from 100 to 300 thousand km with proper maintenance, replacement of boots and lubrication.
The most common reason why, for example, Chinese-made ball joints fail after 5-15 thousand km is a violation of the integrity of the anthers. As a rule, the rubber on such spare parts is of low quality and is not able to withstand the constant presence of lubricant in contact with the boot material, the rubber softens and breaks under mechanical and dynamic loads, such boots, if you pick them up, easily tear, the rubber seems to be damp and easily is torn. I made this small digression so that you understand how important the material of the silent block or ball boot and the condition of the boot are.
If the boot and the spare part are original, another situation arises - mechanical destruction or damage over time or under the influence of factors, for example, careless repairs, the consequences of which are the boot being torn with a screwdriver when diagnosing the suspension, while the owner does not know about this and unless he independently inspects the suspension and condition ball joint boots and floating silent blocks, the owner recognizes it after the fact in the form of creaks or knocks, which already entails a complete replacement of the component).
So we figured out that buying cheap Chinese components is unacceptable - in the case of metal - it simply breaks (there are many examples of fallen off ball rods and torn rods from accident reports), and in the case of rubber - it loses all its properties, hardens - loses elasticity, breaks, therefore, a cheap Chinese boot installed on the original ball joint will, after 5-15 thousand km, kill the ball itself, which is often replaced only together with the lever, and this is a lot of money for repairs. Therefore, in this article I will not consider the maintenance of cheap Chinese ball and silent blocks - you simply do not need to install them if you are going to drive the car yourself and you do not care about the lives of passengers and other road users.
How to press in silent blocks with your own hands?
We have already talked about how to remove the silent blocks, now another problem arises, how to press in the silent blocks? This procedure is complex in that it requires certain skills and abilities. A silent block installed incorrectly or “at awry” will either not work or fail ahead of time.
Method 1
As with pressing out, pressing should ideally be done using a vice. The principle is similar, but exactly the opposite. Before pressing in the silent block, you need to use sandpaper to clean the seat from rust and remnants of the previous silent block. Then the eye is generously lubricated with soap solution or Litol-type lubricant. A lever is installed, a silent block is placed on top, after which, through a special mandrel, press pressure is applied to the spacer, which will press the silent block into the seat.
Method 2
When there is no press, you can press in the silent blocks using the above-mentioned vice or jack. The principle is the same as that of the press. A lever, bushing, spacer are placed and, under the influence of a vice or jack, the silent is pressed into the seat.
How to press in a silent block using a vice - video
Method 3
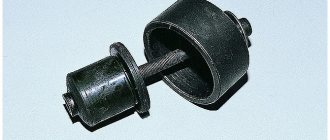
Press puller. If the silent block is small, then you can “put it in place” using the same press puller that was used to press the silent block out of the socket. Again, the principle is the same, only a pin and a thick washer are used as a press.
Method 4
Sledgehammer and brute force. I strongly do not recommend this method for the reason that it is generally considered as purely theoretical, that is, it allows you to press in silent blocks, but it is quite difficult to say what the consequences and quality will be. The principle is quite simple, we take a lever, put a silent block on it, and then sharply and strongly hit the silent block, causing it to go into the ear of the lever. The disadvantage is that it is quite difficult to predict the correct movement of the silent block; it can go into the seat awry. It is also possible for the rubber parts to “bite” and damage the silent block or lever itself. In short, the blow is very difficult to control, and often after such “experiments” you have to go to specialists and redo everything. Therefore, think carefully before using this method.
Method 5
method I know of is to use the weight of the car. The principle is to use the weight of the car, so to speak, for personal gain. It all looks like this: a hydraulic or screw jack is installed under the car, the wheel is removed, although I think it is already removed if you are changing silent blocks, then a lever with a silent block is installed under the hub, which must be pressed in. Next, we align everything properly and begin to slowly lower the jack, it is better to have a friend or assistant help you. I think the weight of the car will be enough to press the silent block into the seat. The disadvantage of this method is that it is inconvenient and somewhat dangerous; in addition, it is quite difficult to control whether the silent block is correctly seated in the seat. However, if you have no other option, then the method is well worthy of your attention.
In principle, that’s it, I don’t know to press out or press in silent blocks If you know any other options worthy of attention, I will be happy to listen to them and publish them. Share your opinions from what you read and comment, I will be glad to see any constructive criticism. I also remind you that the best way to say thank you to the author of the article is to share this article with your friends on social networks using special social buttons. networks located just below. Peace and goodness to everyone, see you again at VAZ Repair.
You can often observe situations in which the driver does not know why the silent blocks creak. Sometimes they can even drown out soft music in the cabin, which causes a number of inconveniences. The “groaning” is especially noticeable on uneven roads. Even the most reserved driver’s nerves will not be able to withstand listening to such squeaks for hours, no matter how much you ignore them.
Sometimes many experienced car owners can argue that the creaking of silent blocks does not mean something strategically important: the wheels will not fall off, and the car will not stop moving. But in other cases, even the most inexperienced beginner tries to localize and eliminate the cause of the heartbreaking grinding noise as quickly as possible.
So what should you do to prevent blocks from creaking? Here the sequence of manipulations directly depends on the cause of the sound. There are not many of them, so it is quite easy to install and eliminate the unpleasant factor with your own hands, without resorting to an expensive inspection at a service station. And if you are used to repairing a car yourself, then you will find the process fun and interesting.
Lubricating (injecting) silent blocks with glycerin
This is the most common option for how to escape from the squeaks of the “cart” - quickly, cheaply and independently, which is presented on numerous forums. But I strongly disagree with this approach, for several reasons.
Firstly, glycerin is not intended for use as a lubricant for mechanical rubbing components and hinges. In terms of its chemical composition, glycerin is a trihydric alcohol, which has nothing in common with the composition of lubricating greases.
Secondly, the use of glycerin as a ball joint lubricant is essentially self-deception, it is hiding symptoms without eliminating the cause - as long as there is liquid around the joint (even water), it will not creak, so the creak can be eliminated for a certain period of time using absolutely any liquid . I really don’t quite understand why you should advise people to syringe with glycerin, why not take gear oil, it will also easily flow out through a needle like glycerin and everyone will be able to fill the space under the boots with lubricating oil intended for high loads.
My verdict is not to use glycerin under any circumstances, and if you really want to, don’t recommend it to other people and don’t write laudatory reviews on forums that you filled it with glycerin and nothing squeaks for six months... it’s better to fill your engine with sunflower oil, it also feels slippery to the touch, what difference does it make to the engine, right?
What is a silent block?
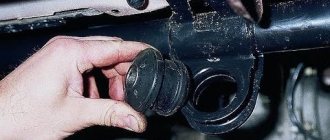
A silent block is a hinge consisting of two metal bushings with a rubber or polyurethane insert. Serves to fasten parts together (suspension, engine, transmission, etc.).
It replaced metal ones in the middle of the last century. Thanks to a rubber or polyurethane insert, it dampens vibrations of parts among themselves, taking on the main load of the components.
Depending on the filling of the bushings, silent blocks can be rubber or polyurethane .
- Rubber
They are used by most car owners because they are cheaper and have proven themselves on domestic and foreign cars. Present even on 30-ton Volvo trucks. The downside is that they are less durable (if a resource of 50-200 thousand can be considered as such for such consumables). Also sometimes found from low-quality rubber.
- Polyurethane
Mainly used on sports cars. They are more expensive, have a longer service life, improve handling, but also increase suspension stiffness.
Minuses:
- Since most fasteners that use blocks are subject to torsional loads, polyurethane is inappropriate and even dangerous for parts. It is effective on sliding/tilting (bushings of stabilizers, shock absorbers and hinges of some Toyota and Mitsubishi models).
Rubber perfectly handles the torsional load without jeopardizing the suspension arms.
- In addition, polyurethane increases the stiffness of the suspension, which is critical on our roads (it will not cause concussions).
- The third disadvantage: the resource declared by marketers to be “5 times greater” is in fact the same as that of rubber ones - in inexpensive models. In the case where it is larger, the price is several times more expensive, which is equivalent at best. Not to mention how many problems are described in the cold.
Lubrication (injection) of silent blocks with lithol
Litol, CV joint, pennant, as well as imported multi-component lubricants designed specifically for ball joints, bearings and friction units, which contain metal-clad compounds that make it possible to minimize friction between parts and maximally protect the metal surface from corrosion and wear, the latter is achieved by using as part of lubricants of fine metal powders, oxides and other compounds that cover the surface of metals with a thin protective layer that is resistant to wear and corrosion. It is these lubricants that are used in ball joints, CV joints, bearings and ball joints, which include floating rear suspension silent blocks with passive steering.
The question arises, why does everyone on the Internet recommend glycerin and not lithol? That’s right, glycerin is liquid, but lithol is thick and you can’t squeeze it out of a syringe, you can’t squeeze it out at first glance! If you take a 5 ml medical syringe with a thin needle, you will really break your fingers faster than squeeze out a drop of lubricant, but what if you take a 20 ml syringe with a thicker needle?
In the photo you see how I fill the space under the boot with Vympel lubricant, it is thick, but with strong pressure on the syringe piston rod (I think the force is 3-7 kg), the lubricant comes out in small quantities. I would like to draw your attention to the fact that the less lubricant in the syringe, the easier it will be to squeeze out the contents. You can try heating the syringe to 100 degrees, but this will not greatly affect the results, and the body of the plastic syringe will begin to lose its rigidity.
It is best to glue the needle with superglue and under no circumstances press on the syringe piston and do the reverse movement - 99% that the needle will jump off and under pressure some of the lubricant will simply leak out onto the suspension elements. It will seem to you that you are pressing with all your might, but the piston is standing still - this only seems if you checked it first and see how the lubricant comes out of the needle, and then inserted the needle under the boot, feeling the stop in the hinge - you know, it’s true, but Slowly, the process of restoring the functionality of the floating silent block began.
Using a medical 20 ml syringe is the most primitive way to restore the operation of the hinge and fill it with lubricant; for a small silent block, 0.2 - 0.4 ml is enough on each side under the boot and this will be enough for up to 50 thousand km or more if the boot is intact without damage. A puncture with a needle does not violate the integrity of the boot, at least you can safely pierce the creaking silent block and try to restore its operation, since it is usually in danger of being replaced and you do not lose anything, as they say, it will not get worse.
Why does the suspension squeak and how to deal with extraneous sounds in the springs?
Let's look at the main causes of squeaking in springs and give examples of solving these problems. First of all, let's determine what can squeak in the front and rear suspension.
- The rattle of the spring itself when the sheets rub against each other and come into contact at the attachment points of brackets, earrings, support or stepladder platforms.
- Another direction to search for extraneous sounds is spring components: various types and shapes of bushings, silent blocks, as well as lubricated spring fastening elements: bronze and threaded bushings and all kinds of pin options.
Spring contamination
Let's start with the simplest. Sand, dirt and small stones often get packed between the sheets (let’s add to this the possibility of spring corrosion due to constant exposure to moisture). Contamination can actually cause a lot of squeaking in the front and rear suspension. The presence of foreign objects can be determined by examining the spring package.
Step No. 1. The first thing to do is wash the spring package. Car enthusiasts have this concept of “driving through puddles.” For some, this really helps, and extraneous sounds disappear. But if the spring is really clogged with sand or mud with small stones, a puddle will definitely not help.
Destruction of anti-squeak plates
After washing the springs, the creaking disappeared, but after a while it appeared again. We inspect the spring and notice that there is almost nothing left of the anti-creaking plates, as a result of which the sheets touch each other and begin to creak at the point where there are no anti-creaking plates or washers. Over time, the grinding noise in the front or rear suspension can only get worse.
Remains of anti-squeaks, friction of sheets on clamps
The tension clamps are loosened, the anti-squeak washers are partially lost and erased.
Step No. 2. Install new washers or anti-squeak plates.
Moving apart the spring package
We replaced the washers and the sound almost disappeared. We are happy, we are waiting for the washers to rub into the places where the sheets are worn out, but every day the squeak is getting louder and, it seems, is becoming stronger than it was before replacing the anti-squeaks.
A new inspection of the suspension, we noticed that the sheets are slightly fanned out and friction occurs on the tie clamps, which leads to creaking in the car’s suspension. This problem often occurs when additional sheets are added to the spring, and the spring cannot be properly tightened with old tie clamps.
Loosening stepladders
In addition to this problem, it is necessary to add loosening of the tightening of the stepladders; this is also one of the options for the spreading of spring leaves.
Step No. 3. If the creaking in the suspension appears for this reason, we align the sheets and clamp the tie clamps, not forgetting to leave a small gap for the free movement of the spring sheets.
Wear of bushings and silent blocks
The car is ready for use, but after driving a few tens of meters, we understand that the problem remains the same - the sounds in the suspension have not disappeared. Bad thoughts appear about springs in general and about those who invented these springs. When examining the silent blocks and bushings, we see that they are broken or moved to the side; perhaps the outer race of the silent block or the inner bushing has become detached.
Cracks along the edge of the bushing indicate that the rubber has dried out and lost its elastic properties.
In addition, you can see small cracks along the contour of the rubber bushings - this indicates that the rubber has dried out and lost its elastic properties. For any variant of the above problems, there is only one recommendation - replacing the bushings or silent blocks with new ones or, as an option, constantly driving through puddles and using various automotive aerosols.
Step No. 4. Since we want to get rid of extraneous sounds in the suspension for a long time, we remove the spring to repress the silent blocks. Some car owners recommend lubricating the spring between the sheets with graphite lubricant. Since our springs are removed, we'll lubricate the leaves just to be sure.
Step No. 5. Install the springs. By the way, about proper installation, many people make the huge mistake of tightening all the fastening bolts and stepladders on a raised car; this is categorically contrary to the spring installation technology. Only after the vehicle is installed in the transport position are the spring mounting bolts tightened and the stepladders finally pulled through. If the correct installation sequence is neglected, the result may be the tearing off of the inner bushing of the silent block within a very short time after the start of operation.
In our version, we will install everything correctly and do not forget to stretch the stepladders through the runs, depending on the type of vehicle.
The sheets are coated with graphite lubricant, new anti-screen washers are installed
What needs to be prepared for pressing silent blocks?
Like any other work related to a vehicle, pressing silent blocks requires a certain list of tools. To perform such a manipulation with your own hands, you will need wrenches and new hinges, a jack and a pry bar. To lubricate the elements, you will need to prepare automobile oil or other types of lubricants. In addition, to perform pressing at home, special mandrels or pieces of pipe with a certain diameter are required. You should also prepare a press to press in the new hinge. You can also use a regular vice as a press.
Checking the element before performing work
Before pressing in silent blocks, it is very important to check their condition. When performing an inspection, it is necessary to carefully inspect the element and make sure that they still need replacement. In this case, you should carefully check the element for damage, and also make sure that the rubber on the hinge has not deteriorated, and the play in the parts has not reached critical sizes. If the value of the backlash has reached a critical point, then replacement must be carried out immediately. Untimely replacement can lead to many problems, which can subsequently cause failure of the suspension arm. As for the common causes of malfunction, they can manifest themselves in the following changes to the car:
- Reduced vehicle controllability;
- The occurrence of knocking noises when driving over uneven surfaces;
- Uneven tire wear;
- There are problems with wheel alignment adjustment.
If you need to press-fit a silent block, then you should start the process by choosing the right element. The new silent block must fit the specific case. After identifying parts that match, you can proceed to the next stage of work. To do this, you need to take a vice or hammers with sledgehammers. It is necessary to apply the tool several blows to the silent block and knock it out. Then the eye in which the hinge was located must be cleared of debris and treated with landing lubricant. Next, you can proceed directly to clamping the lever in a vice and installing the silent block perpendicularly. To press the element in, you need to take tubes or mandrels. One of them should hold the lever, and the second lean against the side. To press the hinges into place you will need a special press. Pressing can be done on the rear and front of the suspension. When replacement of hinges is required in gearbox or engine components, it is better to entrust the work to specialists.
This video will tell you more about pressing in silent blocks:
How to press out a silent block at home?
Replacing silent blocks is not difficult; for example, I personally became convinced of this when I replaced the silent blocks and shock absorbers on the rear suspension with my own hands. It is for this reason that you can often meet those who decide to independently replace silent blocks at home.
Method 1
First, let's talk about how this should ideally happen. The lever in which it is necessary to replace the silent block is taken, installed under the press on a special stand into which the old silent will be squeezed out, after which a special spacer is installed on top, which will squeeze out the old bushing. This method is used by service stations that have the necessary set of spacers and a powerful press of 10-20 tons.
Method 2
Most motorists, of course, do not have a powerful press, but many have a good vice or jack in the garage. Using a powerful vice, you can successfully squeeze out old bushings using a similar principle - a spacer into which the bushing will go and a spacer that will press on the bushing.
Jack. It would seem, how can a silent block be squeezed out with a jack? Everything is very simple, you need to weld a rectangular frame from some channel or corner at a height slightly higher than your jack and lever. The principle is as follows: we install the jack in the frame, after which we install the lever eye and the two spacers mentioned above on top of the rod. We create the necessary pressure, and the bushing is squeezed out of the seat. It should be noted that in most cases, a 3-5 ton jack is simply not able to cope with such work, so it is better to use 10-15 ton jacks.
Method 3
If you don’t have a jack or a press, and you have an insatiable desire to replace the silent blocks yourself, you can use the third method - using a simple press puller (a pin or a bolt with a nut). The principle is to create pressure by gradually tightening the nut on the stud; this method can be considered analogous to a vice. A pin with a washer of the required diameter is inserted into the eye through the silent block, then a spacer with a washer is put on the other side and the nut is tightened. Rotating along the thread, the nut creates the necessary pressure and forces the silent block to be squeezed into the “receiving” spacer. This “method” requires a strong, hardened stud with the same nut. If the nut or stud is soft, you won't succeed. For example, my pin began to bend due to pressure, after which the thread on the nut was torn off. However, there are thousands of those who managed to replace silent blocks using this particular method. The advantage of this method is its cost-effectiveness and convenience from the point of view of “mobility”, that is, you do not need, for example, to completely remove the entire hub or lever, you just need to have such a primitive press puller.
How to press out/press in a silent block using a press puller video
Method 4
This method can be classified as drastic or extreme measures. It consists in using all known methods and devices to extract the silent block from the mounting socket. The principle is to knock out the old silent block using a powerful screwdriver or a thick wedge-shaped piece of reinforcement. The task is to drive a screwdriver or something similar between the bushing and the silent block, thereby deforming the wall of the bushing inward. After the sleeve is crushed and fed inward, knocking it out is not difficult. Before you start knocking out the silent block, you need to burn out or squeeze out the inner bushing of the silent block and, if possible, any remaining rubber.
