How to unscrew the wheel hub nut of VAZ 2108, 2109, 21099?
In order to quickly and easily unscrew the wheel hub bearing nut (front or rear) on a VAZ 2108, 2109, 21099, you need to know some of the features of this work.
Otherwise, unscrewing this nut yourself can present unpleasant surprises, at least in the form of a broken or bent key, and at most in the form of physical and mental injuries.
Required Tools
Special wrench for “30” or a socket with a knob
Preparatory work
Place the car on a level surface and secure it with wheel chocks, engage first gear and use the handbrake
There is no need to jack the wheel so that it does not turn when the nut is unscrewed.
Remove the protective cap from the wheel (if any)
Preparing access to the hub nut
To access the hub nut, you need to remove its protective cap and remove any grease from it (if any). If there is no protective cap and lubricant, and the shank and nut are rusty or covered with a layer of dirt, this connection must be thoroughly cleaned and filled with penetrating liquid. Then wait a while for the penetrating liquid to do its job.
How to unscrew the front wheel hub nut of VAZ 2108, 2109, 21099?
— Straightening the jammed collar of the nut
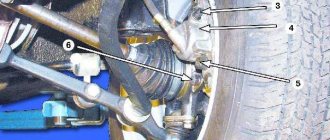
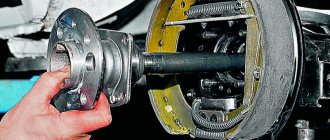
The hub nut is locked on the shank of the outer CV joint of the front suspension or the rear wheel hub axle by bending its shoulder into the longitudinal groove on these parts. Using a thin chisel and a hammer, straighten the jammed shoulder of the hub nut. To do this, we hit it with a hammer through a chisel in several places.
— Unscrew the front wheel hub nut
To unscrew a “soured” nut, it is advisable to use a special wrench, which is a reinforced curved socket wrench. The tightening torque for the front wheel hub nut is 226-247 N.m, for the rear wheel it is 186-226 N.m, which is a lot (plus the resistance of rust and dirt must be overcome), because of this you can bend or break a non-reinforced key when unscrewing it. To increase the force, you should put a piece of pipe on the wrench, thereby increasing the leverage.
If the nut and its threads are in good condition, a socket and wrench can be used.
If you manage to loosen the nut, there is no need to unscrew it completely. This can be done during the process of disassembling the suspension with the wheel already jacked up and removed. For example, when replacing the front wheel bearing of a car.
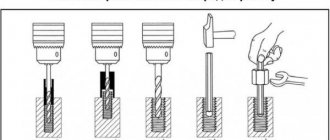
If the nut cannot be unscrewed, you will have to resort to more severe unscrewing methods. For example, heating or cutting with a chisel.
When installing the wheel hub bearing nut back, you need to tighten it to the required torque (to avoid damage to the wheel bearing), bend its collar into the groove of the CV joint shank, apply lubricant and install the protective cap.
Notes and additions
You can easily and without much difficulty unscrew the hub nut using a pneumatic impact wrench. The only problem is that not many people have it.
All hub nuts for the front and rear wheels of VAZ 2108, 2109, 21099 and their modifications have a right-hand thread.
Source
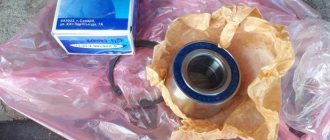
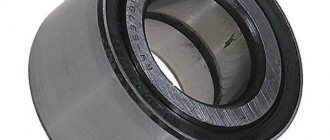
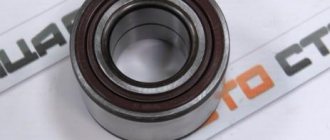
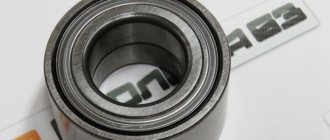
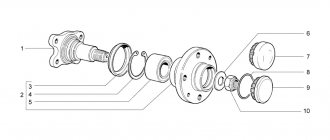
Replacing the rear wheel bearing of a VAZ 2108 without a puller
When the assembly itself is removed, it is necessary to remove, press out and install a new bearing. The first method is relevant if you do not have a special tool at your disposal.
- We take out the locking ring;
- We fix the VAZ hub in such a way that the lower part is free and nothing prevents the clip from falling out;
- We take a pipe of suitable size (slightly smaller than the bore diameter) and, with sharp but gentle blows, knock out the holder with balls (instead of a pipe, you can take a nozzle on “30”);
- After dismantling, you should measure the rear wheel bearing of the VAZ 2108 so as not to make a mistake in choosing a spare part. Also, immediately before replacement, you should treat the inside, removing rust and dirt from there using fine sandpaper and thoroughly lubricate the seats.
Now you can install the new part
- Align the hub in a horizontal plane.
- We treat the new ball bearing with lithol or grease.
- We install the part absolutely exactly in relation to the seat.
- We carefully attach the spare part. The basic rule is to avoid distortion. If the element does not fit, it means there is a curvature and the procedure must be started again.
- After the part goes in halfway, you can apply more force - it will no longer be possible to warp it. (the photo below shows the process of pressing through an old bearing - it is convenient to use it as a spacer);
- We mount the retaining ring;
Replacement using a puller and press
The repair process can be significantly simplified by using a special press. It allows you to carefully press out the part and install it back as efficiently as possible.
- We fix the part in a press vice;
- Using a rod, press out the ball bearing;
- Pressing is carried out in the reverse order. For convenience and safety, it is advisable to press press through the removed part.
An alternative for a press is to have a special tool in the form of a puller. The tool will help save time when working. With its help, you can quickly replace the rear wheel bearing of a VAZ 2108, and its price remains reasonable. So, the cost fluctuates between 1500-700 rubles, depending on the country of manufacture and brand.
- Install the hub in a vice;
- We rest the puller ring against the ball bearing;
- We screw a bolt onto the stem from the reverse side;
- We perform smooth pressing;
The advantages of this approach are obvious - you can install the part yourself or dismantle it, eliminating the possibility of misalignment.
Assembly and installation of the unit
After pressing in the new element, you can begin assembling the entire assembly. The whole process is carried out in reverse order:
- Reinstall the retaining ring;
- We mount the hub assembly directly onto the axle;
- Tighten the lock nut;
- We put the brake drum on the guide pins and tighten them;
- We mount the wheel on its seat;
Wheel nut VAZ 2109 what thread?
For model 2109, the wheel is attached to the hub using wheel bolts. The number of fasteners depends on the year of manufacture of the model and is presented in the table below.
Important: the data presented above are the limits of values for all modifications of the car; specific figures depend on the year of manufacture.
When selecting any fastener, special attention should be paid to the thread pitch. This parameter is always indicated in the marking after the “x” sign.
Most wheel fasteners have metric fine pitch threads (M12x1.25/M12x1.5/M14x1.25/M14x1.5), which should match the threads of the studs or tapped holes in the wheel hub.
Important: the marking of the M12x1.5 mounting bolt is deciphered as follows: thread with a nominal diameter of 12 (mm), thread pitch 1.5 (mm).
Other designations of the VAZ 2109 hatchback on the Russian market: VAZ 2108, VAZ 2113, VAZ 2114, Lada Samara.
Important: years of production of all modifications of the model: 1987-2014.
| General view General view of fasteners |
Caution: The above data are the official figures of the manufacturer, however, please note that the information is for reference only and is not guaranteed to be completely accurate.
Source
Replacing the front wheel bearing of a VAZ 2109, VAZ 21099 with your own hands
We will show you how to replace the front wheel bearing on VAZ 2109, VAZ 21099, VAZ 21088 cars with your own hands. We will show a method applicable in “field” conditions when there is no press and there is no need to carry out a wheel alignment in the future.
Using a large 30 socket, we tear off the hub nut:
We dismantle the wheel. We recently had a wheel alignment done on this car, everything is fine with it, so as not to have to pay money for this procedure again, we will remove the fist along with the strut. Unscrew the two caliper mounting bolts:
We remove it and put it on some kind of stand so that it does not hang on the brake hose under load. Using pliers, unscrew the steering tip and unscrew it:
We pry it out using a universal puller:
Unscrew the two ball joint bolts:
Open the hood and unscrew the 3 bolts securing the strut:
Remove the stand assembly. Unscrew the brake disc mounts:
We press out the old hub, attach one part of the stand to a wooden stump, place a mandrel of suitable size and strike it from the back side:
We dismantle the old retaining rings, this can be done conveniently with round pliers:
From the front and back. Place the mandrel again and press out the bearing:
Use a flat-head screwdriver to clean the grooves for the retaining rings. We install one retaining ring. Lubricate the seat and the wheel bearing housing itself. Press in using a copper spacer:
Attention! If you have a press or at least a vice in the garage, then it is better to use them, it will be much more reliable. We show how you can do it yourself with a minimal set of tools.
Install the second retaining ring in place. We still have a clip left on the hub; we can make a cut with a grinder and then knock it off with a chisel. But this method is not the most humane; very often it leaves marks on the hub. Therefore, we remove the clip using a small mounting tool, apply it and hit it with a hammer:
Here, too, it is important not to damage the wheel bearing seat; if you take a thick chisel, rivet one of the parts, and then the race will become distorted. We lubricate the hub and wheel bearing with lithol and press it in the same way:
After this, we perform the assembly in reverse order.
Continuation of the broken hub nut.
Hello everyone!) They asked me to tell you how I solved the problem. I'm telling you. Sorry for the low quality photo. Phone without autofocus.
I got to Gorda from the dacha (20 km) without incident, I drove 40-50 km/hour. I checked several times to see if it was in the right place; to do this, I put a stamp on the spare wheel so that it could be seen right away.
In the morning I set about solving the problem I created.
