April 30, 2019 Lada.Online 149 984 113
Adaptation of the automated transmission (AMT) is necessary for the correct operation of the clutch release actuator. If this operation is not performed, then malfunctions in the operation of the transmission may occur (jerks, jolts while driving, as well as increased wear of the clutch). AMT adaptation should be performed as the clutch wears out or after replacing it. You can perform AMT adaptation at the LADA dealership or yourself.
Attention! You perform all actions at your own peril and risk. The instructions were written not by specialists/engineers, but from the words of owners of Lada Vesta and Lada XRAY (SrgKlsnkv and sva775) cars. The procedure was not tested on other LADA models with AMT (Granta, Kalina, Priora).
Required
:
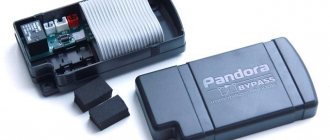
- adapter ELM327 (available in the AliExpress catalog)
What is adaptation and when is it carried out?
Adaptation of a robotic gearbox is the process of resetting the existing settings of the electronics that control the unit. Subsequently, the device is calibrated for new operating modes, ensuring smooth gear shifting and proper clutch operation. The manual transmission adaptation procedure is carried out in the event of malfunctions in its operation, as well as when performing various repair work on the transmission, in particular:
- Complete replacement of a robotic gearbox or its partial repair with disassembly.
- Replacement of the electronic transmission control unit, the electric drive responsible for changing gears.
- Replacement of failed sensors that control the operation of the robotic gearbox.
- Replacement or repair of the clutch drive and sensors, as well as other parts that make up the clutch mechanism.
Adaptation of the device should only be carried out in cases where it is really necessary. Carrying out this procedure too frequently has a negative impact on the clutch assembly and leads to premature wear of the units. Possible positive effects that appear after frequent adaptation are short-term. Here are some of the most common misconceptions regarding robotic box adaptation:
- The procedure does not affect the smoothness when the car starts to move.
- Adaptation will not help prevent jerking when driving at low speeds if other transmission parts are worn.
- The position of the rack in the clutch mechanism does not indicate the need for adaptation.
Rumors about a CVT on the West
It is already known that the Renault Nissan concern, together with AvtoVAZ, is working on installing a continuously variable transmission on Vesta. To install an imported gearbox, you will need to install a new engine, most likely also foreign-made. The release date of the Lada with a CVT is not known, let’s assume that it’s not worth waiting for such a car within the next three to four years.
With a CVT, Vesta will become more economical than it is now. The ride will become smooth without changing gears. One “but” is that repairing a variator is astronomically expensive; Lada manufacturers should think carefully about this.
Typical faults
You can often hear that robotic gearboxes are extremely unreliable. The first models of such units actually failed quite often, but newer models are slightly inferior to traditional manual and automatic transmissions in survivability and performance. The fact that they are becoming increasingly popular in the automotive industry also speaks in favor of robot boxes. However, their characteristic malfunctions are worth talking about. The main symptoms of malfunctions include:
- Clutch slipping;
- Too slow response to increasing engine speed;
- The appearance of sound noise (knocking, buzzing or howling);
- Operation of the indicator light on the dashboard;
- Jerks when automatically shifting gears during smooth movement;
- Leaking transmission fluid;
- Complete failure of the transmission.
As the reader already knows, automatic transmissions are essentially modified “mechanics”, which means they are characterized by the same malfunctions as conventional manual transmissions. In particular:
- Worn speed selector fork;
- Wear of rolling bearings.
Electrical components of the manual transmission can also fail. Despite the fact that almost all electrics in robotic units have a long service life, breakdowns are not uncommon. Especially when it comes to manual transmission of obsolete models. The following malfunctions can be noted:
- Burnout of contacts of electric drives;
- Damage to wiring;
- Failure of sensors;
- Burnout of contact groups;
- Control unit malfunction.
As a rule, electrical equipment fails due to overheating.
It is important for a car enthusiast to monitor the performance of the cooling system. For example, the system channels may become clogged - this will lead to obstructed coolant flow with subsequent overheating of individual manual transmission elements
It is also worth monitoring the condition of the oil. Not only does it prevent dry friction, but it also absorbs and removes excess heat.
When should adaptation be made?
You have a pre-production car, and you need to update the settings to more recent and correct ones.
The fact remains that the first cars turned out to be a little damp and there’s nowhere without it, but fortunately AvtoVAZ quickly solves the problem, as it has already done with bushings and stabilizer struts, with the clutch.
It turned out that the Turkish Valeo clutch, which was installed on the first cars, is not suitable for the weight of the car. As a result, the owners of the first West felt the clutch slipping, felt that the car was moving poorly and needed to increase the speed. When replacing the clutch with a new one, adaptation is carried out.
AvtoVAZ recommends adapting the robot’s clutch as it wears out, i.e. every 15 t.km for correct and resourceful operation.
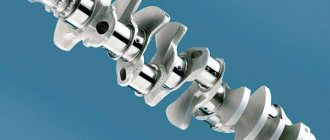
What is a robotic box?
A robotic gearbox is essentially a complex mechanical device with additional electronic components that control its operation. The electronics themselves are responsible for changing speeds and operating the clutch; the driver only gives the appropriate commands using the lever. The digital unit takes into account the vehicle's driving mode, driving style and other conditions, ensuring smooth movement and minimizing wear of parts.
From the driver's point of view, the robotic gearbox allows you to drive with the same comfort as when using an automatic transmission. But at the same time, its use makes it possible to use fuel more economically. And the unit itself is more reliable and costs less than its fully automatic counterpart.
For correct operation, once a year or every 10-15 thousand mileage, it is necessary to adapt the robotic box so that the electronic filling takes into account the wear of transmission parts or is adjusted after replacing components and assemblies. This procedure should only be performed at specialized service stations that have the necessary equipment, knowledge and experience.
Replacement and repair of AMT clutch actuator on Lada
The main distinguishing feature of an automated transmission (AMT or “robot”) from a mechanical one is the electric actuators produced by ZF, which change gears at the command of the electronic “brains”. The manufacturer claims that the actuator unit is maintenance-free and cannot be repaired, but craftsmen have found a way to repair it with their own hands.
If the car’s warranty has already expired, then replacing the clutch release mechanism actuator yourself will cost tens of thousands of rubles (article numbers: 21820210901200 and 21820210501200). In an attempt to save money, you can try to repair it.
In move
I checked how the Lada Vesta drives with such a box. In 5th gear the revs stay just above 1500. Of course, the load on the engine is light, but the car goes uphill. This is not very correct or comfortable. The motor is running tight, not in the best mode. Even when the speed is reduced to 50, the program still tries to pull in 5th gear. It seems to me that this is a minus of the normal mode.
Thus, you can drive in “Sport” mode (urban dynamic). In sport style, 3rd gear drops only to 50 km per hour, 4th to 65. The revolutions do not fall below 2000. For the city, this is optimal driving, as the engine runs quietly. There is no such problem as in the standard gearbox, when when going uphill, the 5th speed stubbornly holds on.
Jatco automatic transmission and long climb
The operating manual supplied with all VAZ cars with automatic transmission says the following: it is recommended to turn off overdrive when climbing. This is how you can prevent the box from moving to the last, fourth gear. Overdrive is turned off by a special button located on the selector housing (it is turned on by it). Look what we have on the selector: “D”, “2”, “1”. Well, between “D” and “2” there could be a number “3”, but they decided to implement this option using a button.
On a long climb, the automatic transmission should under no circumstances try to shift from third gear to fourth. Otherwise, although nothing terrible will happen, the box begins to operate in a mode that is unusual for it.
Since the control unit “doesn’t know” anything about the angle of the body, it means that the driver is required to turn off overdrive at the right time. Actually, foreign cars also have a similar option. And up to the third stage inclusive, if the car is moving no faster than 60-70 km/h, the engine speed will remain at an average level. That is, you won’t be able to spend a lot of fuel with overdrive turned off, unless, of course, you want to accelerate up to 70 km/h on a hill (prohibited in traffic regulations). The Jatco transmission settings were correctly selected from the very beginning of the release of the “second Kalina”.
Video about the entry of "Kalina-2" with automatic transmission onto a hill covered with ice
How does a master adapt AMT?
From the driver's point of view, the master simply programs the control unit using special equipment. In fact, this is how the sensors are trained and the actuators remember the desired position, and the clutch is initialized. And also the drives are adapted and the same “robot training” takes place.
After the procedure, the AMT “remembers” the positions of the clutch and gear lever, taking into account the wear of parts on this particular machine. That is why adaptation must be carried out after any transmission repair.
IMPORTANT: Sometimes the incorrect operation of the AMT is not due to a settings failure, but to a failure of the clutch or other transmission components
Via phone
- For an Android smartphone, download and install the ECU Tweaker application. We copy the ecu.zip archive to the root of the internal or external memory without unpacking it.
- Connect the ELM327 V1.5 adapter to the OBDII port of the car.
- Turn on the ignition.
- Launch the “ECU Tweaker” application on your smartphone
- In the search, select “BM LADA”
- Then "Automatic Transmission"
- Then "BVR_On_CAN_x52_JS3_v2.4"
- Then "After sales"
- Then "Diagnostic"
- Then the "Wrench"
- Go back and select “Learnings information”
- Go back and select “Learnings Procedures”
- Complete the training (see “Training Procedure” above)
If after AMT adaptation the engine does not start
. It is possible that the last learning procedure was completed incorrectly and an error was stored in the memory of the electronic unit. It is necessary to perform diagnostics, reset errors, and perform adaptation again.
You can also perform AMT adaptation using OpenDiag Pro or Scanmatic software (see an example of such adaptation). Both programs are paid.
AMT adaptation can be performed by specialists
in various cities of the country. You can order the service through our online store.
Have you ever had to adapt the AMT on a LADA yourself?
Let's remember that we previously told you how using ELM327 and DDT4ALL you can:
Source
Common problems with Durashift EST
1) Gears do not shift due to damaged wiring
The wiring harness is not protected from negative environmental influences. The switching suffers from moisture and dirt, especially in the area located between the electric motors and the gearbox controller, which is located as close as possible to the ground.
2) Clutch failure
The clutch resource ranges from 120–180 thousand km. Its development is related not only to the quality of service, but also to driving style. If during long stops the gearshift knob is moved to the neutral position, this contributes to less overheating, long service life of the performer and the clutch itself.
3) Sensor errors
Most errors are related to incorrect position of the clutch or shift mechanism.
4) The motors in the servos are not functioning properly
Servo drives use complex pulses to control motors. The motors themselves are equipped with brush units with Hall sensors. When they become dirty, the operation of the mechanism is disrupted.
Typical Jatco faults: when do you need to sign up for diagnostics?
Jatco hydromechanical automatic transmissions are quite reliable and consistently operate up to 200,000 km. Nevertheless, for trouble-free operation of the automatic transmission, it is important to completely replace the transmission fluid once every 50-55,000 km, and also to flush the hydraulics once every “hundred”.
The most popular problems that arise with a Jatco automatic transmission until the end of its service life are:
- Failure of the oil pump occurs, as a rule, due to the filling of low-quality ATF oil, or as a result of a rupture of the filter element.
- Clogging of the valve body occurs in the event of a filter break or prolonged absence of maintenance. A valve body clogged with friction dust additionally loads the oil pump and torque converter and can lead to blocking of the solenoids.
- Bushing wear is a fairly rare problem, but can occur as a result of aggressive driving of a car with an automatic transmission.
- Deformation of seals occurs due to natural wear and tear. Most often, the problem for the box does not pose a threat if the faulty part is promptly replaced.
Problems with electrical and electronics on Jatco automatic transmissions are a rare occurrence. However, in case of regular aggressive use of the car, it is recommended to install an additional cooling radiator in order to prevent overheating.
How to set up a Toyota Corolla robot
The Japanese began producing an improved robotic transmission with the release of the 2007 Corolla. Although until 2009, owners of these cars encountered significant difficulties in operating the robot. Since 2009, a modernized actuator (gear shifter) has been released. This drive was developed taking into account all the mistakes of previous models. Now, every year, even more practical actuators are produced, when replacing them you will forever forget about sudden MMT failures.
Actuator Toyota Corolla
Robot adaptation is, in other words, individual tuning and adjustment of the clutch. Diagnostics can be carried out using special devices or without them. If you decide to adapt the Toyota Corolla robot yourself, then follow the step-by-step instructions.
Self-adaptation of the Toyota Corolla robot:
Block DLC3 and contacts CG and TC
- Turn off the ignition and put the car on the handbrake.
- We make a paper clip (jumper) of contacts CG (4) and TC (13) in the DLC block. Now we wait about 15 seconds until the system prepares for diagnostics.
- Turn the key to ignition mode. When turning the ignition on, do not press the brake or start the engine.
- Immediately after turning on the ignition, pump the brake 6-7 times for 3-4 seconds.
- Wait for the return buzzer signal, it will be executed in 2 clock cycles.
- After two short signals, hold down the brake pedal and carry out the following gear shift combination: N – E – M – “plus” – M – “plus” – M – “plus” – M – “plus” – M – E – N, then release the pedal and wait 5-10 seconds.
- Press the brake again.
- We are waiting for the buzzer to respond, a short signal will appear, which will mean that the clutch clamp is adjusted. Release the brake.
- Then press the brake pedal and hold it. We move the gearbox lever to the “minus” position. Let's release the pedal.
- Turn off the ignition and wait 10-15 seconds.
- Remove the clip from contacts CG (4) and TC (13) in the DCL block
After carrying out a number of adaptation works, it is necessary to finally complete it, check all elements for serviceability and compliance with the specified parameters.
You won't need the DLC3 block for final setup. Just follow the instructions:
Set the box position to “neutral”. Turn on the ignition and wait about a minute. Turn off the ignition and wait 15-20 seconds. Turn on the ignition again. We start the engine in the “neutral” position and hold the brake pedal. Pay attention to the instrument panel. When the engine is running, you will see the “N” indicator flashing.
We wait until the “neutral” indicator stops flashing, you can turn off the engine. This completes the adaptation of the Toyota Corolla robot.
Via phone
- For an Android smartphone, download and install the ECU Tweaker application. We copy the ecu.zip archive to the root of the internal or external memory without unpacking it.
- Connect the ELM327 V1.5 adapter to the OBDII port of the car.
- Turn on the ignition.
- Launch the “ECU Tweaker” application on your smartphone
- In the search, select “BM LADA”
- Then "Automatic Transmission"
- Then "BVR_On_CAN_x52_JS3_v2.4"
- Then "After sales"
- Then "Diagnostic"
- Then the "Wrench"
- Go back and select “Learnings information”
- Go back and select “Learnings Procedures”
- Complete the training (see “Training Procedure” above)
If after AMT adaptation the engine does not start
. It is possible that the last learning procedure was completed incorrectly and an error was stored in the memory of the electronic unit. It is necessary to perform diagnostics, reset errors, and perform adaptation again.
You can also perform AMT adaptation using OpenDiag Pro or Scanmatic software (see an example of such adaptation). Both programs are paid.
AMT adaptation can be performed by specialists
in various cities of the country. You can order the service through our online store.
Have you ever had to adapt the AMT on a LADA yourself?
Let's remember that we previously told you how using ELM327 and DDT4ALL you can:
Source
Adaptation of the Easytronic grip point from Opel
The problem with a simple and beautiful robotic system is that the actuators do not have feedback sensors to actually evaluate the correct operation of the system. When we disengage the clutch with our foot, we feel the resistance force of the hydraulic drive, the diaphragm spring, and even the engagement point. The robot does not have this; it estimates the position of the rods based on the increased current in the drive winding.
Therefore, in the first 10-20 thousand km of adaptation of Easytronic Opel, the electronics must learn:
- the most accurate determination of three positions: the beginning of the opening of the clutch discs, their complete release and the initial point of contact when the transmission is turned on;
- precise positioning of all main parts of the drive, rod, gearbox and clutch; usually the electronics work out the extreme stop points of the moving parts and are guided by them in the future.
In addition to getting used to the trigger points of the “iron liver,” Opel’s Easytronic remembers your driving style. But you can’t count on the box being able to smooth out and forgive all the driver’s antics. If the information received and stored in memory during the adaptation of Easytronic from Opel does not coincide with the instantaneous data during the current operation of the box, the system will emit a transmission fault signal.
This is interesting: How to choose and install a reliable alarm system in your car? Review of the 8 Best Security Systems for 2022
Reviews
| № | Positive |
| 1. | Semyon (www.zr.ru): mileage 70,000 km, clutch is normal. |
| 2. | Andrey (autobann.su): the pedal travel is natural, not increased. I noticed that in severe frosts the PS becomes a little tight. |
| 3. | Georgy (lada-vesta.net): there are no comments on the DS, it works as usual. |
| 4. | Stepan (otzovik.com): standard pedal travel, 68,000 km of active drive without maintenance and repairs. |
| 5. | Vladimir (www.zr.ru): positive review, no comments. |
| 6. | Alexander (autobann.su): I have a pre-installed DS with a stock from Renault Logan, I heard that the quality of the French is better than the domestic one. |
| 7. | Mikhalych (https://forumvesta.ru): all standard units and components are working properly, without any violations. |
| 8. | Vitaly (lada-vesta.net): Lada Vesta is assembled with high quality, I have no complaints. |
| 9. | Timofey (otzovik.com): in four years of operation, I replaced the sensor once, I don’t consider it a defect or defect. |
| 10. | Stanislav (www.zr.ru): I use Lada myself and recommend it to others. |
| 11. | Gennady (autobann.su): mileage 85,000 km without repairs or equipment replacement. |
| 12. | Alexey (https://forumvesta.ru): soon 100,000 km, the condition of the car is a solid “4”. Much depends on the driver, how he observes the technical inspection deadlines. |
| Negative | |
| 13. | Konstantin (www.zr.ru): the Russian sensor served for two years, after which the rod failed. Replaced it with a French one from Renault Logan. |
| 14. | Vitaly (otzovik.com): the DS is not tightly fixed, periodically it turns out of the grooves. |
| 15. | Grigory (autobann.su): after a year of using the car, the DS flew. Fortunately, it was under warranty and was replaced free of charge. |
| 16. | Kirill (lada-vesta.net): I pumped the system several times, but to no avail. |
Advantages and disadvantages of robot boxes
Robot boxes appeared relatively recently, but they quickly became popular. Car enthusiasts appreciate the convenience and comfort they provide
Motorsport fans paid attention to the most advanced robots that could change gears in a split second. Of course, such units also have their disadvantages, but let’s start with the pros:
- Robotic gearboxes are quite reliable - they are based on a manual gearbox, which is more reliable than CVTs and even automatic transmissions;
- The number of gears in robots corresponds to the number of gears in manual transmissions;
- The unit is quite cheap to repair;
- A transmission with a robotic gearbox has a significant service life - its clutch life is 40% longer than that of a manual transmission;
- It is easy to implement the manual gear shift function in the unit;
- The unit increases the fuel efficiency of vehicles.
It may seem that robots are devoid of shortcomings. This is not entirely true, but it should be noted that they are becoming more and more popular and in demand, unlike the same CVTs. By the way, robotic units also differ from the latter in their versatility. CVTs are usually installed on passenger cars - they have certain limitations on power - while robotic gearboxes can be equipped with almost any vehicle. If we talk about the minuses, then the manual transmission cannot boast of:
- Slightly slow gear shifting and general “sluggishness” of the transmission (the problem often lies in imperfect software);
- Some models of units perform poorly when starting from a standstill, and sometimes when changing gears (also a software problem);
- Many models of robot boxes cannot be reprogrammed;
- In some conditions, the driver needs to switch to manual gear shifting.
As you can see, robotic units do not have many disadvantages. Such gearboxes collected a lot of negativity back in the years when they began to be massively equipped in passenger vehicles. The opinions of car enthusiasts were equipped by automakers, so today robots can safely be called the next stage in the development of manual transmissions. Today there are many cars on the road with manual transmissions, the software part of which cannot be changed, but modern robots can be reflashed.
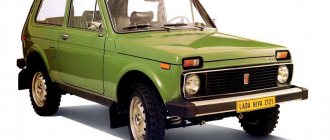
What kind of gearbox does the Lada Vesta have?
Lada Vesta is available with two types of transmissions: manual and robotic. Both are made in Russia. Until recently, AvtoVAZ installed 5 manual transmissions (manual transmission) from Renault. This is due to the inconsistency of the old VAZ-21080 with the established Vesta standards. I had to modify the Priora box.
To increase the gear ratios of the gearbox, the main pair, the second gear gears, was replaced. The new VAZ has a new body, stronger rubber parts, which means the noise level is an order of magnitude lower. Replacing oil seals will be less frequent, adding less oil to the box will increase, torque, acceleration, and maximum speed will increase.
Externally, it will not be possible to distinguish a foreign box from a VAZ one. They look the same inside and below. You can find out the manufacturer by the vehicle's VIN code. The combination “GFL11” means that the machine has a Russian node, and “GFL13” means a French one.
The combination “GFL12” indicates AMT on Vesta. 5 AMT - five-speed automated transmission, in common parlance - a robot. Many people mistakenly call manual transmission an automatic transmission. This is wrong. Perhaps they are similar in appearance due to the lack of a clutch pedal. The robot can rather be called a semi-automatic, or a modernized manual transmission.
The Vesta robot was created on the basis of a VAZ 21827 manual transmission, to which a control unit, actuators and drives from the German company ZF were added. AMT transmission sensors are connected to the Lada's on-board computer. The most useful feature in Vesta is the indicator with gear shift prompts. The hint of Lada Vesta is two triangles pointing up and down. When one of them lights up, it means you should engage an upshift or downshift. This option is accompanied by sound, which can be disabled.
AMT automatically releases the clutch electronically. To start moving, you need to remove the lever from the neutral position and press the accelerator pedal. To bring the Vesta robot as close as possible to the machine, there is. The chipped Lada begins to move when the brake pedal is released.
I'll tell you how to change the functions of the Lada Vesta using the Car Scanner application
We continue the topic of activating all sorts of goodies and additional options through the Car Scanner application.
The Car Scanner program looks like this on your phone (icon on the screen).
You can download it through the Play Market. Go to the application, connect the ELM 327 adapter, you need version 1.5. It works well with this application and does all the functions.
Many people say that the key icon does not appear. It will not appear until the adapter is connected to the car unit.
Click the “Connect” button. If you can’t connect the first time, then you need to go to the “Bluetooth” settings and select the appropriate OBD adapter. After this, the connection should be successful.
After connecting, the “Coding and Service” icon appears.
Click on it, you will be asked to accept the terms, agree. Wait for the connection process to complete. Further understanding of the Car Scanner program is very simple.
I went to the “Exterior Lighting” section, then “Disable DRLs while the turn signal is on.” There are only two switches: “Enabled” and “Disabled”. In the same way, I turned off the “Automatic rear wiper operation”. In winter, this option is not needed, since the wiper may freeze, and when activated, the slots will become unusable.
You can also go to other sections and see what you need and what you can disable. For example, on my Lada Vesta I activated the “Temperature display principle” and set it to “Linear”. I found out that it rarely reaches 90 degrees.
This is a very simple application. In the free version, you can activate any 3 functions. After installing the PRO version of the application (activation), an unlimited number of functions become available to you. Access to additional settings is available. You can adjust the readings of different sensors, check errors, and measure acceleration up to 100 km per hour.
The Car Scanner application can be used not only on the Lada Vesta car, but also on many other cars. You can also activate functions. I like this program, very convenient and understandable. When activating the full version, you will have to pay about 200 rubles, but you can also use the free version.
You can also activate the “Tire Pressure Monitoring” function on the Lada Vesta. Calibration will occur while the vehicle is moving. But before doing this, it is recommended to ensure the same pressure in all tires.
Write in the comments which application you use and why. Subscribe to the channel so you don't miss the next reviews. It will not be difficult for you, but it will be pleasant for me. Good luck to everyone on the roads!
Source
Box adaptation procedure (st-2 and st-3)
Adaptation of a robotic gearbox is carried out using specialized equipment and consists of several stages:
- Software initialization of the clutch.
- Adaptation of drives responsible for gear shifting.
- Repair (if necessary) of clutch and gear control drives.
- Repair of manual transmission control units.
The adaptation process should be carried out in the following sequence
And:
- Bleeding the hydraulic parts of the clutch mechanism (removing air bubbles from the system), setting up the electronic control module for this unit. The brake fluid is usually replaced at the same time.
- Transmission training for gear shifting.
- Adaptation of the operation of the clutch engagement mechanism and gear shift drives in the box.
It is important to know!
In some cases, the incorrect operation of the unit is caused not by a failure in the settings, but by breakdowns in the electrical part. If the electrical impulses between the units are unstable, the wiring harness in the device must be replaced. Adaptation will also be required after replacing the clutch pack.
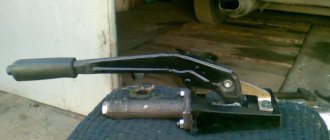
Replacing the AMT clutch actuator
- Disconnect the negative terminal of the battery.
- The engine air filter has been removed.
- Remove the screw securing the wiring harness.
- Remove the three screws securing the AMT actuator unit.
All that remains is to disconnect the connector (press the fasteners, the direction is indicated by the arrow) and pull the actuator out through the top.
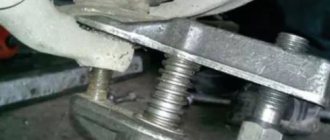
Install actuator 1, Figure 8-6, clutch release on bracket 3 and tighten three self-tapping screws 2. Screw tightening torque 7. 12 N.m (0.7. 1.2 kgf.m) (replaceable attachment Torx T30, knob, torque wrench).
Attach block 4, Figure 8-5, of the additional wiring harness to connector 2 of actuator 1 of the clutch release mechanism and secure the harness to bracket 3 with two fastening brackets 6.
Install actuator 3, Figure 8-4, clutch release assembly with bracket and additional wiring harness on the gearbox, install the outlet hose bracket on the actuator bracket and tighten, without tightening, two bolts 2 and nut 4 of the fastening (replaceable head 13, knob).
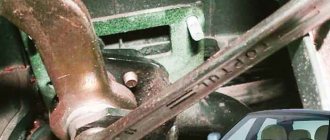
Adjust the extension of rod 6, Figure 8-7, of the actuator, for which you need to:
- move the actuator 5 in the direction of the arrow until the rod 6 touches the clutch release fork 7 and mark the position of the bracket 4 relative to the gearbox using a non-stress method.
- using the mark, additionally move the actuator in the direction of the arrow by an amount of 6±2 mm and finally tighten two bolts 1 and 2 and fastening nut 3. The tightening torque of the bolts and nuts is 16...25 N.m (1.6...2.5 kgf.m) (replaceable head 13, wrench, torque wrench, ruler or caliper).
Figure 8-7 — Installation of the clutch release mechanism actuator: 1,2 — bolts securing the actuator to the gearbox; 3 — nut securing the actuator to the gearbox; 4 — actuator mounting bracket: 5 — clutch release actuator; 6 — actuator rod; 7 — clutch release fork
Connect the additional wiring harness connectors to the gear shift actuator connectors, the control controller connector, and the input shaft speed sensor.
Secure the additional wiring harness with brackets built into the harness to the radiator outlet hose, to the left engine mount bracket and to the fan housing.
Automatic expected
Many people are concerned about the issue of the machine gun. The predecessors Kalina and Grant already had a four-speed Jatco automatic, why isn’t it on the 2180? The fact is that there is no suitable base for the machine gun on the Lada Vesta. The mentioned box is already outdated, and purchasing a new one will significantly increase the price of the car, which is contrary to the policy of the Volga Automobile Plant.
Company President Nicolas More denied rumors about a 4-band automatic transmission for the most popular Lada models. So will the Lada Vesta have a gun? Most likely Yes. It will be a 6-speed modern transmission. Negotiations are already underway on the creation of a new plant in the Russian Federation; automatic transmissions will be created at the plant with the support of foreign companies. The appearance of an automatic machine on the Lada Vesta should be expected in at least 4-6 years.
AMT clutch actuator repair
Clean the inner surface with solvent. Let's examine the insides. In this example, wear on the ball stops and a crack on the plastic part of the actuator were detected. The problem is that there are no repair kits. That is, AMT clutch actuator parts are not sold separately. If you cannot restore the old ones, all that remains is to lubricate the mechanism.
LIQUI MOLY Thermoflex Spezialfett was used as actuator lubricant. It is very similar to the one that was in the actuator from the factory. Read more about actuator lubrication here.
We perform reassembly and installation of the AMT actuator on the car (see above).
Let us remind you that if other malfunctions occur in the operation of the AMT (howling, crackling, the car jerks, jerking, rattling, etc.), you can determine the cause using these instructions.
Share on social networks:
Found an error? Select it and press Ctrl Enter..
Source
When is it recommended to carry out the adaptation procedure?
Timely maintenance of the automated box allows you to increase its service life without the need for repair or replacement of failed parts. To do this, as already mentioned, it is recommended to adapt the manual transmission to the degree of wear of the clutch disc at least once a year or every 10 thousand km. mileage In addition, it is recommended to perform this procedure if you observe the following phenomena:
- the car jerks when starting to move or when stopping;
- twitching is observed when changing gears from first to second and vice versa;
- when starting to move, after releasing the brake pedal and before pressing the gas pedal, the car makes a sharp jerk;
- There is some “slip” of the car when suddenly starting from a standstill or driving through mud.
Having problems with the transmission and need to adapt the robotic gearbox? Contact the multi-brand car service "Orbita". Come to the address indicated on the website or coordinate your visit in advance by phone. Our service specialists will promptly diagnose faults and, if necessary, carry out the procedure for adapting the unit. Maintain your car regularly and it will serve you for many years.
Via phone
- For an Android smartphone, download and install the ECU Tweaker application. We copy the ecu.zip archive to the root of the internal or external memory without unpacking it.
- Connect the ELM327 V1.5 adapter to the OBDII port of the car.
- Turn on the ignition.
- Launch the “ECU Tweaker” application on your smartphone
- In the search, select “BM LADA”
- Then "Automatic Transmission"
- Then "BVR_On_CAN_x52_JS3_v2.4"
- Then "After sales"
- Then "Diagnostic"
- Then the "Wrench"
- Go back and select “Learnings information”
- Go back and select “Learnings Procedures”
- Complete the training (see “Training Procedure” above)
If after AMT adaptation the engine does not start
. It is possible that the last learning procedure was completed incorrectly and an error was stored in the memory of the electronic unit. It is necessary to perform diagnostics, reset errors, and perform adaptation again.
You can also perform AMT adaptation using OpenDiag Pro or Scanmatic software (see an example of such adaptation). Both programs are paid.
AMT adaptation can be performed by specialists
in various cities of the country. You can order the service through our online store.
Have you ever had to adapt the AMT on a LADA yourself?
Let's remember that we previously told you how using ELM327 and DDT4ALL you can:
Source
Robot "Multimode" - functions and purposes
As mentioned earlier, the Toyota Corolla Multimode CVT is an excellent option for those drivers who are tired of thinking about manual gear shifting. The MMT consists of automatic and electric clutch control elements. The main component that performs the specified functions by the system is the actuator. This is one of the few elements that experiences wear and tear on its components (brushes, bushings and the drive motor itself).
MMT Toyota Corolla
“Multimode” is an improved variator created by Toyota for even smoother torque shifts. The new variator “Multidrive S” released by the Japanese has become even more productive. Now fuel consumption is reduced by 10-15%, and gear smoothness is reduced to a minimum.
New crossover Changan CS95 enters the market
The advantageous characteristic of the Multimode variator is the ability to travel in emergency mode. After any malfunction, the sensor transmits a signal to the TCM, which turns on the emergency lamp. In such situations, autonomous driving mode is activated.
Gearbox 09A, 09B / Transmission 09A, 09B
Designations of type 09A gearboxes that were installed on VAG cars:
EEB, EEC, EED, EEE, EEF, EGN, EGP, EGQ, ELD, EYM, EYN, EYP, FGA, FST, FYL, FYM, FYN, FYP, GNY, GNZ, GPA, GPB, GPC, GPD.
Designations of type 09B gearboxes that were installed on VAG cars:
EGH, EGJ, EGK, EGL, EGM, FBN, FBP, FBQ, FLX, FLY, FLZ, FYQ, FYR, GPE, GPG, GPH.
5-speed automatic transmission 09A / 09B (rus.)
Device and principle of operation. Self-study program 232 VW/Audi. The new 5-speed automatic transmission is designed for installation in Volkswagen and Audi vehicles with a transverse engine. It is produced by the famous automatic transmission manufacturer Jatco. Adaptation to the vehicle, as well as the development of software for the control units, was carried out in collaboration with Volkswagen engineers. The 09A / 09B gearbox is distinguished by the following components and functions: – automatic shifting of five gear levels using shift programs that adapt to the driver’s driving style and the road situation; – a gear shift program that adapts to the degree of driving resistance (recognizes driving resistance when driving uphill and downhill, when driving with a trailer and in a headwind); – Tiptronic mode; – display of the gear number on the instrument cluster display; – key locking device in the ignition switch; – torque converter with torque converter lock-up clutch; – opening function when stationary. If the selector is set to the driving position and the car stops, the transmission switches to idle mode. Advantage: no residual drive torque from the torque converter (the car does not try to start moving at low speed), which reduces fuel consumption and reduces the emission of harmful substances into the atmosphere. Contents: General information, Basic design of automatic transmission, Gear shifting, Torque transmission, Overview of system components, Electronic components: control unit, output signals, sensors, actuators. Electrical diagram, Self-diagnosis, Service.
Automatic Transmission 09A (eng.)
Repair Manual. Revision 07/2007 2000 VW Golf, 1999 VW Jetta, 2001 VW Jetta Wagon. Repair manual for automatic transmission type 09A. Automatic transmission 09A letter designation: EYN, EYP, EEF. These gearboxes were installed on cars: Volkswagen Golf 4 / Volkswagen Golf 4 (model code: 9B1, 9B3) 2002 - 2009 Volkswagen Bora / Volkswagen Bora (model code: 1J6) 2002 - 2005 Volkswagen Jetta (Mexico) / Volkswagen Jetta (model code : 9M2) 2002 - 2004 Audi A3 (Brasil) / Audi A3 (model code: 8L1) 2000 - 2006 Contents (repair groups): 00 - General, Technical Data, 32 - Torque Converter, 37 - Controls, Housing, 38 - Gears , Hydraulic Controls, 39 - Final Drive, Differential. 00 - Technical data, 32 - Torque converter, 37 - Controls, housing, 38 - Gears, hydraulic control, 39 - Final drive, differential. 112 pages. 3 Mb.
5-speed Automatic Gearbox 09A / 09B: Design and Function (eng.)
5-speed Automatic Gearbox 09A: Removal & Installation (eng.)
Automatic transmission 09A - removal and installation
5-speed Automatic Gearbox 09A: Servicing (eng.)
Jatco JF506E JA5A-EL ATSG update handbook manual. Repair Transmission Transaxle (eng.)
Information on the valve body. JF506E automatic transmissions are manufactured in Japan by JATCO and are used by many automobile manufacturers. Volkswagen brands them as type 09A and installs them in the Volkswagen Golf, Jetta, Golf GTI, etc. Mazda puts them in the Mazda MPV and Mazda 6 under the JA5A-EL label, and Land Rover and Jaguar put them in the Land Rover Freelander and Jaguar X respectively labeled JF506E.
Automatic Transaxle Workshop Manual JA5A-EL (eng.)
JA5A-EL is another name for Mazda's JF506E box. Complete analogue of the Volkswagen type 09A box. The hydraulic circuit is discussed here.
Automatic transmission - basic information (rus.)
Device and principle of operation. Self-education program manual. Contents: Power Conversion, General Design Description, Shift Timing Determination, Automatic Transmission Fluid (ATF), Torque Converter, Torque Converter Lockup Clutch, Planetary Gears, Shift Assemblies, Multi-Disc Clutch, Multi-Disc Brakes, Band Brakes, Freewheel, Transmission Control transmission systems, Description of automatic transmission systems, Emergency operation/Self-diagnosis, Hydraulic system, Hydraulic oil circuit diagram/hydraulic pump, Hydraulic shift control unit, Hydraulic system diagram, Hydraulic system pressure, Hydraulic shift components.
How can I find the information I need here? Decoding of the factory equipment of the car (English) Decoding of the factory equipment of VAG in Russian! Diagnostics of Volkswagen, Audi, Skoda, Seat, error codes.
If you have not found information on your car, look at the cars built on the platform of your car. Most likely, the information on repair and maintenance will be suitable for your car.
How to adapt the AMT (“robot”) LADA with your own hands
Adaptation of the automated transmission (AMT) is necessary for the correct operation of the clutch release actuator. If this operation is not performed, then malfunctions in the operation of the transmission may occur (jerks, jolts while driving, as well as increased wear of the clutch). AMT adaptation should be performed as the clutch wears out or after replacing it. You can perform AMT adaptation at the LADA dealership or yourself.
Attention! You perform all actions at your own peril and risk. The instructions were written not by specialists/engineers, but from the words of owners of Lada Vesta and Lada XRAY cars (SrgKlsnkv and sva775)
The procedure was not tested on other LADA models with AMT (Granta, Kalina, Priora).
Conditions for completing the training procedure
:
- battery voltage > 10 V;
- temperature of the actuator electric drives, training of the final positions of the clutch actuator. Execution time is about 5-6 seconds. (you will hear the actuator moving).
- After the operation, press the “STOP” button and turn off/on the ignition.
- We wait 5-10 seconds and start the gearbox learning
. We do not turn off the ignition. Execution time is about 1 minute. - After the operation, press the “STOP” button and turn off/on the ignition.
- Start the engine and wait 15-20 seconds, then start learning the clutch touch point
. Execution time 5-10 seconds. - After the operation, press the “STOP” button and turn off the ignition. Wait for the main relay to turn off (about 4 minutes)
- We start the engine and check.
Adaptation of AMT Lada Vesta
Some owners of Lada Vesta family cars with a robotic gearbox have a number of difficulties and questions regarding the normal operation of the transmission. The fact is that most of them are faced with an AMT malfunction, which is expressed in the car jerking and nodding when changing gears.
The main reason for this problem lies in the malfunction of the clutch release actuator. In this case, jerking and nodding is the least of the troubles, because if the actuator is not working properly, the clutch is subject to increased wear, as a result of which it will soon need to be replaced. However, there is also good news. AMT disease can be cured using the transmission adaptation procedure, which can be done at an official dealer in your city, or, if desired, independently.
We've done an automatic transmission adaptation - what's next?
If you notice subtle twitching when you change (or turn on) the speed during the adaptation process, do not be alarmed, this is completely normal. Over time, the twitching should go away on its own. If this does not happen, then you should adapt the system using a computer (use a dealer scanner).
In the future, the automatic transmission will adapt (the process will end after 40 shifts have been made)
In this regard, it is worth remembering that:
- After the reset procedure, the automatic transmission operates almost in “sports mode”, so at first you should be extra vigilant;
- If you bought a car that has already been in use, be sure to reset it so that the automatic transmission adapts to your driving style;
- This reset can be done on the vast majority of machines at least every day.
You can perform the above steps yourself, but if you doubt that you will reset the automatic transmission correctly, then contact specialists who, using professional equipment, will carry out this procedure efficiently and quickly.
How to change the clutch on a robot
The replacement is the same for all manual transmissions (2180, 2190 and 2181) after removing the box.
Equipment and tools
The clutch is replaced after removing the box, which requires the following:
- inspection pit or lift;
- wheel chocks (when working on a pit or overpass);
- a set of wrenches (open-end wrenches, socket wrenches, socket wrenches, balloon wrenches, as well as special bits), a mounting blade or long chisel, a hammer, pliers;
- jack;
- safety stands for securing a car with removed wheels and telescopic stands for supporting a dismantled gearbox and engine with partially removed mounts when working on a pit, overpass or lift;
- container for used oil.
Clutch Actuator
Before dismantling the box, it is necessary to remove both actuators, which is carried out according to the same principle.
How to disable and remove the clutch actuator
To remove the clutch actuator, you will need to unscrew the mounting screws holding it to the gearbox using a Torx30 L-shaped wrench (asterisk) or an appropriate bit. To do this you need:
- De-energize the car's electrical system by opening the ground.
- Remove the air filter, remove the mudguards and the engine crankcase protection from below to provide access to the mounting screws.
- Pressing the connector latches with your fingers, disconnect it from the actuator.
- Unscrew the 3 mounting screws and pull out the actuator.
If necessary, lubrication will need to additionally unscrew the 9 screws securing the cover.
How to remove the gearbox
After removing the actuator, work continues under the bottom of the car:
- The front wheels are removed and the hub nuts are unscrewed.
- The U-shaped arm extension bracket is unscrewed from the front beam.
- The nut is twisted off the steering tip pin and, using a puller, it is pressed out of the socket, disconnecting from the stabilizer link.
- The ball joint and the wheel knuckle assembly are separated, the entire structure is pulled off the splines of the outer CV joint and moved to the side.
- The oil is drained from the gearbox.
- A chisel or mounting blade is inserted into the recess between the housings of the inner CV joint and the box, then several taps are made with a hammer to shift and remove the CV joint from the splined engagement in the box.
- After dismantling the CV joint, a plug or a piece of plastic pipe with a diameter of 30-35 mm is inserted into the hole. If this is not done, then after dismantling the second CV joint, the axle gears will turn and fall into the gearbox housing.
- The second CV joint is removed.
- The protective boot is unscrewed.
- Separate safety stops are placed under the engine and gearbox to prevent movement during removal.
- The starter bolts are unscrewed and it is removed.
- The 2 upper gearbox mounting bolts are loosened, then the lower bolts are unscrewed.
- The box is undocked from the cylinder block by moving it backwards and carefully removed.
Removing the gearbox on a Lada Grant
In this case, it is necessary to exclude the impact of the driven shaft on the clutch basket springs if it does not change.
How to replace and align the clutch
Before installing a new clutch or disc, alignment is required, i.e., aligning the centers of the clutch disc and the hole formed by the sharp ends of the diaphragm spring petals.
To do this, you will need a special mandrel, which is a section of the input shaft, or a specially machined part that exactly copies the shape and dimensions of the input shaft end. By inserting the mandrel into the hole in the center of the basket, achieve alignment between the disc and the spring and attach the clutch basket to the flywheel, gradually tightening the bolts on it with a star. After tightening is completed, the mandrel is removed.
How to train actuators after replacing a clutch
Adapting the Granta clutch to the robot gearbox is not difficult and is carried out according to the following scheme:
Operating modes and nuances
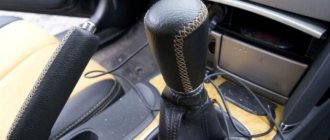
After flashing the gearbox to AMT 3.0, the parameters of modes A, N and R do not change. A “Sport” mode is added, although it can be called urban for a more dynamic ride. To switch to it, you need to move the handle to position “A”, then to the left to position “M”, without moving forward or backward.
In this case, the letter “A” will remain lit on the instrument panel. The box will still operate in automatic mode, but the speed will increase slightly. The speed range will be maintained from 2 to 4.5 thousand. In starting mode, it will switch at 3.5 thousand. When going uphill, switching will occur at 4500 rpm.
With an optimal gear range, the engine will operate in a more correct mode. To switch to manual mode, you need to swing the handle forward or backward. But the “+” and “-” have now swapped places. If previously the gear increased upward, now it will decrease, and vice versa. This happened because the firmware was taken from the Lada XRay car. He has these signs made in reverse.
Via phone
- For an Android smartphone, download and install the ECU Tweaker application. We copy the ecu.zip archive to the root of the internal or external memory without unpacking it.
- Connect the ELM327 V1.5 adapter to the OBDII port of the car.
- Turn on the ignition.
- Launch the “ECU Tweaker” application on your smartphone
- In the search, select “BM LADA”
- Then "Automatic Transmission"
- Then "BVR_On_CAN_x52_JS3_v2.4"
- Then "After sales"
- Then "Diagnostic"
- Then the "Wrench"
- Go back and select “Learnings information”
- Go back and select “Learnings Procedures”
- Complete the training (see “Training Procedure” above)
If after AMT adaptation the engine does not start
. It is possible that the last learning procedure was completed incorrectly and an error was stored in the memory of the electronic unit. It is necessary to perform diagnostics, reset errors, and perform adaptation again.
You can also perform AMT adaptation using OpenDiag Pro or Scanmatic software (see an example of such adaptation). Both programs are paid.
AMT adaptation can be performed by specialists
in various cities of the country. You can order the service through our online store.
Have you ever had to adapt the AMT on a LADA yourself?
Let's remember that we previously told you how using ELM327 and DDT4ALL you can:
Source
Automatic transmission adaptation reset
The most common way to reset automatic transmission adaptation is as follows:
- You need to start by warming up the engine to a “working” state. There is no need to take any action yet;
- Then you need to turn off the engine for 5 seconds and start it again;
- Wait until the engine speed reaches 2.5 thousand - 3 thousand. in a minute;
- Turn off the engine again for 5 seconds and start the engine again;
- While holding the brake, turn on each speed in turn;
- Connect the dealer tester and do a reset;
- Start a smooth movement;
- Carefully, smoothly pick up speed to 40 km/h, and after 1 minute slowly stop the car;
- Turn off the engine, then start it;
- Carefully, smoothly pick up speed to 80 km/h, after 1 minute slowly stop the car;
- Turn off the engine, then start it;
- Drive at different speeds for 20 minutes (40 km/h, 80 km/h, driving on a straight road at the same speed)
- Wipe (wash) any oil that has come out from the bottom of the gearbox;
- Ride from 5 to 20 kilometers without particularly loading the engine;
- See if oil is leaking from the gearbox seals and other places;
- If necessary, raise the oil level to the lower hot level;
How to determine if an automatic transmission is faulty?
How to perform AMT diagnostics (error reset)
- Turn on the ignition and connect to the car using the ELM327 adapter and DDT4ALL software.
- Select in the upper left window XGA-XRAY - AT - BVR_On_CAN_x52_J53_v2.4
- In the middle window [AT] BVR_On_CAN_x52_J53_v2.4
- In the lower left After sales - Diagnostic
. - We make sure that the two selected windows have non-zero values.
- Click on the “heart”
in the top menu, remember or write down the errors, then erase the errors.
Is it worth flashing
This is an individual decision for each driver. You need to understand the consequences of this procedure. The dealer will see this firmware, and it is unknown how he will react to it. It is a fact that the car drives better. The new mode is more correct for engine operation. There are no unnecessary jerks or slips, it just switches smoothly.
If the car is under warranty, then you should know the consequences if a warranty claim occurs. I don’t recommend flashing if the clutch is about to be replaced. Firmware 3.0 will only ruin it, but there will be no harm to the new clutch. Also, before changing the program, negotiate with the technician on shore so that you can come and roll back to the stock firmware while you contact the dealer.
In addition, do not forget to adapt the gearbox every 10 thousand km. This is setting the correct positions of the actuator.
Step-by-step instructions for replacing the Lada Granta clutch
1. Put the car on a lift and remove the gearbox.
2. Next, if you do not change the clutch basket, you need to check the marks on the flywheel.
3. Unscrew the six bolts securing the basket to the flywheel. As you unscrew the bolts, hold the flywheel with a mounting blade (or a screwdriver).
eight open-end wrench .
4. Carefully remove the clutch basket from the engine flywheel and the driven disk.
5. Now you need to remove the release bearing. To do this, use a flat-head screwdriver to pry up the ends of the spring that holds the bearing.
6. After removing the spring from the guide bushing, remove the release bearing along with the clutch.
7. Now we finally remove the spring that held the release bearing.
8. If you need to replace the clutch fork or bushing, you need to pry up the rubber boot and remove it.
9. Next, remove the fork bushing from the clutch housing.
10. Lifting the clutch fork up, remove it from its seat and remove it from the clutch housing. If necessary, we make a replacement.
11. Let's start assembling the clutch. First, wash the entire clutch part in kerosene and replace everything that needs to be replaced.
12. Apply CV joint-4 grease to the guide sleeve of the release bearing as well as to the splined part of the input shaft. Don't overdo it, apply a thin layer of lubricant.
13. We install the removed parts of the clutch housing:
- release bearing
- clutch fork
- spring
- bushing
14. Next you need to center the clutch. To do this, use special. frame that needs to be inserted into the hole in the end of the crankshaft.
15. Place the driven disk on the frame so that the protrusion on the hub faces the gearbox.
16. Install the clutch basket.
17. If you made marks, then combine them and tighten the bolts with a torque of 19-31 Nm.
18. Remove the centering frame and reinstall the gearbox.
Let's sum it up
With the new control program for the AMT 3.0 robot, you have an additional sports (city) mode. The box itself becomes faster by about 30%. The dealer will see the new firmware, even without special equipment. It is enough to get into the Lada Vesta, switch the gearbox selector to manual mode and look at the dashboard. Instead of the letter “M”, “A” will remain lit.
To sew or not is an individual question for each car owner. In reality, the situation will get better - quick switching, sport mode, proper driving. This is beneficial for the engine, since the speed is kept optimal for it. This increases the service life of the motor.
If your car has a faulty clutch or other components, firmware will not fix them. First you need to do repairs, and then change the software.
What tricks have they done with TsBKE?
Some time ago, the list of defects would have included the failure of the CBKE, that is, the body electronics unit. The firmware intended for the specified Grants/Kalina-2 unit has now been updated. As a result, we managed to get rid of the malfunction completely - the equipment itself cannot fail. But not everyone likes how the new firmware works - some owners experienced an incomprehensible defect when the reaction of the lamps to the actions of the warrior became “strange”. However, we have published a video where a corresponding example is given further, and you can evaluate the quality of the work of the Central Bank of the Russian Federation “live”.
The same unified TsBKE units are installed in different configurations of the “new Prior”, “Grant”, “second Kalina”. Previously, dealers simply changed this unit (we were talking about breakdowns in isolated cases), now the problem has been fixed, but, it seems, not yet completely.
In the “first Kalina”, by the way, electrical devices were controlled by individual elements (relays, toggle switches), each of which could theoretically fail, which would require its search and replacement. The design of "Kalina-2" is more modern, something is being updated in it, and the use of some components has to be abandoned. This was the case with the South Korean EUR. Now Russian amplifiers continue to be used.