03/04/2022 28,299 checkpoints
Author: Ivan Baranov
Car owners are always sensitive to their car, as they spend a long time in it. It is important for the driver that the steering wheel and gear shift knob are comfortable and pleasant to the touch - tuning these components allows you to achieve the desired effect. Services from tuning companies are not cheap. Tuning the gearshift knob can be done by any car enthusiast with his own hands if desired. An article will help you cope with this task, which provides recommendations on the selection of material and describes the step-by-step reupholstery process.
The reason for reupholstery is most often the unsightly appearance of the steering wheel and gear shift knob, which acquire it after many years of use. Sometimes car owners want to change the cover material or change the color. Tuning is popular on cars in which, from the factory, the gear knob is made of soft plastic and has an unsightly appearance. It's always nice to feel the skin under your hand. The leather interior looks prestigious and cozy.
[Hide]
Material selection
All work begins with the selection of material.
Nobody forbids you to take some kind of rubber, fabric or any other option. But here the issue of practicality and operational stability should be taken into account. It is optimal to choose one of the following materials.
- Leather. If we take practicality, quality, aesthetics and price-quality ratio, then leather cases are objectively the best. Only leather should be purchased specifically for cars, and not for haberdashery or furniture. These are materials that are completely different in quality and characteristics. Automotive leather has a polymer coating that additionally protects against mechanical damage, ultraviolet radiation, chemicals, oil, gasoline, etc. When selecting parameters, it is also worth choosing perforated leather without large pores;
- Eco leather. Fashionable and popular material based on polyurethane. Do not confuse with leatherette, which uses PVC. The latter does not breathe and has worse performance characteristics than eco-leather. Practical, inexpensive and easy to use. Although the skin is still a little inferior;
- Alcantara. A relatively new material that is very pleasant to the touch, does not fade, does not freeze, unlike leather, and does not crack. Don't be put off by the fact that Alcantara is thin. In fact, it is durable and wear-resistant. May cost slightly more than genuine leather. Plus, Alcantara is easier to work with and can be processed better.
Regardless of what you choose, each material is perfectly suited to the task at hand.
It doesn’t matter what kind of car you are going to sew a leather, eco-leather or Alcantara cover on.
Similar light tuning options can often be found among owners of such cars:
- VAZ 2114;
- Renault Logan;
- Lada Granta;
- Lada Priora;
- Kia Rio;
- Chevrolet Cruze;
- Lada Kalina;
- Ford Focus;
- Deo Lanos;
- VAZ 2110, etc.
For some, the lever has worn out during use, while others simply do not like the appearance of the factory cover. So car owners decided to buy a piece of material, make a cover, or install a new ready-made attachment. With display or classic, it's up to them to decide. Replacement is usually very simple. But sheathing an old handle is more difficult.
Alcantara
This is an artificial suede made from synthetics. It has a soft and velvety surface, and in terms of characteristics and properties is close to natural leather. The fabric is elastic and durable, characterized by high wear resistance.
Alcantara does not fade when exposed to sunlight; it is difficult to burn through. If ash from a cigarette or a spark from a cigarette lighter gets on the fabric, it is not damaged, and its original appearance is not lost even after a long period of use.
The main advantage is Alcantara's ability to retain heat. If you get behind the wheel in the cold season, when negative temperatures prevail outside, you will not touch frozen skin, but warm fabric. The cost of Alcantara is low, it can easily be found on sale, and using this material for covering is much more convenient and easier than leather.
User Garik Silantos showed in his video how to tighten the transmission lever on a car.
[custom_ads_shortcode3]
Recommendations for covering
First of all, you need to remove the handle from the main long gearshift lever. It is the handle that we will tighten. If you wish, you can also replace the cover of the lever itself, which hides the metal pipe in the tunnel. But more on that another time.
The task is to obtain blanks. Here is an option:
- wrap the handle with cling film;
- or just use a plastic bag;
- wrap tape (stationery or masking tape) on top, but most importantly tightly;
- Use a marker to apply future markings on the tape;
- Use a sharp knife to cut the wound tape;
- you will receive something like a blank or papier-mâché;
- remove, level on the table;
- Apply the completed patterns to the purchased material for reupholstery;
- cut according to the pattern, but make leather blanks literally 2-3 mm smaller, otherwise the cover will hang;
- step back 5 mm from the edge of the leather and go through it with a sewing machine (stitch);
- return the pattern to the gearshift knob, treating the reverse side with glue;
- when the glue fixes the handle, you can start sewing together the pieces of leather;
- insert good quality threads into the stitches of the seams and tighten them tightly;
- if leather was used, wet the material after stitching is completed;
- Replace the gear diagram, if there was one.
But there is another option. It is suitable for those who like the old case's shape and seam placement, but the product is simply worn out. To do this, carefully remove the old trim from the gearshift knob.
It will be used as a template for a new case. Cut out blanks from the new material in the shape of the old cover, and sew them together in the same way. The convenience of this option is that you do not need to measure anything, make markings, etc.
IMPORTANT! The cover should be sewn from the wrong side so that the seams are not on the outside. Then the comfort of gripping the gearbox will deteriorate significantly.
Thanks to everyone who reads us! Subscribe, ask your questions and invite your friends to join us!
(1 ratings, average: 5.00 out of 5)
Subscribe to updates and receive articles by email!
We guarantee: no spam, only new articles once a week!
Grinding
The handle is sanded to obtain a more transparent surface. You can grind it on a machine, drill or sandpaper. You can grind on a machine manually, or you can attach the handle to a drill. The better the polishing is done, the better and more transparent the result. After polishing, put the handle on the lever and try to ride with it.
Making the perfect gear knob from epoxy resin the first time is not easy, but the first results will please you. Using epoxy resin, you can turn any idea into reality, even inserting an LED. But it’s especially nice that this gear knob is made by hand.
Gearbox knob reupholstery
Not everyone can re-tighten the gearshift knob with their own hands: you need to have certain skills and patience. If you are not confident in your abilities, then it is better to contact a service that provides tuning services. If you really want to, you can do the tuning yourself. You need to stock up on the necessary tools and follow the instructions below.
Tools
Tools for work
To retighten the gear shift knob you will need the following tools:
- marker;
- stationery knife or scalpel;
- scissors;
- cling film;
- masking or regular tape;
- high-quality, durable nylon thread;
- thimble for safety;
- sewing machine;
- sewing needles: preferably hardened ones, as regular ones bend;
- glue;
- sheathing material.
It is best to reupholster the handle with genuine leather. The material must be of high quality. You must work very carefully so as not to damage the skin and not redo it several times. It is advisable to use a combination of smooth and perforated leather - it is practical and gives a more aesthetic appearance.
Re-upholstery process
The reupholstery begins by removing the gear shift lever with the cover, if any. First of all, they sew a new cover. An old cover is used as a pattern: the seams are ripped out and the necessary patterns are obtained. New parts are cut out from these patterns. The cover is sewn from the wrong side using a sewing machine or by hand. If you sew the cover manually, you should make holes with an awl in advance. To make the seam even, you can make an awl from a table fork, sharpening its ends. The case is attached to the frame with superglue. After making the cover, you can start covering the handle. There are several options.
The first version of the constriction consists of the following steps:
The handle should be wrapped in cling film, or you can take a simple plastic bag.
Painting or regular tape is wrapped on top. It’s better to paint on a painter’s bench.
Use a marker to draw lines where future seams will be located.
Next, use a utility knife or scalpel to cut the winding along the drawn lines.
Then you need to remove the resulting “Papier-Mache” and carefully align it
The parts may not be completely aligned and may have wrinkles, but you don’t need to pay attention to this. Thus, we got a pattern.
Using these patterns we cut out leather parts
Popular articles Angel in a ball of threads
In this case, you should cut the parts 5 mm smaller on each side for subsequent stretching of the skin.
Next, stepping back 5 mm from the edge, you should use a sewing machine to stitch the workpieces around the perimeter or stitch them by hand using a large needle.
Now, having fixed the skin with a small amount of glue so that it does not move, the parts are sewn together.
The threads are threaded through the seams and tightened.
When all the seams are completed, the skin should be slightly moistened: it will better take the required shape.
For the second option of tightening the gear shift knob with leather, old trim is used. Reminds me of the process of sewing a cover. First, the old seams are cut. The parts obtained after jointing are used as patterns. Blanks are cut from leather using them. Next, the blanks are sewn together in the same way as the old casing. After this, the workpiece is turned out and put on the gearshift knob.
Stretching the finished workpiece
If there was a gear diagram on top, it is installed in place.
Installing the cover
Photo gallery
Below are options for stretching leather on a gear knob with your own hands.
Option 1 Option 2
Option 3
Option 4
Option 5 Option 6
Make or buy
Let's start with the main thing. Namely, from the idea of modernization. The gearshift lever is usually located inside the case, and the top handle itself, which the driver grabs when changing gears, can be plastic, silicone, leather, etc.
The leather option is usually found on more expensive models. And in Soviet or old domestic cars, glass knobs with flowers, roses and other once-fashionable handle decor options are not so rare. Now some people appreciate rare solutions, trying to decorate the interior of their own car with something similar. Making a complete lever attachment from glass, plastic or silicone is quite problematic. It's much easier to buy it. But you can sew the cover yourself if you have certain skills and desire.
conclusions
Today there are a lot of options for tuning the gearshift knob. Above are only some of the simplest and most accessible tuning methods for everyone. In addition to originality, drivers often want to make their car more ergonomic, shift the gearbox, or try to improve the shift mechanism itself, upgrading the gearbox and transmission. Most of the work on tuning handles is done quite simply in your garage. However, in order to modernize your car, namely to tune an automatic transmission or manual transmission, make changes to their technical parameters, adjust their operation, you need special knowledge and skills, otherwise there is a chance of ruining everything. That is why it is better to entrust more complex types of tuning to professionals in the workshop.
Tips and recommendations for replacing the gearshift lever on a VAZ 2107
When choosing parts to replace failed ones, you must purchase only original spare parts from the manufacturer. Despite the simplicity of the design and easy repair of the product, when purchasing counterfeit material, the service life of the parts is low. When using such products, it is quite possible that there will be negative manifestations in motion in the form of crunching, jamming of gear engagement, spontaneous transition to other gears, howling in the lower part of the tunnel, which can subsequently lead to an emergency situation.
Also, during the procedure for reassembling parts, it is imperative to follow the sequence of actions when installing the linkage hinges. It is necessary to use special lubricants when installing the mechanical parts of the product. Special silicone lubricants with a water-repellent composition are best suited. Such material will preserve the integrity of the composition for a long time and protect the main parts of the scenes. Also, at the first appearance of signs of breakdown, it is necessary to carry out a scheduled preventive inspection with dismantling of the entire unit.
DIY gear knob cover
While I'm waiting for the spring warmth to work on eliminating body jambs, I decided to work on the interior. The gray gearshift knob cover did not fit into the style of my interior. I decided to replace it, besides it was already slightly worn in places. And I decided to change it by making a new cover with my own hands. Below is the whole process from A to Z.
In the morning I began searching for materials. My new one requires black leather + good thick white thread for nice stitching. The search at home was not crowned with success on any of the points, and I went in search of a fabric store.
In the first nothing, in the second 1300 rubles. Of course, I didn’t charge it per linear meter, and the leatherette was sooooo thin. What I needed was found in a fabric store for upholstery. The same black color as my cases and a slight matte finish. So, 500 rub. per linear meter of black “ekodermantine”))) with a width of 1.5 m. I took 0.5m, with a reserve for future alterations. I bought thick threads just right at Auchan. It says extra strong, let's check it.
These are the threads from Auchan + needle + thimble included Threads in 3 colors: white + black + gray. I took it for 97 rubles. Also included with them is a needle and a thimble. They won't be needed today, but I think they will come in handy in the future.
I took off the old cover and went home and made a new one))
old cover The cover was separated from the frame, it was held on by glue, it was easily torn off, all the glue remained on the cover.
no longer framed. Next, I ripped the seam open. And I cut the old cover into 2 equal parts, and then cut one of them in half again. I did this because the idea was to sew a new one, not one piece as it was, but from 4 parts with stitching. I traced one of the quarters on the new material.
And of course I added 5mm on each side for the seam (on the long sides). I multiplied this entire farm to 4 copies and cut it out.
4 black ones... Next, a good old foot-operated sewing machine was used. She has already helped me make a cheesecake sled. I sewed the first 2 parts.
Here they are, those 5mm left for the seam. And I immediately processed them with a stitch.
already with white stitching I did the stitching almost by hand, that is, I carefully and slowly turned the sewing drive by hand, it turned out quite evenly and accurately.
result Well and so on, I sewed on the 3rd part + line.
downside The last seam was the most difficult. More precisely, not the seam itself, but the white stitching. It was done entirely by hand. The precision of each stitch is almost jewel-like)) But this seam will still face the torpedo, because a little different from the previous ones.
After almost 3 hours of work, this is the result:
I attached it to the handle itself with electrical tape and slightly tucked the cover on top. I glued the frame with this glue:
cosmofen This is cosmofen, it glues in seconds. He is well known to those who deal with stretch ceilings. The price is about 120 rubles. but I had it at home. And now my new case is ready.
Immediately installed it in the car
It’s not so clearly visible from the photo, but now the gear knob is in the same color scheme as the seat covers and the steering wheel braid. + for comfort in the car.
And I also want to note one point: if you need to take out a comprehensive insurance policy or compulsory motor insurance policy, then you definitely need a technical inspection. Do you know that it is completely legal to simply buy a vehicle inspection directly and have it delivered to your home. Come in and negotiate.
Author; Alexander Kulikov Kostroma, Kostroma region
Manual transmission: cover + shift lever handle
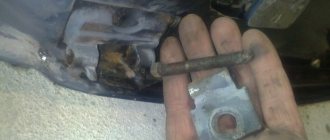
The leatherette is cracked. Not critical, but it looks ugly. The interior looks like it’s new, but there are holes in the lever casing... Of course, I didn’t buy a new one for that kind of money. I didn’t find any leather goods at home, as luck would have it, everything was thrown out recently. I went to the nearest auto store and purchased two leather covers for a VAZ 2110 without handles with different textures for 140 rubles each. I bought two because I didn’t want to install them right away... it looks too obscene, and one is not enough for cutting. I took off the handle (it was very difficult to unscrew), brought it home, and began to disassemble it.
At this stage I warn everyone - very carefully pull out the staples, the plastic is very fragile and begins to crack. I took it off, cut the plastic clamp on the handle (I had previously bought the same one, black), and ripped out all the seams on the cover
Popular articles Textile dog
We ended up with 3 stencils; for ease of further use, I steamed them through gauze so they wouldn’t curl. Using an old leatherette as a stencil, I cut 3 pieces of leather (in my case, 2 pieces with a grain for “mesh” leather and I decided to make one (back) piece from smooth). Because I don’t have a sewing machine, I had to sew by hand. What a damn job it is. I used a thick Phillips-head screw screwed into a thick plastic dowel to put pressure on the needle. Small pliers to pull the needle on the other side. I didn’t make two seams, the leather was too rough, I couldn’t make the second seam like on the old cover. Each stitch of the seam was passed 2 times, at the ends of the seams I made a 4-fold stitch for strength. After sewing it, I smeared it on the inside with Johnson & Johnson baby oil so that I could pull the skin when pulling it onto the frame. I stuck the plastic clamp into a specially sewn groove, installed the handle and pulled the clamp as hard as I could (with pliers), otherwise it would not be tightened. Next, I inserted the inner plastic frame into the case (it came with a pretty big guy) and cut holes for the hooks. I didn’t put any paper clips in and it all fit together very tightly. I spent quite a lot of time installing the inner frame into the outer one. Well, overall it turned out pretty good. Very similar to the factory one, the solution with different patterns on the leather looks especially good. Because the leather is much thicker and rougher than leatherette, all the bends in the folds are not sharp... gentle. It looks very noble. In general, I'm pleased. By the way, the leather is darker than leatherette (it looks greyish). Black looks like it was there.
ffclub.ru
Self-rethreading of the gear knob
Before starting the upholstery, it is necessary to remove the gear knob. As a rule, it is easily pulled out if you pull it towards you with force. However, depending on the car and the gearbox installed on it, the technology for removing the handle may change. In any case, this step will not cause you any particular problems. As an example, take a look at how easy it is to remove the handle on a Skoda Octavia.
Video: how to remove the gear knob
After you have removed the handle, you can begin making the pattern and the binding itself. But first, prepare the necessary set of tools.
Tools and materials for upholstery
In order to tighten the gearshift knob you will need the following tools and materials:
- material for upholstery (leather, eco-leather or Alcantara);
- tailor's scissors and stationery knife;
- film (you can use food film);
- glue;
- felt-tip pen or marker;
- tape (it is advisable to use masking tape);
- durable nylon threads;
- durable needle;
- thimble for protection when sewing;
- sewing machine.
Re-upholstery process
First of all, you need to make patterns for the future cover. The easiest way to do this is if you have an old case. In this case, your actions should be as follows.
- Remove the old cover from the handle and open its seams.
- Apply the resulting parts to the wrong side of the material and trace along the contour.
- Carefully cut out the resulting parts.
use the old ripped cover to create a pattern for a new one
Using this method of making a pattern, you can be sure that your product will fit on the handle as it should. Unfortunately, it is not always possible to use an old case. In this case, you will have to make the pattern yourself.
- First of all, wrap the handle tightly with thin cling film. If you don't have it on hand, use a regular plastic bag. Make sure no air bubbles form.
- Place masking tape over the film so that it completely covers the surface of the handle. For reliability, make several layers.
- Using a marker, draw lines following the curves of the pen. Be careful because these are the places where your future seams will be.
- Using a utility knife, cut the masking tape along the lines you drew. You should have two parts.
- Attach the patterns to the material used and trace along the contour.
- Carefully cut them out.
Making a cover for a lever - photo gallery
After you have cut out the parts, the most important process begins - reupholstery. This can be done in two ways:
- sheathing:
- pasting.
The difference between them is that when sheathing, the parts are sewn from the wrong side. The resulting cover must be turned out and straightened. Now you need to put the resulting product on the handle. If you put the leather in hot water for a while, it will become more elastic and you can tighten it without any problems. When the material is completely dry, it will sit tightly in place.
This method of reupholstery is good because it makes it easy to remove and put on the cover at any time. In the case of the gluing method, you can remove the cover only by ripping it apart at the seams. In order to tighten the handle in this way, first of all you need to stitch the parts on a sewing machine at a distance of 3 mm from the edge.
stitch each piece at a distance of 3 mm from the edge
After this, you need to apply a small amount of glue to the parts and place them in their places
Pay attention to the lines you made earlier. You need to insert a strong needle into the thread, and then, passing it under the stitches, pull the parts tightly together
pass the needle under the stitches and tighten the parts
To ensure that the cover fits well on the handle, moisten it with warm water. After drying, it will take the desired shape.
Video: how to trim a gear knob with your own hands
As you can see, it is not at all difficult to tighten the gearshift knob with your own hands. The necessary tools are available in every garage. You don’t need to have any special skills either: just be careful and patient. If you didn’t succeed in replacing something the first time, don’t be upset: the second and even third attempts won’t drive you into debt. Almost certainly the store will not sell you less than one linear meter of material, and this is quite enough for several of these pens. Believe in yourself and you will succeed!
Home →
With your own hands →
What will it take?
Both leather and high-quality leatherette are equally suitable for reupholstering the gearshift knob. It is worth paying attention to the word “quality”, since when stitching the edges of a loose and fragile material will simply tear. It is also necessary to pay attention to the covering of the front side of the leatherette. It should be dense and thick so as not to fray from constant hand touches during the first months after reupholstery.
So, when you have chosen a suitable piece of leather (we will focus on it), you should take care of the tools and other consumables. To carry out the work, in addition to leather, we will need:
- Glue "Moment".
- High-quality nylon thread.
- Small, sharpened scissors.
- A sewing needle with an eye suitable for the thickness of the nylon thread.
- Awl.
- Construction tape.
- A table knife or a not too sharp screwdriver.
When everything is collected, you can start working. We will tighten the handle of the Lada Vesta car. Re-upholstering the gear knob with leather from Vesta with your own hands will be the easiest thing to do, especially for those who are going to do this for the first time. Let's prepare two patterns, which will subsequently be pulled together (sewn) by us in front and behind the handle.
Material selection
Every driver wants the material with which the interior elements of his car are covered to be not only strong and durable, but also pleasant to the touch. In addition, it must meet the tastes of the owner and be combined with the interior design. The financial issue is also important. So how to choose a coating that will meet all these characteristics? The following materials are most often used to cover the gearshift knob:
- Genuine Leather;
- artificial leather (or eco-leather);
- Alcantara (artificial suede).
All of them have good performance. The coating will not tear at the most unexpected moment, and with proper care it will last a long time. But each of these materials has features that distinguish it from the rest. This could be price, softness, or even the ability to cause allergies. To make the right choice, let’s look at the characteristics of each of them.
Popular articles Poems and congratulations on Victory Day on May 9
Genuine leather for upholstery
Genuine automobile leather is the highest quality, but at the same time the most expensive material that can be used in upholstery. Leather seats, ceiling, control panel - it all looks solid and stylish. Having covered the gearshift knob with leather, you will not only enjoy its appearance, but also experience a pleasant sensation when touching it to change gears.
the use of genuine leather in the decoration of the car gives it a stylish and solid look
Leather is highly wear-resistant. Thanks to special processing, it is less susceptible to mechanical and chemical damage. In addition, this material is resistant to ultraviolet radiation, which means it will practically not fade in the bright sun. Another advantage is moisture resistance.
On sale you can find a special type - perforated genuine leather. It differs from the usual one in the large number of barely noticeable through holes throughout the entire area of the material. In addition to all the above positive properties, it has increased elasticity, softness and vapor permeability. You need to choose perforated leather carefully: if the holes have too large a diameter, a lot of dust will accumulate in them. This means you will have to clean it much more often and more thoroughly.
perforated leather has many small through holes, which increases its performance properties
It is not surprising that the cost of leather is much higher than any other material. But despite this, its use will be much more favorable in terms of price and quality ratio, because its service life without loss of properties can reach 7 years. But, besides the price, genuine leather has one significant drawback: the chemicals involved in the leather tanning process can cause a severe allergic reaction in some people
If you are one of them, pay attention to eco-leather
Artificial leather (eco leather)
Eco-leather does not emit harmful chemicals, which allows it to be considered a completely hypoallergenic material. Temperature changes do not have a negative effect on it, so we can confidently speak about the high wear resistance of the material.
As for the appearance, it is almost completely identical to natural leather: the artificial material retains its softness and texture. But the price of eco-leather is much lower, which makes it attractive to most car owners.
eco-leather looks identical to natural leather, but costs much less
Alcantara
Alcantara is otherwise called artificial suede. And if real suede is specially processed and tanned leather, then Alcantara is a synthetic material that has the same soft and velvety surface. In terms of its properties, Alcantara is in no way inferior to genuine leather. It is just as strong, elastic and wear-resistant. It does not fade when exposed to direct sunlight for a long time. In addition, Alcantara is difficult to burn: if a cigarette ash falls on it or a spark bounces off a cigarette lighter, the material will almost certainly remain in its original form. Another pleasant advantage is the ability to retain heat. When you sit in a frozen car in winter, you will touch warm fabric, not cold skin.
Alcantara looks similar to suede, but has better performance properties
Alcantara has a low cost and is easy to find in automotive stores. Working with it, especially at home, is much easier than with natural or eco-leather. This is a good choice for motorists who prefer practicality.
Artificial leather (eco leather)
A special feature of eco-leather is that the material does not emit chemical elements harmful to the human body. It is considered a hypoallergenic fabric. Eco-leather will not deteriorate as a result of temperature changes.
The fabric is characterized by high wear resistance and moisture resistance. Faux leather is not leatherette.
The difference between the materials is significant:
- Compound. Leatherette is produced on the basis of polyvinyl chloride. And artificial leather is made from cotton or synthetic fabrics with a polyurethane layer.
- Production technology. In the production of eco-leather, technology is used that allows the material to “breathe”, unlike dermantine.
In appearance, eco-leather does not differ from natural leather. It has the same relief and softness. The cost of the fabric is lower; many car owners choose this material to cover and restore the gearbox selector.
[custom_ads_shortcode2]
Do-it-yourself handle wrapping
You can sheathe or alter an automatic or manual transmission lever at home. To re-tighten the transmission selector, you will need standard tools. If we are tightening and sheathing the handle yourself, be sure to take into account all the nuances described in the instructions below.
Tools
To tighten the car gearbox lever, you will need:
- pen, felt-tip pen or marker;
- scissors;
- stationery knife;
- cling film;
- scotch;
- Super glue;
- sewing machine;
- threads (silk or nylon);
- fabric that will be used for upholstery.
Re-upholstery process
Before completing the task, you will need to remove the transmission selector
Don’t forget to remove it with the cover, which we then carefully rip into pieces using a utility knife. From them we create patterns, according to the dimensions of which the components of the new product are cut out
The gearbox cover is sewn by machine or by hand, the procedure is carried out from the wrong side. If you do not use a sewing machine, the parts of the product must be pierced with an awl in advance to facilitate the joining procedure. The made cover must be fixed to the frame with glue.
User Vladimir Mazur in his video explained in detail and showed how the procedure for tightening the transmission selector is carried out.
The tightening procedure is performed as follows:
Take cling film and cover the gear selector with it. The top of the film must be secured with tape.
It is better to use a painter's one, as it is easier to mark with a felt-tip pen. Mark the lines on the tape with a marker or felt-tip pen where the seams will be located. Using a utility knife, carefully cut the winding along the previously drawn lines. You will receive a dummy that must be carefully removed and aligned. Using the finished pattern, parts are cut out from Alcantara, genuine leather or other material. Don't forget to leave some space around the edges (about 5mm) to adjust the tension. By hand or using a machine, sew all the elements of the cover, while maintaining the remaining distance of 5 mm. Sew the components of the future product together
Before using a needle or machine, glue the parts for secure fastening. You need to pull the prepared threads into the seams you made. Afterwards they are tightened as much as possible. When the cover is ready, it must be wetted with water. This will make the material more elastic. Then we pull the product onto the gearbox lever.
User Liberman in his video showed how the procedure for re-stretching and restoring the appearance of the gear selector in a car is performed.
Preparatory stage
It contains the same steps no matter which method you choose next.
- The handle is removed from the lever and disassembled. Most often, you will see a head that has a plastic attachment with a thread at the bottom, with which it is fixed to the lever. This lock is removable. There will be a sleeve underneath; it will also need to be removed;
- A plastic cover covers the top of the head. It is pryed off with a screwdriver and removed. Next there will be an insert secured with a screw. It unscrews, the insert goes into a common pile;
- The old sheathing is ripped apart at the seam and removed; it will act as a pattern;
- There may be variations in which a cover was not provided: you have a plastic knob in front of you. In this case, you will have to do the preparation yourself;
- The handle with the lower lock removed is tightly wrapped in several layers of cling film;
- Painting tape is glued on top;
- Cutting lines are drawn using this kind of papier-mâché. They must pass in such a way that they fall on the sharpest bends;
- The workpiece is cut along the markings with a stationery knife. You get two parts, which represent your patterns.
Regarding cutting:
If the old pattern case is severely deformed, you can first transfer the patterns onto thick paper so that the pattern on the leather is as even as possible.
Making a pattern
This is the most important step in re-tying the gearshift knob with your own hands. The parts must be cut to the ideal dimensions. And this is achieved by the accuracy of the pattern made. To do this you will need construction tape. The procedure in this case is as follows:
- We draw lines on the front and back of the handle dividing equal right and left sides.
- We completely cover the right half of the handle with pieces of tape, making sure that the edges of the tape fall exactly on the edges of the dividing lines and with an overlap of 3-5 mm in the places where the panel and the lower part of the handle will be located.
- Then carefully remove the tape. This will be the pattern for the leather on the right side of the handle. The left one will serve as a mirror image of the right one.
- Our original pattern has a convex relief. In order to make it flat, carefully use small scissors to cut its edges to such a depth that it becomes completely flat.
- We place the pattern on a piece of prepared leather and outline its outline. There are gaps in the places of the cuts; we fill them, smoothing out the overall contour. The leather for the right side of the handle is ready.
- We turn the pattern over and make a blank for the left half of the handle.