During operation, the engine consumes air and fuel and emits exhaust gases. The valves allow air-fuel mixture to enter the cylinder (through the intake valve) and exhaust gases to be removed (through the exhaust valve). The alternation of intake and exhaust cycles is called the engine duty cycle. It consists of four measures.
- Inlet. Inlet valve is open. The piston moves downwards and, due to the vacuum created in the cylinder, carries with it the air-fuel mixture, which enters through the open intake valve.
- Compression. Both valves are closed. The piston moves upward (toward the spark plug) and compresses the air-fuel mixture.
- Working progress. Both valves are closed. The spark plug produces a spark that ignites the air-fuel mixture. During combustion of the air-fuel mixture, a lot of gas is formed, which pushes the piston down.
- Release. The exhaust valve is open. The piston moves up and pushes exhaust gases out of the cylinder through the open exhaust valve.
Video: how the engine works and the purpose of the valves
The meaning of valve adjustment
The opening of the valve is controlled by the camshaft cam. When the engine is running, the valve heats up and elongates, which can cause it to not close completely. To compensate for this elongation, there is a gap between the valve and the camshaft cam . The point of adjusting the valves is to set the required value of this gap.
Signs of improper valve adjustment
Signs of improperly adjusted valves include:
- Extraneous metallic knocking noise from under the valve cover.
- Reduced engine power.
- The smell of pure gasoline in the exhaust gases.
Adjusting the valves on VAZ 2107 cars is mandatory after repairing the gas distribution mechanism, as well as after a mileage of 10–15 thousand kilometers.
Video: operating principle of the gas distribution mechanism
Valve cover tightening torque for VAZ 2107
This article will talk about how to replace the gasket and tighten the cylinder head of a VAZ 2107. In fact, it’s not difficult to do it yourself, although you’ll have to tinker a little. The head gasket is a small and cheap element, but it affects the operation of the entire internal combustion engine. And first, it’s worth finding out what symptoms of a damaged gasket may appear.
Valve stem seals
While adjusting the valves, it is quite possible that you had no idea that you were next to another very important element of the gas distribution mechanism - the valve stem seals.
Purpose of valve stem seals
While the engine is running, the camshaft, rocker arms, valve springs and valve tops operate in an oil mist. Oil is deposited on all parts and mechanisms located under the valve cover. Naturally, it also ends up on the top of the valves, called stems.
Basic faults
There is damage to the gasket in which the operation of the VAZ 2107 is strictly prohibited. But there are also breakdowns in which it is still possible to drive. So, here is a list of the main breakdowns:
- Destruction of the gasket between the lubrication and cooling channels. With such a breakdown, antifreeze begins to seep into the engine sump. Of course, mixing with engine oil occurs. If there is a suspicion of a gasket failure, then you need to remove the dipstick and check the lubricant level. It's also worth looking at the consistency of the oil. In this case, the antifreeze turns light brown. In the event of such a breakdown, it is strictly forbidden to even start the engine, as this can quickly lead to jamming.
- Destruction between the cylinders and the cooling system occurs if the cylinder head gasket is of poor quality. It is quite possible that there was a weak tightening torque of the VAZ 2107 cylinder head during assembly. Under pressure, the integrity of the gasket is destroyed. The result is that air gets into the engine cooling system, and something terrible happens in the expansion tank. The temperature rises, there are huge bubbles and seething in the tank. Of course, it is undesirable to continue driving in this case.
- Sometimes (much less often than in the two previous cases) destruction occurs between adjacent engine cylinders. The result is a significant decrease in compression and unstable engine operation.
- And, of course, one cannot help but mention the banal marriage. In this case, the cylinder head gasket of the VAZ 2107 simply collapses, literally before our eyes. In this case, you can see how antifreeze begins to leak between the cylinder head and the engine block. In this case, tightening the bolts has no effect. Most likely, there is unevenness in the gasket itself, which leads to a similar result.
And now you have decided that you really need to replace the gasket, your car has one or more symptoms. What to do? Arm yourself with keys and other tools, and then begin preparation.
Causes of oil leakage from under the valve cover
Oil leakage can occur through the oil filler neck, in the place where the valve cover adheres to the cylinder head, as well as in the places where the cover is attached to the cylinder head with bolts.
Less commonly, oil leaks can be found on the valve cover body itself. This indicates defects and cracks in the case, and there may also be a manufacturing defect.
As you know, motor oil in the engine lubrication system is supplied to various elements and components of the internal combustion engine under a certain pressure, which is created due to the operation of the oil pump.
- If an oil leak is noticed in the area of the bolted connection or lubricant leaks out of the neck, then experts consider the most likely cause to be an increase in pressure in the engine lubrication system.
- The presence of oil leaks at the junction of the cover and the cylinder head may also indicate an increase in pressure in the system. In parallel with this wave, wear of the gasket or insufficient sealing in the area of \u200b\u200bthe connection between the valve covers and the cylinder head is allowed.
Note that the valve cover gasket is a rubber product. Moreover, the operating conditions of this seal are such that the specified element operates taking into account a constant temperature difference (high heating and cooling). It is quite obvious that rubber under such conditions gradually loses its elasticity and hardens, and cracks appear in the structure of the material. As a result, the gasket no longer fits tightly to the surfaces of the cover and head. In this case, the problem is solved by replacing the valve cover gasket.
Let us add that the above statements also apply to the cylinder head gasket. Oil can also leak from under the cylinder head if the pressure in the lubrication system increases, and also as a result of defects in the head gasket. The only thing is that in this case you need to pay attention to the condition of the mating planes of the head and the cylinder block itself.
It should also be noted that traces of oil and grease drips on the engine can also appear when the leak occurs through the exhaust manifold gasket. It happens that craftsmen come to a hasty conclusion that oil is leaking from under the cylinder head, after which they immediately begin to change the cylinder head gasket.
Moreover, in many cases such a leak looks similar in appearance to a head gasket leak, although the oil actually leaks through the manifold gasket. During diagnostics, this fact must be taken into account; it is recommended to check this element separately.
Oil leak from under the valve cover: high pressure in the engine lubrication system
So, if everything is clear with the gaskets, then oil leaks as a result of high pressure in the lubrication system require separate engine diagnostics. One of the main methods at the initial stage can be considered to measure the oil pressure in the lubrication system.
To measure the oil pressure that is created in the channels of the oil system, it is necessary to clarify in advance what indicator is considered normal for a particular type and model of internal combustion engine. This information can be found in specialized technical literature, clarified on specialized auto forums, etc.
For measurements you will need a liquid pressure gauge. Next, the oil pressure sensor is unscrewed, after which a pressure gauge is installed in its place and the oil pressure in the engine is measured. If the pressure gauge readings indicate that the recommended value is exceeded, then an oil leak from under the valve cover will be a natural result.
High oil pressure can occur for various reasons. Among the main ones it is customary to highlight the following:
- problems with crankcase ventilation. In this case, the crankcase ventilation does not work properly, gases accumulate in the engine and excess pressure is created. As a result, the engine oil “presses” from under the valve cover. Note that with such a malfunction, oil also enters the air filter housing. Frequent causes of the problem include a clogged oil separator mesh, as well as clogged fittings to which the crankcase ventilation hoses are attached. To eliminate the malfunction, the oil separator mesh must be washed and the fittings must be cleaned.
- contamination in the engine lubrication system. In some cases, the accumulation of deposits in the channels of the lubrication system can lead not only to a decrease, but also to an increase in pressure. The possibility of clogging of the oil lines after the oil pump should not be excluded, which causes a decrease in throughput and an increase in oil pressure. In such a situation, it may be necessary to flush the lubrication system, change the oil and oil filter.
- use of oil with high viscosity, excess oil level, strong thickening of the lubricant at low temperatures. As you know, motor oils should be selected not only taking into account the internal combustion engine manufacturer’s tolerances and various properties, but also pay attention to seasonality. This means that all-season motor oils have different viscosity indexes. It turns out that in winter, especially in regions with severe frosts, it is better to use a less viscous oil from the recommended list. It should also be taken into account that after the engine warms up, the oil will thin out. For this reason, selection should be made taking into account the general condition of the engine, the degree of its wear, the tightness of oil seals and gaskets. It is also not recommended to exceed the engine oil level.
- sticking of the oil pump pressure relief valve. The oil pump of the engine lubrication system always has a certain performance reserve. This is done in order to prevent a gradual decrease in oil pressure, taking into account the natural wear of the pump itself, the accumulation of contaminants and the occurrence of other problems in the oil system during engine operation. For the same reason, this device has a special pressure reducing valve in its design, which allows you to always maintain pressure within specified limits.
Start of work
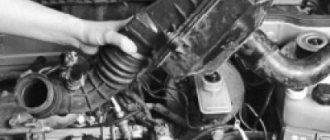
The very first step is to remove the air filter. Of course, on a carburetor engine it is somewhat easier to remove it. If you have an injector, you will have to tinker with its rubber fasteners. But the essence remains the same - it is necessary to disassemble the fuel system completely to get to the cylinder head. But we will look at the example of not an injection, but a carburetor seven. Still, there are many more classic cars with such a power system.
It is advisable to dismantle the carburetor, since if you remove the head along with it, you can accidentally damage it. On all classic series cars, the carburetor is removed in the same way. This procedure is quite simple, but it will take some time. Now you can unscrew the nut securing the distributor and remove the distributor along with the wires. Getting closer to the engine, all that’s left to do is drain the antifreeze from the system.
And then turn off all the pipes that you see. After this, it will be possible to dismantle the cylinder head cover. It is secured with nuts and shaped washers. Don't lose them during repairs. That's all, the preparation is complete, you can begin the most difficult part - dismantling and installing the cylinder head.
When to replace
This gasket must be replaced immediately after a leak is detected. If you do not replace it on time, then soon the entire surface of the engine, as well as all units near the internal combustion engine, will be covered in oil.
Then dust and dirt will certainly stick to the oily elements. Dust not only significantly spoils the appearance of the engine, because the valve cover is the first thing that catches your eye. A layer of oil and dust on the surface of the internal combustion engine greatly worsens heat exchange processes - the engine temperature will rise.
During operation of the engine with a leaking valve cover, oil will inevitably get to the sensors and other electronic devices - the sensors may fail. If the leak is quite severe, the oil level will quickly drop - driving without oil leads to very sad consequences.
Most often, the cover is changed in the following cases:
- Engine overhaul;
- Determination of oil leaks at the seal installation site;
- Cylinder head repair, timing belt repair, unit maintenance.
The frequency of replacement differs on different car models - it all depends on the gasket material. Original products are of higher quality, non-original and cheaper ones are most often a low-quality copy from the Middle Kingdom.
The service life of the gasket depends entirely on the quality of the product and the material. The average price of an element is small, so everyone tries to buy something inexpensive, because the element is insignificant. Many people do the same. As a result, oil leaks under the hood. There is no need to do this.
Among the reasons for replacing the valve cover gasket, the first thing to highlight is the low quality of consumables for the car. It happens that you buy a product at an average price, but after a few days of intensive use of the car, the leak appears again.
When choosing, you should carefully examine the surface of the gasket and its materials; it is important to make sure that the part is elastic. Hard gaskets will not provide the required tightness, and gaskets that are too soft will certainly be pressed through during installation.
Another popular reason that leads to replacement is improper installation. The gasket is destroyed during its installation.
Removing the cylinder head of a VAZ 2107
Now is the time to remove the timing chain. To do this, loosen the tensioner, or even better, remove it completely. Only after this can you unscrew the bolt that secures the sprocket to the camshaft. But don't forget to straighten the washer before you start unscrewing it.
To prevent the chain from falling, it must be held with a soft wire. Next comes the turn of the camshaft. It is secured to the cylinder head with nine nuts. The shaft is very easy to remove, there will be no problems with it. Then you need to get rid of the exhaust pipe and unscrew the exhaust manifold mounting nuts.
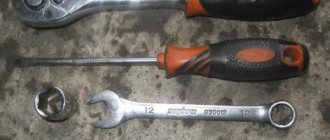
That's it, the withdrawal is almost complete. There are 11 bolts left that secure the head to the block. To unscrew them, you will need to use a socket wrench with a long handle. A dynamometer is not suitable for such purposes.
Cost of work and parts
The cost of replacing a chain at a service center is around 700 rubles, and the price of complex replacement of a chain, sprockets, tensioner and chain guide is about 1,800 rubles.
The cost of a chain is from 350 to 600 rubles, a set of sprockets (crankshaft sprocket, camshaft and oil pump) is about 400 rubles, a classic tensioner shoe (with a rubber lining) is about 100 rubles, a modernized one with a sprocket on a bearing is about 1,400 rubles, a chain guide is about 80 rubles.
When buying a chain, carefully inspect its rivets ; they should all be well flattened so that not a single pin pops out and the chain does not come apart.
It is recommended to buy a new chain tensioner with a sprocket on a bearing, even despite its high cost. It increases the life of the chain and the noise level with it is much lower than with a classic “shoe”.
In addition, while the engine is running, the rubber pad on the shoe wears off, and all the chips fly into the oil, for this reason the chain needs to be tightened more often. A tensioner with a bearing does not have these problems, and its service life is much longer.
Gasket replacement and assembly
If your car had pronounced symptoms of a gasket failure, then you don’t even have to look for its damage; it still won’t be possible to repair it. Immediately buy a new one and put it in place. But you need to clean the entire surface that the gasket is attached to beforehand. There should be no remnants of the old one left. You can even evaluate how smooth the surface of the head and the block itself are. It is quite possible that the cylinder head has an uneven surface, which is why, no matter what gasket is installed, it very quickly begins to leak antifreeze or air.
Before installing the VAZ 2107 cylinder head, it is necessary to check the serviceability of all valves. If there is such a need, replace the seals. This will reduce oil consumption. When everything is complete, place the gasket on the block. Place the head on top. Please note that there are two types of gaskets - old and new. The latter is produced by a very thin layer of sealant around the entire perimeter.
Do not forget to align the gasket so that it is positioned as accurately as possible. There are two guides for this purpose. And the time has come to tighten the cylinder head of the VAZ 2107. First, tighten all the bolts and tighten them by hand until they stop. And then you arm yourself with a torque wrench and, according to the diagram, tighten it. This diagram is shown in the figure. However, it is not difficult to remember it, since everything happens criss-cross.
It is necessary that all bolts are tightened as evenly as possible. To do this, they need to be pulled in two or three passes. During the first, the tightening torque of the VAZ 2107 cylinder head is 4 kgf*m. During the second pass, you need to set the moment to 11.5 kgf*m. The small bolt should be tightened to approximately 3.8. Installation of the camshaft is carried out in almost the same way; its fastenings will need to be tightened crosswise, but the moment here is not so important. The main thing is not to break the thread.
That's it, assemble your VAZ 2107 and try to start it. Just remember to fill the cooling system with water. If the engine is working perfectly and the gasket does not allow air or water to pass through, then you can add antifreeze.
We perform valve cover gaskets during engine repairs, cylinder head repairs, and when there are oil leaks from under the covers.
Remove the air filter housing from the carburetor.
Use a thin screwdriver to pry up and remove the spring clip.
Disconnect the rod from the throttle valve drive shaft.
Use a screwdriver to pry up and disconnect the throttle valve drive rod from the carburetor.
Use a screwdriver to pry up and remove the spring lock washer of the lever.
Remove the lever from the axle along with the rods.
Remove the carburetor fuel hose from the bracket.
Using a 10mm wrench, unscrew the eight nuts securing the cylinder head cover
Remove the special washers from the studs
Unclench the holder and release the vacuum brake booster hose and wiring harness
What is a valve cover gasket?
Valve cover gasket (cylinder head cover gasket) is a sealing element of piston internal combustion engines with overhead valves; an elastic gasket for sealing the volume closed by the cylinder head cover installed on the cylinder head.
The cylinder head cover gasket performs several functions:
- Ensuring tight installation of the cover to the head;
- Sealing the volume covered by the lid to prevent oil leaks;
- Protection of valve mechanism parts and oil from contamination (from dirt, dust, exhaust gases, etc.).
The valve cover gasket is not a critical part for engine operation; without it, the power unit will function just fine. However, it ensures the cleanliness of the engine, its fire safety (preventing oil leaks and contact with heated parts - exhaust manifold and others) and ease of maintenance. In addition, the gasket contributes to maintaining the cleanliness and performance of the engine oil. Therefore, if leaks appear from under the cover, the gasket should be replaced, and in order to make the right choice, you should understand the types, features and characteristics of these parts.
I once had to climb into the engine and remove the head due to a burnt-out valve. Then the question arose: how to actually tighten the cylinder head according to science? In different manuals, this operation is described by two methods.
- Tighten in several passes to a torque of 10.5-12 kg/m.
- Pull in several passes up to 8 kg and then turn 90 degrees 2 times.
Which method should you choose? The second method supposedly puts the bolts into elastic deformation mode, stretching them like a spring, while the moment goes beyond 13 kg/m. Being in a stretched state, the bolts compensate for the subsequent shrinkage of the gasket and tightening the bolts is no longer required. It goes without saying that re-tightening old bolts is fraught with entering the zone of plastic deformation and subsequent breakage.
The fact that the bolts should be tensioned is in principle correct, but how can this be checked? Right! Moment! Having come to this conclusion, I decided to stall purely for the moment, and at the same time see how effective the second method would be. I took a click wrench marked up to 32 kg. I started with a smooth tightening from 2 kg in several passes and reached 11 kg and then the fun began.
Each bolt began to live its own life. 70% of the bolts clicked when turned at the same angle, while the rest required turning more than 90 degrees to click. The cylinder head was previously milled and the plane of the block was carefully cleaned with a scraper.
It turned out that the real compression of the gasket began only after 11 kg and took place in different areas with different intensities. If I had used the angle method, I would have gotten a scatter of moment across the entire plane and a bend in the cylinder head, which would have inevitably led to gasket burnout. Why is the gasket crimped at different speeds over its entire area?
This may be due to the design features of the gasket itself; perhaps there is a curvature of the plane of the cylinder block. In any case, it is necessary to tighten solely using the torque on the torque wrench; this is the only way to guarantee tight and, most importantly, uniform pressing of the cylinder head plane to the block. At what torque should you turn? I settled on 13.5 kg, perhaps a bit too much, but good compression is guaranteed.
Tightening torques for cylinder head VAZ 2107
- 121 0 110k
When assembling the cylinder head after replacing the gasket or repairing the cylinder head, it is important to tighten the bolts to the torque recommended by the automaker. But different instructions suggest using two different schemes for tightening the VAZ-2107 cylinder head with a torque wrench. Let's figure out what is their difference, and how the cylinder head is tightened on a VAZ 2107 , and with what force.
The table below shows both options for the cylinder head tightening torque diagram on a “classic” VAZ, depending on the type of bolt. Because classic bolts require only two passes , but modern torsion bolts , due to their properties, require four passes . In the article we will look at everything in more detail.
| Bolt type | Diagram and tightening torques of the VAZ-2107 cylinder head bolts |
| Classic bolts | During the first pass, the bolts are tightened to 4.0 kgf/m. During the second pass , tighten the bolts with a torque of 11.5 kgf/m. Bolt No. 11 size M8x45 is tightened with a torque of 3.8 kgf/m. |
| Torsion bolts with elastic deformation | On the first pass , tighten the bolts with a torque of 2.0 kgf/m. During the second pass, it is necessary to tighten with a force of 8 kgf/m. During the third pass, tighten all the bolts at an angle of 90 degrees. For the fourth, you need to tighten all the bolts 90 degrees again. Bolt No. 11 size M8x45 is tightened with a torque of 3.8 kgf/m. |
Cleaning on VAZ 2101-VAZ 2107
Removal
1. Remove the air filter housing from the car engine (for more details, see the article “Replacing the air filter housing”)
Note! Be sure to remove the flame arrester from the crankcase ventilation hose and wash it with kerosene in case of severe contamination.
2. Loosen the clamp securing the additional hose to the breather cover (indicated by the red arrow) and disconnect the additional hose from it. Proceed to loosen the main hose clamp (indicated by the blue arrow) and disconnect it from the cover.
3. Remove the engine oil level dipstick.
4. Unscrew the breather cover bolt and remove the cover from the car engine.
5. Soak a rag in kerosene and wipe the inside of the oil separator.
Note! Be careful when wiping, do not drop any dirt particles inside the engine. If it is inconvenient for you to clean off dirt on the installed oil separator, remove it from the car by unscrewing the fastening nut (indicated by the red arrow). Place the removed oil separator in a previously prepared container with kerosene.
6. Clean the surface of the air filter from dirt by wiping it with a rag soaked in kerosene.
Note! Remove the sealing gasket from the filter housing and clean it of dirt.
Installation
Proceed in the reverse order of removal.
Note! Replace torn or cracked gaskets with new ones. Check that the metal bushings (shown in the photo) are inserted into the air filter housing gasket.
Important! If a large amount of kerosene gets into the engine crankcase, change the engine oil! (read more in the article “Changing Engine Oil”)
For newbies! Question: What does the complete oil separator look like? Answer: in the photo.
Why is correct tightening of the VAZ-2107 cylinder head important?
If you have replaced the cylinder head gasket, and besides major repairs, this is practically the only reason to disassemble the cylinder head, then the exact sequence and tightening torque of the VAZ-2107 cylinder head are critically important for the correct operation of the engine. Because any discrepancies in the fit of the valve cover lead to problems in the engine processes.
If the cylinder head of the VAZ-2107 is not tightened, then the parts of the engine will not be pressed against each other enough, even despite the presence of a gasket. The result is a drop in compression and burnout of the gasket. Also, working gases from the cylinders can enter the channels of the lubrication or cooling system and lead to the entry of these technical fluids into the combustion chamber. And this is already very bad - antifreeze in the oil will lead to insufficient lubrication of engine parts with all the ensuing consequences.
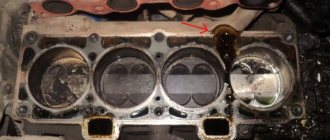
Antifreeze in VAZ 2107 engine oil
Traces of burnout of the cylinder head gasket on the cylinder block of a VAZ 2107
You also cannot tighten the cylinder head cover - this can damage it. Either cracks will appear in it immediately, or tension will arise, which will lead to this in the future. Also common is bolt rupture and thread stripping.
If you tighten the bolts in one place and not tighten them in another, the cylinder head of a VAZ-2107 car or its cover may warp. This will result in gaps that the gasket cannot compensate for. The result is the same as with loose bolts.
If not changed in a timely manner
On some cars, gasket failure is a chronic problem. The original standard part can withstand no more than 70-80 thousand kilometers. During active use of the car, it breaks down even before the mileage of 40 thousand km.
Changing the gasket on time is extremely important. If this is not done, there will be many unpleasant surprises: the entire valve group of the engine will be subject to a powerful attack of dirt and dust, which will penetrate inside without obstacles; severe oil leakage will begin, and a lack of lubrication will have an extremely negative effect on the service life of the piston group and valves; oil will get on sensors, spark plug wells, wires, and other mechanisms in the engine compartment - the risk of fire will increase; cooling of the power plant will become worse.
Change the gasket as soon as it stops doing its job. If you choose a low-quality product or make a mistake during replacement, oil leaks will appear again within a few days after replacement.
This is interesting: How to install lenses in a headlight yourself - useful tips for car owners
Tightening torques for the VAZ-2107 block head on carburetor and injection engines
For the most part, the “seven” was equipped with carburetor engines of various modifications. Moreover, the most common version was a 1.5 liter engine with 77 hp. Although modifications of 1.3, 1.4 and 1.6 liters were also produced. There is no fundamental difference in the tightening torque of the cylinder head of the VAZ 2107 injector and carburetor.
The procedure for tightening the cylinder head bolts on a VAZ 2107 engine
The cylinder head of an injection engine differs structurally only in the enlarged “windows” of the intake manifold channels, because the injector needs a little more air than the carburetor. But the tightening force of the VAZ-2107 cylinder head for such engines will be the same.
The instruction manual for the VAZ Seven contains clear data. Firstly , the tightening order is important (see picture). Secondly , first you tighten the bolts by hand, and then tighten bolts No. 1-10 in two stages with the force indicated in the table (in newton and kilogram per meter). Bolt No. 11 is reached last, in one approach, with a force of 3.8 kgf/m.
| Tightening stage | Rated torque, Nm (kgf/m) | Minimum, N m (kgf/m) | Maximum, N m (kgf/m) |
| Preliminary | 39,2 (4,0) | 33,3 (3,4) | 41,16 (4,2) |
| Final | 112,7 (11,5) | 95,94 (9,79) | 118,38 (12,08) |
Tightening the cylinder head of the VAZ 2107 - second option
On some newer “sevens”, not ordinary M12x120x1.25 bolts were used to fasten the cylinder head, but torsion bar bolts - M12x115x1.25. Therefore, in addition to the first option of the sequence and degree of tightening, there is another option with data on the tightening force of the VAZ-2107 cylinder head. The process itself looks like this:
- Stage 1. Tightening the bolts to a torque of 2.0 kgf/m.
- Stage 2. Second tightening with a torque of 7.5-8.5 kgf/m.
- Stage 3. Turn each bolt 90 degrees.
- Stage 4. One more turn of all bolts by 90°.
- Stage 5. Tighten bolt No. 11 with a force of 3.8 kgf/m.
Different bolts and tightening degree of the VAZ-2107 cylinder head. What is the difference
The “classic” was originally equipped from the factory with ordinary M12x120x1.25 bolts for a 19mm head. Their original catalog number was 2101-1003271 or 21213-1003271. The second number suggests that such bolts were also used on the VAZ-21213 Niva, which is why they are also called “Niva bolts”. Another colloquial name is “penny”. But most often they are simply identified as “cylinder head bolts for an old-style classic.”
On VAZ-2108 and VAZ-2109 cars, torsion bolts of a new type began to be used, which are also suitable for the “classics” - M12x115x1.25. They were unscrewed and tightened with a 12mm hexagon. It is noteworthy that AvtoVAZ’s catalog number remained the same, 21213-1003271. And it is the bolts of the new type that are sold in the original packaging. Their difference is that they “stretch” - and if correctly, they undergo elastic deformation. Actually, this is why you need to turn it twice by 90 degrees.
Old style cylinder head bolt
New sample cylinder head torsion bolt
Pay attention to the length of these bolts, encoded in the markings. 5mm difference with regular bolts. It is by these 5 millimeters that the bolt is deformed, completely filling the internal thread.
What is the difference between these bolts, other than the first ones are not sold in the original packaging and different bolts require different torque patterns? Classic bolts can be used many times if their condition allows it. But on the other hand, you need to remember to do preventive tightening of the cylinder head bolts . About once a year , or more often, you will have to check the tightening torque of all the head bolts of your VAZ-2107 and tighten them if necessary.
The new type bolts do not require such a procedure, because due to elastic deformation they provide constant pressure on the cylinder head cover . But such bolts are disposable . When disassembling the cylinder head, you will have to buy a set of new ones. And unscrewing such bolts can be complicated by the fact that bolts tightened without a torque wrench can break .
How to replace the cylinder head gasket on a VAZ 2107 yourself
A cylinder head (cylinder head) gasket is installed to improve the seal between the head and the cylinder block. When tightening the connections, the gasket is evenly compressed, which ensures complete tightness. This is a disposable part that has to be changed periodically. You can replace the cylinder head gasket on a VAZ 2107 with your own hands in a garage, following step-by-step instructions.
What to consider when choosing a new product
In order for the gasket to perform its functions, it must be resistant to elevated temperatures and have the ability to compress. These properties depend on the material of manufacture. There are several options for making gaskets: from asbestos, paronite, metal and their combinations.
Combined options, layers of which are made of different materials, combine several properties. Gaskets made of asbestos and metal alloys have increased resistance to high temperatures, but do not strengthen the seal between the head and the cylinder block. Products made of paronite and rubber provide high-quality sealing, but their limit for high temperatures is lower. When choosing a gasket, preference should be given to products of a combined type.
In order not to make a mistake when choosing a seal, it is necessary to take into account the characteristics of the power unit that is installed on the car. The VAZ 2107 can be equipped with one of three types of engines. They differ in cylinder diameter. The power unit 2103 has a diameter of 76 mm, while the 2105 and 2106 have a diameter of 79 mm. If you install a gasket of the wrong diameter, the edges of the seal will be damaged. Naturally, the seal will be broken.
When is it necessary to replace the cylinder head seal?
When a gasket burns out, the damage is significant: integrity is lost, the part loses its shape. In the event of a breakdown, the damage is minor, sometimes even invisible to the naked eye.
The gasket becomes unusable for the following reasons:
- overheat;
- During installation, fasteners are tightened with a deviation from the tightening torque standards;
- poor quality refrigerant;
- engine malfunctions;
- defective, low-quality product.
The power unit overheats due to malfunctions of the cooling system elements: radiator, fan, etc. To burn out the gasket, it is enough to drive literally 500 meters. When installing the cylinder head seal, it is important to observe the order of tightening the fasteners and the torque to which they are tightened. If these rules are violated, the seal will be deformed and will subsequently be broken. Poor quality coolant can cause corrosion, causing damage to the seal material and even the cylinder head.
A damaged cylinder head gasket can be identified by the following signs:
- interruptions in the operation of the power unit;
- leaks of working fluids from under the cylinder head;
- rapid heating and overheating of the motor;
- traces of coolant in lubricants;
- steam in exhaust gases;
- condensation on spark plugs;
- increased pressure in the cooling system, smoke appears in the expansion tank.
Symptoms vary depending on where the gasket is damaged. If the edges of the cylinder bores are damaged, the engine may overheat and the pressure in the cooling system may increase.
If the coolant gets into the combustion chambers, the engine will start to stall, since it will be diluted with refrigerant in the fuel assembly and will not be able to burn completely. White smoke with a specific odor will come out of the exhaust pipe.
If there is damage on the edge of the seal, leaks of working fluids may occur at the point of contact between the cylinder block and the head.
Signs of a burned out cylinder head gasket.
If signs of seal burnout appear, you need to take a comprehensive approach to diagnosis. Before you start replacing the seal, you need to make sure that this is the reason. To do this, you need to perform the following series of actions:
- Having discovered fluid leaks on the cylinder block, you need to make sure that it is flowing exactly from under the head.
- We start the engine and analyze the color and smell of the exhaust. If they look like white smoke or smell like antifreeze, turn off the engine and carefully unscrew the cap from the expansion tank. The presence of exhaust gases in the cooling system is indicated by the smell of burnt fuel.
- We start the engine without a cap on the expansion tank; there should be no traces of oil or gas bubbles inside it.
- We turn off the engine and let it cool. We take out the dipstick to measure the oil level and look at its color. If its level has risen too much for no particular reason or there are traces of white-brown liquid, this indicates a mixture of oil and refrigerant.
- Let the power unit run for 5 minutes and turn it off. We take out the spark plugs and inspect the electrodes. If they are wet, then there is a high probability that coolant has entered the cylinders.
Tightening torques for main threaded connections of VAZ PP
Tightening torques for various main threaded connections of vehicle components. These tightening torques can only be ensured using special equipment (torque wrench) Part Thread Tightening torque, N•m (kgf•m)
Engine Cylinder head mounting bolt M12x1.25 cm. Note 2 Stud nut securing the intake pipe and exhaust manifold M8 20.87–25.77 (2.13–2.63) Tension roller mounting nut M10×1.25 33.23– 41.16 (3.4–4.2) Nut of the camshaft bearing housing stud M8 18.38–22.64 (1.87–2.31) Bolt of the camshaft pulley M10 67.42–83.3 ( 6.88–8.5) Bolt for fastening the housing of auxiliary units M6 6.66–8.23 (0.68–0.84) Nut for the stud fastening the outlet pipe of the cooling jacket M8 15.97–22.64 (1.63– 2.31) Bolt for fastening the main bearing caps M10x1.25 68.31–84.38 (6.97–8.61) Bolt for fastening the oil sump M6 5.15–8.23 (0.52–0.84) Nut connecting rod cover bolt M9x1 43.32–53.51 (4.42–5.46) Flywheel mounting bolt M10x1.25 60.96–87.42 (6.22–8.92) Coolant pump mounting bolt M6 7, 64–8.01 (0.78–0.82) Crankshaft pulley mounting bolt M12x1.25 97.9–108.78 (9.9–11.1) Coolant pump supply pipe mounting bolt M6 4.17– 5.15 (0.425–0.525) Nut for fastening the exhaust pipe of the muffler M8×1.25 20.87–25.77 (2.13–2.63) Nut for fastening the flange of the additional muffler M8×1.25 15.97–22, 64 (1.63–2.31) Nut securing the clutch cable to the engine bracket M12x1 14.7–19.6 (1.5–2.0) Bolt securing the front engine mount bracket M10x1.25 32.2–51, 9 (3.3–5.5) Nut of the bolt securing the front engine mount M10 41.65–51.45 (4.25–5.25) Nut of the bolt securing the left mount of the power unit suspension M10 41.65–51.45 (4.25–5.25) Nut securing the left suspension support of the power unit M10 31.85–51.45 (3.25–5.25) Bolt securing the rear suspension support of the power unit M10x1.25 27.44–34 ( 2.8–3.47) Nut of the bolt securing the rear suspension support of the power unit M12 60.7–98 (6.2–10) Bolt securing the oil receiver to the main bearing cover M6 8.33–10.29 (0.85– 1.05) Bolt for fastening the oil receiver to the pump M6 6.86–8.23 (0.7–0.84) Bolt for fastening the oil pump M6 8.33–10.29 (0.85–1.05) Bolt for fastening the housing oil pump M6 7.2–9.2 (0.735–0.94) Oil pump pressure reducing valve plug M16x1.5 45.5–73.5 (4.64–7.5) Oil filter fitting M20x1.5 37 .48–87.47 (3.8–8.9) Oil pressure warning lamp sensor M14x1.5 24–27 (2.45–2.75) Carburetor mounting nut M8 12.8–15.9 (1.3 –1.6) Nut securing the cylinder head cover M6 1.96–4.6 (0.2–0.47) Clutch Nut securing the clutch housing to the engine block M12x1.25 54.2–87.6 (5.53– 8.93) Bolt securing the clutch housing to the engine block M12x1.25 54.2–87.6 (5.53–8.93) Bolt securing the guide sleeve flange of the clutch release bearing M6 3.8–6.2 (0. 39–0.63) Bolt securing the clutch housing to the flywheel M8 19.13–30.9 (1.95–3.15) Nut securing the clutch housing to the gearbox M8 15.7–25.5 (1.6–2 ,6) Bolt securing the bottom cover to the clutch housing M6 3.8–6.2 (0.4–0.6)
Gearbox Conical screw fastening the drive rod joint M8 16.3–20.1 (1.66–2.05) Bolt fastening the gear selection mechanism M6 6.4–10.3 (0.65–1.05) Bolt fastening the housing gear shift lever M8 15.7–25.5 (1.6–2.6) Nut securing the drive rod and torque rod clamp M8 15.7–25.5 (1.6–2.6) Nut of the rear end of the primary and secondary shaft M20x1.5 120.8–149.2 (12.3–15.2) Reverse light switch M14x1.5 28.4–45.3 (2.9–4.6) Bolt securing the forks to the rod M6 11.7–18.6 (1.2–1.9) Differential driven gear mounting bolt M10x1.25 63.5–82.5 (6.5–8.4) Speedometer drive housing mounting nut M6 4.5– 7.2 (0.45–0.73) Bolt securing the gear selector lever axle M6 11.7–18.6 (1.2–1.9) Nut securing the rear cover to the gearbox housing M8 15.7–25, 5 (1.6–2.6) Reverse fork clamp plug М16×1.5 28.4–45.3 (2.89–4.6) Conical screw fastening the gear selector rod lever М8 28.4–35 ( 2.89–3.57) Clutch housing and gearbox mounting bolt M8 15.7–25.5 (1.6–2.6) Drain plug M22x1.5 28.7–46.3 (2.9– 4.7)
Front suspension Nut securing the upper support to the body M8 19.6–24.2 (2–2.47) Nut securing the ball pin to the lever M12x1.25 66.6–82.3 (6.8–8.4) Eccentric nut bolt for fastening the telescopic strut to the steering knuckle M12x1.25 77.5–96.1 (7.9–9.8) Bolt for fastening the telescopic strut to the steering knuckle M12x1.25 77.5–96.1 (7.9–9. 8) Bolt and nut for fastening the suspension arm to the body M12x1.25 77.5–96.1 (7.9–9.8) Nut for fastening the brace M16x1.25 160–176.4 (16.3–18) Bolt and nut mounting the stabilizer bar to the arm M10x1.25 42.1–52.0 (4.29–5.3) Nut securing the stabilizer bar to the body M8 12.9–16.0 (1.32–1.63) Bolt fastening the brace bracket to the body M10x1.25 42.14–51.94 (4.3–5.3) Nut securing the telescopic strut rod to the upper support M14x1.5 65.86–81.2 (6.72–8.29 ) Bolt securing the ball joint to the steering knuckle M10x1.25 49–61.74 (5.0–6.3) Nut of the rear wheel hub bearings M20x1.5 186.3–225.6 (19–23) Nut of the front wheel hub bearings M20x1.5 225.6–247.2 (23–25.2) Wheel bolt M12x1.25 65.2–92.6 (6.65–9.45) Rear suspension Nut securing the lower end of the shock absorber M12x1, 25 66.6–82.3 (6.8–8.4) Nut for fastening the rear suspension arm M12x1.25 66.6–82.3 (6.8–8.4) Nut for fastening the brackets for the suspension arms M10x1.25 27 .4–34 (2.8–3.46) Nut securing the upper end of the shock absorber M10x1.25 50–61.7 (5.1–6.3) Brakes Bolt securing the brake cylinder to the caliper M12x1.25 115–150 (11 ,72–15.3) Bolt for fastening the guide pin to the cylinder M8 31–38 (3.16–3.88) Bolt for fastening the brake to the steering knuckle M10x1.25 29.1–36 (2.97–3.67) Bolt mounting the rear brake to the axle M10x1.25 34.3–42.63 (3.5–4.35) Nut securing the vacuum booster bracket to the bracket booster M8 9.8–15.7 (1.0–1.6) Nut mounting the main cylinder to the vacuum booster M10 26.5–32.3 (2.7–3.3) Nut securing the vacuum booster to the bracket booster M10 26.5–32.3 (2.7–3.3) Nut of brake connections pipelines M10 14.7–18.16 (1.5–1.9) Front brake flexible hose end M10x1.25 29.4–33.4 (3.0–3.4)