How to remove the trim and the side mirrors themselves of a VAZ 2190
- Remove the mirror element. To do this, carefully bend it with your fingers so that you can see the latches that are located along the entire contour of the mirror. You need to bend 5 pieces.
- Remove the mirror covers. To do this, we snap off the latches that are visible from the side of the removed mirror; another latch is visible when bending the mirror towards the stack.
How to remove Lada Granta mirrors
You will need : flat-blade and Phillips-blade screwdrivers, pliers and remove the door trim.
Depending on the Grant configuration, rear view mirrors can be installed with a mechanical or electric drive.
Removing power mirrors:
- Remove the mirror adjuster retaining bracket.
- Remove the 3 screws securing the mirror to the door frame.
- Remove the mirror.
- The photo shows the Granta side mirror assembled.
Installation of mirrors is carried out in reverse order.
Removing power mirrors : First you need to disconnect the negative terminal of the battery, and then:
- Disconnect the connector from the power mirror wires.
- Remove the 3 screws securing the mirror to the door frame.
- Remove the exterior mirror Grant assembly.
By the way, do you know how to paint the mirror caps in the body color and install heated mirrors?
How to glue a rear view mirror to a car windshield
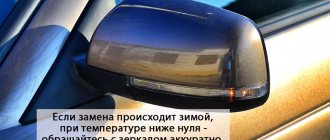
The need to dismantle the rear view mirror does not arise often, mainly in the event of an accident, collision, or impact with oncoming traffic.
Many car owners complain about the lack of methodological information on removing the rear view mirror of a Lada Vesta.
To help drivers, we will consider the main points during dismantling:
- Open the hood.
- Remove the terminals from the battery.
- Open the driver and front passenger doors wide.
- Remove the top and bottom plastic covers.
- Press the metal lock and slide the mirror up from the mount.
Note to the driver!
In the “luxury” configuration of the Lada Vesta, the rear view mirror (hereinafter referred to as the rear view mirror) is installed with a rain and light sensor. You need to move the mirror mount up. In all other configurations, sensors are not installed; the mount must be moved down.
Take this information into account when replacing the CBV to avoid damaging the equipment. Many craftsmen do not know the intricacies of attaching the interior mirror, which damages two digital sensors.
Disassembly procedure
Once the structure has been removed, disassembly can begin. If it is required, of course. Perhaps you have found a new mirror whose price suits you completely. Then you can skip this point.
If it is necessary to disassemble an element, we start from whether it is internal or external.
The interior mirror is disassembled as follows:
- there is a place where the glass and the body are connected;
- spin is inserted;
- pressed with little force;
- a gap appears;
- use a mediator to pass along the entire length of the gap;
- the body is divided into 2 parts;
- the mirror is removed;
- everything else is located underneath it;
- We carry out the necessary work.
You may also need to disassemble your car side mirror.
It doesn't matter whether left or right
- Using a hairdryer, the area between the case and the glass is heated;
- Do not heat to high temperature. Use a household hair dryer on medium power;
- Use a flat-head screwdriver to separate the body into 2 parts;
- Sometimes it is necessary to bend the terminals;
- If you are afraid of damaging the mirror, wrap the instrument with electrical tape;
- On some cars you need to slightly press the mirror to the center and move it to the side;
- The glass is carefully removed;
- Remove the screw from the plastic frame, if there is one;
- Under the frame we see the entire mechanism;
- Use a screwdriver to remove the broken structure and replace it with a new one.
That's it, the work is almost completed. But since we disassembled everything and changed the necessary components, now we need to assemble the structure and install it back on the car.
Review of Manufacturer Prices
| Name / catalog article | Price in rubles |
| LadaVesta and Lada XRAY, Renault Megane 3 with light and rain sensors (8200000509) | From 2000 - 2200 |
| Reflector without light and rain sensors (7700838529) | From 1200 |
| *price indicated as of 04/05/2019. |
Conclusion
Replacing a mirror in a Lada Vesta car yourself is quite simple. The task completes within 10 minutes. Difficulty may arise when purchasing equipment. Check the modification of the car, the presence of pre-installed rain and light sensors. There are no significant differences between domestic and foreign components. The owner of the technical equipment chooses based on personal preferences.
Reassembly
I will say right away that the assembly is carried out simply in the reverse order of the previously carried out dismantling work. Therefore, I see no point in talking about this separately.
With mirrors on special mounting brackets, everything is also extremely simple. All that remains is to tighten the fasteners and fix the mirror on the ceiling or side of the car.
But what’s really more difficult is gluing a car mirror. To begin, choose the appropriate composition. Household superglue or double-sided adhesive tape will not work. Tested by many car owners. It's better to ask for the appropriate adhesive at an auto parts store. If found, for gluing you need:
- choose a warm and sunny day without high humidity;
- create a temperature in the garage of 25-27 degrees;
- remove all dirt and traces of old glue from the body;
- walk a little along the joint with sandpaper;
- sand the gluing area on the mirror;
- degrease all surfaces;
- Apply the required thin layer of glue to the holder;
- spray the purchased activator on the fastening area;
- attach the glass to the surface;
- press the mirror to the glass;
- keep as long as the glue manufacturer said;
- remove the remnants of the used activator and glue from your mirror and also the holder itself;
- put the entire structure in its rightful place;
- use as intended.
Replacing the mirror element on Grant
Many drivers, out of ignorance, change the entire mirror assembly, although in most cases only the mirror element is damaged. And it would be quite ridiculous to pay about 1000 rubles for a complete mirror if you can get by with 300 rubles per element.
The design of the rear view mirrors on Grant, meaning external ones, is the same as on Kalina. That is why the entire process of this repair will be identical. Let's look at the main reasons why this part may be damaged:
- side impact in an accident
- hitting the mirrors when driving on a too narrow section of the road
- other damage not related to the operation of the car
DIY car repair and maintenance
The outside rear view mirror on the Lada Kalina is designed and dismantled very simply and conveniently, like everything on this model of a domestic car (in my opinion, the best in terms of price-quality ratio). This particular mirror is suitable for both Tens and Priora. As we can see in the photo above, the mirror mounting principle is the same as on other Ladas, with one small difference. The side mirror is attached to three self-tapping screws using a shaped screwdriver (see photo above).
The side mirror itself (in this case, simple, without a turn signal repeater, with manual adjustment) consists of two parts. The main part (the mirror itself) and the protective cover. Connect these parts carefully and accurately by aligning the grooves on the mirror and the inserts on the lid and press it. It should click into place.
Next, lean the mirror on the outside of the door so that all three guides and the cable connection fall into place (photo above). Then, screw in and tighten the three screws. Make sure that the mirror on the outside of the door is level and properly positioned.
And now, that same “one small difference” - instead of the Zhiguli plastic nut that we screw onto the connection of the control cables, here it is attached to the same Zhiguli corkscrew, which on the classics secures the door lock cylinder. And finally, put on the plastic panel so that the adjustment lever fits into the rubber frame, lean the panel against the two guides in the corresponding holes and press it.
Mirror for Kalina, price 3000 rubles (with mechanical adjustment and without repeater)
Have you decided to install heated mirrors or paint their trims in body color? The first step is to disassemble the side mirror. The principle of disassembling the mirrors of Lada Granta, Lada Kalina 2 and Lada Priora is the same and can be done in several ways.
How to remove an old mirror element
Everything here is done, although not complicated, but quite neatly. If you rush and make excessive efforts, you can damage the internal fasteners of the element, and then you will definitely have to buy the entire part assembled.
First, we remove the mirror assembly from the car, and only after that can we begin the repair. Then we move one side of the mirror element as far as possible to the side so that you can get inside this structure with a screwdriver.
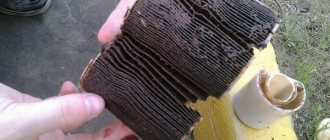
Now, using a screwdriver or by hand, if you were able to insert it there, we move the element latches to the side, as is clearly shown in the photo below.
The latches are located along the entire circumference, so you need to unlatch them from all sides. After which this part can be easily removed with minimal effort on your part.
To see what the design of this fastener looks like, look at the picture below.
In addition to the hooks (clamps, latches), there are 4 more guides that must match the holes in the case when installing a new element. The new one is somewhat easier to install than it is to remove, so there shouldn’t be any special problems with installation. The main thing is not to use excessive force when fixing the element, and try to press the element itself as evenly as possible so that it does not break.
The price of a new such part for Grant is about 300 rubles, and as mentioned above, it is much cheaper than buying an assembled mirror. There are a few more points that relate to replacing the mirror element:
- the design can be electrically driven
- the element may be heated
Due to this, certain issues may arise that have not been described here. This article examined the simplest type of mirror element.
How to secure and how to glue a new one
If you have successfully dismantled the mirror yourself, then returning it back will not be difficult. As a rule, all actions are performed in reverse order.
But you should pay special attention to the selection of glue, since not everyone is suitable for this process
it is necessary to choose the right adhesive for attaching the mirror to the windshield
Glue selection
There are three types of compositions for gluing mirrors:
- chemically cured;
- light-curing;
- compositions based on epoxy resin.
A composition with resins will work well only if it is allowed to dry properly. This usually takes from 10 hours to a day. In this case, the part must be pressed tightly at all times. This approach is not very convenient, so such products are not used in everyday life.
Light-curing mixtures operate when exposed to special ultraviolet lamps. This is one of the most common methods in production. However, if you are not the happy owner of a lamp, you should not purchase such a composition. Sunlight, especially diffused light, is not able to have a sufficient effect.
For these reasons, chemically cured compounds are the most popular. A special hardener starts the polymerization process. As a rule, they consist of the glue itself and an aerosol activator, although one-component compositions are also found.
Please note that some materials cannot be used to glue the mirror
- household superglue;
- double-sided adhesive tape.
The adhesive component of both materials has such a composition that when used on glass or metal, it will not be able to harden completely. High air temperature inside the cabin or heating of the glass from sunlight will soften it and the mirror will fall off. You can use household adhesives only if the mirror fell completely unexpectedly, and now you need to urgently get to a car service center.
Max
https://homo-habilis.ru/v-garazhe/223-chem-prikleit-zerkalo-zadnego-vida-v-avtomobile
How to stick to windshield
Having selected the appropriate glue, you can begin returning the rear view mirror to its rightful place. Choose a warm day for this or install a heater in the garage: the air temperature should be between 20 and 25 ° C.
process of applying glue to the holder platform
- Clean the holder platform of any old adhesive residue.
- Lightly sand the surface of the holder to improve the adhesion effect.
- In the same way, sand the area of the windshield where it is glued.
- Degrease the holder and glass area.
- Apply a thin layer of glue to the holder.
- Spray a special activator onto the place where the part is attached.
- Place the adhesive side of the part onto the glass. Try to follow the trail left from the previous time.
- Press the mirror firmly against the glass and hold for the time indicated on the package.
- After making sure that the part is firmly in place, clean the mirror from any remaining activator and glue around the holder.
- Reinstall the windshield (if you removed it) according to the owner's manual.
Ready! If you followed all the instructions carefully, the mirror looks like it was installed at the factory or at least in a car repair shop.
How to install on bracket
If during dismantling you did not separate the bracket platform from the glass, it will be even easier to assemble it. To do this, find a fixing element: it may be a screw or a latch. After this, connect the bracket leg to the platform.
There are also special brackets that are not glued to the glass, but are installed on the ceiling or other elements of the car, for example, on sun visors.
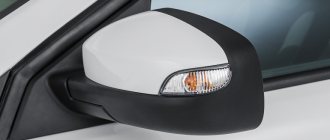
How to remove the side mirror of a Lada Granta
Side rear view mirrors are an integral element of the design of any vehicle. They allow better control of the road situation, promote traffic safety, and optimize the aerodynamics of the body.
Some mirrors are additionally equipped with direction indicators (read the instructions for how to replace them), this statement also applies to the popular domestic car Lada Granta. The need to remove mirrors may be due to the following factors:
- Mechanical impact that caused the destruction of the housing.
- A crack or other defect on the mirror element. (Instructions for replacing the mirror element)
- Burnt spiral of heated mirrors or other damage to the electrical part.
In general, the operation of removing a mirror does not present any particular difficulties; it can be done on your own with minimal waste of time, so there is no need to turn to professionals.
Video
The exterior of the car with such a body turned out to be very stylish. In the car, the developers changed the front bumper, slightly enlarged the air intake, and also changed the appearance of the niches for the fog lights. They did a good job on the interior too. New functionality has been added; the seats and sides in luxury trim levels are covered with more wear-resistant leatherette. The mirror covers of the Lada Granta were also replaced. They are manually adjusted in this car. Granta is available in three trim levels:
Although it is made on the basis of Kalina, it still has its own individuality. Nevertheless, Lada Granta owners often think about various modifications.
The process of changing the appearance of a car can take place in different ways. Car owners go to various lengths to make the car stand out among other similar ones. You can change cars beyond recognition. There are special bumpers on sale; you can do airbrushing on the entire body. You can change the interior of the cabin or make changes to the design of the engines. And that is not all.
The side mirror cover can significantly improve the car's aerodynamic capabilities. When the speed is more than 80 km/h, mirrors with overlays will not whistle, since their shape is more streamlined. Another benefit of these accessories is improved appearance. You can experiment with different trims without damaging the body.
You can buy trims with the option of an LED turn signal repeater. This allows for additional safety while operating the machine. The turn signal repeater on the side mirror improves the visibility of the flashing light. This will avoid accidents and other problems. You can buy pads with electrical adjustment and heating. Most side mirror covers are made in Togliatti.
It all depends on the colors, shapes, and fastening capabilities. Overlays that are not painted in any color can be purchased for pennies. Analogues that are made in China can be purchased for 100 rubles. However, they are unreliable. Overlays with a repeater option, adjustment, and heating cost about 2,000 rubles. Mirror covers are one of the simplest, but very noticeable types of tuning!
As for installation, anyone can handle it. However, in case of even minimal doubts, it is better to contact the nearest car service center. This way you can avoid the risk of damaging the paintwork of the body or trim. Usually the linings are equipped with everything necessary for convenient mounting on a car. Using an example, we will describe the installation of an overlay using hermetic glue or silicone.
Removing the door trim
To gain access to the elements that fix the mirror, you first need to remove the door trim.
The sequence of actions is as follows:
- Removing the key blocking the lock.
- Removing the plugs.
- Sequentially unscrew the screws and screws holding the upholstery.
- To remove the upholstery, you need to insert a flat-head screwdriver wrapped in electrical tape into the groove between the upholstery and the door panel ( but it’s better to use a special device ). The clamps provide some resistance, but significant force during dismantling is unacceptable.
- The rods of the locking mechanism are removed, the upholstery is moved back to a distance limited by the length of the wires supplying the lifts.
- The wiring is carefully removed, after which the door trim is also dismantled.
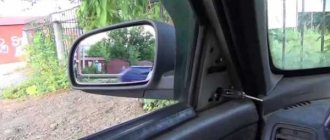
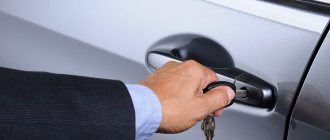
Sequence of actions when replacing a side view mirror yourself
- We place the car on a level platform and provide unobstructed access to the front door from the side where the replacement will be.
- We unscrew the two screws that secure the door card trim and pry the plastic clips around the perimeter.
- From the back side, disconnect the block with wires from the electric drive control unit, disconnect the speaker terminals, and remove the card.
- Using a Phillips-head screwdriver, unscrew the three screws and remove the side-view mirror from its seat.
- We replace the block with a new one and screw it into place. We lay the block with wires and connect them to the sockets. We assemble the structure.
Removing the mirror
The procedure after removing the upholstery is as follows:
- Using pliers, carefully remove the locking bracket, which limits the mobility of the hinge.
- Using a Phillips screwdriver, remove the screws that secure the mirror to the door structure.
- The mirror is removed, all cables and hinge mechanisms are routed through a hole located in the outer door panel.
If we are talking about a mechanically controlled mirror, with automatic control, then it may additionally be necessary to remove the wires that provide the drive with electrical energy.
These wires are fixed in blocks, so disconnecting them is not difficult.
Installing a new mirror occurs in the reverse order of installing door trim.
The main thing is to control the correct connection of the wires in order to maintain the functionality of all electronic systems of the vehicle, direction indicators and heating
Grant liftback mirror connection diagram
Similar problem. I just haven’t gotten around to buying a pulp and paper plant and a luxury control unit yet..
I have this unit as standard. (Photo attached)
I’m thinking about how to make friends with it, and whether it is necessary to replace the pulp and paper plant in this case.
And in your case, I think you need to install everything and hook it up.
The adjustment of the left mirror is connected to the block in the door, the heating goes through the door connector via pin 24 on the TsBKE. That is, there is only one wire out of the door for heating, but I would rather route it to a separate button.
The right mirror goes through three wires through the door connector along pins 23, 24 and 25 to the TsBKE block. That is, you will have to pull wires from the passenger door to the TsBKE. 23 and 25 contact to 6 and 7 (xp3) TsBKE.
counter question - what is the difference between grant and viburnum doors?
Added after 3 minutes
But the mirrors remain the same, and I can connect them to the block, in accordance with the pinout of this block, and they will work?
Yes, the doors are no different! My joint
Heating, as I understand it, must be done through a relay (which is in the diagram with a new button or with a button for heating the rear window), but the mirrors are connected directly without using a relay, do I understand correctly? The only thing I need to do is hang a fuse (10A?) on the wire from which I will take the plus (I plan in the area of the mounting block)
For everyone who wants electric mirrors to be “normal” on Kalina2.
My equipment is standard+ ( CBKE
, climate control, etc.). This module comes from the factory (It has fake mirror adjustment buttons).
In my case, cramming in a separate control module is wildly collective farm. Therefore, after reading the documentation and looking at the electrical diagrams for KALINA 2 2192/2194, I found out.
To operate electric mirrors you need:
1. Replacement of CBKE. Needed from the suite
(Cat number: 2190-3840080-60 IU)
2. Wiring to the front doors from the suite.
(Cat numbers: 21902-3724545-00 21902-3724544-00)
3. Corresponding module in the driver's door.
(I chose 1118-3763080-30 IU from Datsun 2197. Similar to mine. But it has active mirror adjustment buttons.)
4. The wiring harness under the dashboard needs a little addition.
For the right mirror adjustment to work, it is necessary to stretch wires from the front right door to the TsBKE. From 23 and 25 door contacts to 6 and 7 (xp3) TsBKE. (Computer contacts fit perfectly into the xp3 connector) And also for the heating to work on the right and left sides, you need: from 24 contacts of each door, stretch the wire into the mounting block, to the rear window heating relay.
It took a lot of time to purchase all the components. Everything was not taken from the first place that came across
In addition, the native TsBKE passed into another world, so its replacement was extremely important
The complete installation took about 9 hours. The most difficult thing is replacing the CBKE.
And don’t forget to register the immobilizer keys after everything. This requires a second key (with a red tag).
How to remove an old mirror element
Everything here is done, although not complicated, but quite neatly. If you rush and make excessive efforts, you can damage the internal fasteners of the element, and then you will definitely have to buy the entire part assembled.
First, we remove the mirror assembly from the car, and only after that can we begin the repair. Then we move one side of the mirror element as far as possible to the side so that you can get inside this structure with a screwdriver.
Now, using a screwdriver or by hand, if you were able to insert it there, we move the element latches to the side, as is clearly shown in the photo below.
The latches are located along the entire circumference, so you need to unlatch them from all sides. After which this part can be easily removed with minimal effort on your part.
To see what the design of this fastener looks like, look at the picture below.
In addition to the hooks (clamps, latches), there are 4 more guides that must match the holes in the case when installing a new element. The new one is somewhat easier to install than it is to remove, so there shouldn’t be any special problems with installation. The main thing is not to use excessive force when fixing the element, and try to press the element itself as evenly as possible so that it does not break.
The price of a new such part for Grant is about 300 rubles, and as mentioned above, it is much cheaper than buying an assembled mirror. There are a few more points that relate to replacing the mirror element:
- the design can be electrically driven
- the element may be heated
Due to this, certain issues may arise that have not been described here. This article examined the simplest type of mirror element.
DIY car repair and maintenance
The exterior rear view mirror on the Lada Kalina is designed and dismantled very simply and conveniently, like everything on this model of a domestic car (in my opinion, the best in terms of price-quality ratio).
This particular mirror is suitable for both Tens and Priora. As we can see in the photo above, the mirror mounting principle is the same as on other Ladas, with one small difference. The side mirror is attached to three self-tapping screws using a shaped screwdriver (see photo above).
The side mirror itself (in this case, simple, without a turn signal repeater, with manual adjustment) consists of two parts. The main part (the mirror itself) and the protective cover. Connect these parts carefully and accurately by aligning the grooves on the mirror and the inserts on the lid and press it. It should click into place.
Next, lean the mirror on the outside of the door so that all three guides and the cable connection fall into place (photo above). Then, screw in and tighten the three screws. Make sure that the mirror on the outside of the door is level and properly positioned.
And now, that same “one small difference” - instead of the Zhiguli plastic nut that we screw onto the connection of the control cables, here it is attached to the same Zhiguli corkscrew, which on the classics secures the door lock cylinder. And finally, put on the plastic panel so that the adjustment lever fits into the rubber frame, lean the panel against the two guides in the corresponding holes and press it.
Mirror for Kalina, price 3000 rubles (with mechanical adjustment and without repeater)
Have you decided to install heated mirrors or paint their trims in body color? The first step is to disassemble the side mirror. The principle of disassembling the mirrors of Lada Granta, Lada Kalina 2 and Lada Priora is the same and can be done in several ways.
To remove the rear view mirror covers, it is not necessary to remove the mirror element. To do this you will have to:
- fold the side mirror and unclick the first lock of the trim (only for Lada Kalina 2 and Lada Granta).
- Turn the mirror element to the side as far as possible, insert a screwdriver into the resulting slot and unclip the 4 clips of the cover.
- Separate the side mirror trim from the housing.
The process is shown in the video:
https://youtube.com/watch?v=XhsWGy3pONg
If there is a need to remove the mirror element, then you should:
- tilt the mirror element to the side.
- Unclip the latches in a circle using a screwdriver.
The process is shown in the video:
How to disassemble a car mirror
There are many reasons for disassembling a car side mirror. This may be a desire to paint it, or to put it in order after it was caught by some reckless driver. How to disassemble a car mirror, and before that, how to quickly and easily remove it, is of interest to many car enthusiasts. Due to inept movements, a car mirror can become completely unusable and then it will be necessary to purchase a new one, and as a result, the mirror will be installed in a car service center.
But there are many brands and, moreover, models of cars, as well as mirrors for them. There are also many types of mirrors - electrically driven, folding, with turning elements, and so on. The most important thing is how to remove it so as not to damage it. Below are general steps to disassemble a car side mirror.
Wiring diagram Grants
Wiring diagram of the front wiring harness of Lada Granta (VAZ 2190) This article provides information on connecting electrical equipment located in the front of the car. (lights, sound signal, connection of generator and starter, washer motor, cooling system fan, etc.) The harness is connected through plugs 9,10,11 to the instrument panel harness - 1,2.
Fig. 1 Electrical diagram of the front wiring harness of Lada Granta 2190 In the diagram, each wire is marked. The first number indicates which element the wire goes to, the second to which contact. Names of elements for the electrical circuit according to Fig. 1: 1.3 - car headlights; 2 — washer motor; 4 - starter; 5 - battery; 6 - power fuse block (located in the engine compartment - see item 10 in the article “Underhood of Lada Granta”); 7 - generator; 8 — sound signal; 9,10,11 - to the instrument panel block (see article “Instrument panel wiring diagram”); 12 — reverse lamp switch; 3 - electric fan of the cooling system (installed on the radiator in the engine compartment) Electrical diagram of the rear wiring harness of the Lada Granta VAZ 2190 (tail lights, license plate lights, fuel pump, etc.) The article provides an electrical diagram of the rear wiring harness, which is responsible for the equipment located on the sides and in the back of a Lada Granta car. These include lighting devices, light switches and a fuel pump module. The wiring harness is connected to the door harnesses and the instrument panel harness.
Fig. 1 Diagram of the rear wiring harness of the Lada Granta. The diagram has wire markings. The first symbol in the marking indicates which element the wire goes to, the second symbol, separated by a fraction, indicates which contact of the element. The following is the name of the circuit elements: 1,2 - rear wiring harness block to the instrument panel wiring harness block; 3 — right side direction indicator; 4 — left side direction indicator; 5 — handbrake lever position sensor; 6 — rear window heating element; 7 — interior lamp; 8 — switch in the driver’s seat belt; 9 — lighting in the trunk; 10 — electric fuel pump module; 11 — right lamp; 12 — electric motor for opening the trunk; 13 — interior lamp switch; 14 — additional LED brake light; 15 — left lamp; 16 — block of the rear wiring harness to the block of the wiring harness of the rear left door (wires for the speaker - brown-blue and blue-white); 17 — block of the rear wiring harness to the block of the wiring harness of the rear right door (wires for the speaker - green-black and yellow-green); 18 — block of the rear wiring harness to the block of the wiring harness of the front right door (wires for the speaker - yellow-white and green-white); 19 — block of the rear wiring harness to the block of the wiring harness of the front left door (wires for the speaker - gray-red and green-red); 20 — airbag control unit; 21 - block of the rear wiring harness to the block of the wiring harness of the state registration number lamps. Wiring diagram of the ignition system of the Lada Grant (VAZ 2190) The article shows the connection of the controller to all sensors, injectors, generator, spark plugs, everything that ensures the correct supply of the air-gasoline mixture to the engine, as well as its timely ignition.
Rice. 1 Diagram of ignition and connection of engine sensors to the controller on a Lada Granta car. The marking of the wires indicates which element the wire goes to and, through a fraction, (/) to which contact of the element. The ignition system diagram is shown for the VAZ 2114 engine. The following is the name of the circuit elements, according to the marked numbers: 1 - engine oil pressure warning lamp sensor; 2 - generator; 3 — throttle pipe with electric drive; 4 — coolant temperature sensor; 5 — block of the ignition system wiring harness to the block of the instrument panel harness; 6 — solenoid valve for purge of the adsorber; 7 — speed reading sensor; 8 — mass air flow sensor; 9 — crankshaft position sensor (the only sensor, if it breaks, the car will not start. If other sensors fail, there will be deviations in engine operation, but the engine will start and run); 10 — oxygen concentration sensor; 11 — car controller; 12 — diagnostic oxygen concentration sensor; 13 — ignition coil; 14 — spark plugs; 15 — nozzles; 16 — blocks of the wiring harness of the ignition system and the wiring harness of the injectors; 17 - engine knock sensor Electrical diagram of the Lada Granta instrument panel (VAZ 2190) This article provides a schematic electrical diagram for connecting the Lada Granta instrument panel. The diagram shows the connection of the mounting block (assignment of fuses and relays), instrument clusters, connection of lighting controls, electric power steering, interior heater, etc.
Rice. 1 Diagram of the VAZ-2190 instrument panel (Click on the picture to view it in full size) Each wire is marked, it indicates which element it is stretched to, and through the fraction to which contact of this element. Below is a description of the elements, according to the diagram below: 1,2 - panel wiring harness block to the front wiring harness; 3.4 — panel wiring harness block to the rear wiring harness; 5 — vehicle lighting control module (dimensions, low beam, hazard warning lights); 6 — ignition switch (mechanical); 7 — on-board computer mode switch (located on the steering column switches); 8 — windshield wiper switch; 9 — instrument cluster; 10 — light signaling switch; 11 — trunk lock drive switch; 12 — diagnostic block (for connecting diagnostic equipment, clearing error codes); 13 — block of the wiring harness of the instrument panel to the block of the wiring harness of the air supply box; 14 — rear window heating switch; 15 — alarm switch; 16 — brake light switch (brake light switch); 17 — block of the instrument panel wiring harness to the radio (acoustic wires to the speaker installation location); 18 — block of the instrument panel wiring harness to the radio (radio power supply); 19 — device rotating on the steering wheel; 20 — driver airbag module; 22 — mounting block; 23 — electric power steering; 24 — cigarette lighter; 25 — backlight lamp for the heater control panel; 26 — lighting lamp; 27 — block of the instrument panel wiring harness to the block of the ignition system wiring harness; 28 — Lada Granta controller is used from Lada Kalina (model 11186-1411020-22); 29 — clutch pedal position signal switch (the car will not start without the clutch depressed); 30 — electronic gas pedal; 31 — additional resistor (to select the speed of the heater fan); 32 — electric motor of the stove; 33 — heater motor switch; 34 - control unit for the door lock system. Application and designation of the relay on the Lada Granta K1 car - relay for the electric fan of the engine cooling system; K2 - door lock relay; K3 - additional starter relay; K4 - additional relay; K5 - relay-interrupter for direction indicators and hazard warning lights; K6 - windshield wiper relay; K7 - headlight high beam relay; K8 - sound signal relay; K9 - relay for low beam headlights; K10 — relay for turning on the heated rear window; K11 - main relay (ignition relay); K12 - fuel pump (gasoline pump) relay. Additional electrical circuits of the Lada Granta (doors, lights, air supply duct) This article provides electrical circuits for: car doors, state registration plate lighting, air supply duct. Electrical circuits for the rear doors (left and right are similar). The wires of the electrical circuits are marked. The first digit indicates which element the wire goes to, the second (through a fraction) to which contact.
Cost of covers for Kalina mirrors
They cost on average from 500 to 1000 rubles, depending on the shape, color and method of attachment. Unpainted overlays can be purchased for only 200 rubles. Chinese cheap analogues cost very little (100-300 rubles), but are significantly inferior in quality. They are more fragile, brittle and inelastic.
Mirror covers for the Lada Kalina are the simplest but most noticeable tuning element!
The VAZ service station provides complete diagnostics and repairs of the Lada Kalina (1118) sedan.
Our car service specialists have extensive experience in maintaining and repairing VAZ vehicles, and thanks to our own auto parts store, we always have the necessary parts in stock.
View the price list for basic VAZ repair work
Prices for our car service services are significantly lower than the market average, which allows you to carry out high-quality repairs at an affordable price.
STO VAZ provides the following types of services:
- Car repair Lada Kalina (1118) sedan;
- Full diagnostics of VAZ 1118: diagnostics of the engine, brake system, suspension, compression measurement;
- Maintenance of Lada Kalina 1118 sedan: changing engine and transmission oil, replacing filters, replacing technical fluids, replacing the brake system and timing belt;
- Repair of the chassis: suspension, clutch, steering, brake system;
- Tire fitting and storage;
- Car wash;
VAZ-1118 is a new model of AVTOVAZ LLC, the production of which began in 2004. This is a five-seater passenger car with front-wheel drive, a front engine and an all-metal welded body. Lada Kalina is distinguished by a reinforced structure of the roof, sills and central pillar. Additionally, safety is ensured by bumpers made of impact-resistant polypropylene. The engine is four-cylinder, four-stroke, in-line, eight-valve, with a displacement of 1.6 liters.
How to remove an old mirror element
Everything here is done, although not complicated, but quite neatly. If you rush and make excessive efforts, you can damage the internal fasteners of the element, and then you will definitely have to buy the entire part assembled.
First, we remove the mirror assembly from the car, and only after that can we begin the repair. Then we move one side of the mirror element as far as possible to the side so that you can get inside this structure with a screwdriver.
Now, using a screwdriver or by hand, if you were able to insert it there, we move the element latches to the side, as is clearly shown in the photo below.
The latches are located along the entire circumference, so you need to unlatch them from all sides. After which this part can be easily removed with minimal effort on your part.
To see what the design of this fastener looks like, look at the picture below.
In addition to the hooks (clamps, latches), there are 4 more guides that must match the holes in the case when installing a new element. The new one is somewhat easier to install than it is to remove, so there shouldn’t be any special problems with installation. The main thing is not to use excessive force when fixing the element, and try to press the element itself as evenly as possible so that it does not break.
The price of a new such part for Grant is about 300 rubles, and as mentioned above, it is much cheaper than buying an assembled mirror. There are a few more points that relate to replacing the mirror element:
- the design can be electrically driven
- the element may be heated
Disassembling the rear view mirror
Salon
In order to disassemble the internal, you will need special picks and push-ups. The case is divided according to the same principle as a mobile phone or control panel to replace the battery.
- Find the junction of the body and the mirror part.
- Insert the wringer into this area and press firmly. A gap should form on the housing.
- Carefully walk the pick along the entire gap and divide the body into two parts.
- Remove the mirror. All the elements you need will be located under it.
Lateral
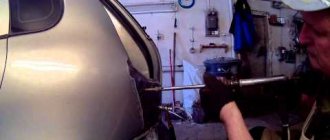
Once you have separated the side mirror housing from the car body, it should be disassembled. First of all, you need to remove the mirror element. This process may not be the same for different brands, however, the following procedure is most often used.
- Use a regular household hairdryer to thoroughly heat the junction of the reflective element with the body. The temperature of the air flow should not be too high, so a technical hair dryer will not work here.
- Using a flat-blade screwdriver or a small spatula, pry the mirror away from the housing. On some models, at this stage you need to bend the terminals. To avoid damaging the glass, you can wrap a screwdriver or spatula with electrical tape or a soft cloth.
- In some designs, to separate it, you need to lightly press it in the center and, as it were, push it to the side. After this, the reflective element can be removed with careful movements.
- Then remove the center screw from the plastic frame (if equipped).
- All side mirror mechanisms are located under the frame. Using a screwdriver, you can unscrew any of them and put them in place. You can independently divide the structure into all its component parts, including adjustment and folding motors.