The cooling of the car starts from the grille at the front. A good part can cool the engine only with the flow of air. The radiator grille in Priora 1 and 2 (SE) has such functions. The price of the part is from 700 rubles. On long trips, they allow air to pass through perfectly and cool the radiator. There are several spare parts options for Priora. For example, the radiator grille called the saber looks great. Our Priora is like a Lego. This type of tuning is popular among car owners - change the headlights, or the grille with bumper. As if the Lada Priora will no longer be a Lada. The black radiator grille of the Priora car without a badge also looks great on the car. It is popular with those pelvis workers who constantly rip off badges as if it won’t be a pelvis after that. The part is the “first step” in the air purification system entering under the hood of the car.
The main purpose of the part is to prevent foliage from getting inside. The mesh structure with which the standard spare part is made can only stop relatively large lumps of dirt and leaves. If its structure contained too small a honeycomb, the volume of air entering under the hood in a given unit of time would decrease. This will negatively affect the temperature of the car.
Standard radiator grille for Priora - article number and price
The standard part is divided into two parts - upper and inner. The air flow is distributed in two ways: one at a time, it goes up to pass through the air filters. The second flow comes from below to go along the bottom of the engine and cool it.
For the 2170 car, this element was updated compared to its predecessor, the “ten”. The front became unrecognizable. The upper part of the Priora 1 air heat exchanger received catalog number 2170-02803056-00, the cost is about 700 rubles.
Radiator grille on Priora 2 - restyling
The restyled Priora received several changes in appearance, but the usual configuration did not affect the bumper detail.
Only the “Premium Class” version of the car received an update - the SE radiator grille with catalog number 21704-2803056-00, costs about 700 rubles.
Lower grille: article number, price
The cost of the lower part for the bumper is about 400 rubles, and the article number under which the part is sold is 2170-02803057-00.
Installing the deflector on the hood
To make the process easier, many parts come with installation instructions. Using the instructions, you can install the deflector yourself. Moreover, this operation will not require a lot of time.
Installation of deflectors, which do not come with instructions, is carried out according to the diagrams described below.
Saber – article number, price
Sabers are special facing linings that are installed on the front and rear of the Priora. At the factory they are installed chrome plated, but with the help of simple tuning they can be changed.
- radiator grille molding (saber) hood – 2170-08402104-00, price – about 700 rubles;
- decorative trim (for the trunk of a sedan) – 2170-08212512-00, price – 900 rubles;
- decorative trim (for trunks of hatchbacks and station wagons) – 2171-08212526-00, price – 1500 rubles.
Tuning "Lada Priora" using moldings
A very interesting radiator grille (Lada Priora) is obtained if you use a couple of moldings. This tuning allows you to radically change the appearance of the front of the car.
The work is quite simple - you do not need any special skills.
- remove the radiator grille;
- cut off the VAZ icon located in the middle;
- We mark 2 chrome moldings along the length and cut them to the required size with a hacksaw;
- Using epoxy resin, we glue the moldings to our base and wait for it to dry;
- use a file to smooth out any unevenness if necessary;
- We install the resulting product on the car - and the tuning is successfully completed.
Basic faults
The single most common malfunction of the plastic from which the Priora part is made can be mechanical damage. The part may crack or even break into several pieces. In this case, it will perform its task worse, because a large gap will appear that will allow foliage, dirt and dust to pass through.
The solution to the problem ends with the usual replacement of the part - it should not be connected with anything, because under the influence of vibration this connection will become loose, and then the gap will appear again. The second option is often for tuning and ordinary parts made to look like chrome, this pasting peels off from the frost. Sabers are susceptible to this. Replacing the radiator grille will completely get rid of this disease. The Priora is not so expensive that it is impossible to buy new spare parts for it. Another point is that this is not practical. Some practical pelvis workers paint this spare part after it peels off in the cold.
The main reasons for changing the grille
Another design option
Tuning and grille removal are necessary to give the car an original appearance. Car owners should know how to replace a part if cracks appear on it. It should be noted that this design has:
- resistance to large temperature changes;
- individuality;
- low price.
Tuning the Priora se involves installing an “aggressive” grille. This model will give the vehicle a sporty look by increasing radiator cooling. Some Lada owners prefer to tune the factory model. For this you can use chrome strips and moldings. They stick easily to the ribs.
Tools you will need:
- hacksaw;
- scissors;
- double sided tape;
- epoxy.
The radiator grille of the Priora se can be easily tuned with your own hands. To do this, you will need to cut out the VAZ badge using a hacksaw. Then you will need 2 moldings, which are first placed on the plane, marked and cut to size. This element is attached to the grille with tape. Moldings must be wrapped with masking tape in advance. This will prevent damage to the main element.
The next step is to dilute the epoxy glue in a container. Moldings and radiator grille are coated with it. Then the strips are applied, pressed down and held for some time. After the glue has dried, the edges are trimmed. A file is used for this.
Replacement: how to remove the radiator grille on a Priora
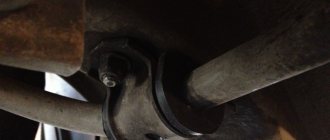
To remove and change a spare part on a Priora, you need to disassemble the front bumper of the car; it will have to be completely removed. This work must begin by removing the bumper:
- Pull the handbrake and raise the hood.
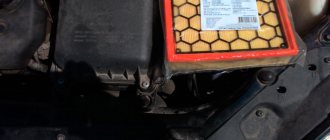
- Remove the engine splash guard.
- Remove the fender liners, first unscrewing the fastening screws.
- Unscrew the screws securing the bumper to the fender.
- Next, unscrew the screws securing the plastic cover above the headlight. Pull the cover towards you.
- In the middle, unscrew the two fastening screws that hold the bumper relative to the upper frame.
- Disconnect the wires from the fog lamp by pressing the fastening lock.
- Lightly pull the flange on the side of the bumper toward you to disengage it from the fender.
- Do the same on the other side. After this, unscrew four more mounting screws from the top. Place the bumper on a soft cloth.
- Next, to dismantle the air heat exchanger element, unclip the 11 plastic fasteners (for SE these are screws), pull the plastic part towards you. It is not recommended to dismantle without removing the bumper, because there is a fairly serious risk of damaging the element and its fasteners.
Replacing the lower grille
In order to remove the lower part of the part, you also need to remove the bumper. After this, the fastening washers are unscrewed, and the grille comes out of engagement; it can be easily removed.
In what cases is it necessary to dismantle the bumper on a VAZ-2170 Priora
There are a number of reasons why it becomes necessary to remove the plastic rear bumper on a Priora. These include:
- Repair of the product due to its damage (including painting). If the damage is minor, you can carry out repair work yourself.
- Installation of parking sensors.
- Replacement of the product due to damage to its integrity if it cannot be repaired.
- Replacing the bumper on a pre-restyling Priora with restyled devices. It is important to know that you need to buy not only a new product, but also an amplifier for it.
- Repair of the car body part located under the bumper, for example, treatment with anticorrosive agent, Movil, etc.
- Replacing reflectors. Practice shows that in this case it is not at all necessary to completely remove the rear bumper, since the procedure can be carried out without dismantling. However, access to the devices in this case will be limited, which will complicate the process of removing them.
The bumper on the car is also removed in case of preparatory work for painting the body. There is no need to dismantle the device to install the tow bar on the Priora (link), since the trailer hitch is installed without the need to remove the rear bumper.
If there is a need to remove the device on the Priora, then first you need to prepare the appropriate tools. What you will need for this is described in the next paragraph.
Winter grille cover
The winter cover is installed to ensure that only more or less hot air enters the radiator. This happens in such a way that the air entering under the hood circulates for some time, taking heat from the engine and heating up, and then gets inside the “stove”. This way the air is heated in advance before entering the cabin.
The plug is solid, and therefore the volume of air entering under the hood is noticeably reduced. It is recommended to remove it at the end of the winter season, because in summer such tuning can result in the car overheating. Plugs can be placed on both parts - upper and lower.
For the lower part, the solid version ZRLP-050602 is suitable, the price is 480 rubles, on top you can put a “Razor” for 1,000 rubles, or a completely blank version for 800 rubles. However, it is not recommended to close both parts - you should leave a “window” for a large air flow.
The value of tuning
Tuning is a modification of a car that allows you to improve its appearance and change its factory characteristics. With the help of tuning, engine efficiency and power are increased, suspensions and braking system performance are improved.
Tuning the grille allows you to improve the appearance of the car, as well as increase the protection of the radiator. Refinishing can hide damage and defects.
Main options
Before starting work, you need to determine the final type of grating. There are several types of modifications. The chosen type determines what materials and tools will be used in the work.
Most often, the radiator grille is replaced with a metal fine mesh. ABS or fiberglass construction is also used. Using silicone glue, various decorative elements (for example, brand labels, letters and even drawings) can be attached to the part.
When doing tuning yourself, you must avoid partially or completely blocking the air flow through the grille. Otherwise, due to a decrease in the efficiency of the cooling system, overheating of the lower part of the body is possible.
How to tune it yourself?
Independent modification of the radiator grille is carried out in several stages.
Removing the factory radiator element
To carry out work, the part must be removed. Usually the grille is fixed with bolts and self-tapping screws. But modern models are equipped with plastic latches. Dismantling is carried out carefully so as not to damage the fasteners and grooves intended for them. You can remove the grill in about 20 minutes.
This is interesting: Review of small cars for women with automatic transmission
Making LED lighting
LED lighting is placed around the perimeter of the removed part. To install it, you should think about the connection in advance. It cannot be attached to parts that heat up during movement. It is best to install diodes on the grille ribs. You can securely fix the tape using silicone or quick-drying glue.
We equip chrome protection
The chrome plate on the radiator protection will give the old design a mirror-metallic shine. When creating it, special binders are applied to the surface of the product. They are dried at a temperature of +65 °C.
The work involves performing the following actions:
- a layer of activator is applied using a spray gun (for example, ST. 2516);
- then the grate is washed with distilled water;
- using a double gun, “Metachrome” and a reducing agent are then applied.
A pre-purchased radiator protection cover can greatly simplify the work.
The main reasons for changing the grille
Another design option
Tuning and grille removal are necessary to give the car an original appearance. Car owners should know how to replace a part if cracks appear on it. It should be noted that this design has:
- resistance to large temperature changes;
- individuality;
- low price.
Tuning the Priora se involves installing an “aggressive” grille. This model will give the vehicle a sporty look by increasing radiator cooling. Some Lada owners prefer to tune the factory model. For this you can use chrome strips and moldings. They stick easily to the ribs.
Tools you will need:
The radiator grille of the Priora se can be easily tuned with your own hands. To do this, you will need to cut out the VAZ badge using a hacksaw. Then you will need 2 moldings, which are first placed on the plane, marked and cut to size. This element is attached to the grille with tape. Moldings must be wrapped with masking tape in advance. This will prevent damage to the main element.
The next step is to dilute the epoxy glue in a container. Moldings and radiator grille are coated with it. Then the strips are applied, pressed down and held for some time. After the glue has dried, the edges are trimmed. A file is used for this.