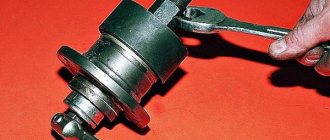
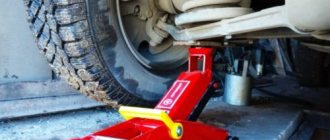
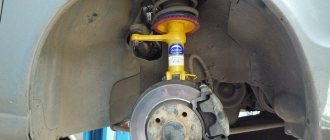
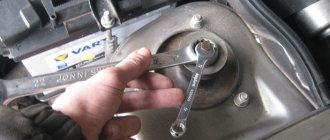
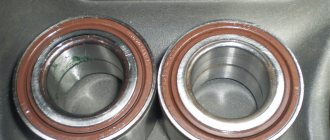
Every Lada Kalina owner will have to replace the front wheel bearing at some point. This element may become unusable after 20,000 miles. Sometimes situations occur when a part “asks” for replacement before the designated interval. At this point, the quality of the hinge itself has a significant impact. Service manuals prescribe the need for replacement every 25-30 thousand km.
Front wheel bearing replacement process
In order to successfully replace the front wheel bearing on a Lada Kalina car, you will need to acquire the following type of tool:
- head at “30”;
- thin chisel;
- screwdriver;
- pliers that can be used to remove retaining rings;
- a set of mandrels, a wrench and a mount.
Let's get to work.
- Disconnect the terminals from the battery terminals.
- Loosen the hub nut.
- We hang up our Lada Kalina and remove the wheel from the required side of the car.
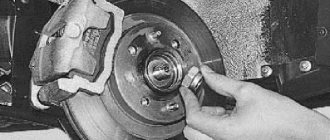
- Now we move on to removing the caliper and brake disc.
- We unscrew the fasteners that secure the ball joint to the suspension steering knuckle. We disconnect the knot (you will need a pry bar).
- We unscrew the hub nut and remove the axle shaft assembly with CV joint from the splined engagement with the hub.
- Next, we proceed to dismantling the knuckle from the mounting bracket on the shock absorber strut. We perform the action by unscrewing two bolts and nuts.
- Having removed the steering axle, we proceed to pressing out the hub. In most cases, during this manipulation, the hinge is destroyed, and its outer race remains inside the seat in the fist. Here a puller comes to the rescue, with which we remove this clip.
- Do not forget about dismantling the bearing retaining rings, which must be replaced only with new analogues.
- Next, we press the inner race of the bearing off the hub shaft.
- We begin assembly by installing the outer retaining ring inside the steering knuckle seat.
- Using a suitable mandrel, we press in the new bearing.
- Now we install the hub itself. We press it in carefully to ensure the correct seating depth inside the cage.
- The remaining assembly manipulations are carried out using the reverse disassembly algorithm.
Replacing the front wheel bearing on the other side of the car is absolutely identical to the sequence of actions we considered.
Lada Granta Liftback standard equipment, what is included
Lada Granta standard equipment specifications
What is needed to replace the rear pads of LADA “Kalina”
If you decide to replace the Kalina rear pads yourself, you will need:
- wheel wrench;
- jack;
- keys for 7 and 12;
- slotted screwdriver;
- metal brush; pliers;
- a pair of M8 bolts for pressing out the brake disc (bolt length is about 70 mm);
- brake fluid;
- a rubber bulb or syringe to remove some of the brake fluid from the reservoir;
- a small container into which you can drain the brake fluid;
- two mounts;
- rubber hammer;
- WD-40;
- set of new rear pads.
Attention: replacement of rear Kalina pads is carried out only as a set, two on the right and left sides. You should never change pads “one at a time” or only on one side!
Analogue bearings
As an alternative, you can consider the products of two manufacturers:
- "Weber", product catalog code - "BR 1118-3020";
- "Pilenga", part number - "PW-P1313".
The products of these companies have proven themselves well. The cost is approximately 1 thousand rubles. The contents are identical to the original delivery.
In practice, it has been revealed that a bearing from a VAZ-2108 may be suitable for the LADA Kalina hub, but it is a few hundredths of a millimeter narrower. Experts do not advise leaning towards this alternative, since there have been cases when the product rotated inside the hub.
How to replace the front wheel bearing yourself without a press
Failure of the vehicle element in question worsens the technical characteristics of the car, increasing the risk of destruction of the wheel fasteners. At the same time, controllability deteriorates greatly, increasing the risk of an accident.
To avoid trouble, it is important to react in time to the symptoms of a malfunction:
- wheel play (lateral/axial, may be accompanied by uneven wear of the tire tread, the car pulling to the side, steering wheel vibrations);
- “humming” in the area (the nature of the sound changes along with the speed, can often be confused with a failure of the wheel alignment adjustment).
Independent work is possible. At the same time, experienced car owners recommend going to professionals when it comes to the chassis of the car - this affects safety.
Find out the cost of replacing a wheel bearing online in 3 minutes
Don't waste your time - use the Uremont search and get offers from nearby services with specific prices!Get prices
Replacing a wheel bearing yourself
The wheel bearing is checked sequentially. First, hang the wheel - this ensures the possibility of free rotation (a jack or lift can help).
Spin the wheel to eliminate the friction factor between the pads and the drum/disc; this can also cause extraneous noise).
At the last stage, grab the wheel edges, swinging the part towards/away from you (repeat the procedure, moving your hands 90 degrees).
When play is detected during the inspection process, you need to check the nut. For this work you will need the following tools:
- collar with a large shoulder;
- torque wrench;
- socket head of suitable size.
Be sure to study the specifications of the car you are working with. Find the tightening torque value there. After this, remove the protective cap, then the cotter pin. Ask an assistant to sit in the driver's seat and press the brake pedal. After this, check the tightening force using a torque wrench.
Replacing the front wheel bearing - “sound” test
Without visible play, focus on the hum.
How to find a faulty element? It's not easy to determine the source from the driver's seat. Here again you will need a second person to stand in an open area for a test run. Meanwhile, you move around it in different gears and in different directions. This is effective if noise is present even at low speeds.
This procedure is especially valuable when no play is detected - a hum remains.
The second option is for the assistant to get into another car, which will move along the highway at the same time as yours. Both of these methods cannot be called simple - they require certain skills.
Replacing the front wheel hub bearing - what to consider before starting work
If a problem is detected, a new chassis element must be installed. Don’t delay with this - delay threatens to significantly reduce the car’s controllability (you may be left without a wheel). In some cases, play can be removed by adjusting the axial clearance. To do this you will need a nut and other standard tools. Use high-quality lubricant from a reputable manufacturer. If a “sound” test reveals creaking, noise or knocking, installation of a replacement is inevitable.
The hub bearing “lives” for about one hundred thousand kilometers. The period is shortened due to excessive loads. Regular off-road driving accelerates wear.
about replacing the front wheel bearing
To prepare, gather the necessary tools, read the instructions, and watch the video.
Some experienced car enthusiasts do not need additional information - their acquired skills are enough for them. When you decide to carry out repairs yourself and are not confident in your abilities, prepare in advance. Specialized forums, consultations with auto specialists, and videos with step-by-step instructions will help.
If you decide to replace the front right wheel bearing yourself, prepare the following tools:
- socket wrenches and heads;
- hammer;
- pliers;
- vice;
- flat and figured screwdrivers;
- press-fit hub puller;
- locking wheel;
- gloves;
- lubricant;
- new spare part, etc.
Instead of a puller, a regular hammer will do, but without experience there is a high risk of damaging the machine elements and yourself.
Replacement
First, let's set priorities. If you just want to save money, so you do the work yourself without any experience, then this is a wrong decision that can lead to dire consequences. If you have experience and certain knowledge, you can safely do the repairs yourself.
In any case, we recommend watching the training video instructions, where you will be told in detail about all the nuances of such work. This way you will gain additional experience and useful knowledge.
After this, we proceed directly to the work of replacing the wheel bearings. There are several ways. We will tell you about each of them in more detail, and you will decide for yourself which option suits your skills and capabilities.
- The first method involves carrying out work without removing the steering knuckle from the car. But here you will definitely need a special puller to dismantle the bearings. The advantage of the method is that there is no need for subsequent wheel alignment adjustment. But this is the most inconvenient way. To press out and reinstall the wheel bearing, we recommend driving the car into an inspection hole.
- The second method will require removing the steering knuckle. A workbench will also be useful for removing the bearing. In this case, you will definitely break the collapse. If you don’t want to go to a service station after repairing yourself, use a couple of tricky tricks: Before removing the lower bolt of the strut and steering knuckle, apply marks;
- One mark will allow you to determine the position of the bolt;
- The second mark will be responsible for the position in the steering knuckle strut;
- During the reassembly process, try to ensure that the marks match each other as accurately as possible. This method allows you to simultaneously make adjustments to the chassis and check the condition of the components.
The third method will require removing the bearing along with the stand and dismantling it using a vice. This method is complex compared to others.
Before work, do not forget to turn on the handbrake and place wheel chocks under the wheels to avoid accidental movement of the vehicle.
- Remove the strut, knock out the tie rod ends and unscrew the fasteners of the upper support to the body of your car.
- Position the jack so that it does not become an obstacle during operation. It all depends on your personal understanding of comfort.
- The wheel bolts are unscrewed, after which the nut of the desired bearing is removed using a 13 mm wrench.
- Using a 17 mm wrench, you dismantle the caliper, which is secured with wire to prevent sagging on the brake hose.
- After this, the brake disc and ball joint are removed.
- The hub will now be knocked out of the steering knuckle, giving you access to the damaged bearing.
- All that remains now is to press out our problematic element using a puller.
- If you do not have a device such as a puller, use a metal tube whose diameter is slightly smaller than the diameter of the bearing.
- Clean the landing site, treat it with lubricant, after which you can install a new spare part.
- Reassemble in reverse order. Do not forget to simultaneously check the condition of various components, lubricate, change gaskets as necessary.
As you can see, there is a lot of work to do. Do not rush to conclusions regarding the ease or difficulty of such a task. If you want to do everything quickly, efficiently, without having any experience, contact the service station. Otherwise, be prepared to spend a whole day, or even more, on repairs.
conclusions
Replacing the front wheel bearing on a Lada Kalina, as it turned out, is not so difficult, but it still requires some knowledge in the automotive industry. As practice shows, some car enthusiasts install this product from a hub tuning kit from Brembo. It has improved characteristics and also lasts up to 50-60 thousand km. True, the price is also not small, one set costs about 2000 rubles.
Every Lada Kalina owner will have to replace the front wheel bearing at some point. This element may become unusable after 20,000 miles. Sometimes situations occur when a part “asks” for replacement before the designated interval. At this point, the quality of the hinge itself has a significant impact. Service manuals prescribe the need for replacement every 25-30 thousand km.
Dimensions and parameters of the hub bearing depending on the design
All joint venture designs have basic dimensions by which they can be identified, standard size for selection and identification. The tables and sketches present the two main standard sizes of parts, provide the parameters and their explanation
| No. | Designation on the sketch | Decoding |
| 1 | d | Inner ring inner diameter (mm) |
| 2 | D | Outer ring outer diameter (mm) |
| 3 | B | Outer ring width (mm) |
| 4 | b | Inner ring width (mm) |
| 5 | rx (min.) | Coordinate (X) of the mounting inner ring chamfer (mm) |
| 6 | ry (min.) | Coordinate (Y) of mounting inner ring chamfer (mm) |
| 7 | ℓ | Distance between load application points (mm) |
| 8 | m | Approximate weight (kg) |
| 9 | Ga | Axial clearance (mm) |
| No. | Designation on the sketch | Decoding |
| 1 | d | Inner ring inner diameter (mm) |
| 2 | Dw | Outer ring outer diameter (mm) |
| 3 | Df | Flange outer diameter (mm) |
| 4 | D | Outer ring outer diameter (mm) |
| 5 | Bi | Outer ring width (mm) |
| 6 | Pb | Flange bolt center hole circle diameter (mm) |
| 7 | Ba | Outer ring width with flange (mm) |
| 8 | b | Inner ring width (mm) |
| 9 | rx (min.) | Coordinate (X) of the mounting inner ring chamfer (mm) |
| 10 | ry (min.) | Coordinate (Y) of the mounting (mm) of the inner ring of the chamfer |
| 11 | ℓ | Distance between load application points (mm) |
| 12 | m | Approximate weight (kg) |
| 13 | Number of bolts in outer ring flange (pcs) | |
| 14 | Ga | Axial clearance (mm) |
Recommendations
If necessary, replace the Kalina front wheel bearing; all connections should be cleaned during reassembly. Removing dirt allows you to increase the service life and improve the quality of fit of parts and elements;
We also recommend reading the article on how and with what to lubricate a wheel bearing. In this article you will learn why you need to lubricate your wheel bearings, as well as how to lubricate your wheel bearing.
During the process of reassembling the connections, it is also important to fill them with lubricant. Graphite lubricant (graphite) is well suited for these purposes. Additional lubrication also increases the service life of parts, and also greatly simplifies subsequent disassembly.
Why did it happen so?
Perhaps the automatic requests do not belong to you, but to another user accessing the network from the same IP address as you. You need to enter the characters into the form once, after which we will remember you and be able to distinguish you from other users exiting from this IP. In this case, the page with the captcha will not bother you for quite a long time.
You may have add-ons installed in your browser that can make automatic search requests. In this case, we recommend that you disable them.
It is also possible that your computer is infected with a virus program that is using it to collect information. Maybe you should check your system for viruses.
If you have any problems or would like our support team, please use the feedback form.
Tools:
- Tubular socket wrench 17 mm
- Straight box spanner 7 mm
- Straight box spanner 17 mm
- Driver for socket attachment
- Knob attachment 30 mm
- Large flat screwdriver
- Beard
- Large hammer
- Shoes
- Jack
- Support posts
- Soft metal drift
- Vise
- Dull chisel
- Double jaw puller
- Cup puller
- Circlip pliers
- Needle file
- Wheel key
Parts and consumables:
- Bolts M12x1.25 mm, length about 130 mm, 2 pcs.
- Front wheel bearing
- Brake disc
Note:
The work can be carried out on a flat area, but it is more convenient on an inspection ditch or overpass.
1. You can replace the bearing in two ways - on the car, without removing the steering knuckle and thereby not disturbing the wheel camber angle, or by first removing the steering knuckle. The work is shown on the right wheel bearing. The left wheel hub bearing is replaced in the same way.
2. Loosen the wheel bolts.
3. Use a screwdriver to pry off the protective cap of the wheel hub.
4. Remove the protective cap of the wheel hub, which is fitted with a rubber O-ring.
5. Use a beard to straighten the dented collar of the hub bearing nut in two places.
6. Apply the parking brake, engage first gear and place shoes under the wheels.
7. Use a 30mm socket to loosen the hub bearing nut. The nut is tightened with a large torque, so the head and driver must be strong enough to transmit the necessary force.
