The injection method of supplying fuel to a car has a number of advantages over the traditional carburetor method. That is why many owners of older generation cars want to install an injector on their car instead of a carburetor. These are indeed quite sensible thoughts, but only if you are going to register everything correctly with the traffic police or will not drive onto public roads. The fact is that today cars cannot be converted independently; for each change in the technical base, you need to obtain permission from special organizations. But no one will give you permission to install injection injection on a carburetor engine. Therefore, you can immediately abandon this process if you are afraid of problems with traffic police officers while operating your car on public roads.
If you are not afraid of the registration procedure or problems with the traffic police, then you can achieve considerable benefits by installing simple injection equipment. It is enough to purchase a set of necessary parts, carry out the work, check the necessary settings and obtain the required quality of vehicle operation. Operating a vehicle will become much more convenient if you use modern fuel supply systems. There are several important advantages that the car driver receives in this case. However, all benefits are offset by the fact that this modification is not official and cannot be registered. Many lawyers can challenge this point, because the size and type of engine does not change. True, the number of horses changes, which determines the transport tax.
Benefits of installing injection equipment on cars
Direct fuel injection has a very positive effect on the dynamics of the car; the vehicle turns out to be of sufficient quality and can be used in various conditions. You are not afraid of high temperatures, the carburetor or fuel pump will never overheat again, as often happens on old cars. But these are not all the important advantages that the driver of a car with an injector instead of a carburetor receives. It is important to remember the following features:
- the car’s power becomes higher, this is especially felt when you press the trigger for the first time, as the car accelerates much better and demonstrates excellent dynamics;
- the quality of response to pressing the gas pedal also changes, this improves dynamics, increases driving comfort, and expands travel options;
- another important advantage is the reduction in fuel consumption, a car with a carburetor has 10 liters or more, an injector can get by with 7 liters;
- the car becomes unpretentious to the quality of fuel; you only need to occasionally clean the injector nozzles to obtain the desired quality of operation of the power unit;
- Maintenance of this system, if implemented correctly, is quite simple; you only need to occasionally contact specialists to solve the necessary problems.
Installing an injector instead of a carburetor will solve many problems for your car. It must be recognized that transport can actually be operated well without any particular difficulties or problems. But for this you need to professionally supply all the equipment. Otherwise, the car will not be able to function normally and will not receive the most flattering driver reviews about its technical advantages. Sometimes crookedly installed parts cause very serious engine problems.
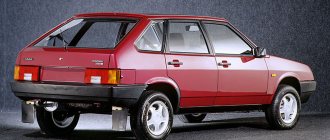
Comparative characteristics for VAZ-2109
| Specifications | Injection engine | Carburetor engine |
| Cylinder diameter (mm) | 83 | 76 |
| Motor power (kW) | 78 | 64 |
| Average fuel consumption (l/100 km): | ||
| around town | 9 | 10 |
| along the highway | 7 | 9 |
| Acceleration to 100 km/h (sec.) | 13 | 16 |
| Maximum speed (km/h) | 160 | 145 |
Perhaps there are also personal reasons to convert your VAZ-2109? For example, there was a desire to rummage through the car for my own pleasure. One way or another, if you firmly decide to change the carburetor to an injector, move on.
What spare parts are needed to convert to an injector?
The issue of purchasing the necessary spare parts for converting a carburetor car to an injector is quite complicated. It is important to stick to the quality parameter. If you buy low quality equipment, you will have to accept that the car will perform very poorly. It is worth taking this into account when applying for disassembly, where you are unlikely to be able to find the best options for technical means. The main spare parts are as follows:
- a new throttle valve with a new drive and type of control, which is suitable for installation in fuel injection type fuel injection and will not jam in operation;
- a ramp with installed injectors for subsequent adjustment of all parts, with connected pipes for supplying fuel to the combustion system in the engine;
- on-board computer, which is one of the most important elements of the system and offers sufficiently high-quality solutions to perform each task;
- new wiring, which will include the BC and other control elements, and will also allow diagnostics by connecting computer equipment;
- a new fuel pump, which will be able to develop the required pressure in the system, will allow fuel to be supplied to the injectors with sufficient parameters and characteristics.
It is necessary to take into account the quality of the spare parts purchased. For example, it makes no sense to buy a used gas pump. Such an element will not be able to survive for a long time in your car. You can safely give preference to used injectors if you can visually distinguish high-quality parts from low-quality ones. Sometimes it is better to use the help of a specialist with extensive experience.
What to prepare to change
The whole process will take you about a week, provided you work 3-4 hours a day. Therefore, prepare your garage in advance and buy everything you need. You can assemble the injector on different ECU controllers, but in the case of the VAZ-2109, the January 5.1.1-71 model is better than others. Available domestic spare parts can be used for it, and it does not use an adsorber and an oxygen sensor.
List of components required for replacement
| 1 | Oil pump (with mounting for PCV sensor) |
| 2 | bracket |
| 3 | V-belt |
| 4 | Wiring |
| 5 | Thermostat |
| 6 | Ignition system module |
| 7 | Upper and lower air filter housing |
| 8 | Fuel and air cell |
| 9 | Intake manifold |
| 10 | Two air filter supports |
| 11 | Throttle pipe |
| 12 | Receiver |
| 13 | Gasket for throttle pipe |
| 14 | Fuel pressure control |
| 15 | 4 nozzles |
| 16 | Injector ramp |
| 17 | Intake manifold gasket |
| 18 | Mounting kit for receiver and air filter |
| 19 | Ramp tube set |
| 20 | Throttle cable bracket |
| 21 | Throttle cable |
| 22 | Hose |
| 23 | Air flow sensor |
| 24 | Fuel hose kit |
| 25 | Electric fuel pump |
| 26 | Controller January 5.1.1-71 |
| 27 | Knock sensor |
| 28 | Crankshaft pulley |
| 29 | Crankshaft position sensor |
| 30 | Gas tank |
| 31 | Plug with gasket |
| 32 | temperature sensor |
| 33 | Fuel pump pressure ring |
| 34 | Generator with mountings |
Also pick up bolts, nuts and clamps from the store that you will need for the job.
Tools
The repair will consist not only of dismantling some components and mechanisms. In some cases, it will be necessary to make changes to the design of cylinders and other parts.
From the tool you will need:
- Set of wrenches.
- Flathead and Phillips screwdrivers.
- Good drill.
- Hammer and chisel.
- Rust remover.
Installation and configuration of all elements of the injector system
After removing the old carburetor, you will be ready to install injection equipment. This is a rather complex process that requires concentration and a certain professionalism. It will take a good technician half a day to install and configure all the elements, unless additional problems arise. If a person without experience is involved in the business, the time spent will increase. The main processes are as follows:
- installation of basic fuel equipment taking into account all necessary clearances, absence of backlashes and other installation troubles in order to avoid problems;
- installing the computer on the car body in a safe place, as well as installing the gas pump in the tank (sometimes you will have to get a new tank to complete the task);
- if necessary, laying the gas pipeline in a safe place, as well as planning the wiring with its location and high-quality fastening;
- connecting all elements, making the necessary connections, installing an injection-type air filter, visually checking all parts;
- setting up the computer, making the necessary changes in accordance with the technical parameters of the engine and other features of the vehicle equipment.
It is important to use high-quality on-board computer firmware and fully configure the equipment, otherwise you will soon have to say goodbye to the possibility of normal operation of the car. At the same time, incorrect settings will also cause problems such as increased consumption and poor vehicle dynamics. That is, the meaning of installing an injector will be too veiled, and you will not receive any special benefits.
How to remake: step-by-step instructions
Before starting work, wash the car thoroughly and remove dust and dirt from around the engine.
- In the rear of the car we remove the old carburetor fuel system.
- Pull out the gas tank and fuel pipes.
- We screw on the new bracket and use it to secure the new injection lines.
We install the bracket in its original place and secure the lines - We install the fuel filter along with hoses.
We fix the fuel filter with hoses - We attach the fuel pump to the injection gas tank.
- We go into the engine compartment and remove the ignition.
- We disconnect the wires that go from the sensors to the ignition braid.
- We pull out the old ignition tee and install an injection tee in its place. Before doing this, completely drain the antifreeze from the system.
We install the injection ignition tee in place of the carburetor - In place of the distributor, we make a plug with a seal and treat it with sealant.
- Remove the carburetor along with the intake manifold.
We dismantle the old carburetor along with the manifold - We replace the gasket and install a new injection manifold.
We install the injection manifold in place of the carburetor - We install the injectors on the ramp and secure it to the manifold.
- We connect the hoses and install the receiver.
We install the injection receiver and connect the hoses to it - If your model has an oil pump without a casting, then it also needs to be replaced.
- The generator on the nine must be replaced, but the pulley itself is suitable for the new system and can be left.
- Instead of a carburetor ignition cable, we install an ECU wiring cable.
- We connect the wiring to the controller and the motor.
- In our case, the fuel sensor will remain the same; you just need to connect it to the new pump.
- Turn on the ignition and check the operation of the fuel pump. The entire fuel system must be sealed and leak-free.
- We replace the carburetor module with an injection one.
We remove the carburetor ignition module and install the injection module in its place - We install a new ignition system (spark plugs and module).
- We install the air filter.
- Drill a hole for the knock sensor (depth 16 mm).
- We start the engine and check its operation.
First start-up and testing of all systems of the new technical unit
After installing and configuring all the equipment, it is worth once again visually checking the correct installation of each module and checking whether any important parts are clogged. After this, you can start the car engine. During the first start, do not touch the gas pedal; the computer itself should increase the speed at the right moment. If the start-up has occurred, then you should make the following observations while the car is running:
- monitor the revolutions - if you have a tachometer, this will help determine the normal operation of the computer; until the car warms up, it holds 1100 revolutions, then 900-950;
- also monitor the smooth operation of the power unit; if the engine is running unevenly, you will have to inspect the system, clean and sort out each module;
- you should let the car warm up to operating temperature, and then listen to the engine, monitor the fan turning on and other vehicle functions;
- It would also be a good idea to perform a test drive, starting off very carefully and listening to the operating characteristics of the engine and other equipment; It’s not worth driving far during a test ride, but you’ll have to circle around a few kilometers to obtain the necessary information about the operation of all systems.
After installing the injector, you can also install a small on-board computer to determine fuel consumption, engine temperature, distance traveled and other important parameters. This will allow you to always be aware of what is happening with your car. It is important to use up-to-date data to always keep control of everything that happens to your car. We offer a short video about the advantages of installing an injector on a classic VAZ engine:
Injector versus carburetor, reasons for replacement
Many car enthusiasts are extremely tired of the need to frequently clean the carburetor. By adding the ability to autostart in winter, regardless of sub-zero temperatures, complemented by a reduction in fuel consumption, we get the rationale for switching to an injection engine.
So, let’s take a closer look at why the redesigned mechanism is attractive:
- The engine starts without problems in any weather conditions. Even in cold weather the engine starts easily;
- ignition and quality of the fuel-air mixture no longer require adjustment;
- uniform engine operation appears, characterized by the absence of noticeable jerks and unpleasant jerking;
- fuel consumption is reduced;
- although very slightly, throttle response improves.
However, the disadvantages of such a transformation should also be taken into account:
- Replacing simple mechanics with advanced electronics requires a variety of sensors. Often, a non-professional finds it difficult to determine which one has failed;
- The rather significant financial costs of re-equipment do not pay off immediately.
If, after carefully weighing the above arguments, you are determined to remake an outdated carburetor engine, replacing it with an injection engine, follow the suggested recommendations. By carrying out a difficult transformation yourself, you can save on the services of car service specialists.
Let's sum it up
Modern cars all have fuel injection. Carburetor cars, which were too voracious and very undynamic, have not been produced for a long time. Today, the injector has become the main type of fuel injection in gasoline engines. Until automotive technology comes up with anything more interesting, it is worth using this particular equipment option. When choosing an injector for your car, you can select equipment removed from a high-quality foreign car. This will provide even more interesting opportunities for operating transport and will actively change the attitude towards technology.
It is important to use high-quality equipment, otherwise installing an injector will turn out to be another problem for your car. If you want to operate your vehicle without problems, you need to get rid of the carburetor as a relic of the past. This unit will not be the most reliable and far from the most successful for every motorist. So buy injection equipment and modernize your vehicle. However, it is worth following innovations in laws and checking whether such conversion options are included in the list of prohibited ones. What do you think about installing an injector instead of a carburetor?
How to replace the generator on a VAZ 2108-VAZ 21099?
Removal: You will need to remove the generator from the bottom of the car, but there is usually a crankcase protection at the bottom, so you will definitely need to remove it, as soon as the bolts securing the protection are unscrewed and it is removed, remove the minus terminal from the battery (How to do this, read “here in this article”, in paragraph 1) and first of all, disconnect the wiring from the generator (two terminals are attached to it and a block of wires is connected in addition, to disconnect the terminals, you will need to unscrew the nut that secures them, see the large photo, but you are near the block you will find it, you just need to pull it out by hand), immediately after which loosen the upper nut of the adjusting bar, and then the lower one a little (see small photo) and as soon as this is done, move the generator by hand closer to the engine and remove it from it the belt that is put on it, but that’s not all, and until the generator is removed, all that remains is to completely unscrew only three bolts, one is the one that secures the adjustment bar (Indicated by a blue arrow, you will have to completely unscrew it), and the other two are located at the bottom ( More on them a little later, namely in paragraph 2).
Note! When the belt is removed, take it out and inspect it, under no circumstances should there be traces of oil or other types of liquids on it, and it should not be cracked or have any obvious defects, otherwise the belt will need to be replaced with new!
2) At the very bottom of the generator (You will have to crawl under the car), you will find two bolts, but remember, one of them is long and the other is short, remember where each one is wrapped, so that later you do not match them with each other, but immediately wrap them on those places where needed, well, both bolts must be unscrewed, and when they are completely unscrewed, carefully remove the generator and place it on the ground or wherever you need it.
Installation: The new generator is installed in place of the old one in exactly the same way, but just don’t forget to unscrew the nut that secures the adjusting bar on the generator and move this bar to another one, and that’s all in essence, the replacement of the generator on the car has been completed successfully.
Additional video clip: To see in more detail the process of how the generator is checked for serviceability using a device such as a multi-meter, you can watch the video clip located just below:
