Why install a new power unit?
Installing a new engine can be useful for those motorists who want to improve their outdated car. Many domestic car enthusiasts know that the “nine” has pretty good driving characteristics, requires little gasoline and is generally not as demanding to maintain as foreign cars, which is why it is often tuned. Replacing an engine from an 8 cl to a more advanced model has its advantages:
- Increased power.
- Improved driving characteristics at high speeds.
- Efficient use of fuel due to the injection system.
- More stable operation of the power unit.
- No constant valve adjustment required.
- You need a lot of parts and tools to replace them in your garage.
- At low speeds the 16 cl engine is slightly worse than its 8 valve counterpart.
There are two replacement options here:
- Installation of the entire engine from the 2112 model. In this case, not many parts will need to be replaced, but the cost of the entire engine may discourage this idea.
- Modification of the cylinder head for new components. This is a more economical, but very labor-intensive process.
Return to contents
Basic faults
Almost all VAZ 2109 engine failures, no matter what type it is, are associated with malfunctions of 3 systems:
- Lubrication systems.
- Cooling systems.
- Gas distribution systems.
In cases where the lubrication system is faulty, the engine oil does not lubricate the rubbing parts well, which causes them to wear out quickly, scuffs appear on their surfaces and a knocking noise occurs in the engine. Any knocking noise in the VAZ 2109 engine is a very bad sign, especially when it comes from below. If the main or connecting rod bearings are knocking, you must immediately stop and go to the service station in tow, since otherwise the engine may simply jam. If the source of the knock is located in the cylinder head, then you can go to the service center yourself, at low speeds.
If the cooling system malfunctions, the power unit overheats, as a result of which the cylinder head gasket and valves burn out, the cylinder head becomes bent and the piston rings become stuck. If there is severe overheating, the block may simply jam. The main malfunction of the timing mechanism is a broken drive belt. Since on 1.1- and 1.3-liter engines a broken timing belt leads to bending of the valves and major repairs of the head, it needs to be changed every 30-60 thousand kilometers, regardless of the condition. This repair is very simple:
- First, the engine protection is unscrewed.
- Then the alternator belt is removed.
- After this, 3 bolts are unscrewed and the front timing drive cover is removed.
- Next, the mark on the camshaft pulley is aligned with the mark on the rear drive cover.
- After this, the nut is unscrewed and the crankshaft pulley is removed.
- Then the nut securing the tension roller is loosened. It is moved to the side, and the toothed drive belt is carefully removed first from the camshaft pulley, and then from all other pulleys.
- The new belt is placed first on the crankshaft sprocket, then on the camshaft pulley, and only then on the pump gear and tension roller.
- After this, the crankshaft pulley is screwed on and the belt is tensioned by turning the roller and tightening its nut.
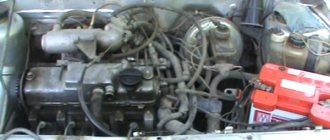
Standard tuning of the VAZ 2109 carburetor power unit involves installing an injector. And on injection engines you can install lightweight connecting rods, pistons and a crankshaft with a flywheel.
We install the finished engine
We put the 2112 engine on the “nine”, since the power units of the models are similar to each other. You will also need a fuel pipe of a suitable diameter (you can take a steel one, but copper is better) and a gas tank from the same 12th model. The following work is carried out:
- We dismantle the old power unit, disconnect all pipes and electronics. In order to remove and install the engine, a crane is needed for convenience, since the entire assembly is heavy. This is a major problem in the garage.
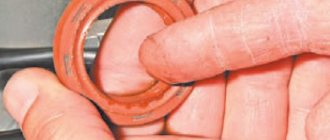
- When the engine is removed, you can install a new one in the seat. It is worth immediately checking the condition of the seals and gaskets if the unit is used. Also check the belt tension.
- Next you need to replace the entire fuel system: tank, fuel pump, fuel lines.
- An excellent replacement for the “nine” tank is the analogue from 2112. The parts are the same in size, but their design is different, which is not an obstacle to installation.
- For fuel lines you need to take copper tubes, which bend better.
- Now you can start wiring the injector. If the “nine” was produced in 2002 and younger, then there will be no special problems with connecting the wires, but for older models you will have to make new holes manually.
- You need to install an absorber and a gasoline filter. They are usually placed under the bottom and secured with studs.
- We install the sensors, change the wiring to one that is suitable in length.
- Installing the generator will have to work hard, since the original mounts do not fit. Find suitable ones, replace them and you can install them. If the gearbox is not changed, then it will have to be sharpened with a grinder.
- The starter will have to change the bendix from 12 to 9 teeth.
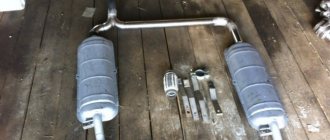
- The last modification is the exhaust system. The pipes will not fit, so they will need to be welded. Fitting helps put all the parts in place.
Return to contents
Replacement
Now we move on to replacing elements. Doing it yourself or contacting a car service is purely your personal decision.
For the VAZ 2109, the use of three supports is provided:
- Front;
- Rear;
- Left side.
The replacement of each of them should be discussed separately, since the processes differ from each other.
Replacing the rear cushion
- Find a suitable place to carry out repairs. You will need a pit or overpass.
- Place the car there, secure it with stops, and put the car on the handbrake.
- Disconnect the negative terminal from the car battery.
- Using a 17mm spanner, unscrew the nut that holds the cushion to the body.
- Using a 17 socket, remove the mounting nuts of the support bracket to the gearbox. There are 3 of them in total.
- Remove all the bolts and remove the old engine mount.
- Install a new motor element and reassemble the unit.
Dismantling works
Side left pillow
Left element
- Provide yourself with free access to the bottom of your VAZ 2109.
- Secure the vehicle with jack stands and the handbrake.
- Disconnect the minus from the battery.
- Remove the left engine splash guard.
- Using a 17mm spanner, remove the nut that holds the cushion to the body.
- Using a 17 socket, unscrew the 3 mounting nuts of the support bracket, removing them from the gearbox.
- After removing the mounting bolts, replace the worn engine mount with a new one.
- Carry out the reassembly procedure. Stick to strict consistency.
Replacing the front airbag
Here, follow all the same conditions that were relevant for previous works. That is, drive the car into a pit, place supports and turn off the power to the car by removing the negative terminal from the battery.
- Using a 17mm spanner, remove the nut holding the cushion to the body.
- Using a 17mm wrench, remove the 4 fastening nuts securing the airbag to the engine.
- Remove the rubber element from the eyelet.
- Place a new support in place of the old unit.
- Reassemble the unit.
When replacing engine mounts, be sure to make sure that the new mounts meet the quality and size requirements. It is also recommended to thoroughly clean the seats before installing a new element, which will extend the service life of the new motor mounts.
Replacement does not require special skills, special tools or special conditions. Therefore, VAZ 2109 owners often change the pillows with their own hands. But if you are not confident in your abilities, contact a trusted car service center.
Which of the VAZ 2109 airbags do you consider the most difficult to replace?
- Front support
- Back cushion
- Left (side) engine mount
- They are all very easy to change
Cylinder head modification
Installing a 16-valve engine on a VAZ 2109 will be much more difficult if you replace individual parts.
- A 16-valve cylinder head with a corresponding receiver (the kit must include a manifold with a knock sensor, a throttle valve and a pressure switch);
- another fuel supply system: gas tank, fuel line, ramp with suitable injectors;
- electronics kit - wiring, controller;
- new sensors for thermostat, oil level, crankshaft position, phases;
- mechanics: thermostat, pulleys for the camshaft, pistons with finished rings and pins, connecting rods, pulley for the crankshaft;
- complete replacement of the exhaust system;
- power supply: generator with suitable tensioners, generator drive;
- other parts: throttle pipes, idle speed regulator, housing for the oil pump with a cast-in mounting location for the crankshaft sensor.
All parts must be suitable in power to work with a 16-valve engine and injection system. The kit is impressive, and there is even more work to complete the VAZ 2109 with 16 valves. Engine conversion begins:
- We dismantle the following elements: the old cylinder head, the gasoline tank, the fuel system pipes, the entire ignition along with the generator and thermostat. Remove all belts and pulleys.
- We install the tank and fuel pump first.
- You need to remove the carburetor and wiring and replace everything with new parts.
- We turn off the cooling, the system should be replaced with an analogue of the 2112 model.
- We remove the pallet. We replace the pistons and connecting rods of the “nine” with a set from the 12th VAZ.
- Let's start replacing the oil pump; it is advisable that the new one has a molding for the crankshaft position sensor.
- Let's prepare to install the 16-valve cylinder head. The mounting points match, but the bolts do not fit, they need to be made shorter. You also need to drill 12 mm holes if there are none.
- We replace all the fuel lines with new ones, then connect them to the tank. We connect the ECU to the fuel pump.
- We make holes in the block to install a new element: a knock sensor. You also need to cut an 8mm thread.
- We change the pump, crankcase ventilation breather and oil dipstick - all from 2112.
- We put a new cylinder head with 16 valves in the seat. If it does not fit tightly, you need to trim all the protrusions at the joints.
- The best replacement for the thermostat is a similar spare part from Lada Samara. We change.
- We install the cooling system pipes.
- Install the rear timing cover and rollers. We tighten the belt and pulleys from 2112.
- We install the generator and its drive in its place. To put the part in place, you will need a lower bracket, a generator mounting bolt and an upper tensioner, like the VAZ 2108. We do not touch the upper fastening, just tighten the two lower bolts.
- We put all the sensors in their places.
- You will also need a new thermostat sensor that works with the injection system.
- We put the valve cover in place and coat it well with sealant.
- We install the ignition. Next we work on the receiver, installing the corrugation and throttle.
- Install the air filter and throttle cable. The part from 2110 will fit.
- We install the exhaust elements.
- We connect the wires to the tidy and ignition switch.
- Fill in all liquids - antifreeze, oil, fuel.
The motor is ready for use.
It’s easier to install a power unit from a VAZ 2112. Of course, you will need a crane to pull out the engine itself, but this is nothing compared to the work that will have to be done to modify the “nine” unit.
Source
What is needed for such an upgrade?
- cylinder head 16V,
- equipped with collectors and receiver,
- knock sensor,
- a throttle pipe having a throttle position sensor, an idle speed regulator,
- DMRV,
- exhaust pipe with DC,
- thermostat with sensor,
- both videos
- camshaft pulleys,
- phase sensor,
- timing cover,
- wiring kit,
- controller,
- fully equipped fuel line and gas tank,
- oil level indicator and sensor,
- HF position sensor,
- ramp with a set of nozzles,
- pistons with rings and pins,
- generator with brackets and tensioner,
- crankshaft pulley,
- connecting rods,
- generator drive,
- oil pump housing with ebb for HF position sensor,
- exhaust system included.
VAZ-2108: Difficult, but possible
Is it possible to install a 10-liter sixteen-valve engine with a volume of 1.6 liters on a VAZ-2108?
Theoretically, such a replacement is possible, but this will require a fairly large number of new parts. You need the 21124 engine itself assembled with attachments - a crankshaft pulley, a generator with brackets, a plastic receiver, a ramp, ignition coils, a thermostat and a coolant supply pipe, an air filter housing, intake and exhaust manifolds). In addition, you need an electronic engine control unit Bosch M7.9.7 (factory index 21124-1411020-30) or “January” - manufactured by AVTEL (21124-1411020-31) or ITELMA (21124-1411020-32), wiring from the ECU to all sensors and several sensors themselves (speed, mass air flow (MAF), lambda probe), as well as a tank for the injection version and an electric fuel pump with a pressure regulator, a fuel line laid along the bottom (supply), a set of fuel hoses, a fuel filter and a receiving pipe (“pants”) from VAZ-21124.
| On a V8 with an eight-valve injection engine 2111, only the engine and its ECU need to be changed. |
In addition, in cars with a 21124 (Euro 3) engine there are two catalysts - the so-called cat-manifold in the exhaust manifold and a conventional catalytic converter after the exhaust pipe.
Of course, such a procedure will not be cheap, but there is also a legal nuance. Since the manufacturer did not produce such cars, in accordance with clause 38 of the Vehicle Registration Rules, the modification must be agreed upon with GosavtotransNIIproekt or the Research Center for Road Safety of the Ministry of Internal Affairs. Having examined the technical feasibility of re-equipping a particular vehicle, specialists will give appropriate permission to carry out this operation. Then you need to re-register the vehicle with the MREO at your place of residence, where a different engine size will be entered into the new technical passport.
We install an engine from Lada Priora on a VAZ 2115-13
Let's see today how to install a Lada Priora engine on these VAZ models. First of all, we need to dismantle all attachments: exhaust manifold, receiver, etc. Then install the engine on its standard mounts and connect it to the control gearbox. We purchase a standard ramp so as not to experience problems when changing the fuel pump and laying a new fuel line.
In addition to the ramp, you will also need to purchase fuel injectors, which are longer. But we don’t connect the ramp directly to the engine. We first need to install the receiver: this process is labor-intensive, you need to tighten all the airbags and lift the car with a jack. Having inserted the receiver, insert the ramp with the injectors. We screw the ramp when the injectors are inserted into their wells. And only after that you can put the receiver in its place and secure it. The work must be done carefully so as not to damage the rubber seals on the receiver. Then we put the attachments in their standard place. Let's move on to the electrical wiring. The first step is to disassemble the ignition. Since the car does not have four ignition coils, we will leave the standard coil; we will take only high-voltage wires from the Priora. The wiring will have to be increased by about 40 centimeters, since its length may not be enough. This also applies to the phase sensor. Now about the exhaust. We remove the standard exhaust manifold with the catalyst and install the Spider 4-2-1 system, which has holes for the DC. After inserting the corrugation there, it is necessary to completely replace the exhaust pipe and modify the standard can.
Now let's move on to the cooling system. On Lada Priora, this system is significantly different from 2113-15 models, so it will be better if you install a radiator from Lada Priora.
You don’t have to change the thermostat and leave it as standard, you just have to reconfigure it correctly. If the cooling fan is in contact with the receiver, we install a Niva fan instead - it has two impellers on the outside. We also change the hoses on the radiator. There is no need to change the alternator belt, and the alternator itself is mounted on standard mounts.
The injectors will have to be flashed and calibrated, after which the engine will start working normally. The decorative grille of the engine can be left in place, only the necessary cuts must be made on the front side. We also recommend purchasing and installing a brace with a 4th mount for the power unit, this will strengthen the entire structure, and significantly. And it won't cost much.
When all installation work has been completed, fill in the oil, install new filters and begin running in the engine. At first, you should not accelerate the engine to maximum speed, since at this stage the engine components are grinding in, and excessive load can deform the parts, as a result the engine may even fail.
We recommend changing the engine on a lift; it’s much more convenient to pull out the original one and install a new engine. If the new engine was installed correctly and everything was assembled correctly, with a new heart your car will become much more powerful and faster.
Work order
All operations can be performed without removing the block, but it will be much more convenient to work if you remove it.
- The cylinder head is removed, all fuel pipes, the standard gas tank are completely dismantled, the thermostat, generator, all belts and pulleys are removed.
- The cooling system pipes are disconnected. Some of them can be used, but you shouldn’t be greedy, because the kit for the VAZ 2112 engine is quite inexpensive.
- The tray is removed. The old pistons and connecting rods are replaced with pistons for floating pins from the 12th model and “tenth” connecting rods. This replacement is due to the fact that the old pistons have a lower compression ratio, and there are no special recesses for the valves of the new cylinder head.
- The oil pump is replaced with another one, on the cover of which there is an ebb for DPKV. Of course, you can only replace the cover, but it cannot be removed without a powerful hex wrench.
- New cooling system pipes are being installed. It is recommended to replace the entire set; it is rational and inexpensive, although you can leave some old pipes. There is no need for a sensor that turns on the fan.
- Preparations are being made for installation of the 16-valve head. Despite the fact that the location of the fasteners is the same, you will still have to shorten the bolts from the previous head, and drill holes in the new one with an x12 drill.
- The fuel line is installed from the model with an injection engine (08, 99) to standard places.
- The fuel tank is installed in place and connected to the lines. The wiring to the fuel pump from the control unit is installed. The fuel level sensor wires can be left as old.
- To avoid lengthening the new wiring, you can cut a hole in the wall of the engine compartment during its installation, as in the VAZ-2110.
- A hole is drilled in the block to install the knock sensor, in which an x8 thread is cut.
- A pump from a VAZ-2112 is installed.
- for crankcase ventilation, it is replaced with a new one from the VAZ-2112, it is purchased complete with an oil dipstick.
- The head is mounted, and the old gasket is replaced with a new one for the new head. Before installation, it is advisable to prepare the collectors and head, for which you need to remove all protrusions at the interfaces, and walk through the channels with a roller cutter to reduce the resistance inside them.
- The thermostat is installed from the Samara injection engine - 21082.
- The cooling system pipes are connected.
- The rear cover of the timing mechanism, pulleys and rollers from model 2112 are mounted. The belt is installed according to the marks, the generator and its drive are mounted. The upper tensioner, pain and lower bracket are from the injection “eight”, the whole set is sold as a set.
- All sensors are installed in place. The temperature sensor remains old, and for the thermostat you need to buy a new one, designed for an injection engine. Other sensors also need to be purchased new. How to install them, as well as a description of the features of their installation can be found in specialized literature.
- The valve cover is mounted with sealant. The ignition module, receiver, wires, throttle and corrugation are put in place. Next, the wiring to all sensors is installed. The air filter is installed in place, the throttle drive cable from 21103 is installed.
- The exhaust system is being installed. You can keep the old muffler, but the manifold, “pants” and resonator will have to buy new ones.
- The wiring is connected to the lock and the dashboard. Oil is added, the cooling system is filled, and the tank is filled with gasoline.
But before starting such a rework, it is necessary to answer the main question: is the game worth the candle? At disassembly sites you can find ready-made 12-valve engines from the VAZ-2112. And if in Russia, in the process of legalizing such a modification, you may encounter some problems, then in Ukraine, the engine for a car is considered nothing more than an ordinary spare part.
Most owners of the “Nine” know that you can install a 16-valve engine on a VAZ 2109, thereby improving the driving characteristics of your car at high crankshaft speeds. Is it worth doing this, and how to bring the idea to life?
Lada 2109 Devyaton 16v › Logbook › Installation of a 16 valve engine in a VAZ 2109
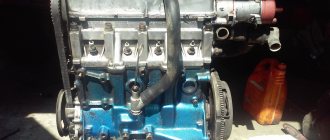
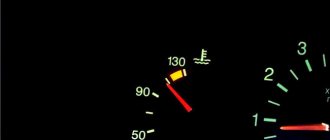
Hello everyone, when I first bought the nine, I knew that it would have 16 valves, but in the future. In February 2022, I was driving from point a to point b, I was driving, and then the engine stalled and wouldn’t start, I checked for breakdowns: spark, injection, sensors, everything was fine. I called a friend, they towed the car with him to the nearest service station, after a long time and useless attempts to start the engine, I told the servicemen to lift the car and look at the knee, they reluctantly agreed to lift the car, the knee was standing tight. And then I had 2 ways to repair my engine or a more interesting option is to install 16V. I chose option 2. The 16V engine had been lying in the garage for a long time and was waiting in the wings)) Below I’ll tell you how it all happened. Let's start. Engine VAZ 2112 16 valves 1.5. The main differences between the 2112 engine and the 2111 are the use of 4 valves per cylinder, 2 camshafts, this allows the engine to supply more fuel-air mixture to the combustion chamber at a time and quickly remove exhaust gases to the exhaust channel. Up to 3 thousand rpm, the engines operate approximately the same; after 3 thousand, 16V becomes much more dynamic. At the same time, fuel consumption is lower than on my standard 8 valve 2111. VAZ 2112 1.5 liter engine. injection in-line 4-cylinder with an overhead camshaft, the gas distribution mechanism is belt driven. Cylinder block 2112, the same as on 21083, but with modified mounts under the cylinder head and additional oil channels for the main bearings, the VAZ 2112 engine number is stamped on the block under the thermostat. The normal operating temperature of the 2112 engine is 90 degrees. The service life of the 2112 engine, according to the manufacturer’s data, is 150 thousand km; in practice, the engines run more than 250 thousand km.
It was necessary to find a master who would install the engine and I found such a person crazygarage. I bring the engine to him and the car on a cable and the work began. The engine was assembled, the missing spare parts were purchased such as: Valves Guides Cylinder head bolts New bolts securing the cylinder head to the block Timing belt with rollers Gaskets (a set for the entire engine) Many new clamps of different sizes Engine oil and filter Main and connecting rod bearings Antifreeze 10 liters Spider 4 2 1 Throttle 54mm Camshaft keys Knee pulley for the belt Pump Stretching and many other little things...
Features of engine disassembly
The first thing to do is to disassemble the engine as carefully as possible. This element of the car is the most valuable, so you need to disassemble the engine with extreme caution. It is best to carefully study the instructions and watch videos on the Internet about how craftsmen cope with this task, and only after that do the disassembly yourself.
Under the valve cover you can find many unpleasant defects, including the poor condition of the roller. The cylinder head may also not look its best, and the bushings may be so worn that many are surprised that they still work.
All this means that after the engine is disassembled, a lot of faults or worn parts can be found. It is best to replace each of them. This will increase the reliability of the car and will allow you not to worry that the increased power of the VAZ could become a fatal factor and lead to breakdown in the near future.
It is best to install bronze bushings. They are highly reliable and quite durable.
Engines VAZ 11183 and 21114
Engine characteristics 21114
Years of manufacture – (2004 – present day) Cylinder block material – cast iron Power system – injector Type – in-line Number of cylinders – 4 Valves per cylinder – 2 Piston stroke – 75.6mm Cylinder diameter – 82mm Compression ratio – 9.6 Engine displacement – 1596 cm cube Power – 81 hp /5200 rpm Torque - 125 Nm / 3000 rpm Fuel - AI95, 92 (According to unofficial data) Fuel consumption - city 8.8 l. | track 6.2 l. | mixed 7.6 l/100 km Oil consumption - 50 g/1000 km Oil type: 5W-30 5W-40 10W-40 15W40 How much oil is in the engine 21114 11183: 3.5 l. When replacing, pour 3.2 liters.