The efficiency of the stove and other parameters that affect the operation of the entire engine depend on the engine temperature. The temperature depends on the thermostat. A thermostat is a device that directs coolant through a large or small cooling circle.
- What is a thermostat?
- Engine cooling system diagram.
- Types of thermostats for VAZ.
- Injection thermostats.
- Which thermostat is better for VAZ 2114?
- Video.
Thermostat
A thermostat is a device that regulates temperature. Essentially, it is a shut-off and control device that opens, closes and changes the direction of flow of coolant. There are two cooling circuits in a car engine cooling system: large and small. The large circle is the circulation of fluid through the main radiator, and the small circle is the circulation of fluid bypassing the radiator.
The operation of the thermostat is regulated by a valve, which, depending on the temperature, opens one pipe and closes the second.
Purpose of the device
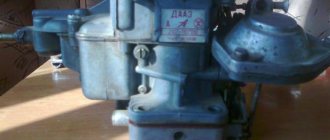
Thermostat for a VAZ-2114 car
Essentially, a thermostat is a large valve whose task is to allow (or, conversely, not to allow) coolant into the car radiator . When the car's engine has just started, it remains cold for some time, as does the coolant. During this period of time, the thermostat valve is closed, so that the coolant is directed in the so-called small circle. And when the engine temperature reaches 90°C, the valve in the device automatically opens and coolant begins to flow into the radiator. Thanks to this operating scheme, the engine temperature is kept at a constant level, and overheating is eliminated.
Types of thermostats
Externally, if you take the thermostats of the Niva and VAZ 2101 (kopecks), the differences will not be visible. They have differences inside, the pipes are located differently.
Types of VAZ thermostats:
- Thermostat 2101. The valve began to block when it reached 80 degrees, and fully opened when it reached 95 degrees.
- Almost the same ones are installed on the VAZ Niva, only the angle between the pipes is about 180 degrees.
- The VAZ 2108 thermostat is installed on all VAZ models with carburetor engines of various modifications. The thermostat valves of front-wheel drive VAZs operate 7 degrees later than those of classic models.
- The thermostat of the VAZ 2110 is the same as the classic one, but the pipes are located in a mirror image. There is no small pipe for air outlet.
- The VAZ 2112 thermostat is made for VAZ injection engines. The valve opens when the temperature reaches 85 degrees.
Scheme and design
In order to promptly determine the malfunction, check or replace the thermostat, you must first understand its circuit and design elements.
The scheme presented above is deciphered as follows.
| Item number | What is this? |
| 1. | Inlet pipe coming from the radiator |
| 2. | Rubber insert |
| 3. | Heat sensitive solid filler |
| 4. | Bypass valve spring |
| 5. | Inlet pipe coming from the engine |
| 6. | Bypass valve |
| 7. | Outlet pipe going to the pump |
| 8. | Main valve spring |
| 9. | Main valve |
| 10. | Pipe coming from the expansion tank |
| 11. | Piston |
Video
This video contains useful information on how to check thermostats for quality.
How to check the thermostat yourself.
Thermostats for VAZ 2101-2107.
Thermostat VAZ-2114 - do-it-yourself replacement
Unfortunately, the build quality of Russian cars differs significantly from foreign ones, not for the best. All components of our cars last an order of magnitude less than those imported from other countries, and the thermostat is no exception. And now we will look at how to replace a VAZ-2114 thermostat (“injector” and “carburetor”) with your own hands.
FakeHeader
Comments 43
But there are no original ones for Toyota for 88. Only for 82 or TAMA?
I decided to do this myself in the winter of 88 and in the summer of 82
I installed a new TAMA at 88 in Caribe, and changed the fluid at the same time, in the winter I burned my hands with the heat from the stove, and in the summer there were no problems. Installed TAMA. But I would put the original on a Lexus, I’d already put it in the cart.
Question for the experts, I replaced the antifreeze, the thermostat at 82, removed the air, the stove heats only at 2. On long trips the heat is on the 1st and the lamb is half full. Where to dig?
VAZ-2114 - replacing the thermostat and causes of malfunctions
Why does this part fail? A more possible reason is the accumulation of various deposits in the car’s cooling system. The scale formed inside significantly worsens the operation of the thermostat, making it less mobile. As a result, this part stops responding normally to temperature changes in the antifreeze in the system. In most cases, scale is created by car owners who pour ordinary water instead of high-quality antifreeze. The thermostat may become stuck open. Then the “coolant” (in other words, ordinary water) will circulate in a large circle. Then the engine takes a very long time to reach its own operating temperature, and in winter it is completely impossible to start it. Therefore, in order to protect your car from scale, you need to fill only high-quality antifreeze and under no circumstances use water. These were all the main reasons why the thermostat fails.
Installation process
Anyway, now is the second part of repairing the cooling system of the VAZ-2114 car. How to change the thermostat and install a new one? To do this, we will need a couple of minutes of free time and a small set of tools. Now all that remains is to install the newly purchased thermostat in the car. VAZ-2114 (replacement of this part should not be carried out without a special check) should first be diagnosed for the operability of parts of the cooling system. Before installation, the thermostat must be checked for suitability for use. To do this, boil a pan of water to 80 degrees Celsius and throw it there. At a temperature of 87 degrees, the mechanism rod should move out of the power element. If this does not work, most likely you received a defective thermostat. The VAZ-2114 (replacing this part with a defective one will not solve the problem with the cooling system) will simply boil, which will certainly reduce the life of the internal combustion engine. We only need a working thermostat.
And this part is installed in the same way as removal in reverse order. True, here you need to pay attention to several points. When installing, take a close look at the condition of the O-ring in the socket groove. If it is damaged or very deformed, it is best to replace it with a new one. Also, the sealing ring must have elastic properties.
Sequencing
- Using a 13 key, unscrew the air filter.
- Unscrew 2 bolts and 1 nut on the radiator. Under one of the bolts there is a hole through which the coolant is drained into a container placed in advance under the radiator.
Drain bolt on the radiator for draining antifreeze - The connector located on the recirculation valve filter housing is removed. Then the valve itself is removed and carefully moved to the side along with all the tubes located next to it. The connector from the air flow sensor is also removed, the clamp on it is loosened, and then the air supply hose is removed.
All hoses have been removed from the recirculation filter housing and it is ready for removal. - After these operations, the filter is easily removed and access to the thermostat is opened.
- Use a 12 wrench to unscrew the nut on the top of the thermostat (there is only one there). After this, the ground wire is removed and the stud and the lower nut on the device are unscrewed with a 13mm wrench.
- After this, the thermostat is removed from the socket (this is done by slightly shaking the device, and if this does not help, the thermostat is pryed off with a screwdriver).
The thermostat is carefully removed from the socket - Before installing a new thermostat, the socket is thoroughly wiped off from drops of coolant and other contaminants, after which a thin layer of sealant is applied (the sealant must be allowed to dry for at least 5 minutes before installing the device).
- The new thermostat is installed in its original place, after which all components of the vehicle’s cooling system are reassembled.
Procedure for replacing the thermostat on a VAZ 2114
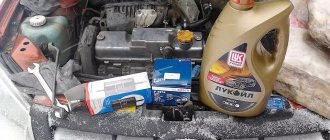
Having established that the coolant flow regulator is faulty, it is necessary to resolve the issue of replacing it. Before starting work, you need to prepare a new device, screwdrivers, keys for “12” and “13”, a sealing gasket, silicone sealant, antifreeze to replace the old one, a container for draining used coolant, new cooling system pipes.
When choosing a new regulator, you need to find out which thermostat is better for the VAZ 2114 and how much the thermostat for the VAZ 2114 costs. You need to choose a device based on the price-quality ratio. The price of a VAZ 2114 thermostat ranges from 280 to 500 rubles.
To replace it, it is best to go to the inspection hole in the garage and give time for the engine to cool down before changing the thermostat on the VAZ 2114. Antifreeze should not be hot, otherwise you can get burned during operation.
- Open the hood and remove the air filter. Take this opportunity to check the condition of the filter element and replace it if necessary.
- Open the cap of the expansion tank and, opening the antifreeze drain plug on the radiator, drain the liquid into a specially prepared container.
- Loosen the clamps on the cooling system hoses that go to the flow regulator, including on the thermostat itself.
- Using wrenches, unscrew the studs and fastening nuts on the device body, removing the ground wire.
- Disconnect the hoses and, shaking slightly, disconnect the thermostat.
- Before installing a new device, you need to clean the mounting points and check the hoses. During operation, they crack and begin to leak antifreeze and air. Replace damaged hoses.
- Before installing a new thermostat, it is necessary to coat the pipes on its body with sealant and allow it to dry slightly.
- Install a new one in place of the old gasket, fasten the studs with nuts and put on the pipes. Carefully tighten the clamps and be sure to check the tightness of the connections.
- After first checking the closure of the drain plug, add fresh antifreeze in the required quantity.
- Start the engine and check that the valve of the newly installed thermostat opens at the desired temperature.
- Check the functionality of the heater radiator. If hot air flows evenly, then the antifreeze is filled correctly and there are no air pockets.
During operation, the driver must carefully monitor the operation of this important device and under no circumstances allow the engine to overheat.
Which to choose
Model PEKARBefore making a replacement, you need to figure out which thermostat is best to purchase. Based on the experience of the owners of this car, several options can be offered.
- Native. The VAZ 2114 is equipped with fairly mediocre thermostats, so replacing it with the same one makes no sense. Many experienced drivers immediately decide to install an analogue, even if the original element is working.
- Chinese equivalent. If you are wondering which device is better, we strongly do not recommend choosing a Chinese-made element. They are close in price to their relatives, but the quality is even worse. There is no need to save money here, since a more or less good unit costs around 300-400 rubles.
- Thermostats from Gates, Vernet and Wahler. It is these companies that show themselves as one of the best analogues for the fourteenth model. Their price of around 350 rubles allows you to purchase a truly high-quality part for little money.