03/02/2022 1,725 Alarms
Author: Victor
Tomahawk X3 is a two-way alarm system of the latest generation, which, in addition to the basic functions of the security system, is equipped with such options as auto start, service mode and anti-grabber. The main feature of the anti-theft complex is the ability to maintain engine operation for a certain time after the ignition is turned off.
[Hide]
Alarm Tomahawk
The company offers its consumers a wide range of products: from simple one-way car alarms to the most modern “sophisticated” models with a huge number of options. The company's pricing policy allows it to withstand fierce competition in the market, which makes it one of the most common car alarms today.
Model overview
Currently, the company can offer its consumers the following types of security systems:
- with one-way communication - used only for arming and disarming the car, as a rule, they are chosen by owners of budget cars due to their low cost (prices for them start from 1800 rubles), today they are represented by the tomahawk models CL-550 and CL-700.
- two-way – such alarms are more advanced; they can transmit information about the protected object to the owner at a distance. If an emergency situation occurs, the system will notify you with a sound signal, and the key fob display will show the reason for the operation and data on the condition of the car (popular models tz 7010, Z3). A two-way car alarm will cost the buyer from 2,300 rubles (for the Tomahawk Z1 model).
- alarms with auto start - they are in greatest demand among car owners. The remote engine start function allows you to start the car from a distance without leaving your home, which is invaluable in cold and hot seasons. The alarm range is 1300 meters, frequency 868 MHz and 434 MHz. Such modern models of the security system are the best-selling, their prices start from 5,000 rubles (the most popular models are tomahawk X5, Z5, 9010, 9020 and 9030).
Main functions
All modern security systems have a large number of different functions, the main ones:
- anti-grabber and anti-scanner – prevent the interception of the alarm key fob code by hijackers’ devices;
- security sensors for doors, hood and trunk;
- user programmable engine lock;
- remote engine start;
- immobilizer - locks the doors and prevents theft if a burglar has already entered the car;
- setting a personal PIN code;
- arming and disarming in automatic and emergency modes;
- securing an object with the engine running;
- two-level shock sensor;
- interior and engine temperature sensor;
- false alarm protection system;
- recording information about the system into memory;
- panic modes that allow you to scare away hooligans in time;
- service mode valet;
- battery charge display;
- searching for a car in a large parking lot;
- opening the trunk with the key fob.
- Operating Instructions
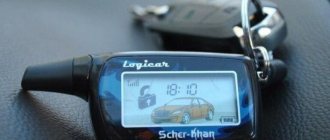
Car alarm Tomahawk X3
High quality, warranty service and technical support. The multifunctionality of the systems provides a wide range of service functions, reliable vehicle security and the possibility of full control using stylish LCD key fobs.
A wide range of models will allow you to choose the optimal security system for your car
All systems are equipped with additional waterproof key fobs, a microphone-type shock sensor, wiring harnesses for connection, a bright LED indicator, a locking relay, etc.
Functional characteristics:
- Anti-grabber
- Antiscanner
- Feedback
- Security for doors, hood, trunk and ignition system
- Programmable engine lock
- Built-in immobilizer
- Individual PIN code
- Emergency disarming
- Silent arming/disarming
- Automatic arming
- Automatic re-arming
- Two-step disabling the security mode
- Two-level shock sensor
- Possibility of connecting an additional sensor
- Built-in central locking
- Programmable impulse of the central locking
- Central locking control when the engine is running
- Built-in parking light relay
- 3 additional channels (3 programmable)
- Taking into account the delay of interior lighting
- Courteous backlight function
- temperature sensor
- Possibility of connecting the “comfort” system
- Possibility of connecting a standard horn
- Bypass the faulty zone
- Protection against false positives
- Status memory
- Trigger memory
- System status indication by LED indicator
- Panic mode
- Valet mode
- Anti-Hijack mode
- Silent security mode
- Remote siren switch off/on
- Remote zone-by-zone shutdown shock sensor
- Remote zone-by-zone shutdown of additional sensor
- Programmable key fobs
- Information about programmed key fobs
- Keychain pager with LCD
- Visual and audio confirmation of functions performed
- Visual indication of all triggers and system status
- LCD backlight
- Built-in clock
- Built-in timer
- Built-in alarm clock
- Battery charge level indication
- Vibrate mode
- Battery saving mode
- Locking key fob pager buttons
- Control of the key fob pager coverage area
- Increased range of the key fob pager (depending on external conditions)
- Display system status changes on all programmed
- keychain pagers
- Safe driving function
- Search/silent vehicle search
- Remote trunk release
- Door open warning function while driving
- Turbo timer
Specifications:
| Rated voltage | +12V |
| Current consumption with ignition on | 16 mA |
| Operating frequency | 433.92 MHz |
| Modeling type | FM frequency |
| Power circuit | 15A |
| Central locking control relay contact circuit | 15A |
| Remote blocking relay contacts | 30A |
| Siren power output “+” | 1.5A |
| Output of the 1st additional channel," - " | 300mA |
| Output of the 2nd additional channel,”-“ | 300mA |
| Output of the 3rd additional channel,”-“ | 300mA |
| Polite backlight control output," - " | 300mA |
| Range:* | |
| — from the key fob-pager to the vehicle | up to 1200 |
| - from car to key fob pager | up to 1200 |
*Ranges are based on the assumption of no interference.
#The device meets the climatic requirements in accordance with GOST 15150, version UHL2 (placed inside an enclosed cabin) #The device meets the electromagnetic compatibility requirements of GOST R 5078995
Key Features and Benefits
Override button on the tomahawk alarm system
Features of the Tomahawk X3 security system:
- The presence of five protective zones. The alarm system protects the ignition system, engine, engine compartment, luggage compartment and car body.
- Automatic engine start. You can start the power unit not only by temperature readings, but also by time.
- Possibility of setting up a passive engine blocker.
- Availability of a personal password to disable the protective mode. If the remote control is lost or the battery in the device is low, you can enter a special code using the “Override” button.
- Availability of service mode. When activated, the user can leave the car for repairs or washing without giving the keys to specialists. Another person may not even know if the vehicle has an alarm installed.
- Activation of alarms by command from a pager. This will allow you to designate the car as protected if there are strangers near it.
- Separate opening of door locks. You can set the alarm to prioritize unlocking the driver's door.
- Protection of a vehicle when the engine is running. A useful feature if stopping quickly.
- Remote activation and disabling of motor blocking by command.
- Self-diagnosis of the security complex. When arming the car or disabling the protection, the alarm system checks all work areas and structural components. Information about problematic components is sent to the car owner in the form of a message on the remote control with a display. The screen display will allow you to determine the non-working security zone.
- Silent vehicle protection. The alarm system can turn on silent security, then when the alarm is triggered, the siren will not turn on. Protection activation data is sent only to the display console. You can also turn on security without accompanying siren signals. When this function is enabled or disabled, only the side lights of the vehicle will be activated.
- Alarm protection against false activations. Tomahawk X3 and Z3 have a special protection system from external influences. This eliminates the possibility of an alarm going off for no reason.
- Audible and visual confirmation of commands and function settings. If necessary, the user can disable communicator notifications and enable only vibration mode. This will prevent rapid wear of the batteries in the pager.
- Displaying the current time on the communicator screen. The pager is equipped with a multifunctional display, which displays information about the air temperature, as well as the type of display of degrees - Celsius or Fahrenheit.
- Availability of “Anti-robbery” mode.
- Two-stage system shutdown when disarming. The user can configure the deactivation of protection using the communicator, but after this he will additionally need to enter a service password to turn it off.
- Availability of pager backlight. This function allows you to simplify the process of setting up an alarm at night.
- Function of blocking the remote control controls. Allows you to prevent spontaneous pressing of the pager buttons in your pocket.
- Control of air temperature in the car interior. The control unit is equipped with a built-in temperature sensor.
- Warning the car owner about an unlocked car door. When security is activated, if one of the locks is open, the system will notify the user by sending a message. The communicator screen will display a car with an open door.
- Maintaining engine operation for 2 hours after turning off the ignition. As reviews show, this helps prevent rapid wear of the structural components of the engine in the winter.
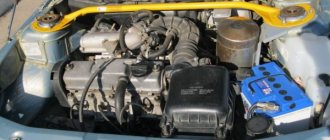
How to install an alarm?
Before proceeding with the instructions for installing the system, you need to turn off the power to the vehicle's on-board network. All electrical equipment in the car is first turned off, after which the negative terminal is disconnected from the battery.
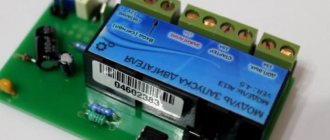
Installation diagram
Connection map of the main alarm control unit:
Wiring diagram for connecting the Tomahawk X3 microprocessor
Table: features of connecting the main 14-pin connector
| Contact color | Description |
| Red | 12-volt alarm power supply, the wire must be connected directly to the battery. When connecting, the electrical circuit should be protected with a 10 amp fuse. |
| Black-green | Positive input of side light relay or light alarm contacts. A 7.5 amp fuse is used for connection. |
| Black | Alarm power supply, negative contact. It is necessary to connect this output to ground; for this you will need any standard bolt firmly screwed to the vehicle body. Direct connection to the negative output of the battery is allowed. |
| Yellow-green | Positive contact of the parking light or warning light relay. When connecting, be sure to use a 7.5 ampere fuse element. |
| Red-blue | Positive door trigger output |
| Grey | Positive contact for connecting a siren or steering horn |
| Black and blue | Negative output for connecting limit switches installed in doors |
| Yellow | Positive contact for connection to the ignition switch. On the switch you need to find the input at which a 12-volt voltage is generated when the ignition is turned on. The power on the line should not be lost when the starter mechanism is activated. |
| Gray-orange | Negative input for connecting a trigger mounted on the hood |
| Gray-green | Negative contact that must be connected to the engine blocking relay |
| White-orange | Negative output for connecting the luggage compartment sensor |
| Black and white | Negative contact for implementing an additional channel |
| Orange-violet | Parking brake input. The element must be connected to the negative output of the handbrake sensor if the car is equipped with a manual transmission. On a car with an automatic transmission, the connection is made with the electrical circuit for powering the brake lights. |
| Blue | Negative output for connecting the polite backlight system. Can be connected to the power window control system. |
General installation principles
Nuances of installing an anti-theft system:
- The microprocessor module is installed as discreetly as possible inside the car. The device is placed on a flat surface and fixed with plastic clamps or self-tapping screws. There should be no sources of moisture or elevated temperatures at the installation site of the unit. During installation, it is advisable to prevent the device from coming into contact with wiring harnesses or metal products.
- The siren is installed under the hood. The wires from the device must be routed into the interior in such a way that they are not accessible from under the bottom of the car. It is advisable to place the siren with the bell facing down to eliminate the possibility of moisture accumulation inside.
- The transceiver is placed on the windshield inside the cabin. Do not place the device near electronic equipment or metal objects, as this will degrade the signal quality.
- Sensors for the hood, trunk and doors are installed in hard-to-reach places, away from drains. The free movement of the device when closing the body element must be at least 5 mm.
- The sensitivity and impact controller must be installed in the central part of the body, inside the car. For installation, you can choose a metal partition that separates it from the engine compartment. Fixation is carried out on a flat surface using plastic clamps or self-tapping screws.
- All high-current lines must be protected by fuse elements of the appropriate rating. We are talking about the electrical circuits of the central locking system, ignition system, side lights, etc.
- Contacts are soldered at the connection points and, if necessary, to extend wires.
Video about installing the Tomahawk Z3 alarm system on motorcycles
User SANEG PFARGER spoke about the features of self-installation of the Tomahawk Z3 alarm system on motorcycle equipment.
Malfunctions and their elimination
Car alarm tomahawk tz 9010
When the battery charge level drops, the range of signal transmission and reception decreases. To install a new AAA element, you need to open the cover on the back of the case. If the remote control does not work after replacing the battery, you should check the correct installation. If the battery is installed incorrectly, the device must be placed with correct polarity.
Moisture entering the internal cavities of the remote control causes corrosion of metal contacts. To remove plaque, you need to disassemble the device, then the oxidized surfaces are cleaned with a dry cloth. It is recommended to check the condition of the product with a test device; broken circuits are restored independently or in a service center. When disassembling the control panel, it is recommended to inspect the condition of the buttons and rubber protective covers. Dirt is removed with cotton swabs moistened with alcohol or a special composition for cleaning contacts.
If the remote control is dropped, the tracks are destroyed or the display is damaged. The repair consists of restoring the conductive elements and installing a new scoreboard. If the microprocessor or transceiver quartz is damaged, the remote control must be replaced.
Autostart based on temperature: warming up the engine
Tomahawk alarm (instructions on how to set it up)
The Tomahawk X5 system provides for the installation of an auxiliary power unit temperature sensor, which allows monitoring the condition and heating of the coolant inside the CO. The sensor itself is mounted on the engine housing or in the engine compartment. Experienced craftsmen recommend placing the part on the inlet pipe of the cooling system - this will help to adjust the engine operating time as accurately as possible.
According to the instructions you can see the main provisions:
- setting the relay response threshold with a spread of 20 degrees Celsius;
- how to change the temperature on and off the automation;
- how to start the mode remotely.
The option is configured in the standard manner, following the factory instructions.
How to check engine temperature
The Tomahawk X5 generation alarm design provides the ability to view the temperature of the power plant in real time. The implementation of the addition is made possible by the engine temperature sensor supplied with the main units.
Remote polling can be done like this:
- press and hold the speaker key;
- the key fob will give a single signal;
- quickly re-click on the specified element;
- the car will blink the emergency lights three times;
- The key screen will display the actual engine temperature.
Buttons and icons
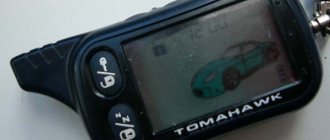
To configure and control the model 9.7 complex, a main remote control equipped with a display and 5 keys is used. The screen displays icons that allow you to identify the triggered security zone. Additionally, there are icons displaying automatic start modes; there is a separate field for displaying time and temperature.
The kit includes a spare remote control with 4 keys and a control LED that allows you to monitor the activation of additional modes. The buttons on the key fobs are marked with pictograms; a description of the functions performed and possible key combinations are given in the alarm manual. The auxiliary key fob allows you to enable the same functions as the main device.
Autorun doesn't work
Some netizens complain that the car does not start from autostart or that the engine warms up by the hour. These are the consequences of a violation of one of the Tomahawk X 5 alarm units or the mode activation technology. The source may also be the vehicle's on-board circuit. Usually, if the required sequence of actions is not included, the problem must be looked for in one of the indicated directions.
- Battery drain. To remotely start a motor, a higher starting current is required than with a standard start. Usually the car makes two or three attempts and does not start, after which it sends a signal to the key fob. You can charge or change the battery.
- Preliminary preparation was not performed correctly. Drivers often forget to put the car on the handbrake or take it out of gear.
- Engine control is not programmed. There is a technical failure within the control unit itself. It can be solved by diagnosing the corresponding element or replacing it.
- Contacts are coming off or terminals are oxidized. A common reason is when the car is parked in a damp box or on the street. To correct the situation, simply clean and crimp all connections.
- Freezing of lubricants inside the crankcase compartments. Thick oil prevents the crankshaft and gearbox drives from turning. It is usually eliminated by setting a shorter relay response interval or increasing the antifreeze temperature at which the mode is activated. How to change the time for automatic heating can be found in the instructions.
- Mechanical damage or exposure to large amounts of water. Consequence of unsuccessful car wash or repair. Solved by drying or replacing damaged parts.
How to setup
Before you start using the Tomahawk alarm, you need to set the operating parameters. Alarm settings are made using the Override button; to activate the setting mode, you need to press the button 5-6 times (depending on the type of adjustment). Then the owner selects the required function value, based on the tables available in the documentation. The parameter is assigned using buttons, the choice is confirmed by the corresponding number of beeps and a siren.
To reset the parameters, you need to activate the procedure by pressing the Override button 9 or 10 times (depending on the table number), and then turn on the ignition. The complex will sound 9 or 10 beeps, respectively; after briefly pressing the button on the remote control, marked with a padlock with a locked shackle, the settings are deleted. The driver then programs the parameters again.
Performing soft neutral
Neutral setting algorithm:
- After stopping the machine, tighten the parking brake lever. The box is first moved to the neutral position, the power unit is not turned off.
- Hold the button marked as an open lock until the buzzer or green control diode (on the auxiliary remote control) turns on.
- Press the button again (the interval between impacts does not exceed 3 seconds). If the procedure is carried out correctly, a melodic signal will turn on (on the remote control with a display).
- Remove the key from the lock. On cars with a button to start and stop the engine, the step is not used.
- Unlock the door, get out of the car, and then slam the door. The security system will automatically stop the engine and lock the locks.
Tomahawk 9.7 car alarms allow programming of an automatic algorithm. After activating the handbrake, you need to remove the key and then leave the car. After pressing the remote control button, the protection is turned on and the power unit is stopped at the same time.
Autorun operating principle
The Tomahawk alarm system supports automatic engine start without using a key. The complex's central processor turns on the starter based on a timer signal or data received from a temperature sensor. The complex disables the protection of the power unit circuits, and the shock sensor is temporarily deactivated. The starter rotates the motor shaft; after the engine starts running, the starter is automatically turned off (based on signals from the generator or speed sensor). After warming up within a specified time, the engine stops and is armed.
Trigger by temperature
The start is carried out according to signals from sensors installed in the cabin (inside the antenna unit) or in the engine compartment. The factory sets the default start from the cabin sensor (for example, in 9.7 complexes). To activate the sensor in the engine compartment, you will need to modify the wiring harnesses and program the central unit. The adjustment algorithm and wiring diagram are given in the manual.
- Press the button on the alarm remote control, marked with a locked padlock symbol. The key is held until the buzzer sounds or the control diode blinks. Then you need to briefly press the key with the lock icon with the shackle open.
- After sound and light signals are given, the icon with the text “1-2 Temp Start” will turn on on the remote control, and the threshold temperature value will also be displayed (programmed when setting up the unit).
- When the engine starts, the key fob emits a 5-fold signal, and an icon in the form of an exhaust cloud is displayed on the display, indicating that the engine is running. The number of restarts is not limited, the warm-up time between starts is at least 2 hours (the parameter is not forcibly regulated). The car owner adjusts the warm-up time.
Trigger by time
The car owner can turn on the hourly engine start by successively pressing buttons with the symbols of an open and locked lock. The text message 2-1 Daily will appear on the screen and the power unit will start. After warming up (the time is programmed when setting up the central unit), the engine will stop. Further starts are performed after 1, 2, 4 or 24 hours (the parameter can be configured separately).
Settings and Features
First of all, we suggest that you familiarize yourself with the manual for installing an alarm with or without auto start yourself. Regardless of the model, alarms must be installed according to the same principle.
Identification of buttons and remote control options
How to install?
The installation process of anti-theft equipment briefly looks like this:
First, the on-board network is de-energized; for this purpose, the battery is disconnected. Then a control device is installed - a block; it should be placed in the cabin, behind the dashboard, so that a criminal cannot reach it in the event of a car break-in. Next, the antenna adapter is installed. It is better to place it at the top of the windshield, on the inside, that is, in the cabin
Important - the antenna adapter should not come into contact with metal parts of the body and wiring, otherwise interference may occur when transmitting the signal from the key fob. Then the siren is installed - it must be placed with the horn down in the engine compartment. It is also advisable to limit access to the siren; also keep in mind that its operation can be negatively affected by high temperatures and moisture. If the system is equipped with a temperature sensor, then it is advisable to place this element in the engine compartment, in close proximity to the engine
This way the device will transmit the most accurate data. Limit switches are mounted in the doors, trunk lid and hood. A diode light bulb also needs to be installed in the area of the windshield - its blinking will let potential intruders know that the car is under guard. The impact controller is mounted in the vehicle interior; it is advisable to place it in the central part of the body. The device is fixed using ties or tape. Then all elements are connected to the control module, while the wires are better protected with fuses and also additionally insulated.
Model 9010 functionality
The TZ 9010 car alarm package includes a siren, a control unit, limit switches, an antenna diode indicator, mounting elements, and an instruction manual.
This model belongs to the budget segment of the market, however, it has many useful functions for the consumer:
- the presence of an anti-grabber and an anti-scanner to prevent signal interception;
- feedback function with the control panel;
- the ability to block the operation of the engine, as well as doors and luggage compartment;
- central locking control system;
- One of the key features is the automatic engine start function.
Model 9020 functionality
As the instructions for the car alarm model 9020 show, this alarm has standard functionality, but besides this, it also supports additional options:
- In addition to the shock sensor, the kit includes a vibration controller;
- the ability to start the engine remotely;
- the ability to receive a signal at a distance of 1.2 km;
- two-way communication with the control panel;
- protection against false inclusions;
- In addition, the system warns the car owner that the doors of his car are left unlocked (video author: Petr Permyakov).
Functions 9030
The instructions included with model 9030 describe all the nuances of installing and using the alarm. Main functions:
- protecting the system from signal interception;
- many auxiliary functions that allow you to remotely arm your car;
- if necessary, the car owner can program the control panel to suit his preferences;
- two-way communication with the system via a key fob with an LCD display;
- the ability to start and stop the engine remotely;
- option to warm up the internal combustion engine to a set temperature;
- The signal reception radius is 1.2 km.
Equipment
Overview of devices and elements included in the package:
- The main key fob equipped with a display and feedback function. With its help, the user can monitor the status of the vehicle when the alarm is on.
- Spare communicator, one-way. This device does not provide two-way communication, since the pager is not equipped with a screen. The spare key fob is supplied in a waterproof case.
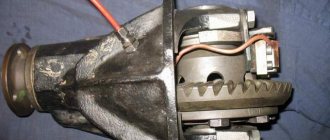
- Microprocessor module that configures basic parameters in accordance with user commands. The control unit is equipped with a built-in temperature sensor. Based on its readings, you can turn on and configure the engine to start automatically at a certain temperature, which makes it possible to warm up the engine.
- Two-level sensitivity and impact controller.
- Transceiver with built-in antenna adapter.
- Blocking relay.
- Button to activate the “Anti-robbery” mode. Enabling this function will allow you to automatically start the immobilizer in the event of a forceful seizure of the car. The car's engine is blocked, making it impossible to drive the car.
- Button to enter the alarm service mode - “Override”.
- Red LED light bulb.
- One limit switch designed for hood mounting.
- A set of wires with 10 harnesses, allowing you to connect to the vehicle’s on-board network.
- Service user manual, which allows you to install and configure the anti-theft system options. The manual includes an electrical diagram for connecting contacts and all devices.
- Packing box.
The Tomahawk X3 model does not include limit switches for door locks and the luggage compartment, so these elements must be purchased additionally if necessary.
Tomahawk Z3 alarm kit
Auto Arm Icon
The Auto Arm inscription indicates that the car is set to automatic arming mode. The option insures the driver against accidentally forgetting to set the car alarm. Usually the extension is activated forcibly. The key fob itself cannot send a signal to the computer.
The factory instructions indicate the sequence of actions on what to do when the icon appears on the screen. Usually, to deactivate the mode, it is enough to hold down the key and wait for two flashes of the dimensions. After this the option is disabled.
If the mode is set accidentally, it is recommended to use the key lock on the remote control.
Video
The AvtoGSM channel talked about the operation of the Tomahawk Z3 car alarm installed on a scooter.
Do you have any questions? Specialists and readers of the AUTODVIG website will help you ask a question
Was this article helpful?
Thank you for your opinion!
The article was useful. Please share the information with your friends.
Yes (100.00%)
No
X
Please write what is wrong and leave recommendations on the article
Cancel reply
Rate this article: ( 4 votes, average: 5.00 out of 5)
Discuss the article:
Review of technical characteristics of Tomahawk X3, Z3 alarms
Description of the technical properties of Tomahawk car theft protection systems:
- when the ignition is turned off and security is on, the “signaling” consumes no more than 16 mA of current;
- data transfer between the transceiver and the communicator (pager, key fob, remote control) is carried out via a radio channel with a frequency of 433.92 MHz;
- the range of the antenna module when sending commands and receiving data is 1200 meters;
- modulation type for information transmission - FM;
- current in the power supply circuit - 15 mA;
- protection of the car body is carried out through the use of a two-zone sensitivity controller.
Tomahawk key fob functions: button combinations
The most common Tomahawk models have two standard remotes. The main element has five buttons and is a tool equipped with all the necessary controls.
Depending on the key combination, the security system can be configured to suit the needs of the motorist, which guarantees sufficient comfort during operation of the device. The instructions for use contain a detailed description of the buttons and options.
- The F key is designed to enter the key fob settings and calibrate alarm options.
- Crossed out speaker – control of the sound of the security module.
- An element with a pattern of an open trunk is responsible for the position of the cargo compartment lid and hood.
- The key is a button for calling the security function and activating the anti-theft system.
- Lock - a structural element designed to control the locking of doors and central locking.
Depending on the key combination entered, the remote control calls up a certain option or operating mode of the alarm. The full list of features is in the instructions.
Security modes
Thanks to the updated firmware, all Tomahawk devices have several modes.
- Standard protection. The mode provides for normal vehicle security with all sirens and lights turned on.
- Setting in silent mode means turning off the sirens. Information about a break-in attempt is transmitted only to the driver's key fob.
- Auto staging. This option allows the owner not to worry about forgetting to turn on the alarm. If the extension is active, the car will automatically arm itself after turning off the engine and closing all doors.
- Immobilizer - turns on automatically 30 seconds after closing the car. In this case, it is impossible to start the engine with a regular key.
Find out how to identify a Tomahawk alarm using your key fob.
Automatic heating based on temperature
Most Tomahawk models have the ability to automatically warm up the power plant based on temperature. The built-in sensor allows you to accurately adjust the thermometer to trigger the mode. In some modifications, it is possible to connect an additional thermoelement and warm up the engine according to the temperature in the engine compartment (the accuracy and efficiency of the procedure increases).
In addition to activation, you can set the following parameters:
- lower engine start threshold;
- starter cranking time;
- oil pressure or crankshaft speed at which the start relay is turned off;
- upper threshold for power plant shutdown.
Remote motor start
Some device modifications have the ability to remotely start the engine. The extension is extremely convenient for drivers who need to preheat the engine before leaving. Thus, you can start the car while sitting at home and when the owner arrives, the vehicle will be immediately ready to go.
The main parameter is the need for proper preparation - the process is universal for all alarms:
- turn off the ignition;
- put the gearbox in neutral;
- raise the handbrake lever all the way;
- get out of the car and close all doors.
After completing the operation, the appropriate combination is entered on the remote control.
Auto start by timer
Similar to other options, Tomahawk key fobs offer automatic engine start using a timer. The extension is in demand among a group of owners who need quick departures at different times.
Depending on the model, the response interval can be set with a gap of 2, 4, 12 or 24 hours. Just like with starting by temperature, the procedure requires preliminary preparation (manual gearbox).
Jack State
Many users cannot figure out the Valet mode. The function is designed to make it possible to provide the vehicle to third parties for repairs or service. When activated, the security complex is completely disabled, except for the part responsible for controlling the central locking.
To enable Valet mode on each device, you must enter a unique combination of characters. At the same time, the Zz indicator will light up on the display of the main key fob, indicating that the sleep mode is operating.
Anti-theft mode
Along with modern analogues of third-party alarm systems, the Tomahawk security complex contains the Anti-hijack function. The anti-grabber helps the driver preserve property during an attempted theft. In case of illegal entry into the car, the device turns off the engine and sabotages the operation of the main systems. Thus, it becomes impossible to leave by car.
To activate the Anti Hijack program, you usually need to follow these steps:
- start the engine;
- simultaneously press the closed lock + open trunk.
User manual
In accordance with the instructions for using the Tomahawk X3 alarm, before use, you need to install a working battery in the communicator. The battery is inserted into a special compartment located behind the rear protective cover.
Correspondence of controls on the main and spare Tomahawk X3 consoles
Functions and designations of the key fob
Description of indicators on the key fob screen:
- Car security with or without sound.
- The handbrake of the car is not applied.
- Emergency vehicle maintenance mode activated using the “Override” button.
- Automatic arming.
- The immobilizer is turned on, blocking the operation of the power unit.
- The engine turbo timer option is active.
- Warning about the inclusion of the main or warning level of the shock sensor. If “Pass” appears with this icon, this indicates complete or partial deactivation of the controller.
- The car's ignition system is working.
- Emergency disabling of the security function using a personal PIN code.
- Symbol of a triggered sensitivity controller.
- Manual transmission mode is activated.
- Key lock on the key fob.
- Battery charge indicator in the communicator. If the icon blinks, then it is time to change the battery.
- A running car engine.
- The “Anti-robbery” option is activated.
- A symbol confirming the operation of the anti-robbery function.
- Another indicator of the enabled “Anti-hijack” option.
- Current time. This field also displays information about the temperature of the interior and engine during automatic start of the unit. This display displays units of degrees.
- The "Timer" option is activated.
- The alarm clock is working.
- The option of automatic start according to the alarm clock is enabled.
- Start the power unit using a timer.
- Engine start based on temperature readings.
- Door locking when the protective mode is turned on and off.
- Indication of communication between the transceiver and the control unit.
Symbols on the screen of the Tomahawk X3 key fob
Table: commands that can be quickly executed from a pager
| Button | Option Description | Note |
| 1 | Activating the auto protective mode, locking the central locking (CL) | The ignition must be turned off |
| 2 | Disabling the security function. The button is also used to open the central locking | Ignition off |
| 1 | Closing the central lock | Ignition activated |
| 2 | Unlocking the central lock | Likewise |
| 1 | Double pressing the key will disable the sensitivity controller, as well as the additional sensor | Security mode must be active |
| 2+4 | Activating and disabling the "Turbo timer". To do this, hold down the second key for two seconds, then briefly “click” the fourth button | |
| 1+2 | Activating and disabling the service maintenance mode. The first button is held for two seconds, then the second control is briefly pressed | Security mode must be disabled |
| 4 | Activation and deactivation of the siren by command | Ignition off |
| 3 | Diagnostics of the state of the anti-theft complex | |
| 3 | Double pressing the button will activate the vehicle search function. | |
| 3+3 | Tailgate unlocking or other function configured on the first additional channel. First, the key is pressed for two seconds, and then “clicked” briefly. | |
| 1+2 | Enabling Panic mode. Key 1 is pressed quickly and key 2 is held down for two seconds. | The ignition must be turned off |
| 1+2 | By pressing the controls in the same way, the “Anti-robbery” function is activated. | The vehicle's ignition system is active |
| 2 | Disabling anti-robbery mode | The Anti-Robbery function must be enabled |
| 1+2 | The first key is pressed for two seconds, then the second button is pressed briefly. This will activate or deactivate the engine lock mode. | |
| 1+3 | Automatic activation and deactivation of the protective function. The first button is pressed for two seconds, the second “clicks” briefly. |
How to set up the key fob?
To bind a new communicator, perform the following steps:
- The car's ignition system turns on.
- The “Override” service mode activation button is pressed for six seconds. The alarm siren should emit four beeps.
- On the communicator being registered, the first and second keys are pressed simultaneously. They are released when the siren sounds. A sound signal indicates successful registration of the communicator into the memory of the alarm control unit. The number of pulses will differ depending on the number of the key fob being linked.
- The ignition in the car is turned off. The side lights of the car should blink five times.
Setting up autorun
To remotely start the engine, press the second key of the communicator; it must be held down when the security mode is on. When the task is completed, the car's side lights will blink three times and the siren will sound. A corresponding indicator will appear on the communicator screen. To turn off the power unit started remotely, press the second button of the key fob.
Alarm programming
Enter the anti-theft system settings menu as follows:
- The car's ignition system turns on.
- The emergency service mode entry button is pressed six times.
- The ignition in the car is turned off. To confirm entering the setup menu, the alarm siren will emit six beeps.
- The Override button is then used to select the desired option. Each time you press it, the system will move to the next function. The number of “clicks” corresponds to the option number in the table. To activate, disable or configure alarm operating modes, use the key fob controls.
- To leave the programming menu, the ignition in the car must be turned on and off. Automatic logout will occur if the user does not take any action to work with the system for ten seconds.
Table: Override button functions
| Number of presses of the Override button | Function | ||||
| 1 time | Turbo timer (min.) | 0,8 | 10 | 30 | On off |
| 2 times | Siren or horn | Siren | Klaxon | ||
| 3 times | Pulse length for opening/closing central locking (sec.) | Open 0.8 Closed 0.8 | Open 3.6 Closed 3.6 | Open 2x0.8 Closed 0.8 | Open 0.8 Closed thirty |
| 4 times | Safe driving function | Off | Var. 1 | Var. 2 | Var. 3 |
| 5 times | Locking doors during automatic re-arming | Off | On | ||
| 6 times | Accounting for interior lighting delay (sec.) | 6 | 15 | 30 | 45 |
| 7 times | Polite lighting (VP) or closing windows (CL) (blue wire) / pulse duration (sec.) | VP/20 | VP/30 | ZS/20 | ZS/30 |
| 8 times | Temperature units | Celsius | Fahrenheit | ||
| 9 times | Door open warning function | Off | On | ||
| 10 times | Engine lock type | N.Z. | N.P. | ||
| 11 times | 2 additional channel (sec.) / turbo timer (min.) | 2nd additional channel / 0.8 | Turbo/1 | Turbo/2 | Turbo/5 |
| 12 times | Pulse duration 3 additional. channel (min.) | 0,8 | 10 | 30 | On off |
Reset
To return to factory settings, perform the following steps:
- The car's ignition system turns on.
- The service mode entry button is pressed ten times.
- The ignition in the car is turned off. The siren should sound 10 times.
- The Override key is pressed once.
- The first button on the communicator is clicked.
- The vehicle's ignition is then turned on and off. The vehicle's side lights should blink five times.
How to use service functions?
Features of setting up service options for Tomahawk X3 and Z3:
- Remote polling of the alarm status is started by pressing the third key of the key fob. The car's parking lights will blink three times, and information about the car's security will be displayed on the remote control screen. If no data about the car’s status appears on the display within three seconds, then the communicator is out of range of the transceiver.
- To temporarily deactivate the sensitivity controller and additional sensor, click the first button twice. Both presses must be completed within one second. First, the warning level of the regulator will be turned off, and then the alarm zone will be deactivated. To activate the controller, similar steps are performed.
Emergency disabling of security
If the communicator is lost, it is possible to deactivate the protective mode using the service button (the alarm is normally assigned password 11):
- The car's ignition is turned on.
- The service mode entry button is pressed several times. The number of “clicks” must correspond to the first digit of the password.
- The ignition in the car is turned off and turned on again.
- The second digit of the code is entered in the same way.
- The ignition system is then deactivated again. If the password is accepted by the control unit, the security mode will be disabled.
Unlocking buttons on the Tomahawk X5 key fob
Carrying a remote control in your pocket may cause accidental pressing of one or more keys and subsequent disruption of the alarm functions. To prevent this, the company has provided the possibility of blocking. To disable the keys, you will need to press two buttons simultaneously:
- closed lock/Zz;
- crossed out speaker.
After this, all buttons will stop responding to pressing, and the message “Key Lock” will appear on the screen.
To return to the starting position, you will need to simultaneously press another combination:
- open lock/key;
- crossed out loudspeaker.
After the procedure, the remote unit can be used as usual.
The additional pager is programmed in the same way. These buttons are also present here and the sequence of actions is no different.
press the buttons simultaneously...
Page 8
- Image
- Text
O
+ — press the buttons simultaneously
—► — press the buttons sequentially X 2 — press the 2 rose button for a second
2c — hold the button pressed until the key fob-pager beeps
(or change the color of the LED on the additional key fob to green)
8
Activation of security mode
The alarm system turns on the security mode by pressing the corresponding key (more detailed information about the purpose of the buttons is contained in the instructions). When installing it, the parking lights will flash once, a short warning signal will follow, and all car doors will be locked.
If, when the protection is activated, four short beeps follow and the parking lights flash four times, then the alarm has found and deactivated one of the faulty security zones (one of the doors, the trunk lid, the engine compartment is open, or the parking brake is not applied). The key fob display will display information about the faulty zone. It will automatically come under protection as soon as the zone becomes operational (all doors, trunk, hood are closed).
Comparison of Tomahawk X3 and X5: how to distinguish by key fob
A reasonable question, how the Tomahawk X3 differs from the X5, is asked by many potential buyers. In design, both models are absolutely identical. Also, the keychains are identical in appearance. The internal equipment is also similar, there are the main protective options, range and configuration sequence.
Due to the abundance of similarities, the remote controls are completely interchangeable in terms of technical and software components.
Therefore, this begs the question, what is the difference, and the answer lies on the surface. The younger version does not have the ability to automatically start the engine. Additionally, there is complete incompatibility of antenna modules.
Installation instructions
Installation Guide for Tomahawk Q9 Dialogue Alarm
2.3. Connecting wires
It is necessary to connect the signaling according to the diagrams below.
2.3.1. Power six-pin autostart connector
The black and yellow wire is the starter enable wire (+12V). +12V output signal to the starter solenoid relay. It is connected to the wire on the ignition switch, where +12V appears in the “Starter” ignition key position. This signal is intended to start the engine. Connect this wire after the blocking relay.
Green wire - IGN 2 wire, +12V output signal. It is connected to the wire on the ignition switch, where +12V appears in the “Ignition On” ignition key position, and disappears in the “Starter” ignition key position, if this wire is present in the vehicle on which the system is installed.
2.3.3. Main connector
2.5. Connecting the central lock
The Tomahawk Q9 Dialogue alarm system has built-in power relays for controlling the central locking. The wiring for connecting the central locking is routed to a separate connector.
The last stage of installation of the security complex is configuration.
Car alarm Tomahawk Q9 - connection diagram
Permissible currents
Doesn't respond to key fob
If the key fob does not see the car or vice versa, the reasons are on the surface.
- My battery is almost done. Insufficient battery charge is a typical problem in winter.
- Strong radio interference in the parking area. Usually happens when stopping under television towers, power line farms. In this case, you will need to manually roll the car away and try again.
- The head control module has failed. Solved by resetting the settings.
- Natural wear and tear of the unit. Can only be fixed after replacing the key fob.
- Antenna failure. The element must be carefully examined for contact oxidation or mechanical damage.
Tomahawk X5: price
The cost of the Tomahawk X5 alarm system varies significantly in different regions of Russia. This is justified by logistics features and store markups. The installation of the device on the car also varies. In big cities, craftsmen can demand up to 2,000 rubles, while at the same time, small service stations in small villages will be happy to install an alarm for 800-1,000 rubles.
It is convenient to see the real price of the unit and how much it costs with installation in the table.
| Region | Actual cost, rub. | Installation |
| Moscow | 4200 | 2500 |
| Rostov on Don | 4100 | 2100 |
| Samara | 4250 | 1800 |
| Chita | 4500 | 1500 |
| Yaroslavl | 3900 | 2000 |
| Khabarovsk | 4200 | 1900 |
Specifications, equipment, photos
The complete set of the Tomahawk X5 alarm system allows the motorist to install the device independently, without the involvement of outside specialists. The original packaging contains the main elements of the chain:
- electronic alarm unit;
- two key fobs, main and auxiliary;
- two-level shock sensor;
- temperature sensor mounted in the cabin;
- extended range antenna;
- separate light diode installed in the dashboard;
- Override key, designed to reset and configure the unit;
- engine blocking relay;
- push-button type limit switch;
- instructions;
- main wiring harness.
The kit description does not contain additional equipment. Limit switches for door locks and cargo compartment lids must be purchased separately. This is argued by the fact that the alarm can operate independently of these blocks.
How to register a key fob
After purchasing a replacement pager, you need to program the key fob to “bind” it to the car. The owner must follow several steps.
- We turn on the ignition of the car.
- The OVERRIDE button is pressed for six seconds. The car emits four beeps, confirming the transition to the appropriate mode.
- Press two buttons on the pager (with the lock open and closed) until the signal comes from the car.
- Register all remote controls planned for use (up to 4 units), the system resets the memory with each new registration.
- Turn off the ignition or do not touch anything for fifteen seconds - the program will automatically end, having previously saved the data.
Find out everything about the correct emergency shutdown of the Tomahawk 9010 alarm system.
How to use
The owner of a car equipped with the Tomahawk 9.7 security system controls the equipment using remote controls. Some functions are performed using automatic algorithms; driver intervention is not required. The purpose of the keys is given in the instructions for use. The documentation also contains explanatory tables with algorithms for combined actions on the buttons.
To check the communication channel, you need to press the button marked with an icon in the form of a silhouette of a car with the hood open. If the key fob does not receive a feedback signal within 3 seconds, a short signal is given by the buzzer. The problem also arises when parking a car in an area with a high level of radio interference (for example, near cellular repeaters or transformer substations).
Starting security mode
To activate the mode, use a short press on the button marked in the form of a lock with a closed bracket. The machine emits sound and light signals, accompanied by a short beep-buzzer. An icon in the form of a locked pad is activated on the screen, the control diode goes into flashing mode (1 flash per 4 seconds). The built-in diagnostic unit notifies the owner of problems with 4 flashes and a simultaneous 4-fold siren beep.
Starting security mode without sound
To turn off signals at the moment of activation of protection and in alarm mode, you need to press the button marked with the icon of a crossed out loudspeaker. The display displays an icon in the form of a speaker crossed out by 2 slanted lines. When pressed again, power to the siren is restored and the speaker icon is displayed on the screen. Additional sound or light signals given when the siren is turned on or off depend on the operating mode of the Tomahawk 9.7 complex.
Disabling security mode
To disarm the security, use the key with the icon of a lock with an open shackle. An icon of the disabled mode appears on the screen; at the moment the locks are unlocked, a double signal is given by the control diode. The car's siren and buzzer sound briefly twice, additional confirmation is a double flash from the external alarm lamps.
Locking and unlocking doors
While driving, the driver can lock the door locks by briefly pressing the security button. The complex locks the doors and trunk lid (if the drive unit is activated through an additional channel). To unlock the doors, you must press the unlock button.
Remote engine start
To start the motor from a distance, you will need to press long and short on the keys marked with the icon of an open and locked lock, respectively. After 3 flashes are given by the external lighting equipment, the engine is started and warmed up. The operating time and door locking algorithm are pre-programmed. During operation, the alarm flashes and the control diode in the antenna unit is active.