Most car owners suffer from lack of space in the garage. A small room does not even allow for proper storage of seasonal tires. But it is necessary not only to preserve it, but to do it correctly, otherwise even new tires can be ruined in just one season of improper conservation. A tire storage rack can be an excellent solution to the problem. Such a structure will not only significantly save space, but will also contribute to the harmless preservation of the wheels.
You can buy this design or make it yourself. If you have the finances and no time to prepare materials and assemble, then the easiest way is to purchase a rack in a specialized store. But if you have the time and desire to create a quality thing, then you need to boldly get down to business.
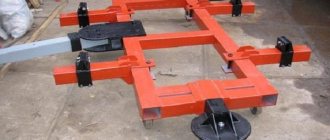
Rack for car wheels
Rules for storing car wheels
Not every car owner knows that they need to follow the rules for storing wheels, otherwise they quickly become unusable and can fail at the most inopportune moment. Different sets of tires have specific storage conditions, but general rules can also be identified, the observance of which will be relevant in any situation:
- Do not store wheels near heating or cooling devices. Significant temperature changes occur near them, which cause condensation to accumulate and deformation of the rubber.
- Make sure that the wheels are not exposed to moisture, oil or acidic liquids.
- Store tires in a cool, dry place.
- If the wheels are wrapped in film, do not forget to periodically remove and ventilate them. Otherwise, dampness will begin to accumulate inside, which will negatively affect the material in the future.
Now let's look at the individual storage features of different sets.
Summer tires
Summer tires are made from materials whose composition is different from winter tires, and accordingly, the storage conditions will be different. The peculiarity of storing summer tires is that the room temperature should be kept around 20 o, with a relative humidity level not exceeding 60%. Small deviations from these indicators are acceptable.
Winter tires
Winter tires do not tolerate high temperatures well. Therefore, beware of installing racks and fixtures for storing it in:
- rooms with high temperatures;
- places exposed to direct sunlight.
On disks
Storing wheels on disks adds additional nuances to the preservation process. The thing is that when stored vertically, the tires, under the influence of the weight of the rims, will begin to deform. This will reduce their quality of adhesion to the road surface, which can lead to an emergency situation.
It is recommended to store assembled tires in a horizontal position, on top of each other, or suspended on a rope that is threaded through the center of the disk.
Note! When storing tires for the winter, they must be well inflated. The pressure inside the wheels should be working or slightly below normal.
No disks
If you store tires separately from wheels, follow these rules:
- keep them upright;
- once a month, rotate the tire 20-180 o;
- It is allowed to store the wheels in a suspended state, stringing them on a rope or metal cable.
Is it possible to keep rubber in a metal structure?
The fact is that it is necessary to adhere to strict rules for saving tires, which include maintaining a certain temperature, air humidity, etc. A metal garage can get very hot in the summer and it will be very dry inside, which is unacceptable for rubber. If such a structure is located in the shade of trees, then as a last resort you can leave the wheels in it, but only in a suspended state.
Building racks for storing tires with your own hands is not so difficult, the main thing is to think everything through correctly and be patient. And what materials to use to implement an idea is an individual choice for everyone.
Design features
Diagrams and design drawings for tire maintenance can satisfy any requirements of the car owner. It can be:
- racks and shelves of various configurations;
- hooks and stands;
- specialized cabinets in which you can create your own microclimate, ideal for keeping a particular set of tires in the garage.
Some of them are universal and suitable for any tire, others are highly specialized and designed for special conditions.
Racks and shelves
A rack for storing wheels in a garage gives the owner the following advantages:
- the ability to equip a rack with wheels with additional shelves designed for various tools;
- depending on the size of the garage and the amount of free space, the size and shape of the stand can be easily adjusted during assembly;
- the design has a large margin of safety at a relatively low cost.
Hooks and stands
Convenient devices for storing wheels in the garage, with the following advantages:
- easily and quickly made independently;
- take up little space and can be placed in any free corner of the garage;
- the stand, unlike a shelf or rack, can be easily moved from place to place and, in case of repair, it does not need to be dismantled or disassembled;
- materials for their manufacture are readily available and relatively cheap.
Note! Wheel hooks can be made as permanent brackets that attach to the wall, or as a removable piece that can be hung from a metal cable or rope, which is very convenient.
Specialized cabinets
If there is desire, time and money, the garage owner can equip the room with a special cabinet for storing wheels. Advantages of cabinets:
- the design does not spoil the appearance of the room;
- placed in any free space. It is not necessary to install it on the floor; you can make special fastenings and hang it on the wall;
- storing the wheels in a special cabinet will ensure that a jar of oil or other liquid that is in your garage will not accidentally be knocked over on them. This will significantly extend the life of the tires.
Under what conditions should wheels be stored in a garage?
With proper storage and care, protectors and wheels will last much longer. The benefit of this is obvious; it’s unlikely that anyone will want to spend extra money on buying new wheels. Following the rules for storing them in your garage is quite simple and inexpensive. Therefore, if you love your vehicle and save your family budget, be sure to listen to the recommendations in this article.
The room must be at the appropriate temperature
.
However, this requirement is quite easy to fulfill - manufacturers claim that tire rubber
can
be stored
in a temperature range from -30 to +35 degrees Celsius.
But if the room is unheated
at a temperature below
for a long time
warm
them up before putting them on the car .
You also need to pay attention to the fact that the racks should be no closer than
one meter from
the heating radiators
.
For better wheel safety
they should be stored
on special shelves
,
racks and stands
.
Such storage areas must have a flat surface
and
smooth corners
, because if the rubber lies on a sharp surface for a long time, a mark remains on it.
Protectors, the standard of which does not exceed 205 millimeters, can be stacked vertically on top of each other. But you shouldn’t stack stacks higher than two meters. Larger wheels
are stacked
horizontal
rows.
Proper storage of wheels away from ultraviolet radiation is the key to long service life and preservation of the properties of rubber and, as a result, safety on the road.
UV protection is essential
.
It destroys
the structure of the material and because of this, the rubber
fails
.
After prolonged exposure to sunlight, cracks
that are very difficult to see with the naked eye.
Their presence creates a danger that the wheel will burst while driving
. And this often leads to very serious consequences.
In addition to these conditions, the key to good condition of tires after storage is their regular rotation. This should be done at least once every three months. This procedure is necessary to change the contact surface, so that the wheels are not subject to constant pressure. It is also desirable that the humidity in the room is 40-60%, and constant cleaning protects the rubber from dirt and dust. Also for these purposes, you can purchase a special vapor barrier awning for racks and shelves.
Important!
Before storing the wheels in the storage system in the garage, they must be thoroughly washed and cleaned, and then dried well.
Great attention should be paid to protecting the garage from various gases or vapors. Most often, such troubles happen due to incorrect equipment. The condition of the wheels is also detrimental if oils, solvents or gasoline come into contact with them. Protectors must be protected from all chemicals and reagents. In addition, there should be no metals susceptible to corrosion near the racks.
Protect the wheels from any reagents or chemicals, and protect the rims from corrosion.
It is the discs that are most susceptible to moisture and dirt. Therefore, when storing them separately from tires, the room should be as dry and clean as possible. But most often the wheels are stored assembled, because then it will be enough to simply re-align them when installing winter and summer tires.
If your car room is built of metal, then you will need to pay increased attention to the temperature and humidity of the air. Also in this case, it will be convenient for you to use shelves for storing wheels in the garage on the wall. It is especially important for the safety of tires and wheels to have a hard floor covering and high-quality and extensive ventilation. But in any case, if you plan to store wheels in any room, then you should measure the humidity level and temperature and check the readings with the standards presented in this table:
Making a wooden rack with your own hands
Despite the abundance of different designs or devices, not every vehicle owner has the opportunity to spend money on such purchases. The solution in this situation would be to build a wooden rack in the garage, which will require a minimum of costs and will last no worse than its metal counterpart.
Construction consists of the following stages:
- preparation of tools and materials;
- cutting material according to selected drawings;
- assembly and installation of the structure.
These simple steps will help you store wheels in your garage correctly, without damaging them or cluttering the room.
Preparatory work
Preparatory work before constructing the rack consists of the following steps:
- search for suitable drawings;
- preparing the required amount of materials for their implementation;
- preparation of tools. Among them must be: a hammer, a tape measure, a saw or a hacksaw, a level, a screwdriver or a screwdriver, a corner;
- preparing the site for the construction of the structure. It needs to be cleared of debris and filled with concrete if the floor in the garage is not level;
- It is advisable to treat the wood with chemical compounds that prevent rotting and mold formation.
Cutting material according to drawings
The cutting system depends on the complexity of the selected drawing. The number of steps required for cutting may vary.
The basic sequence of actions is as follows:
- We prepare the racks. For one section, the width of which is 1 meter, 4 racks are required. It is not recommended to build a rack whose width exceeds 1.5 meters. Wooden shelves will not be able to withstand the load and will begin to sag in the center. This will negatively affect both the durability of the structure and the condition of the stored wheels.
- We cut off the bars of the required length, which will act as a connecting element of the rack.
- Cut out the shelves. A 150 x 40 mm board or chipboard is suitable as a material for shelves.
Assembly and fastening of the frame
Assembly and fastening are carried out in accordance with the drawing. When assembling the structure, consider the following nuances:
- Assembling a permanent structure begins with attaching the racks to the rear wall of the garage.
- In some cases, the rear wall of the rack will be reinforced with special spacers.
- Elements of the rack that come into contact with the tires must not have corners or irregularities. Otherwise, they will deform the rubber, and you will have to purchase a new set.
How to properly store tires on rims: standing or lying down
However, practical motorists have long realized that it is better to have both sets of tires, winter and summer, on rims. So that, when the time comes, you can simply swap one wheel for another and pump them up to the required pressure. Any male neighbor can do this. An essential point that makes the life of a car lady easier, by the way.
Useful advice Before the seasonal crowds in tire shops occur, it is more than advisable to check the wheels. It's worth taking the time to take a set of wheels there. An inspection, which includes checking for defects and balancing, will protect you from troubles on the road and save life and health.
We have already decided that assembled wheels are more convenient to use. This also applies to ease of storage.
- The wheels are laid one on top of the other on a flat floor, but no more than 4 pieces. High stacks that are stored for many months will destroy the lower tires.
- Or hung on wide, strong slings or ropes from hooks on the ceiling or metal rods on the walls. They are specially equipped with garages or sheds. Suitable for underground storage, where the temperature does not drop below zero degrees and there is no humidity.
Hanging car shoes on disks in a dry shed or garage is preferable. This prevents damage to the main material of the tire - rubber and ensures good ventilation. And the main weight of the wheel is taken by the metal disk.
Packaging should only be done in ventilated cases or cellophane with holes. Condensation, which inevitably forms in a dense bag, will cover the stamped discs with rust.
Please note: A metal garage is not the best place to store winter tires in summer. It heats up inside like an oven. Since winter tires are softer than summer tires, when heated above 50 degrees Celsius, they become completely unusable. There is a risk of losing your wheels completely or discovering that they are defective later, already on the track, which is fraught with unpleasant consequences.
Video material
Absolutely anyone can build such a device. The bottom line is that one design is enough to store two sets. If you use the building very carefully, it will serve you for more than ten years. For those who have doubts about wooden materials, a metal base is also perfect. It will be more durable and reliable, which will only have a positive effect on its service life.
Dimensions
Standard shelf dimensions for 4 rubber wheels:
The rack is installed from the wall surface at a distance of 10-20 centimeters - this is done so that the rubber does not touch the surface. Two parallel beams (metal or wood, it all depends on the material of manufacture) are mounted a meter from the floor - this is a shelf for tires. The upper and lower parts of the rack can be covered with any material - for example, wooden boards, plywood. These shelves are convenient for storing various tools or car parts. When installing the frame, you should remember that the wheels rest on the longitudinal beam during storage.
To prevent the tires from being deformed by the angle of the rack, it is installed so that the tire is in contact with a flat surface. Or a round metal profile is used as supports.
Hanging shelves: fast and practical
Not in all cases there is a need to create a rack, since it will take up a lot of space. On the other hand, in a garage of any size there is always unused upper space, which can easily be used for hanging shelves.
Structurally, it is quite possible to make any version of such a device for the garage with your own hands:
- Wall shelves can be equipped in both open and closed versions. They are convenient due to their spaciousness, as well as ease of construction. They can be hung on a loop or using an anchor. In the first case, a collapsible structure is obtained, the location of which can be conveniently changed at any time. In the second, the shelf gains additional strength due to the reliability of its installation with the wall.
Hanging shelves are attached to the ceiling. Due to the peculiarities of their location, they occupy exactly that part of the space that is not used and do not interfere with the car at all. The disadvantages of the design include its lack of reliability - it can sway a little upon contact. However, for small items (hammer, pliers, screwdriver, paint, etc.) it will do just fine.
An interesting option for storing tools is to make one wall or a fragment of it in the form of a shield. The shield is attached using anchors, and then small shelves are selected and mounted on it.
You can also build a shield yourself from wooden beams, as shown in the photo.
To store large items of small weight, you can design hanging shelves that are attached to the ceiling using studs.
To make these devices for placing useful items in the garage with your own hands, you will need the following materials and tools:
studs and shelf base - most often plywood or chipboard is used, the thickness of which depends on the expected loads;
large anchors (at the rate of 4 units per 1 shelf);
hexagonal and regular nuts;
flat washers and special Grover washers (at the rate of 4 units per 1 shelf.
The tools you will need are the standard set described above. The sequence of actions is as follows:
- Shelves of appropriate sizes are calculated and cut out. It is better to immediately treat them with primer and varnishes and let them dry completely.
- Markings are made on them for fastening. If the shelf is long, the supporting supports should be placed at a distance of no more than 60 cm.
- It is better to reinforce the ends of the plywood with a metal profile to ensure maximum reliability of the structure.
- The edges are marked with grooves into which the studs will be mounted. They should be placed at least 5-7 cm with a margin from the edge so that the wood does not crumble during prolonged loads.
- All grooves and holes are drilled, then future fastening locations are marked along the wall and/or ceiling.
- The holes on the wall are also drilled, after which the anchors are inserted into them all the way.
- The studs are connected to the anchors, as shown in the photo.
Finally, the shelf itself is put on and secured using regular washers and Grover washers. The level checks the correct location and makes adjustments if necessary.
The entire technology is shown schematically in the figure.
Making a shield shelf
The DIY technology for making such a device for a garage has its own differences compared to installing conventional shelves:
- The shield itself is made of durable plywood, the parameters of which are selected according to the situation. Visually, the shield should completely cover the surface of the desktop.
- Space is allocated on the board for all shelves and appropriate notes are made.
- Next, all the holes into which the dowels fit are made in the surface of the structure. It is on them that the hooks will be attached, on which all the tools will be placed.
- The shield is secured to the wall using brackets. The corresponding holes are made using a hammer drill.
All steps are shown schematically in the figure.
Wooden shelves with metal frame
Rack with metal frame
An alternative design option, which is a more expensive, but at the same time more durable and durable solution. The racks in these shelves are made of metal, and the surface of the shelves itself is made of wood or any materials of wood origin.
Such a rack has a higher resistance to moisture and mold. It is more resistant to heat and fire. Moreover, by using metal parts, they can be made dismountable, which will allow you to change the appearance of the structure according to any desire of the garage owner.
Materials and tools needed for work
Corners for shelving in the garage
The racks of such a rack are made from rectangular pipes or from a profile with a width of one of the sides of 5 cm. A 30 mm corner is best suited as crossbars.
The frame is made from a corner, and the thickness of the shelf should be from 1.5 to 3 cm (along the height of the corner). Crossbars made from angles can be attached to the guides in different ways - by welding or using bolts. It all depends on the wishes of the owner.
If you need a durable structure, then welding is preferable; if you require the versatility of the product with the possibility of its further modernization, you should use bolts. The use of bolts allows, for example, to change the height of each level.
Shelves can traditionally be made from any material on hand - from pine to OSB. For reasons of strength, their thickness should not be less than 12-15 mm.
For work you will need the following set of tools:
- drill (screwdriver)
- Bulgarian
- wood hacksaw
- corner
- level
- welding machine (optional)
Manufacturing procedure
Do-it-yourself drip irrigation device in a greenhouse: from a barrel, a plastic bottle, or even an automatic system. For tomatoes and other crops (Photo & Video)+Reviews
Corner shelving frame
It is best to assemble the rack in a free room, and it is advisable to empty the garage of unnecessary things and remove the car from it.
After assembling the frame, it should be screwed to the wall. The assembly sequence is as follows:
Based on the finished measurements, the material of the racks and corners for the shelves is cut using a grinder. The racks are marked in those places where shelves will be attached to them. The corners are screwed to the racks using bolts (or welded in the case of a stationary structure)
In this case, it is extremely important to maintain a connection angle of 90°, otherwise the structure will turn out skewed. Similarly, the racks are connected to each other using crossbars, but at the same time, right angles must be maintained not only between the racks and crossbars, but between the crossbars and the previously attached corners. The assembled structure is installed on its place and screwed to the walls and floor. This can be done, for example, using anchor bolts. The metal frame is sanded using a grinder with an appropriate brush attachment and coated with a primer or paint containing a primer. At this stage, in order to facilitate the labor-intensive process of mechanically cleaning the frame from rust, you can use a chemical rust converter
Typically, converters require a day to dissolve the rust; after which it is possible to paint the surfaces without any mechanical or chemical treatment. After the paint has dried, shelves are cut out of wood or wooden materials and adjusted in size to the finished frame structure. The shelves are sanded, painted or varnished, and then attached to the frame using bolts or self-tapping screws
At this stage, in order to facilitate the labor-intensive process of mechanically cleaning the frame from rust, you can use a chemical rust converter. Typically, converters require a day to dissolve the rust; after which it is possible to paint the surfaces without any mechanical or chemical treatment. After the paint has dried, shelves are cut out of wood or wooden materials and adjusted in size to the finished frame structure. The shelves are sanded, painted or varnished, and then attached to the frame using bolts or self-tapping screws
Video description
The video provides detailed instructions for installing a rack for storing car wheels:
Next you need to make shelves, which can be made of wood or sheet materials. They should also be varnished to avoid the appearance of fungal diseases on their surface. Then straps are attached to prevent the wheels from rolling off from their storage locations. This completes the assembly of the wheel storage rack.
Such a device is quite inexpensive and can be purchased at a home improvement store or in a private workshop. Despite its simplicity, it is able to create optimal and very convenient conditions for storing tires and wheels.
Optimizing tires in the garage space - reliable, inexpensive, safeSource yandex.ru
Tips for use
Any car enthusiast can assemble a wooden structure for storing rubber with his own hands. Especially if he is familiar with the work of a carpenter or knows how to use a hammer and saw. The cost of such a rack is much less than the factory one, and its assembly will take little time.
To learn how to make a rack for wheels with your own hands, see the following video.