Paints for modern cars are endowed with excellent quality characteristics, which allows you to create an ideal glossy finish. However, not every paint can protect the metal surface from rust. In this case, the raptor coating will come to the rescue.
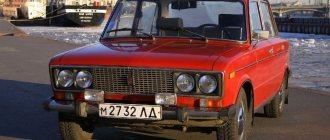
During active use of vehicles such as a jeep, pickup truck, Niva and light-duty trucks, scratches and visual defects often appear on the paintwork of the body surface.
Over time, rust will form in damaged areas when exposed to moisture. Because of this, the appearance of the car loses its attractiveness. To help the car enthusiast cope with such problems, a large number of protective equipment are available on the automotive market today. The most effective product is considered to be from the manufacturer U-pol – raptor pol.
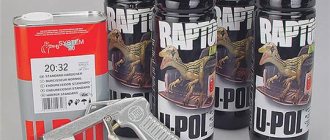
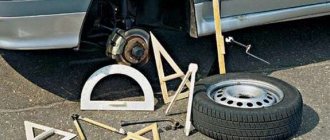
In retail sales, Raptor pol is sold in a package that includes 5 containers. One container (liter) is filled with a hardener, the remaining 4 (each 750 grams) are filled with a special chemical composition.
The kit includes a gun designed for applying this product, which has properties such as anti-corrosive and anti-gravel. The gun nozzle is carefully calibrated, which ensures high-quality application of the prepared composition with your own hands.
To cover a small area of the body, you can use a regular brush. Each bottle is designed for use in conjunction with a pistol.
Today, a car enthusiast can purchase a set with a product in black and cloudy white shades. The latter is used to create almost any color for car painting. The kit also includes detailed instructions on how to paint the surface of a car with raptor.
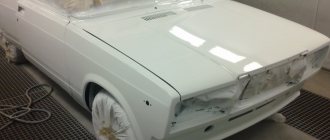
Applying Raptor protective coating is quick and easy
Paints for modern cars are endowed with excellent quality characteristics, which allows you to create an ideal glossy finish.
However, not every paint can protect the metal surface from rust. In this case, the raptor coating will come to the rescue. During active use of vehicles such as a jeep, pickup truck, Niva and light-duty trucks, scratches and visual defects often appear on the paintwork of the body surface. Over time, rust will form in damaged areas when exposed to moisture. Because of this, the appearance of the car loses its attractiveness. To help the car enthusiast cope with such problems, a large number of protective equipment are available on the automotive market today. The most effective product is considered to be from the manufacturer U-pol – raptor pol.
In retail sales, Raptor pol is sold in a package that includes 5 containers. One container (liter) is filled with a hardener, the remaining 4 (each 750 grams) are filled with a special chemical composition. The kit includes a gun designed for applying this product, which has properties such as anti-corrosive and anti-gravel. The gun nozzle is carefully calibrated, which ensures high-quality application of the prepared composition with your own hands. To cover a small area of the body, you can use a regular brush. Each bottle is designed for use in conjunction with a pistol.
Today, a car enthusiast can purchase a set with a product in black and cloudy white shades. The latter is used to create almost any color for car painting. The kit also includes detailed instructions on how to paint the surface of a car with raptor.
Painting” in different colors
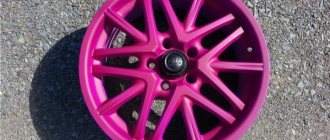
To paint with raptor paint in any color, you should buy a kit from the manufacturer U-POL with a cloudy-whitish substance. It is needed for tinting. But there are also pigments of prepared colors. The best option is to contact a branch of the company. You will be given advice on application and proper mixing of raptor and pigment. Mix raptor with hardener in a ratio of 3:1 and add 10% of the main pigment to the resulting mixture. In case of problems, contact a colorist. The raptor itself has a milky tint, which is important to take into account if you want to maintain the light tone of the car.
Advantages and disadvantages of coating
This polyurethane coating is a product that has been successfully developing coatings for car bodies for more than 60 years. Painting with raptor forms a protective coating that can protect the paintwork of an SUV body, for example, a Niva, from damage.
The main advantages of the substance include:
- excellent durability of the resulting film on metal;
- coating resistance to intense friction;
- resistance to chemical attack;
- Raptor pol does not fade from sunlight;
- providing such useful properties as anti-corrosive and anti-gravel.
At the same time, raptor sex also has its drawbacks. The main ones should be highlighted:
- painting the floor with raptor does not provide for subsequent varnishing, because of this the car body will always be matte;
- the surface of the metal after applying a coating with anti-corrosive and anti-gravel properties takes on the appearance of an orange peel, this does not always make the car aesthetically pleasing;
- If the rules of coating are violated, chipping may occur in the future.
Despite its shortcomings, this coating still protects metal better than most car paints. The body of a Niva or other SUV will have better resistance to rust.
How to protect thresholds from rust?
External processing.
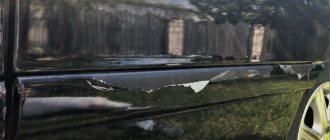
As was written in the introduction, external processing is not as important as internal treatment, but nevertheless, it is the external part of the threshold that determines the appearance of the car. And in order to improve it, many motorists install plastic body kits. The appearance is supposedly better and the chips are not visible. Colleagues are a huge mistake. A non-standard body kit harms the threshold more than the lack of paint!
See what happens under the plastic door sills:
The fact is that dust inevitably accumulates under the linings; naturally, in our climate, the dust collects water and does not dry out most of the time, and with every change in temperature or driving over uneven surfaces, the dust collected under the lining strips off the paint! The result is that the threshold rots not only from the inside, but also from the outside.
We agreed - we will remove the non-standard sill trims...
The thresholds themselves, over time, lose their paint due to the abrasive effect of road dirt. We already have a separate article on our website about how to paint thresholds; we won’t repeat it.
To reduce the abrasive effect of road dirt, be sure to install mud flaps on the front wheels. With mudguards, the paint on the thresholds and arches will last several years longer, and most importantly, the amount of water getting inside the threshold will be reduced.
The author of the article had a case - a Volga 3102, which had been used all its life in Volgograd, but had lived for one winter in St. Petersburg, and by coincidence, the Volga was without one front mudguard, came to overcook the threshold, so - the threshold and the box on the side without the mudguard were ROTTEN, while while the threshold on the other side did not even require overcooking of the lining, although it had damage from impact and chipped paint.
We agreed - we will definitely install mudguards on the front wheels.
To summarize, on the outside:
- removing non-standard linings
- Be sure to restore the factory paintwork
- Be sure to install mudguards
Internal processing.
The network is full of recommendations on materials for treating hidden cavities, from pushsal, mining and Movil to modern corrosion inhibitors, we will also give our recommendations, but before treating the threshold, it must be washed! This is done very simply - the plugs are removed from both sides and the threshold is washed with plenty of water. Here's a video using an example of a 124 Mercedes:
But we shook out so much sand when we were digesting the thresholds on the Mazda 3 2007:
We agreed - before treating anything hidden from the cavity for rust, be sure to wash the threshold and dry it for several days.
Mining is the cheapest option.
The tradition of pouring waste into the thresholds dates back to the times of the USSR, and indeed, 2-3 liters of waste into the threshold at each oil change extends its life by 5-10 years!
They write online that you can’t pour mining, it will accelerate corrosion, etc. - nonsense! Working out helps, the author of the article was a 1993 Volga. which had factory thresholds in 2022 because it was spilled with drainage at every oil change. Think about it - the most rotting Volga (31029) had its original thresholds 25 years after production, only thanks to development!
Extraction perfectly impregnates rust and blocks the access of air to the metal, respectively, the rate of decay slows down significantly.
The myth that working out accelerates corrosion, and if you pour oil into the sills, then only fresh oil, was started by marketers (you have to sell anti-corrosion compounds)…
The development is not without its drawbacks:
- It is harmful to health because... It is unknown what it is made of, and what additives were used in it, and what it washed out of the engine!
- The waste sometimes has a rather foul odor, which takes a long time to dissipate.
- Cavities need to be drained at least once a season.
For those interested, crude oil is an excellent substitute for waste, is much less harmful to health, and is much less easily washed off with water, but it is quite difficult to get.
Movil and pushsalo are a cheap option.
Both were developed a long time ago. Pussalo has been used for more than 200 years to preserve guns and shells, and Movil (Moscow - Vilnius) was developed as an anti-corrosion agent in the early 70s.
Both are petroleum derivatives: pushsalo - thickened petroleum oil, Movil - a mixture of lithol, motor oil, drying oil, kerosene and corrosion inhibitors. Both anticorrosives have the same principle of action - to limit the access of oxygen to the treated surface.
If Movil is relatively liquid, and like a waste product, it wets the rust (albeit worse). That gun lard, at normal temperatures, can be cut with a knife and it is only applied hot, which is not always possible in anti-corrosion treatment, so using it to protect thresholds is nonsense, but covering the bottom for preservation, on top of mastic, for a long period of parking is quite option.
Movil is an expensive alternative to mining. Because it smells just as bad and has just as bad an effect on the health of those who smell it.
Movil also needs to be updated periodically because Over time it dries out and cracks.
Modern anti-corrosion agents...
Naturally, over time, manufacturers have improved anti-corrosion agents, and in addition to the “collective farm methods” given above, there are quite modern compositions:
Most of them are analogues of Movil, but differ in drying speed and corrosion inhibitors. The most important advantage is that they can be applied less frequently, and they are more expensive to purchase, but they also require updating less often. Agree - most people drive a car for 2-3 years and it is much more profitable to carry out anti-corrosion treatment once with high-quality materials than to update the Movil every year for money.
We agreed - the protection of hidden cavities consists of 2 stages:
- Washing the threshold from dirt from the inside
- Treatment with anti-corrosion compound.
That's all for me today. If you still have questions about how to protect car sills from corrosion, or if you want to tell us about your experience of using anti-corrosion compounds, write comments.
Good afternoon, dear readers and guests of the blog. Today in this article we will talk about treating car thresholds with your own hands to protect against rust. All car enthusiasts have encountered the problem of rusty thresholds. It is relevant for any car operating on the roads of the country.
Anti-corrosion treatment of car thresholds can solve the problem of rust. If you let the corrosion process take its course, then in a few years you will have to completely change the thresholds of the car. It is easier to prevent rust than to subsequently deal with its destructive effects.
At the end of the article you will find an interesting and fascinating video. Shows the destructive effect of rust on a car.
Basic preparatory work
Painting with raptor is not a very labor-intensive and complicated process that almost any car enthusiast can do. However, for its high-quality implementation it is necessary to carry out a set of certain preliminary measures, and they will require effort. At the initial stage, all attachments are removed, namely: headlights, mirrors, bumpers, turns. The next step is to remove traces of rust and loose pieces of old car paint from the car. All problem areas must be etched with a special primer - ACID No. 8.
If there are dents on the car, they are straightened and puttied. At the final stage, the entire surface is degreased with S2001 cleaner, and the gloss is removed using fine sandpaper. Work with sandpaper is carried out until the body becomes matte.
The instructions included with the substance say that Raptor pol has ideal adhesion. This indicator allows you to carry out work on applying protection in the sun or in windy weather. But it’s not worth the risk; it’s advisable to work in a closed garage. Having completed all the preparatory measures efficiently, you can safely move on to the main procedure - applying a protective coating to the body of a Niva, UAZ or any other car.
Painting process
It is not advisable to choose a period when applying a protective anti-ground coating when the ambient temperature is too hot or frosty. Optimal conditions will be 20 C and humidity close to 60% and below.
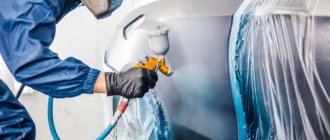
When working in closed conditions, we recommend using a respiratory mask or moving the process to an open area. The main toxicity is not contained in the paint, but in the proprietary solvent used, made using toxic isocyanates.
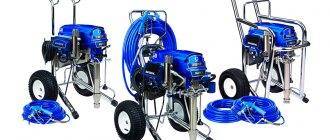
For spraying, it is customary to use special Schutz guns and HVLP spray guns. It is not prohibited to apply with a brush or rollers. If you have the opportunity and desire to get high-quality tools for work, then you should look for a sprayer with an adjustable nozzle RAPTOR PROFESSIONAL VARI-NOZZLE APPLICATION GUN, with which you can create different textures.
After thoroughly mixing the workpiece, attach the bottles to the compressor sprayer. Depending on texture preferences, we adjust the pressure in the range of 2.5–5.0 atm. In the lower range, the texture of the pattern will be larger, and with higher atmospheres, the orange peel will become less prominent.
It is important to know that in addition to pressure, the texture is affected by the amount of thinner and the distance from the surface being treated; the further the distance, the less relief the result will be.
By adding a diluent to the finished solution, you can influence the texture in the direction of reducing its relief. You should not add more than 10%. It is allowed to use proprietary or universal acrylic composition. Classic solvents, for example, 647 or its analogues, will reduce the durability of the result.
It is better to experiment on third-party surfaces, rather than on a car. Or you can choose the inner side, hidden from view. We select a spray interval from 45 to 150 cm. Most often, specialists work up to 55 cm.
All work with the finished composition must be completed no later than 60 minutes. When the interval between applying two layers reaches 5 hours or more, then it is worth sanding the base a little.
It is customary to apply 2-3 layers, no more. A sufficient interval between applications is 60 minutes. When changing the bottle, it is important not to let the solution harden in the gun, but to thoroughly rinse the tool to remove the composition with solvent or acetone.
Touch drying takes no more than 60–70 minutes. Next, we wait 2-3 days for the composition to “set”, after which the machine can be used carefully in non-extreme mode. However, complete visible hardening occurs in 7–9 days.
In extreme mode, you can operate the car no earlier than after 3-4 weeks. Some specialists speed up the drying process by raising the temperature to 60 C. The use of infrared dryers is strictly prohibited. It is preferable to provide natural conditions for the composition to harden on the surface of the body.
The body can be protected using galvanic coatings, galvanizing and special primers. But all these methods are not effective and durable enough. Therefore, many people turn to using Raptor coating. Raptor car paint protects the body from exposure to water, sand, stones, and gravel. With such a coating, the car is not afraid of difficult operating conditions, so the Raptor is ideal for off-road vehicles.
Stages of applying protection to a car
The manufacturer indicates in the instructions that it is necessary to mix chemical reagents with the hardener in a ratio of three to one (3:1). For convenience, the bottle with the chemical component has a border for pouring the hardener. The mixture should be shaken well for several minutes. The manufacturer offers Raptor pol with different drying speeds. This allows the inexperienced car enthusiast to choose a compound that will take longer to dry, giving him more time to apply the coating.
After shaking the mixture, we attach the bottle to a special gun and begin to carry out the main work. Painting with raptor is carried out using a compressor. The gun is connected to the compressor using a long hose so as not to interfere with the technician’s movements around the car.
To paint a car in the color of your choice, you need to purchase a chemical mixture of a cloudy white shade. In this case, you will need an additional component - a color pigment. You can buy it from an official representative of the manufacturer. Only there they will be able to give qualified advice on mixing pigment with raptor to obtain the required color.
We mix the chemical reagents in the package in a ratio of three to one, after which we add pigment to achieve the desired color. Using a compressor and a gun, we paint the floor of the car body with raptor.
The first layer of coating is applied to the roof of the car. The movements are uniform, without sudden changes. The gun nozzle should not approach the surface closer than 40-50 cm. To create a high-quality coating, the following conditions must be met:
- the air temperature when applying Raptor should be within +20 0 C;
- the time interval between spraying the first and second layers should be 40–60 minutes.
When working, avoid overfilling - do not apply a large amount of coating in one place. Experts say that such thickening can lead to the appearance of chips during the operation of the car.
Ideally, the car should dry within 5 days. However, if there is an urgent need, you can start using the machine after 12 hours, but you should make sure that there is no impact on the protective coating.
Dosage of the product
The retail chain sells it in special packaging. It contains four bottles with the main substance. The volume of a separate one is 0.75 liters. There is also a one liter bottle of hardener. The kit contains an anti-gravel gun, specially prepared for working with raptors. All containers and the gun fit together. The sets come in black and dull whitish. The latter is easy to tint in different shades. The instructions have a detailed description and tips for use. This product is certified, the quality certificate and positive reviews confirm this.
Features of working with the substance
No matter what method you paint with, the precautions are the same. All of them are described in the attached instructions, developed by specialists:
- do not spray the mixture near an open fire - Raptor pol is flammable;
- when working, protect your eyes - you need to wear special glasses;
- contact of the substance with the skin leads to dryness and cracking - spraying is carried out exclusively with work gloves;
- Raptor pol vapors may cause drowsiness, so work in fresh air or in a ventilated garage. If the room is not ventilated, you need to work in a respirator.
Removing paint
Removing paint with sandpaper is very difficult - its grains constantly become clogged, and the paper itself quickly becomes unusable. The use of grinders and abrasive wheels is dangerous for the car: careless handling can lead to damage to metal parts, which will then need to be leveled using a primer.
Carefully remove the coating using a metal brush placed on a drill or grinder. It is important to work carefully and carefully, as overheating of large car parts leads to their deformation. This will make the appearance of the car unaesthetic.
The best option for removing Raptor is to use a hairdryer and a narrow spatula. To carefully and quickly remove the coating, a stream of air heated by a hairdryer and the spatula blade move across the area of the car almost simultaneously.
Raptor paint will allow the car body not to be scratched and will protect it from rust formation. Careful preparation of the surface of the parts to be coated will make the process of applying and operating a painted car simple and convenient. But when covering the entire surface of the body with paint, problems may arise with removing contaminants due to the shagreen structure of the material.
OPEN
Preparation and application to old coating and metal. Painting a car with Raptor is not a complicated process and can be done by a car enthusiast, but it requires careful preliminary preparation. If painting will be carried out over the entire body of the car, then initially you need to remove all the attached parts from the body: bumpers, headlights, turns, mirrors, and so on. Contaminants, traces of rust, places of peeling paint are removed from the body using chemicals and cleaning materials.
Raptor is not applied to bare metal, plastic or glossy surfaces; abrasive preparation is required! We prepare the body for painting with P180 sandpaper, this abrasive will remove the gloss. The surface to be painted with Raptor should be matte. If necessary, the body is straightened and puttied in places of dents, the putty is treated with abrasive from P80 to P180. It is recommended to apply 1-2 layers of U-POL ACID#8 etching primer (sold in a can or aerosol) to areas of the body with exposed metal.
U-POL ACID#8 primer has adhesion to bare metal, aluminum, galvanized and galvanized steel. The putty can also be overcoated in one coat with ACID #8 etch primer without sanding after 20 minutes. apply Raptor. Hard-to-reach places where it is not possible to create a risk with P180 abrasive can be treated in 1-2 layers with a special composition GRIP#4 U-POL (aerosol) - an adhesion enhancer. The GRIP#4 U-POL composition is applied to a glossy surface and creates a sticky film that perfectly holds any coating after 20 minutes. apply paint or Raptor.
Parts sanded with P180 abrasive should be cleaned of grinding dust and degreased with anti-silicone cleaner (degreaser) S2001 U-Pol. All parts of the car that remain on the body and will not be painted should be covered with protective material with film or paper, using masking tape as fastening. After this we prepare Raptor for application.
The instructions for use of Raptor say that it has excellent adhesion to painted surfaces, so the painting procedure can be carried out even outdoors, without fear of the sun, wind and dust. However, it is better to carry out painting indoors in the absence of dust, on a clean and grease-free body.
Painting plastic parts
Raptor is not applied to bare plastic, only through the plastic primer PLAST X2 Adhesive primer! Plastic parts without paint coating are degreased and applied with red scotch-brite, then degreased again and applied with 1-2 layers of primer Plast X2 U-POL (aerosol). Only after this, after 20 minutes, can you apply the Raptor primer. If the plastic parts are coated with paint, then we matt the old coating using a P180 abrasive sponge or red Scotch-Brite, and prime the areas sanded down to the plastic with Plast X2 U-POL aerosol. Afterwards, let the primer dry for 20 minutes and apply Raptor.
Application technology Raptor (black version BLACK) After all the preparatory work, you can proceed to painting the body. The instructions for use recommend mixing the material with the hardener in a ratio of 3:1. In the jar where Raptor is located, there is a mark at which you should add hardener - it will be exactly 250 grams. You can also use measuring cups for dosing. Close the jar and shake the contents for a few minutes to mix the Raptor and the hardener.
Fine textured Raptor application. And in order for the texture of the applied coating to be smaller, it is recommended to add 10-15% S2040 U-POL thinner to the bottle with the material and hardener, and then Raptor can be applied even through a primer spray gun with a nozzle of 1.6 - 2.5 mm. In this case, the texture will be fine and similar to regular matte paint. Also, using a spray gun with a nozzle of 1.6 - 2.5 mm will save Raptor and apply the first layer faster with perfect painting of hard-to-reach places. Moreover, a spray gun for soil with a nozzle from 1.6 – 2.5 mm. has an adjustable torch, unlike an anti-gravel spray gun, which paints with a dot, so U-POL recommends using two spray guns for a variety of Raptor applications, both with fine and coarse textures. Painting begins from the roof of the car using even movements. The gun should be kept 20 - 30 centimeters from the surface to be painted. We set the pressure on the spray gun from 2.5 to 4 atm. The texture coating can be adjusted by pressure and distance to the surface. Apply Raptor with a primer gun with a nozzle of 1.6 - 2.5 mm. in 2 layers, with interlayer drying for 40 minutes. Do not dilute the entire volume of Raptor with the hardener, because Raptor is diluted with the hardener after 40 minutes. will thicken and painting into a fine texture will be difficult. Dilute Raptor with hardener only before application!
Preparation
Painting technique
The instructions advise mixing raptor with hardener in a ratio of 3:1. The paint can is graduated and helps you add the optimal amount correctly. The total volume will be 0.25 kg. The jar is closed and shaken for several minutes. This is necessary for mixing the paint and its hardener. They come with different drying times, this allows you to choose the optimal intensity of surface drying. To reduce the surface texture, the company advises adding up to 10% S-2040 thinner to the container.
After connecting the paint container to the air gun, the initial coat of coating is applied. Work begins from the roof of the car, and with smooth movements. The gun nozzle is placed at a distance of 45 - 55 centimeters from the point of application and it is ensured that the layer does not have overflows. The thicker the layer, the worse the strength. The initial layer requires a temperature of +19 degrees to dry and lasts up to an hour. Then the next layer is applied. After this layer, the paint must polymerize for at least 6 days. But the machine can already be used if there are no large and significant loads on the surface.
U-Pol Raptor for the car - heavy artillery against external aggressors
Despite all its visual appeal, gloss, shine and excellent technical characteristics, auto enamel used by the modern automotive industry is not suitable for trucks, pickups and SUVs, which are often operated in quite extreme conditions. The usual coating on such cars is quickly damaged, the body becomes covered with abrasions and scratches, which not only spoil the exterior, but, over time, contribute to the development of corrosion and destruction of the metal. In order to reduce regular visits to a car service center to eliminate defects, there is an effective method - painting a car with raptor.
The cost of "pleasure"
How much does Raptor paint cost? The average cost of a standard set of four cylinders with paint and hardener is about 6 thousand rubles. A set with a pistol will cost an average of 7.7 thousand rubles. The total price of Raptor coverage including the pistol will cost 13.7 thousand rubles.
Raptor painting price. To paint a car with Raptor you will need at least 3 sets, and this “pleasure” will cost 18 – 24 thousand rubles. subject to self-staining. If you decide to paint the car in a workshop, then the price of painting the car with Raptor will be higher by the amount of the cost of the master’s work (about 10 - 20 thousand rudders). Painting a Raptor with your own hands is carried out in several stages, let's look at it in detail.
Advantages and disadvantages of the product
Coating the machine with U-Pol Raptor ensures the formation of a protective film with the following positive qualities:
- high strength;
- excellent resistance to friction;
- high adhesive properties;
- resistance to sunlight, moisture, and many chemicals;
- corrosion protection;
- reduction of vibration and noise;
- does not require the creation of sterile conditions in the garage;
- easy cleaning;
- long service life;
- Possibility of self-coloring.
Speaking about the disadvantages, we can highlight the following inconveniences:
- It is strictly forbidden to varnish the painted surface, that is, it will be matte;
- It is prohibited to carry out polishing work on the surface of the vehicle;
- if painting rules are violated, chipping may occur;
- Not everyone likes the resulting effect due to the similarity of the painted surface to rough skin. If this aspect is in doubt, then it is better to examine the coating in detail, if not “live”, then at least in photographs, and only then make a final decision;
- high cost, especially if painting is carried out in a car service center.
Positive and negative qualities
Raptor, when applied to the surface of the body, produces a protective film that has several advantages in comparison with typical car paint:
- abrasion resistance,
- excellent strength,
- not afraid of the sun's rays,
- great chemical resistance,
- good adhesion,
- easy to clean,
- excellent corrosion protection.
But there are also disadvantages:
- the surface will always be matte, it is forbidden to varnish it,
- if you deviate from the technology, chips may form,
- the surface is not very aesthetic and has the appearance of rough skin.
Packaging and equipment
This coloring agent is supplied for sale in packaging containing:
- four bottles (each 750 ml) with the main substance;
- hardener (1 l);
- anti-gravel gun designed to work with raptor;
- instructions with detailed recommendations for use;
- quality passport.
Sets may be black or off-white in color. Moreover, the latter can be transformed into any desired shade without much difficulty. To paint in different colors, 10% of the coloring pigment is added to the base.
DIY raptor painting
Welcome to the kuzov.info blog!
In this article we will look at what Raptor protective coating is, its advantages, preparation for application, the application and drying process.
The content of the article:
Raptor is a 2-part paint, meaning it is mixed with a hardener before application. It has a urethane base, which gives this paint special strength, while it remains elastic and does not crack upon impact.
So, let's list the main advantages of the Raptor coating:
How to paint a car with raptor?
Preparatory stage
Preparation for painting is one of the most important processes, since the final result largely depends on the quality of its implementation. First of all, it is necessary to dismantle the bumper, headlights, mirrors, handles, windshield wipers and other attachments. Everything that cannot be painted, but cannot be removed, is very carefully covered with a protective material (film or paper) and masking tape, otherwise it will be almost impossible to wash off any accidental paint.
The algorithm for further actions is as follows:
- Using a sander, paint and varnish coating and traces of rust are removed from the surface of the body;
- the resulting dust and dirt are blown out with a compressor;
- cleaned areas are degreased with white spirit or anti-silicone;
- areas with dents, chips or scratches are straightened with a special putty;
- after the surface has dried, it is necessary to blow it again;
- The areas to be painted are treated with a primer for metal surfaces.
Raptor staining
According to the manufacturer's recommendations, raptor coating does not have to be carried out in a specially prepared room - it can be done outside without worrying about weather conditions. However, as practice shows, when applying the composition to car bodies, it is better to avoid contact with dust and small particles of dirt.
How to paint a raptor body? The process consists of the following steps:
- The coloring composition is mixed with the hardener in a ratio of 3:1 (mixing is done in a can of paint). It is important to remember that the resulting mixture is suitable for use for three hours.
- Screw the gun with the hose onto the can.
- Painting begins with the roof of the car. Using smooth, even movements, holding the gun at a distance of 50 cm from the area to be painted, apply the first layer.
- At a temperature within +20°C, the coating will dry in 30-60 minutes, after which you can begin applying the second layer.
- Since this substance has a very pungent and unpleasant odor, and is also toxic, the car should dry in a well-ventilated area. Complete polymerization of the material occurs on 21 days. However, careful use of the vehicle is allowed 7-10 days after painting.
DIY raptor painting
Welcome to the kuzov.info blog!
In this article we will look at what Raptor protective coating is, its advantages, preparation for application, the application and drying process.
Raptor is a trademark of U-POL. The full name of this product is U-POL'S RAPTOR Truck Bed Liner, which means a cover for the rear bed (cargo compartment) of pickups and trucks. Initially, this coating was developed precisely for these purposes. Subsequently, Raptor paint began to be used everywhere, for painting both individual parts of the body and the entire body.
Raptor can be applied to areas most susceptible to wear.
Raptor is a 2-part paint, meaning it is mixed with a hardener before application. It has a urethane base, which gives this paint special strength, while it remains elastic and does not crack upon impact.
So, let's list the main advantages of the Raptor coating:
Surface preparation for Raptor coating
Mixing Raptor Ingredients
Spraying with an HVLP spray gun
Raptor can be painted with most modern paints. To do this, you need to wait 24 hours after applying it and treat it with Scotch Brite. Next, paint or varnish is applied. This is not a mandatory process, but possible.
Drying the Raptor coating
Raptor dries touch-free in 1 hour. After 2-3 days you can use it with caution. After 7 days, the surface painted with Raptor is completely ready for use. Drying can be accelerated by increasing the temperature (60 degrees), but complete hardening will also occur no earlier than 7 days.
It is not recommended to infrared dry the Raptor.
Source
Precautionary measures
Since U-Pol Raptor has a negative effect on mucous membranes, eyes, skin, can cause a feeling of drowsiness and even loss of consciousness, and is also a flammable material, when working with it, be sure to use a respirator, safety glasses, gloves and special overalls. The painting site must be provided with fire extinguishing equipment in advance, and good ventilation must also be ensured.
Painting a raptor is not something super complicated. After looking at the corresponding photos and videos, even a beginner can handle it. The most important thing is to strictly follow all the manufacturer’s recommendations and scrupulously complete the work steps.
Safety precautions during operation
In order not to harm your health, you need to know the dangers of working with dyes. So, you need to consider the following points:
- The mixture ignites;
- With prolonged inhalation and contact of the product with mucous membranes, irritation occurs;
- If the product gets on the skin, it will cause dryness and burning;
- If you breathe the product for a long time, you will feel dizzy.
To protect your health you need:
- Take care of good ventilation if work is carried out indoors. Of course, it is better if a built-in ventilation system is installed, but you can simply open the doors. Wear a respirator and safety glasses;
- Keep paint and painted items away from flammable objects;
- Tools used during work and in contact with the Raptor are placed in a container with water so that they do not freeze, and they can be used again if necessary;
- In order not to stain clothes, wear special protective products;
To avoid getting your clothes dirty, wear special protective clothing.
Raptor paint is an ideal anti-corrosion and anti-gravel paint, the color is perfectly protected from fading in the sun, and will delight the owner with an aesthetically pleasing appearance for a long time. Painting with Raptor yourself is also possible, it saves money, but you need to take care of your own safety, take into account compliance with all work rules in order to properly cover the car and get the desired result.
Raptor paint for car body protection
When operating a vehicle off-road, there is a high probability of mechanical damage to its body. The appearance of a defect on the body, even a small one from a rebound stone, will lead to the formation of corrosion over time. To prevent such a problem from arising, modern SUVs have plastic linings to protect the body in particularly hazardous areas. But it will not be possible to completely cover the car body with plastic, and Raptor paint can be used to protect the metal elements.
Are there any negative aspects to using such a solution?
In all types of work there are positive and negative aspects, the only question is their quantity.
View gallery
Possible disadvantages include the following:
- contraindications to the use of varnish substances over the protective layer, so the coating will be permanently matte;
- the external appearance of the treated body will resemble the surface of an orange peel; some car enthusiasts may not like this;
- Deviation from the recommended technology will lead to the appearance of defects;
- long process of complete drying (polymerization).
For the final result, these shortcomings are not significant. Now you know what this car coating is.
What is Raptor paint for a car?
Raptor is a special product designed to protect the body of cars that often travel off-road. The paint composition has increased strength characteristics, due to which, after applying it to the car body, the impact resistance of the body increases.
Please note: In addition to protection from mechanical damage, Raptor also protects the car body from other negative factors, such as direct sunlight, exposure to moisture and chemicals.
Raptor paint is based on a urethane composition. It is worth understanding that Raptor is precisely paint, which, when applied to the car body, acquires the appropriate tone. Therefore, Raptor can be used by drivers to not only protect the body from future damage, but also to paint over existing defects.
The Raptor paint composition can be applied both to already painted surfaces and to fresh primer, for example, if work was carried out to restore the car body. The surface painted with Raptor is not as shiny as after applying regular car paint, which is why it is more often used specifically for SUVs. The structure of the applied Raptor layer is slightly rough with clearly defined grains.
Please note: If you need to protect the body of a city car from external negative factors, you can use Gravitex.
Raptor can be used for application both on the entire surface of the body and on its individual parts. You can paint with Raptor using regular brushes and rollers, or using a spray gun.
What will happen as a result
The paint and varnish market is rich in a variety of products that provide all types of exterior coatings for vehicles. They block the interaction of metal elements with negative factors, which include the following phenomena:
- moisture;
- ultraviolet;
- minor mechanical impacts;
- thermal fluctuations, etc.
By applying the Raptor coating with your own hands, the car owner forms a strong polyurethane layer on the outside, which takes care of preventing body defects for a long period. This paint is resistant to contamination, prolonged exposure to the sun, and even exposure to chemicals, which are used in large quantities by utility workers.
As a result of processing, the surface becomes matte and slightly rough, like an orange peel. There is no gloss, which does not prevent the appearance from being aesthetic and original. After the work is completed, the machines are not polished, since this process will only damage the protection.
Advantages and disadvantages of Raptor
There are various means, the application of which allows you to protect the body from mechanical defects. In comparison with them, Raptor has the following advantages:
No special knowledge or tools are needed to apply Raptor to the car body. The work can be done in the garage;
- Raptor quickly sets on the car and adheres well to both paint and primer;
- The product protects the body well from the appearance of mechanical defects, as well as from other negative influences: humidity, ultraviolet radiation, temperature changes;
- Unusual appearance.
The disadvantages of the Raptor include, as well as the advantages, its unusual appearance. The rough structure that forms after applying Raptor is not suitable for all cars.
Preparation of paint and varnish solutions
The main color tone for the Raptor is black. About half of the cars are painted in this color. The company also offers, in addition to BLACK, a tinted version called TINTABLE. To the latter it is necessary to add the desired color component of the required pigment.
It is important to know that when applying paint with a roller, you must purchase the appropriate kit called ROLL-ON RAPTOR.
Mixing is carried out in accordance with the instructions in a 3:1 ratio of paint and hardener. For convenience, packaging is carried out in containers of 0.75 l (paint) and 0.25 l (hardener). You should not use ordinary solvents for the process, as they will not give the desired effect.
How to apply Raptor to a car body
Before you get started, you need to acquire some tools. At a minimum, for work you will need: a body cleaner, putty (if there are dents on the body), a primer (you can do without it and apply Raptor directly to the paint), rags, a means for applying Raptor (brushes, rollers or special sprayers), masking tape and paper to protect unpainted parts of the car.
The process of applying Raptor to the car body is as follows:
- The first step is to remove various elements from the car that do not require painting. These are attachments, plastic elements, etc.;
- Next, remove all dirt from the car body - rinse it thoroughly and dry it;
- If there are dents, scratches, chips and other defects on the body, they need to be repaired with putty;
- If there are already corrosion formations on the body, they should be treated with a corrosion inhibitor;
- After preparing the body, cover those areas that do not need to be covered with Raptor. To do this, use masking tape and paper (newspaper);
- Next, you need to thoroughly wipe the body to remove dust particles formed during the preparatory steps;
Mix Raptor as indicated in the manufacturer's instructions. Most often, the product is supplied in several bottles, one of which contains a hardener. It must be mixed with the paint itself in the proportions indicated by the manufacturer. After the composition is mixed, it is better not to delay its application, otherwise it will quickly harden;
That's it, painting the car with Raptor can be considered complete. A day after applying paint to the car, you can drive it.
Application technology
The Raptor painting technology is quite simple and can be done by any car enthusiast, but it requires preliminary preparation.
What is required for application
1) Materials
To apply Raptor, you must prepare the accompanying materials in advance. The technological process of coating requires the use of abrasive and polishing materials, hardeners, adhesive primers for plastic, acidic primers for metal, branded degreasers and solvents, putty, rags, etc.
2) Pistol
Also, for proper, even application of Raptor, a proprietary pistol is required. This gun is very similar to a regular anti-gravel gun, but has a number of differences. The most important difference is the ability to adjust the size of the “pimples” or shagreen when applying the coating. With this gun you can create a smooth matte finish.
3) Quantity of materials
The final quality of painting largely depends on the correct choice of consumables. It is best to entrust the selection of these materials to a competent specialist. To determine the amount of materials, you need to make some calculations. The quantity and composition of consumables depend on the area to be painted, the number and thickness of application layers.
Safety precautions when working
The product data sheet states that Raptor car coating is a flammable material, irritates the eyes, causes dryness and burning upon open contact with the skin, and vapors from the composition can cause clouding of consciousness. Therefore, as with any other painting, when painting a car with Raptor, all safety and personal protection measures must be observed.
General safety precautions when working with paint and varnish products (including Raptor car paint):
- The room where painting work is carried out must have good, proper ventilation. The room should be ventilated as often as possible. If the premises are insufficiently ventilated, you should work in them for a strictly limited time and use protective equipment: gauze bandages, respirators.
- Smoking is prohibited in these premises.
- The use of open fire is prohibited.
- Used materials must be kept in separate containers. Used rags should be filled with water.
- It is important to keep the room clean and avoid spilling paint materials.
- Work must be carried out in special clothing, rubber gloves, a respirator and safety glasses.
- Paint and varnish materials must be stored in a dark, separate room, inaccessible to unauthorized persons. Optimal conditions: 7-8 degrees Celsius. Any container must be tightly closed and labeled.
Painting stages
Painting a car with Raptor takes place in several stages:
For high-quality application, the Raptor coating needs a smooth, prepared surface. The paint can be applied to any surface – plastic or metal.
Before applying Raptor paint, read about how to remove rust from a car body.
To prepare the surface, do the following:
- Disassemble the body: remove bumpers, mirrors, wheels, etc.
- Clean the surface of the body, remove old layers of varnish and paint;
- Clean body parts from corrosion, where required, and process thoroughly;
- Putty the uneven areas, cover up the corrosion areas and sand them;
- Prime the surface, preferably using ACID acid primer;
- Wait several hours until the preparation is completely dry.
- Painting
Preparation of the composition. Before applying paint, you need to prepare the composition. A hardener is added to the paint in a ratio of 3 to 1. That is, 250 g of hardener is added to 750 grams of paint. The mixture must be stirred for several minutes, or simply shake the jar.
Painting work must be done in a box or garage with good lighting. What to do:
- First paint the inside of the body with the prepared mixture to see how the paint adheres;
- After making sure that the Raptor lays flat and well, paint the entire body;
- Let the paint dry.
After a few hours, you can assemble all the car parts in place. In the first days, it is best to use the car in urban conditions, and only after 14 days, when the composition gains strength, can you go off-road.
We recommend watching: DIY Raptor painting video
Mixing Raptor Ingredients
- Raptor is sold in two versions - traditional BLACK (black) and TINTABLE (tinted), to which you can add car paint (or pigment) of the desired color. Raptor is available in 1 liter, 2 liter and 4 liter spray kits, and there is also a Roll-On RAPTOR kit.
- Mix raptor according to instructions. Raptor bottles are filled with 750 ml. You need to add 250 ml of hardener, or mix 3 parts Raptor and one part hardener in a separate container. Next, you need to stir everything for 2 minutes. If Raptor Tintable (tintable) is used, then up to 10% of paint (or pigment) of the total volume is added.
Advantages and disadvantages
Benefits after painting a car with Raptor:
- Interior sound insulation increases;
- salt, rust and scratches are not harmful to the coating;
- It is possible to restore even damaged parts;
- the coating does not break, is resistant to external influences;
- combining the bumpy texture of paint with some colors can give a good result;
- Suitable for jeeps, trucks and pickups.
- fumes are toxic (until they dry completely);
- the surface of the car looks like an orange peel, which is not always adequately assessed;
- varnishing the coating is contraindicated - polishing is impossible, the car will always be matte;
- even an experienced painter who specializes in classic car painting does not always cope with the application - to do the job efficiently, a lot of experience is needed;
- if poor-quality soil was used, the Raptor may simply fall off;
- By painting the car with a bright and light shade, the dirt stuck in the bumps will be visible.