Tuning and auto gadgets / From Vladimir
- Varieties: silicone, PET and others
How to tint: the most popular options for removable structures on video
- Video: how to properly glue removable tint onto a car
When driving a car, many drivers are faced with the problem of glare and excessive heating of the interior during the warm season. The most practical solution to these problems is removable tint film for car windows. The great popularity of this film is also explained by the fact that when a vehicle is stopped by a traffic police officer, you can easily remove the tint and resume its use in the future. A nice bonus is that you can make such a product and stick it on your car windows with your own hands.
How to make and apply removable tinting on car windows
When driving a car, many drivers are faced with the problem of glare and excessive heating of the interior during the warm season. The most practical solution to these problems is removable tint film for car windows. The great popularity of this film is also explained by the fact that when a vehicle is stopped by a traffic police officer, you can easily remove the tint and resume its use in the future. A nice bonus is that you can make such a product and stick it on your car windows with your own hands.
Car window tinting: requirements
Today, tinting is a regulated procedure. There are a number of requirements that traffic police officers place on her. If you do not comply with them, you may receive a fine.
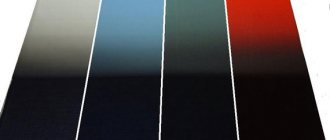
The main indicator of tinting is the degree of its light transmittance. It depends on the purpose for which you are using the film on the car glass. To hide everything that is happening and the salon itself from prying eyes, this figure should be 5%. It is rarely used, since law enforcement agencies prohibit this type of tinting.
Characteristics of removable tinting
Removable tinting is a film that has a static effect of adhering to car glass. In terms of external characteristics, it differs slightly from ordinary film. The only noticeable difference is that after gluing it there is a clouding effect, which disappears as a result of shrinkage.
The main characteristics of removable auto-tinting include increased resistance to low temperatures and mechanical stress. During long-term use, the film is not damaged or deformed. Removable tinting perfectly protects the interior from ultraviolet radiation and does not interfere with normal illumination.
Plastic removable tint option
A distinctive feature of removable film compared to conventional film is the possibility of reusable use without loss of proper appearance and effectiveness. Regardless of the number of removals and re-installations with your own hands, it will protect the interior of the car and hold firmly to the windows.
At the same time, it is worth knowing that, most likely, a fine cannot be avoided when stopped by an inspection officer. Judicial practice shows that in most cases the court takes the side of the traffic police, relying on the fact that at the time the illegal actions were recorded (in our case, the presence of tinting not in accordance with GOST), the driver had already violated the norms, that is, the offense had already taken place.
Advantages and disadvantages
Removable silicone tint objectively has more advantages than disadvantages.
Let's start with the strengths. These include the following points:
- installation does not require the use of glue, which simplifies installation and dismantling of the product;
- high-quality films are reusable, which allows them to be reused after removal, and many times;
- externally, removable elements are no different from ordinary films;
- Silicone is practically not affected by high temperatures, frosts or high humidity levels;
- the material additionally protects the glass from mechanical damage;
- this is excellent protection from prying eyes;
- the material can be folded in several layers, since it is not afraid of bends;
- the material does not reflect light;
- helps protect the interior from burnout;
- installation takes minimal time;
- for installation there is no need to contact specialists;
- They cannot issue a fine for it if it is withdrawn on time.
According to the law, if it is possible to eliminate the discrepancy on the spot, the driver is obliged to do so. In this case, the traffic police officer does not have the right to issue a fine.
Everything is simple here. If a driver is stopped for suspicion of tinting that does not comply with the rules in terms of its light transmission characteristics, he may be required to use a device to evaluate the indicators. At this time, the film is removed and removed in a matter of seconds. There can no longer be any complaints.
Varieties: silicone, PET and others
To produce removable tinting, different materials can be used, which determine the appearance and technical parameters of the finished product. Among the common types are the following:
- Silicone, capable of absorbing ultraviolet rays. Due to the specificity of the tinting, the possibility of creating a mirror effect and blinding the light of other vehicles is eliminated. In order to install silicone film, a special approach is required, since quick gluing poses the risk of a loose fit to the glass. It is easy to stretch such a film, as well as straighten it.
- Photochromic (electrochromic) film, which becomes lighter or darker depending on the degree of voltage applied to the glass. The advantage of this tinting method is that the transparency of car windows can be changed independently at any time. The disadvantage is the high cost compared to other options.
- Monopolycarbonate based tint, also called static plastic. This film reliably adheres to glass and has a relatively low cost. However, the visibility of the road with this tint is greatly reduced at night, so whether to hang it or not is a moot point.
- Tinting using double glass technologies, one of which is darkened and lowered separately from the standard transparent glass. Despite the maximum convenience in everyday use, tinting a car using this method is much more difficult.
Removable tinting can be soft or hard, depending on the needs of the car owner.
How to tint: the most popular options for removable structures on video
Pasting a reflective strip on the windshield
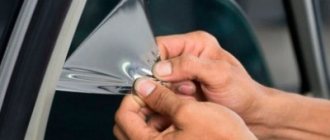
The tint strip must be cut along the roll with a small margin. Then wet the surface of the glass and place your workpiece on it with the adhesive layer facing out.
Make slits along the seals and remove excess tinting film.
Do not forget that you must use only special blades that do not leave scratches on the glass!
- Smooth out the pattern so that there are no horizontal folds - only vertical ones.
- Then, using a hairdryer and forcing, heat and smooth out the vertical folds.
The windshield is sensitive to temperature changes, so do not heat it up or cool it down suddenly!
- Moisten the workpiece, fold it in half and smooth it carefully so that there are no folds or wrinkles.
- Then, using a ruler and a knife, make notches at a distance of 10-12 centimeters from the top edge of the pattern.
Make notches as often as possible. Using this method you can make a reflective strip of any width. The width will depend on how far from the edge you make the notches.
- After this, remove the excess tint film.
- Then lay out the pattern along its entire length and use a ruler to cut the notches between each other (this process is clearly shown in the training video below).
When working with film when tinting windows, always place the adhesive layer and liner on yourself.
- After this, place the resulting workpiece again on the damp windshield from the outside.
- Wet and smooth the pattern and use the light from inside to make precise cuts.
To avoid gaps after applying the tint film, make a cut so that the film extends a few millimeters onto the opaque area of the glass.
Clean the glass and apply the film for tinting from the inside in the same way as in previous cases.
Tools and materials for creating and gluing film
You can make tinting for car windows yourself using special consumables. To create, you will need a sheet of polyester (PET) no more than 0.5 mm thick and a film that will be applied to the plastic. The following set of tools is also required:
- knife with replaceable blades;
- pencil for drawing outlines;
- metal scissors;
- forcing to smooth out irregularities on the film;
- a spray bottle for applying a soap solution to the surface of the glass.
The forcing can be purchased at a construction supply or outdoor advertising store.
In addition to tools and materials, it is necessary to first prepare a cleaned and smooth surface on which the film will be applied to the plastic. For this purpose, you can use glass with a thickness of 15 mm or more.
Preparing everything you need
Before applying the tint, you need to prepare a clean and dry place to work, as well as a standard set of tools:
- Tinting film that meets the requirements of GOST 5727-88. Light transmittance for the windshield must be at least 75%!, for the front side windows - 70%!, for the rear side and rear - any. Typically, 4 side windows require 1 roll of film filter.
- Liquid soap (without dyes) to fix the film. It is better to use special installation compounds that do not leave streaks, or a 10-20 percent solution of any transparent shampoo.
- Plastic sticker for smoothing tint. Usually it comes complete with a film filter, but if you don’t have one, you can use any elastic plastic, rubber spatula or construction rubber eraser. Also in the store you can find special distillers for removing bubbles (chisler - for hard-to-reach places, slammer - for squeezing the edges, bloomax - for forcing out liquid).
- Scrapers for cleaning glass surfaces. 12 cm products of various shapes are best suited.
- Spray bottle (manual) for applying soap solution.
- Blade or utility knife. The latter is made of mild steel, so it is convenient to cut the film without fear of the glass being scratched.
- Soft rags, clean rags or napkins made of lint-free material.
- Industrial dryer.
If you are tinting your car yourself for the first time, it would be a good idea to purchase special camouflage markers and tapes. With their help you can correct minor errors.
You should also ensure that you have easy access to clean, cold tap water. The room should be free of insects and dust.
If everything is prepared, you can start cutting the film filter.
How to make and stick with your own hands: instructions
To avoid mistakes when creating and then applying removable tint yourself, you should follow the step-by-step instructions. To make a film, you must perform the following steps:
- Remove the pattern from the glass. First you need to glue a transparent protective layer from the film, carefully smooth it over the surface using a solution of soap and water, and using a knife, cut off the side contours and the bottom along the sealing rubber inserts. After this, you need to slightly lower the glass and cut off the film along the upper border. The result is a transparent glass-shaped sample.
Prepare film blanks Having prepared the pattern, you need to transfer it to a sheet of thick paper and insert it between the glass and the seals. Next, you will need to lift the glass all the way and fit all the parts to the seals. If the contour along the top part coincides unevenly with the edges of the glass, you need to cut off the protruding elements and ensure that the edges match exactly.
Align the contours of the selected film. Having adjusted the pattern to the size of the glass, you can remove it and cut out plastic blanks based on it. To speed up the process, the blanks can be made in pairs, since the right and left glasses have the same dimensions and shape. After cutting out the blanks with metal scissors, it is worth sanding them along the edges.
Sand the patterns so that they do not damage the film. After creating the blanks, you need to prepare patterns from the tint film. Removable tinting requires gluing the blanks on both sides, so you need to cut out two pieces of film of the same format. Then it is enough to remove the layer of protection on one side and wait for the static effect to disappear.
Wait until the static effect disappears. The entire area of the polyester workpiece must be wetted with a soap solution 10–15 minutes after performing the previous step. A similar procedure is performed with a tint film using a spray bottle. If the humidity is not enough, the film may not stick securely in the future.
Do not skimp on the solution before gluing. The treated film should be applied to the plastic blank and smoothed over the entire area using forcing. After careful alignment, the excess edges are cut off along the contour of the glass with a knife.
Making patterns
The first stage of making removable tinting will be to remove the pattern from each glass. The most difficult part of the complex tuning will be the manufacture of removable tinting on the windshield . Here it will be important to perform the darkening efficiently so that the visibility of the road situation does not deteriorate. And hardly anyone wants to dismantle the windshield. The pattern is made in the following sequence.
- First, you need to “stick” a transparent protective film from the tint material or a cellophane analogue to the outside of the glass using a soap solution. It must be smoothed over the entire surface, removing air bubbles and cleaning solution.
- Now you can start cutting the film along the contour of the glass. For convenience, the side windows should be lowered a little to make a cut along the upper border. When all sides are trimmed perfectly, you will have a transparent template made from transparent material.
- You can also make a template from tracing paper. The material is attached to the car glass with double-sided tape, after which you need to trace the contours with a marker or pencil. All that remains is to carefully cut out the pattern from tracing paper with scissors.
How to make and install removable tint on your car yourself
Most car enthusiasts are not averse to tinting their car using the well-known method, but everyone is held back by the fact of problems with passing a technical inspection and meeting with a traffic police officer. An excellent option for window tinting is removable tinting, which can be made at home in a few hours.
What materials are needed?
First you need to purchase a transparent thin polyethylene terephthalate or polyvinyl chloride sheet and a tint film of the desired light transmittance. PVC or PET are flexible, strong and durable materials, and they are also very pleasant to work with. The thickness of the plastic should be chosen as thin as possible. Optimal – from 0.5 to 0.8 mm.
You can purchase such film from advertising companies, as it is used for the production of advertising stands, booklets, etc.
How to make removable tint yourself?
1. Next, you need to cut out a blank from a transparent sheet that exactly matches the shape of the glass being tinted. You can remove the door glass and accurately trace its contours first on a piece of thick paper with a thin marker.
2. The resulting scan must be cut out and transferred to a transparent plastic sheet. Now, using stationery scissors, carefully cut out the outlined piece of plastic.
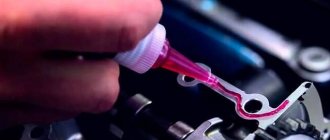
3. Remove the protective transparent film from the cut plastic sheet. You need to stick a tint film onto this blank, after wetting both it and a sheet of hard plastic with an aqueous soap solution. After the film has been glued to the plastic, you need to wet the front side of the tint and use a rubber spatula to smooth out the unevenness, remove air and water between the tint film and the plastic blank.
4. After all the procedures, excess tinting is trimmed along the contour using a stationery knife or blade. The entire creation should dry for several hours at room temperature.
As a result, after all the work carried out, there is a tinted transparent sheet, exactly the same size as car glass, which is inserted from the inside of the door under the seal, and, if necessary, attached to the top with double-sided tape.
Typically, this design creates glare from the glass on the outside of the car, which just spoils the aesthetic appearance a little. But a cure has also been found for this shortcoming, in the form of pharmaceutical glycerin, which you simply need to lubricate the inner surface of the glass before installing the finished removable tinting.
Video: DIY removable tinting.
Now, at the slightest complaint from a State Traffic Inspectorate employee about the tinting on a car, it can be immediately removed, and after driving to another block, it can be installed back.
How to tint a car's rear window
It is not uncommon to see tinted windows with the film peeling off, or air bubbles visible on the car glass. All defects occur due to the fact that when applying the film material the surface was poorly washed, and when installing the TP, water and air were not sufficiently expelled from under it.
Before tinting the rear window (RW), it must be washed very well, not only from the outside, but also from the inside.
Next we perform tinting in the following order:
- apply a 1.5 m wide film to the rear window, cut off the TP along the contour with a small margin;
- heating with a hairdryer, straighten the film with a spatula, straightening it from the middle to the edges;
- the film should be heated carefully; if overheated, it may become deformed, which will lead to damage to the material;
- using the lighting inside the cabin, we cut out the formed TP along the contour, the size of the workpiece should be approximately 2 mm larger around the perimeter of the white glass, that is, slightly overlap the black edging;
- Before gluing the film material, thoroughly wash the glass from the inside. Each speck of dust remaining on the surface of the surface forms an air bubble;
- wash off the soap suds with a stream of water under pressure;
- We remove the protective layer from the film, while simultaneously wetting the TP with a soap solution. The tint film has two sides - lavsan and tinting (adhesive), so when installing the sides you need to not mix up the sides and install the tint material correctly;
- open the door, place the film in your place, you need to do this together. The TP should be applied smoothly, without sudden movements - you should not touch the adhesive side, nor create dust with your movements. It should be noted that it is more difficult to install the film in a sedan than in a hatchback;
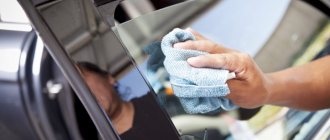
- Having fixed the tinting material on the glass surface, we begin to carefully straighten and smooth it with a spatula, expel air and water from under the film with movements from the center to the edges of the surface;
- Use a rubber spatula to squeeze out the remaining water between the surface and the film;
- to smooth the TP along the edges of the glass in a sedan, we use a forcing tool (trowel) with a long handle, since getting to the edges here is not easy;
- To speed up the drying process of the glue, warm up the surface using a hairdryer.
Despite the apparent simplicity of the work, it is very difficult to properly lay the film on the rear window, and tinting may not work the first time. The most important thing in this matter is to take your time and do everything strictly according to the instructions.
Do-it-yourself hard removable tinting
Hi all. Tired of spending money on tinting, I decided to take a photo shoot. Silicone did not suit me because... it's cloudy. (no matter what it is. Even if China is expensive) The method I used, the tint is not at all cloudy, and everything is clearly visible from the interior, but from the outside it differs from the usual tint that I have behind me. This shot is a bit of a mirror. I tried to glue it in this order: glass/pet sheet/tinting and changed it the other way around, glass/tinting/pet. So, so, so, everything mirrors exactly a little. In general, the result is absolutely pleasing, because there is a tint effect ✓, you can see it perfectly from the interior ✓, it can be removed simply in a split second, it’s very convenient.
I'll briefly tell you how I did everything. First I bought a sheet of A-pet plastic itself. 1400x2200cm 0.5mm thick for 400r in an advertising agency, 15% wide tint, China (first for test) for 200r and thin adhesive transparent tape (50r) That’s it, nothing else is needed for this. There is still about 3 more of these sets of material left.
I started by cutting out a small sheet of plastic 50x80cm and went to the car. I adjusted it to the glass, more or less shaped the edging and went home to straighten everything out with a ruler. It’s not at all convenient to do this in weight, pressing it against the glass. The plastic all starts to move in waves. I ran home and to the car a couple of times, and ended up cutting it exactly to the shape of the glass. Using this blank, I also cut out the second window.
With tinting, of course, everything is much simpler. 2 layers of tinting, a finished sheet of PET on top and cut out. Ready
I removed the protective film and glued the tint to a sheet of PET plastic. It turned out pretty good.
The final point remains. Apply tape to the very top edge.
Actually, that's all, the tinting is ready. I looked at such a shooting on the Internet, you can order it for 2600, but it took me 650, and there is still a lot of material left. Then I’ll cut out another set of the same and sell it. There will be buyers no matter what.
I’ll also throw off the sketch parameters, you never know who will find them useful. By the way, the bottom can be trimmed a little, I did it with a margin just in case. I didn’t take a photo of the car because it was wildly dirty.
Prices for tinting at the Auto-M1 tuning studio
| № | Body type | Window tinting film, SunTek (USA) except front windows, RUR | Tinting of 2 front windows with Armolan athermal film 80%, RUR | Windshield tinting with Armolan athermal film 80%, RUR |
| 1 | Sedan/Hatchback | 3 500 | 2 000 | 3 000 |
| 2 | Station wagon | 3 800 | 2 000 | 3 000 |
| 3 | Executive class | 5 000 | 3 000 | 4 500 |
| 4 | SUV/Jeep | 3 800 | 2 000 | 3 000 |
| 5 | Minivan | 5 000 | 2 500 | 4 000 |
| 6 | Minibus | 6 000 | 2 500 | 4 000 |
| 7 | Business Class | 4 000 | 2 000 | 4 000 |
| 8 | Jeep big | 5 000 | 2 000 | 4 000 |
Removable tint 15%
Specialists from the Auto-M1 tuning studio are pleased to announce that removable tinting of 15% is now available: Film for two glasses (1m*1m) - 700 rubles, Work (cutting on glass, gluing) - 700 rubles
UV protection
Car window tinting not only gently protects you from prying eyes, creating a comfortable personal zone, but also serves as protection from ultraviolet radiation. High-quality film for cars blocks the lion's share of sunlight - up to 99%. And it blocks part of the infrared spectrum radiation - heat rays.
This is especially important on a hot summer day. After all, an excess of UV is harmful. And not only for your skin, but also for seat upholstery, panel trim and other interior parts. And overheated air reduces the driver’s concentration and attention, making him distracted and quickly tiring. Car tinting helps solve these problems.
In winter, car tinting is also very useful. It perfectly reflects the sun's glare from the white snow, protecting your eyes. And in addition, tinting (polymer film) serves as an additional heat insulator, retaining up to thirty-five percent of the heat in the cabin.
Additional argument
Car tinting performs another task that is often forgotten. It prevents small sharp glass fragments from scattering throughout the cabin in the event of an accident or being hit by a stone. The glasses, of course, crack, but their pieces remain glued to the film and hang on it. This saves the driver and passengers from dangerous injuries. Car tinting provides additional protection in the event of a collision or stone hitting the glass.
Stylish accent
Tinted car windows become a sophisticated accent in the design of your car. The appearance of the car subtly changes, acquiring completeness and a certain mystery. According to some drivers, tinting car windows gives the car a special personality, makes it more solid and visually more expensive.
Resilient Americans
However, in order to cope with all these tasks “perfectly”, car window tinting must be done professionally and only using high-quality materials.
The Auto-M1 tuning studio uses films from the American brands Llumar and SunTek. The most advanced technologies are used in their production. Such films consist of several layers of silicone, sprayed metal, polymer, and dye. In total - from five to fifteen layers.
The simplest option is films coated with paint, which provide good protection from the sun and overheating. Metallized films (aimed at tinting) also solve these problems and, in addition, do not fade in the sun. And a combined coating with metal and dye gives even more guarantees.
American-made products perfectly resist external influences. This film is almost impossible to scratch, it is not afraid of cold and heat, does not peel off, and bubbles do not form on it.
Windshield tinting
The windshield and front windows can also be covered with film, but only with a special one. Athermal film protects the interior from overheating and has an anti-glare effect: you can safely drive your car even on an unlit country road. At the same time, there will be no complaints from the traffic police officers, because the light transmittance index of such a film complies with GOST.
Car tinting is a complex process that requires maximum concentration. Auto-M1 specialists have tinted a large number of cars and thanks to this we can say with confidence that you will be satisfied with the result!
Temporary option
A special offer from the Auto-M1 tuning studio is removable silicone tint for cars. It stays on the glass due to static tension. Easy to install and remove as many times as you need. The light transmittance of such a film is only fifteen percent.
According to many of our customers, this is a very convenient car tinting. The price of film for a car for two windows measuring 1x1 meter is seven hundred rubles. The cost of the work (cutting to the shape of the window and gluing it) is also seven hundred rubles.
By choosing this option, you can independently tint your car wherever and whenever you want.
Do-it-yourself removable tinting: how to make it?
Many drivers struggle with the dilemma of whether to install tinting and hunker down at the sight of every patrol post, or to leave the windows untouched and at the same time endure the sunlight shining in their eyes and the curious glances of passers-by? A useful invention called new generation removable tinting will help solve this problem in one fell swoop. And this is not in vain, because it not only masks the interior of the cabin, but will also be available for dismantling at any convenient time. Well, the decisive argument is that in our time it is quite possible to make removable tinting with your own hands.
How to dismantle
It’s not for nothing that it’s a removable tint. The coating is based on silicone. At the same time, statics and careful installation actions allow the tint to adhere tightly to the glass surface of the car windows.
If it happens that the silicone tint has worn out, or traffic police officers have questions regarding your car and require a fine for tinting the car, you will have to get rid of it. Probably temporary. This film can be reused as soon as possible.
Dismantling is extremely simple. You need to open the window if it is tinted on the side door. After lowering the glass, use your fingernail or some thin object to pry up the edge. Now calmly pull on it. Unlike conventional tinting with an adhesive base, the static material is removed without much resistance. It does not leave traces of glue behind, nor does it leave pieces of film.
What is removable tint
In order to understand the manufacturing principle, you must first determine what exactly such a film is. So, reusable removable tinting is a sheet of translucent material that is cut to the shape of the glass on which it will be glued. In order to attach such tint to the surface, most people use a soap solution in a spray bottle. When the product is on the glass and is thoroughly leveled, the water dries and then the film is held in place due to static. That is why you can attach and remove the new generation of removable tint at any time.
Thanks to the functional features of this product, you get many advantages:
- The film prevents up to 70% of sunlight from entering the interior. This is doubly necessary, because in addition to the fact that the light prevents the driver from following the road, in hot weather the interior very often overheats, as a result of which the upholstery burns out and the temperature inside the dashboard rises significantly. A simple film will help protect your interior from all these harmful influences.
- Removable tinting does not create a mirror effect and does not allow curious glances into the interior. In addition, if such a film is present, it becomes much more difficult to break the glass, since it holds it to some extent. The same applies to cases of road accidents - if the window breaks, the fragments will not fall on the passengers only thanks to the existing tinting.
- If you are afraid that burglars will be attracted by things left in the car or an expensive audio system, you will be much calmer with the film, because it will reliably hide the contents of the cabin.
On the other hand, some types of tinting have a detrimental effect on visibility from the inside, making the glass cloudy and the image blurry. This effect can be observed in the first days of using the film, or may remain throughout the entire period of its use.
But this is the least of evils, because a well-chosen product will not create such problems. And in order to provide truly high-quality tinting for your car, you need to know which materials are the most optimal in our case.
Allowed or not
According to the legislation of the Russian Federation, car window tinting should not exceed the standards prescribed in the following documents:
- GOST 32565-2013 “Safety glass for land transport”, which came into force on January 1, 2015.
- Technical regulations of the Customs Union TR CU 018/2011 “On the safety of wheeled vehicles.”
- SDA “List of faults and conditions under which operation of the vehicle is prohibited”, clause 7.3.
Note! The previously valid GOST 5727-88 “Safety glass for land transport” became invalid on December 31, 2014.
It is recommended to remember the following information from these documents:
- “The light transmission of glass that provides the driver with visibility of the surroundings must be at least 70%” (in the old GOST it was required to comply with the standard of 75%.) The light transmission of other glasses is not regulated and can be anything, up to complete sealing, but in this case, the vehicle must be equipped with 2 exterior mirrors.
- In the List of Faults, in the above paragraph it says: “Additional objects or coverings have been installed that limit the driver’s visibility.” In addition to the paragraph there is a note: “A colored film may be located at the top of the windshield. It is allowed to use tinted glass (with the exception of mirror glass), the light transmittance of which is in accordance with the above-mentioned GOST. It is allowed to use curtains on the windows of tourist buses or place blinds and curtains on the rear windows of a passenger car if there are external rear-view mirrors on both sides.”
As a result, we can draw a logical conclusion that the offense charged by the traffic police inspector under clause 3 of Art. 12. 5 of the Code of Administrative Offenses of the Russian Federation “Driving a car in the presence of malfunctions or conditions that do not allow its use” is not legal.
However, in order to prove this to him, the car owner must fully understand the issue himself, so it should be further explained using the following examples:
- Firstly, the new generation of tinting is not a film, the light transmittance of which, according to GOST, must be at least 70 percent, that is, this standard does not apply here.
- Secondly, the hard screen is a separate structure that is installed in the window opening of the car. At the same time, it does not limit the driver’s visibility in any way. This is the main text of the List of Faults in clause 7.3. How the inspector will be able to prove the opposite is unknown, the main thing is that the car owner insists on his own: “Visibility is excellent, nothing interferes with the view.”
- Thirdly, with regard to the note to the above item of the List: “The use of blinds and curtains is permitted on the rear windows of the car...”, a removable screen is neither one nor the other, so this does not apply to this situation.
If you know all these standards, then you can safely stand your ground. The inspector, in turn, can look in the Rules, Technical Regulations or GOST for other requirements and standards relating to the current situation - everything is useless.
It turns out that the legislation does not provide for a ban on the use of such means of protection from sunlight, which means there is no offense.
By the way, a similar situation used to be with the letter “Ш” on the rear window of a car: the traffic rules only mentioned that “the driver must,” but there was no direct reference to administrative punishment, while fines were issued.
Therefore, even now, to protect the driver from incompetent road service employees, he must know the Rules well and only one GOST 32565-2013.
Creating a template and blanks
The next stage in the formation of removable tinting is transferring the prepared pattern onto a sheet of whatman paper. This will allow you to obtain a dense sample, which should be applied to the glass inside the cabin. If the edges of the template do not coincide with the contour of the glass, it is necessary to adjust the Whatman paper to the ideal.
- When you get an exemplary template, you can cut out plastic blanks from it. Blanks for side windows are made in pairs, since they have the same shape and size.
- You need to cut the polyester sheet with metal scissors. Thanks to this tool, the least amount of burrs and creases is obtained. However, the cut workpiece will still have to be processed in the cut areas using sandpaper or fine sandpaper.
A wide variety of polymer materials are used for production. However, from the list of those that can be obtained for making with your own hands, there are only a few types of products.
One of the most popular and in demand is a material with the complex name polyethylene terephthalate. In “everyday life” it is also called verolite, but by its simplest and abbreviated name it is PET. According to reviews, removable PET tinting is characterized by good adhesion (adhesion) and a wide operating range. The whole problem is that it is not so easy to get such high-quality material, since it is used only in industry and is sold in huge volumes, which makes no sense to buy if you decide to just make a removable tint on your forehead.
That is why enterprising car enthusiasts go the other way and purchase A-PET, which is produced in China. As a rule, Chinese products are not of high quality and this case is no exception. The operating temperature of such material is limited, and the service life is not too long. To better understand what the problem is, just know that standard plastic bottles are made from A-PET, only flat sheets are used for machines. You can purchase such raw materials from a printing company or an advertising agency, and even the largest sheet will cost you very little.
In addition to PET, when making reusable removable tinting at home, plexiglass and other available materials, such as ASWF or DC-FIX film, are used. However, the final properties and disadvantages are always approximately the same. Some quick-release car tints are attached only with water, while others require the use of a soapy solution. There are also those that can tear during the first removal, but these are products of the worst quality. To avoid the latter troubles, it is better to use hard removable tinting.
Another fairly common option is car window tinting made of silicone. The special beauty of this film is that a wide variety of tinting shades are available for sale. Thus, we see a fairly large selection of bases for materials with which you can make removable tinting with your own hands. And if you have decided, then it’s time to study the process itself.
Silicone vs gel
Quite often, motorists are offered to glue removable gel tint rather than silicone tint. Moreover, some are sure that this is the same material.
Actually no. Gel coating is considered more modern. With its help, it is also easy to tint a car using a similar technology. This is a reusable material that has its own characteristics.
Gel tint is characterized by the following properties:
- it is slightly better in the optical clarity component, since it does not create a feeling of cloudiness;
- can be operated in a temperature range from -38 to 60 degrees Celsius;
- in severe frost it does not deform or lose its shape;
- resists mechanical stress well;
- the gel does not shrink over time;
- stored exclusively in rolls;
- It cannot be crumpled or folded.
The silicone analogue is inferior only in resistance to mechanical damage and picture distortion. Gel coatings are more resistant to wear.
But silicone products can be easily crumpled, folded in several layers, then unfolded and glued again. But the gel ones do not wrinkle or fold. They must be stored exclusively in roll form. How significant this is is a drawback, everyone can decide for themselves.
In practice, silicone and gel tint films are very similar to each other. They are produced by various companies, divided into more budget and expensive ones.
Source
Bonding tint material
At the next stage of work, it is necessary to make patterns from the tint film. Removable tint requires gluing the plastic mold on both sides.
- The tinting material is applied to the plastic base, the necessary marks are made, and the outline is trimmed. Then you need to remove the protective film from the pieces of tint material. You can't do without an assistant here. It is important to carefully remove the protection and leave the pieces of tint film for 10-20 minutes. During this time, the static effect will disappear, which creates problems when laying on plastic in the form of bubbles and swelling.
- After waiting the specified time interval, you should spray the surfaces to be bonded. It is not worth saving on detergent, so that during the process of aligning the film along the contour of the plastic blank, premature gluing does not occur.
- All that remains is to apply the tint film to the workpiece, make the necessary adjustments and begin smoothing the material using forcing. The first pass from the center to the edges is done without pressure. During the second and third smoothing, the forcing is strongly pressed against the workpiece. In this case, it is necessary to wet the film for good glide.
- When the film adheres perfectly to the plastic base, use a sharp utility knife to trim off the excess film along the contour of the workpiece.
We tint car side windows
Before pasting the side windows, it is better to remove the glass and wash it with soapy water.
Making a pattern for the tint film
Before making the tint, we will make a pattern from the film . For cutting you will need a table; it must be clean and of a suitable size in order to cut the material not only for the side windows, but also for the rear window.
The cutting must be done taking into account allowances for errors, apply the film to the glass and add 5-7 mm on all sides, use a marker to mark the cut line and cut it out. If the glass will not stretch, the edge is made minimal, 2 mm.
Side window tinting sequence
We have the blank, now let’s start gluing it.
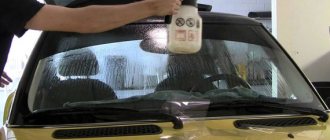
- Before fixing the tint, the entire area to be pasted is generously moistened with soapy water from a spray bottle.
- The gluing process starts from the top. Two-thirds of the protective layer is removed from the film and also sprayed with the solution. Hands should also be moistened with water.
- The workpiece is applied with an adhesive layer and aligned along the top edge.
- If everything is smooth and there are no gaps, begin to force the liquid from the center to the edge. These actions must be performed carefully. In this case, the film can slide over the surface. Use a soft cloth, and then a hard spatula and a hair dryer.
- After removing the bubbles, the protruding edges of the pattern are cut off with a stationery knife.
- Next you need to glue and also smooth the bottom part. The protective layer is removed from the pattern, the adhesive layer is moistened with a soap solution and applied to the glass surface. The liquid is distilled out in the same way as when gluing the upper area. To avoid vertical folds , follow the direction of movement: from the center to the edges.
How to make it yourself
Making decent removable car window tinting at home is quite easy.
- To do this, you first need to find a template that would be suitable for both the front removable tinting and the side windows.
- Then you need to transfer this form to the rough material and only then to PET. Even the hardest removable tint should not have a thickness of more than 0.75 millimeters, otherwise it will provoke constant difficulties in its installation.
- If you haven't found a decent template for removable tint, this video will help you make one using the car's glass directly. You can remove the seal and attach a draft from the outside, or you can dismantle the glass itself and trace it on the floor. The first option is undoubtedly simpler.
- After the rough template is ready, you need to try it on the glass one more time and if everything fits the shape, then you can transfer the shape to the film.
- Next you need to get rid of the special protective layer on the sheet and tint the glass in the most usual way - that is, using a soap solution. This process is quite simple: first, the glass is thoroughly cleaned using standard household chemicals, wiped dry, and then a soap solution is applied to its surface. To do this we need a spray bottle with a fine spray. When the surface is processed, you can attach the film.
It must be carefully leveled using a soft rubber spatula. When the product dries, the reusable removable tint will be ready for use. Of course, a similar procedure will have to be done every time after dismantling the film, but in its simplicity and low cost, the new generation of removable tinting cannot be compared with anything.
We can conclude that purchasing such a simple product as a reusable tinting film can greatly simplify a driver’s life. In addition, if you know how to make removable tint with your own hands, then you no longer have to spend money on the services of professionals.
How to cut glass with a glass cutter at home
Sooner or later, a household may need to replace glass on its own. But working with such fragile material is very dangerous. Therefore, in order to avoid injuries and unnecessary consumption of material, you should know the basic rules for working with this material and the selected tool.
Cutting ordinary glass is very simple and will not cause any difficulties for a person. You can cut such glass with a special glass cutter or even ordinary scissors.
If you have no idea how to properly handle this tool, you can watch numerous videos on this topic on our website. They will help you cut out the desired shape and provide the necessary information on working with a rather complex and fragile material like glass.
Tools and materials
Before you start making removable tinting, you need to prepare some available tools and materials.
- The tinting base will be a sheet of polyester 0.5 mm thick. You can purchase it from advertising companies that create posters.
- A tint film will be applied to the plastic surface. The choice of this material is determined by the thickness of the car owner’s wallet. This applies to both the color and the manufacturer of the tint material.
To work with film and polymer sheet you will need:
- stationery knife;
- whatman;
- pencil, marker or felt-tip pen;
- Double-sided tape;
- paper scissors;
- metal scissors;
- fine grain sandpaper;
- forcing for smoothing the film;
- spray bottle with cleaning solution.
For comfortable work, you should prepare a warm and clean room. A table or a piece of thick glass can act as a flat surface on which the film will stick to the plastic.
Since the process of making removable tinting is quite complex, it is better to invite an assistant to visit you.
Specify the service you are interested in
ServiceThermal tintingMirror tintingGlass tintingRemovable tinting (silicone)Removable tinting, plasticCar tintingTinting with color transitionTinting of headlights and lanternsColor tintingServiceAnti-gravel protectionMatte anti-gravel body protectionArmoring side windowsArmoring headlightsArmoring a motorcycleWindow armorWindshield protectionProtection of screens and monitorsProtection and interior car interiorServiceAuto vinylAntichrome for a carCar brandingVinylography (pasting film with a pattern - individual design project) Camouflage on a car Wrapping a car under a taxi Wrapping motorcycles with colored films Wrapping a carbon fiber film Wrapping the interior of a car Pasting any stickers on a car Styling on a car Removing vinyl from the body Panoramic roof effect on a car Service Sound insulation of a car (the entire body inside) Sound insulation of arches Sound insulation of doors Service Anti-rain Liquid glass Ceramics Painting of calipers Body polishing Floor Headlight cleaningDent repairRemoving scratches and chipsCar dry cleaningServiceDisc paintingPainting calipersChip repair and cracks Bumper mesh Car dry cleaning Back Forward
Installing car tint
After the removable tinting is made, you should wait a few days before you start using the homemade tuning element. During this time, the film will reliably stick to the polyester base. Otherwise, the tinting will not last more than 3 months.
Having met all the time limits, you can begin installing removable tinting on the car.
- First, the manufactured element should be carefully inserted under the velvet cloth, and then the product should be aligned along the contour of the glass.
- The top tinting is attached to the window using double-sided tape. After repeatedly installing and removing the removable tint, the job will be done within seconds.
Removable tint is not an ideal car tuning option. It not only has its advantages, but also some disadvantages.
- So the disadvantage of removable tinting is the difference in color on different glasses.
- The manufactured darkening element is quite fragile, easily broken and scratched.
- The disadvantages include the mirror effect of such tinting.
- In addition, removable tinting will not be a 100% guarantee of avoiding a fine from a zealous traffic police inspector.
- Therefore, before you get down to work, you should weigh all the positive and negative aspects, and then make your choice.
Procedure technology
Car window tinting is a labor-intensive process that consists of a number of interrelated works. The first thing to start with is preparing your work surface. To do this, remove dust and other dirt from it. Then dry thoroughly. There should be no water left on it.
Now you can proceed directly to gluing the film. To do this, it is well wetted in a specially prepared solution. It consists of water and soap. The glass must also be coated with the same mixture. Moreover, all work is first performed inside the car. This will allow you to determine the required size and shape of the film.
To fix the tint on the glass, it is dried using a hair dryer. After all the work is completed, you should not open the doors for two to three days. During this period, the tint will be firmly and securely fixed. As a result, it will have a long service life.
Operational benefits
This “protection from prying eyes” is advantageous compared to film in several ways:
- Easy installation technology . Since only latches are involved in the installation, the owner will not need additional tools or special skills. When using plastic as a more practical material, the owner will not have any special problems during installation. The owner can only select the size of the material for a specific model of his car, since such products are produced strictly for a specific model;
- Compliance with GOST . This formulation in relation to hard tinting is not entirely correct, since the measurement of light transmittance is carried out in relation only to the glass and the film that is on it. If hard tinting is installed, a plastic mesh is installed behind the glass, the performance of which does not comply with the law. However, in the event of complications with traffic police officers, it is enough for the owner to quickly dismantle such a mesh;
- Prostate dismantling . It is the ease of removing this tint that is its main advantage. If, when removing removable tinting, its properties are in most cases lost, and re-installation is practically impossible, in the case of using hard tinting, its reuse is absolutely adequate.
The video shows hard removable tinting:
Varieties
There are 2 types of silicone films. They are:
- Statically removable. They will be the main focus. Easy to apply and quick to remove, they have properties and characteristics similar to conventional vinyl films.
- Removable on a rigid base. This is essentially tinted plastic that follows the curve of car windows.
Models with a rigid base are less practical. They take up quite a lot of space. Sometimes it is difficult to choose a product that will repeat the shape of the window opening to within a centimeter. As a result, it turns out that part of the glass remains open. It doesn't look very aesthetically pleasing.
Therefore, in most cases, when it comes to removable films, they mean silicone products based on static electricity. They take a little longer to install, but they completely cover the window and provide a number of advantages.
Choosing a film for car window tinting
The tinting film market is so large that to review it, we wrote a separate article about films for tinting car windows.
We do not recommend buying cheap Chinese DIY kits; instead, we recommend purchasing only high-quality roll film for window tinting.
Also listen to the recommendations of sellers who sell tint films. From them you can purchase all the tools necessary for tinting windows.
Still, it is better to see once than to hear a hundred times. Therefore, we suggest watching a video tutorial on tinting car windows with your own hands, which is located at the bottom of this article.
And for better assimilation of the material, all stages of self-tinting windows are described below and can be used as a cheat sheet.