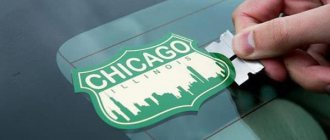
Stickers on a car windshield allow the driver to identify his personal vehicle. The stickers are durable and weatherproof. They will help hide the cracks, and if desired, you can remove them without effort.
Drawings are used for different purposes:
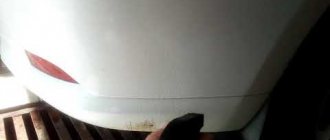
- Hide the defect. Such stickers do not carry any meaning. The inscriptions “You can’t overtake”, “I have nothing to lose”, “I’m not drunk - I drive around pits” are pasted on for fun or to hide a visible flaw - a scratch, crease, chip, crack.
- Submit information. The drawings warn about the presence of a child in the car, a woman driving, etc. The “Spikes” badge is required and must be installed in the upper left corner of the rear window.
- Replacement of airbrushing. Stickers are inexpensive, while a professionally made drawing will cost the car enthusiast a pretty penny. If necessary, the sticker can be removed or replaced with another image. Airbrushing can only be painted over.
- Advertising. Helps the car owner promote his business. Advertising with a phone number increases the chances of finding new customers. Large companies offer drivers to place information about their company in the form of a sticker on the rear window. In exchange, drivers receive a reward.
Stickers as a way of advertising
One of the ways of marketing has become advertising stickers of various subjects. This could be company logos, contact information, a brief description of the service, or part of an advertising slogan. The more impressive the image on the glass, the greater the chances of attracting new customers and increasing income. Luminous images are becoming increasingly popular. The drawings are visible in the dark, which attracts the attention of passers-by and drivers. This is often used by taxis and delivery services.
Informativeness and originality
Stickers can carry useful information, for example, informing that there is an inexperienced car owner, a child, a car is for sale, or the driver is driving on studded tires - these are examples of the use of informative stickers.
How to put a sticker on a car
Depending on the material of the sticker, its size, and where you plan to stick it, the methods for this process may vary. There are so-called “dry” and “wet” pasting methods . Let's start with the last one. If you plan to glue vinyl film over a large area, then for this you will need the following materials:
- sticker directly;
- detergents for car surfaces (car shampoos or similar compounds);
- soap solution;
- stationery knife or scalpel;
- plastic spatula;
- needle;
- degreaser (alcohol or vodka is best; it is better not to use solvents, as they can damage the car’s paintwork);
- construction or household hair dryer (preferably a construction hair dryer).
Using soap solution and hair dryer
It is worth paying attention to the environment in which the work is carried out. The room temperature should not be lower than +10°C, the air should be dust-free, and there should be no drafts. The further operation takes place in several stages. The first of them involves surface preparation, the second - fitting, the third - application, the fourth is the gluing itself and the elimination of defects. All work is performed according to the following algorithm:
- The surface to be pasted must be thoroughly washed, grains of dirt, grains of sand and other debris must be removed. Any, even the smallest particle that gets under the sticker will be visible, which will spoil the appearance of the surface.
- Try the sticker on the surface. If its canvas is large, then it makes sense to glue it in parts. In this case, decide into which parts you need to divide it. In this case, it is necessary to proceed from the considerations that it is necessary to glue first of all smooth surfaces, and then convex ones. After this, the joints between them should be processed.
- Separate the paper base from the sticker.
- Apply a soap solution to the adhesive surface of the sticker, as well as to the surface of the car where you plan to stick it.
- Carefully apply the sticker to the surface. A soap solution will help you level it if you were unable to glue it evenly the first time.
- Using a rubber spatula, gently smooth it out, starting from the center and working out to the edges.
- Remove the top protective film from the surface without damaging the car sticker or tearing the adhesive layer off the main surface.
- If an air bubble has formed under the sticker, you must carefully pierce it with a needle so that the air comes out.
- If the film is glued to the door joints, it must be cut with a utility knife.
- The final stage consists of heating the surface with a construction hairdryer to a temperature of +60...70°C. This is necessary so that the sticker becomes soft and it is easy to bend it at the joints.
Don't go overboard with the temperature. Otherwise, the sticker may simply melt.
For the first few days (up to about 10) after sticking, it is not advisable to wash the car . It will take some time for the glue to dry completely.
Next, we will analyze the “dry” method using the example of a sticker on a car window. To do this you will need:
- directly the sticker that you plan to stick;
- glass cleaner and rags;
- mounting tape;
- ruler or tape measure;
- scissors;
- rubber spatula, plastic card or other object with a smooth edge (optional).
The work is carried out according to the following algorithm:
“Dry” gluing method
- The first step is to thoroughly wash the surface of the glass where you plan to place the sticker and remove particles of debris and sand.
- Next, place the sticker in the planned location and secure it at the top corners using mounting tape.
- Using a ruler or tape measure, align the sticker and check for symmetry. If necessary, move the sticker and re-tape it at the corners.
- Attach a strip of mounting tape in the middle of the sticker vertically. Remove the tape from the upper left corner of the sticker.
- Lift the left half of the sticker and peel off the backing (down to the mounting tape). When doing this, make sure that the mounting film is aligned with the pattern.
- Cut off the separated piece of backing and set aside.
- Using a spatula or card, begin carefully applying the decal, moving from the center to the edges. Be careful not to create air bubbles.
- When half of the sticker is pasted, remove the mounting tape from the middle and right corner of the sticker.
- Remove remaining backing. When doing this, make sure that the mounting film is aligned with the pattern.
- Glue the right side of the sticker in the same way. Proceed carefully and carefully. Make sure there are no air bubbles.
- When the entire sticker is installed, remove the mounting film from it. It's best to do this at an angle.
Stickers on the side of the car are installed in the same way. The main thing is to always act carefully and not rush. However, car owners often wonder not only about applying, but also about removing the sticker from the surface of the car, as well as any adhesive residue from it.
Manufacturing materials
Stickers are made from various materials. Let's list all possible options, starting with the most popular:
- Vinyl film. An acceptable option that is resistant to changes in climatic conditions. Retains ideal shape from 2 to 10 years, which depends on the thickness of the film and its quality. With the help of a vinyl sticker it is easy to remove a visible defect.
- Fluorescent film. It has a special brightness. Valued by drivers who often drive in the dark. The service life is no more than 1 year. Later the film begins to fade.
- PVC film with reflective microspheres included. Able to reflect light from a source, it is visible in the dark, withstands scratches and lasts up to 3 years. In brightness it is inferior to fluorescent film.
- Tinting film. Most drivers prefer film that protects from sunlight. Tinting helps protect the driver from the sun and the interior from fading.
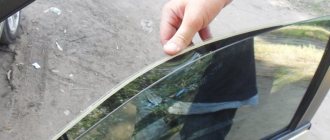
How to remove a sticker from a car
Using a hair dryer to remove the sticker
Let us examine in detail how to remove a sticker from the glass of a car or its body. First of all, you need to know that there are different types of stickers, but the most popular among motorists are vinyl ones.
We need to start the story with the features of vinyl stickers. The fact is that they are produced on the basis of vinyl (a chemical compound that is resistant to moisture, temperature changes, and so on), which has excellent performance properties, durability, strength, and resistance to external influences. The stickers are produced as disposable ones, and their adhesive is designed to last for 2…3 years. After this, it polymerizes, and the sticker itself shrinks. In addition, its surface is often covered with cracks, and when you try to tear it off, it breaks off in small pieces.
Another common type of stickers is paper-based. They are cheaper, but are not resistant to moisture and temperature changes. However, they are often used for gluing on the inside of glass.
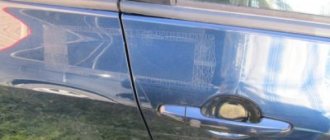
If your car has a dark tint, and the sticker has been used on it for a long time, then there is a high probability that after removal, the tint in its place will be darker than on the rest of the surface.
A popular way to remove a sticker from a car body is to heat it with a hair dryer . At high temperatures, the material becomes soft, and if it is not very cracked, then there is a high probability that it can be removed in one piece. The metal must be heated evenly. As it cools, it is necessary to periodically maintain the temperature. Remember that the higher the temperature of the metal, the less likely it is that glue residue will remain on the surface. However, do not overdo it, otherwise you may damage the car's paintwork.
To protect the surface of the machine, we recommend that you use special products. You can read about the best of them in the additional material.
Is a fine possible?
When stickers on a car block the view, the driver will be fined. Violation of technical regulations and the collection of traffic rules is punishable by administrative measures. A traffic police officer can issue a warning if the driver does not immediately get rid of the sticker on the car glass, but the police officer has the right to choose a different preventive measure. The minimum fine for a windshield sticker is 500 rubles, the maximum penalty is confiscation of license plates until the driver removes the stickers on the car.
How to remove glue residue from car surfaces and glass
Residues of glue can be removed by first moistening them with alcohol or alcohol-containing mixtures. Be careful when using different solvents. Read their composition first to make sure that they will not damage the paintwork of your car. In particular, in this case you cannot use acetone-based solvents , as well as acetone itself.
You can also remove vinyl stickers on your car using:
Comparison of different sticker and adhesive removers
- gasoline;
- kerosene;
- liquids for removing bitumen stains;
- silicone solution for removing glue from the body;
- degreaser for painting work.
After using the listed liquids, do not forget to use foam (soap solution) to wash off any remaining residue. Also, some car owners in such cases remove glue residues using very fine sandpaper (“zero”). However, after this the problem area will need to be polished using polishing paste. In stores you can find a special rubber roller that fits onto a drill. It can also be used to quite effectively remove pre-softened glue.
Results
Applying film to a car is not particularly difficult. This is especially true for small size stickers. Almost any car owner can handle this. It’s another matter if you want to use vinyl stickers on the car throughout the entire body (for example, “carbon-look”). In this case, it is better to seek help from the experts.
As for the question of how to remove a sticker from a car body or the dried glue left behind, then, as practice shows, it is best to use AI-92 gasoline and a hair dryer to heat up the adhesive. Gasoline is much cheaper than other cleaning products, but has a superior solvent action to most of them. However, the choice is yours alone, and we do not claim to be the ultimate truth. We invite you to share your own experiences using cleaning products in the comments.
Low pressure tires
Good day, friends. Not long ago we looked at tracked modules for SUVs - an excellent tool for increasing the cross-country ability of a vehicle. Today we’ll talk about another great invention - low and ultra-low pressure tires. The difference between low- and ultra-low-pressure wheels is arbitrary, so it can be neglected. So, what are the good things about pneumatics, what are their features, advantages and disadvantages? How much do they cost and is it possible to make low-pressure tires with your own hands? Let's try to answer these questions.
Aveo carbon fiber trim
If you are dealing with carbon-look film for the first time, then first master the principles of working with it by gluing small parts.
For example, the linings on the front door handles in a Chevrolet Aveo quickly lose their attractive appearance, because... The silver coating on them quickly wears off from the knees. You can also use film to cover inserts on the steering wheel, plastic in the area of the handbrake, door handles, a panel with a switch for adjusting the side mirrors and the angle of low beam lamps, panels in the area of the audio system, glove compartment, etc.
Trimming the interior with carbon fiber inserts will definitely improve the interior of the Aveo.
Dry method
Dry carbon fiber pasting has its advantages:
- the film does not move during installation;
- adhesion to the paintwork of the car is higher than with the wet method;
- vinyl stretches less.
Instructions:
- Preparation for pasting using the dry method is not fundamentally different from the wet method. But after removing contaminants with a wet solution, you need to dry everything thoroughly and then treat the surface with White Spirit.
- The film is applied to the element and smoothed.
- Heat the film with a hairdryer over the entire area and gently smooth it again with a spatula.
- After careful smoothing and heating, excess carbon is cut off.
It is worth considering that 3D class carbon films are more durable than 2D and are more suitable for the dry method. High-quality films have special perforations, and these channels help to expel air evenly.
Conditions for gluing carbon film on a car
Before gluing carbon fiber, you need to prepare a place to work, as well as a set of tools:
- Vinyl pasting is carried out at positive temperatures up to 20° C in a ventilated dry room;
- It is very difficult to work alone on tuning, so it is better to agree in advance with a partner;
- You will need scissors, a scalpel for cutting the film in hard-to-reach places, a construction knife, a tape measure and a hair dryer for drying the surface, a set of polymer spatulas for smoothing and removing air bubbles.
Nuances and features
It is worth considering some nuances:
- So, for example, if you want to glue a large picture that will take up more than one part - for example, a door and a wing, first stick the whole picture, and then carefully, so as not to leave nicks on the vinyl, cut between the door and the wing
- Alternatively, you can cut the design directly on the machine. To do this, you need to attach the vinyl film to the car body with the reverse side. Mark on the film where your drawing will be located and remove the blank. This is how we get the boundaries of our future tuning. When you start drawing, remember that you need to do it in a mirror manner. All that remains is to cut out the picture and glue it to the car using the same technology
- If the pattern is complex, first attach the elements with tape, and then begin transferring them to the machine one by one
- At the end of the procedure, it is recommended to warm the sticker thoroughly to consolidate the result. To do this you will need a regular hairdryer. Carefully process the entire surface of the drawing, not bypassing even the smallest details.
- Please note that when heated, edges that have been cut, for example between the fender and the door, may bend. This means that you cannot let go of the spatula during the process - be sure to even out the pattern
- The sticker will finally dry and stick only after a couple of days. This should be taken into account and during the drying process try not to drive over rough terrain at high speed.
Be sure to stock up on patience in addition to tools. After all, this process is extremely painstaking, and you can’t rush it, otherwise you can ruin everything.
Adviсe
- Stickers are rectangular and elongated; it is most convenient to glue them on the narrowest side;
- Gluing in rain or cloudy weather, even in a garage or box, is not the best idea;
- Go straight to the highway or just drive through the streets for over 50 km. per hour, at least in the first day it is not recommended - there is a high chance that everything will have to be redone;
- The average lifespan of a sticker is 1.5-2 years