14.09.2012
Acoustics for cars
In this article I will tell you how to connect and install component speakers.
After 3 thousand km of mileage on the VAZ 2114, I was ready to replace the front speakers and install tweeters on the instrument panel. I decided after I felt the difference in sound on my car and my father’s 14, which had mystery tweeters, and my front speakers for 400 rubles began to choke after 5 months of use.
Important!
- Throw away the factory wires and install silicone ones with a diameter of at least 1.5 mm.
- For better sound quality, it is recommended to solder the wire contacts rather than twist them by hand.
Car audio: Replacement of acoustics.
Have a nice day everyone!
And we’re talking about the need to prepare the car for the next “long-distance trip” - a trip to the region and, perhaps, to the middle zone, but later)
In 2114 there is obviously not enough ShVI, it may be that it is practically not there. And being lazy is a failure)
We had to approach the solution of this problem for us from the other side, the most pleasant one, namely, to drown out the noise with music.
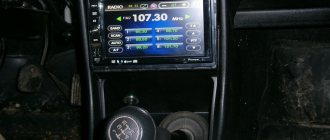
At the beginning, the car already had “music”: a Sony head unit (it was decided to give it up for a while), albeit with a retractable screen. But “the creation of China” coupled with the price (from 12 to 17 rubles) is being stopped for now.
But changing the acoustics in the doors is the best thing. There was one
They left the old wires - they were not replaced, the new ones were returned)
This was purchased
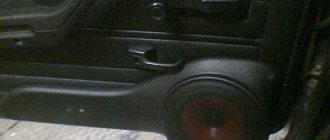
“Two birds with one stone are killed” - at the same time, the pockets on the doors are also changed: the old ones were significantly tired of their appearance and were kept practically on their word of good faith. It’s too late to tune all the doors, so replacing the pockets with podiums is at least some kind of solution to the problem.
Before installation the podiums looked like this
In a special workshop they charged 1,500 rubles for the work. (installation of acoustics and podiums), the time is about 4 hours.
In the end it turned out completely decent
And if you associate “done/was” – it looks like this
From a practical point of view, my calculations did not come true: if the engine is muffled, the “newest” sound is definitely better. But as I walk, I can no longer discern the difference between the new and old sound.
You still need to create a ShVI, but later.
One thing is fun - visually there is “progress”, and to the touch the leatherette is more pleasant than narrow plastic)
You have to turn a blind eye to the fact that the capacity of the newest pockets has almost halved, but oh well!)
Thank you for your attention, good luck to everyone!
- More about this machine:
- In-flight magazine
- Reviews
- Breakdowns
- Suddenly I realized that the star was missing... 143618 km
I just didn’t realize how many speakers there are in total? You changed two front ones. It’s a pity that you don’t feel the difference when the engine is running, this is the largest percentage of the time in the car.
Don’t even think about inserting the head unit; no one has broken or stolen the glass for you.
There are only 4 speakers: they replaced them in the front doors, two more “pancakes” are on the trunk shelf.
Very simple, with a removable panel, or, like that, with a retractable screen)
At the moment, cases of penetration into Russian cars have become more frequent, and the growth trend has continued since the beginning of 2014.
It’s better to add a couple or four more speakers + an amplifier. If the radio has connectors.
You need to be puzzled by this question, and then the old ones can be put somewhere else)
I thought about just changing it on a Qashqai, but the cost scared me away; if I change it, then I’ll have to install all the speakers + subbuffer + amplifier + head, because it’s not good in terms of music. But here there could also be tasks with bluetooth communication, reading a flash drive in the elbowrest, and so on.
So on foreign cars the cost of work is always more expensive, because the car is more difficult - that’s what they take money for)
Well, in the case of music - it’s approximately identical, just because of the additional standard goodies - it will be more expensive. Well, I’m sorry to spend more than 50 rubles on music - 3 CD blanks)))
Here is another “moment” - not every car can be given into the wrong hands)
Happy shopping! Have you already washed the speakers?
On vacation I’ll wash everything right away, I’ll wait for my friend from St. Petersburg and have a blast))
This is true, but driving is not allowed.
Here, after all, it’s such a thing, to create a Shumka in Samara, this is probably not a rewarding task, it will be a little better, but at a cost like the third part of your machine.
if you want a normal sound, then just make some noise on the doors (without interest, just a little), on the roof because it all resonates on it and plays the role of a drum/membrane when driving on rough asphalt, this is all quite inexpensive and does not last long.
well, install ordinary speakers, from experience without an amplifier it’s better than Sony and Pioneer, it’s difficult to find something more useful and not precious, better than 4 ohms, and the membrane that holds the speaker diffuser is made of a material like a rubberized rag, but not rubber and its like, freezes in the cold and the sound is worse. The ones you bought will normally only be played with an amplifier; there will be no low or high frequencies.
The head is better than the Pioneer, the sound is more juicy or something.
and a radio with a 14mm screen is like a saddle on a cow, what is it there for, there is no space for it, if you need it specifically with a TV/DVD, then it’s easier to buy an ordinary DVD receiver and a separate screen/TV.
You can’t dampen the engine + you can’t remove the vibration, I agree one hundred percent with the unappreciative matter.
everything must be thought out and done at the factory.
I even saw that in traditional Zhiguli cars there is virtually no noise coming from the wheels, that is, the arches are even more noisy than in Samara, apparently this is the best designed way.
At the factory, if the Shumka is improved by 1,000 rubles, then the cost will be raised by 10,000. )))
Zhenya, your position is clear and you are right, almost as always)
So I wanted to create only the doors and the ceiling (by myself). Well, wheel arches - 4 rubles. for their work, but I doubt the quality.
I need the radio screen to cover the heater levers)
You are one hundred percent right, audio preparation of doors is one of the most important points in car audio for economical cars. Everything else is really secondary. I support Pioneer one hundred percent, he plays very, very well.
Don't listen to anyone.
No noise insulation is needed for the engine.
I had two fours. One with full audio preparation and complete sound insulation (including ceiling), with amplifier and subwoofer and head (located in the head)
an Alpine device with a microprocessor (cost about 20,000 back in 2010) and Swedish acoustics (I don’t remember the company but it’s cool), wires and more. The devices in the car alone were worth 80-90 thousand... the speakers in the front door cost about 10-11 thousand rubles for those funds)).
And the 2nd four without everything, but with good music, a good pioneer head and four speakers - 16 cm doors and a rear shelf like pancakes.
And after comparing both of these cars, I thought that if there is not enough money for noise, then you can only make noise on the doors. Because the rattling of the TAZ doors cannot be drowned out, believe me.
so Shumka front doors are about 8000-10000 rubles. In your case, the only way to combat noise is by changing the machine.
I also realized this very well when I bought a Volvo after the basin. In the basin, at first everything was not made as it should be, to my chagrin. So my advice is not to waste your money. The main noise in a working basin 2114 is the front doors.
Where do these expenses come from? The material itself will cost a lot less + work of its own.
Change the car later, but for now you need to create the maximum possible with reasonable expenses)
Thanks for the advice.
Yes, I’m not talking about expenses. These are expenses for music. What I mean is that there was an opportunity to compare and evaluate even very cool music in the fourteenth, and I realized that this fuss was not worth it.
So I’m telling you to create soundproofing for the doors and what the heck. Still not enough sense. it is there but not enough.
This is understandable - the effect from installing ShVI on 2114 is the same as it was initially on the same Juke, Golf or Tiida - you cannot achieve it ((
But it is possible to make what we currently have better (without fanaticism))
don't associate vases and golf.
glue the envelopes and speakers need to be placed on a wood spacer, you will say later. there will be a difference.
Climate change inside the cabin
Another modification is the installation of air conditioning. During a warm couple of years, quite a lot of breakdowns occur with a significant increase in temperature in the cabin. On sale you can find small car air conditioners that can be installed on a VAZ. There are quite a lot of difficulties with such a modification.
To begin with, you should pay attention to the fact that the design does not provide a compartment for the air conditioner, which is quite large. Therefore, installation involves changing the front dashboard: quite often the glove compartment is sacrificed, using its space to install an air conditioner.
Also, do not forget that for such a design to work, an air supply is needed. In this case, the air must be filtered, since the ingress of debris causes a significant reduction in the service life of the structure in question. For the air conditioner to operate, power must be supplied - another reason why you should entrust the work to real professionals.
Installation of front speakers VAZ 2114, VAZ 2115, VAZ 2113, Lada Samara 2
We show the installation of speakers on a VAZ-2115 car, because in cars of the Samara family the speakers are installed under the panel trims of the devices, and such work is ordinary. In Samara-2 cars, front speakers are installed in the windows of the internal panels of the front doors. The diameter of the windows is 130 mm. There are four holes for attaching the speaker with screws to the inside door panel.
When installing, a fundamental point is the method of laying the wires from the head unit to the speakers. Due to the fact that the doors are opened and locked, the sections of wires between the door and the body pillar will constantly be subject to bending. Therefore, in these places the wires should be tightly protected.
The wire can be routed differently - take it out from under the device panel and pass it under the door trim. With all this, the wire in the cabin will be constantly visible, which is not very aesthetically pleasing. In addition, such a wire is easy to destroy, and in the place where it goes under the upholstery, the upholstery will not adhere to the door. This, in turn, will lead to loosening of the upholstery and, accordingly, rattling and squeaking when moving, which will certainly appear after a short time. In addition, the upholstery, constantly acting on the wire, will grind it. Thus, this method of laying wires can only be considered temporary.
In order to install the wires as thoroughly as possible, special holes are provided in the front pillars of the body and the front side ends of the doors. But simply passing the wires through the holes is only half the battle, because vibration will quickly rub the insulation of the wires against the edges of the holes. Therefore, to protect the wires, you need to install a corrugated case between the door and the stand. Such casings are commercially available and inexpensive.
If the wires do not have lugs to connect to the speaker terminals, they must be installed independently.
Remove the insulation from the end of the wire.
We insert the exposed part of the wire into the tip to a sufficient depth.
In this case, you need to make sure that the insulated part of the wire does not get into the crimping space.
Because the installed tip is not insulated, we insulate it with a cambric.
This is what a corrugated case for laying wires looks like. Please note: the ends of the casing are made in such a way that they can be firmly fixed in the holes of the pillar and the end of the door.
The diameter of the casing also allows you to lay in it the wires of other electrical consumers that can be installed in the door (electric door lock, electric window and mirror drives).
We bring the wiring harnesses of the speaker, electric lock and electric window into the hole at the end of the door and fasten their ends with insulating tape,...
...which makes it easier to thread a single wiring harness through the corrugated case.
We bring the wiring harness into the passenger compartment through the hole in the front door pillar and fix the ends of the corrugated casing in the holes in the pillar and door.
The wiring harness is now securely protected.
Space for installing a speaker on the inside panel of the front door with mounting holes.
If the suspension of the magnetic speaker system (speaker with a nominal diameter of 130 mm) does not fit in the hole,...
...the edges of the hole need to be bent.
The leading edge of the hole, unlike the other 3, is welded from 2 alloy sheets and has a fairly high hardness.
To make bending easier, we make several cuts in it.
...or with a cutting machine (grinder).
We bend the “petals” of the front edge with a hammer,...
...and the top, back and bottom edges are used with sliding pliers.
Now the speaker is located in the hole.
We install the brackets for fastening the speaker with screws, and the holes in the brackets must coincide with the holes in the door panel. There are four such brackets - according to the number of mounting holes.
We install the door trim on the space and lead the wires through the hole in the trim created for installing the speaker.
The length of the wires must be chosen with allowance for the convenience of connecting their tips to the speaker terminals.
If a power window is installed, place the switch block into the hole in the door trim.
Having connected the wires to the speaker, we install it in the hole in the door trim.
We screw in three screws securing the speaker, as shown in the photo.
The lower front screw strengthens the door trim pocket, so we screw it in when installing the pocket.
We install the speaker in the left door in the same way.
Source: vazclub.com
Do-it-yourself acoustic shelf for VAZ 2114
Acoustic shelf for VAZ 2114
An acoustic shelf for a VAZ 2114, made of plywood and covered with carpet, will improve not only the interior of the car. On the VAZ 2114, the acoustic shelf is a component that solves several problems at once: sound output improves, squeaks in the trunk disappear, speakers can be installed in any size, even the largest ones.
Acoustic shelf is very necessary
VAZ 2114 acoustic shelf
You can purchase a shelf in a store (the choice is now very rich) or you can create it yourself using the resources at hand. Let's focus on the second option, which appeals to the majority of Russians who are not accustomed to wasting excessive funds (why, if everything requires little effort). According to the majority of drivers who have little or excellent knowledge of car audio, installing 4 speakers according to the scheme: 2 at the front and 2 at the rear will be an ideal solution. There will be no problems with the front acoustics in terms of playback, because in front of the VAZ 2114 there are standard places for installing 13-inch speakers.
Note. Note that such speakers play perfectly, there is enough power, but still, if this is not enough, then podiums are placed in the doors where larger speakers are installed - 16 inches.
Acoustic shelf for VAZ 2114
Let's leave the front speakers alone and move on to the rear. There are more problems here. The standard places for speakers (see How to choose speakers for a car radio on your own) in the back, not only on the VAZ 2114, but on all other cars, are no good because they are very small. You can’t install huge speakers here, and small ones can’t handle playing more or less tangible bass. In addition, the standard shelf on the VAZ 2114 is very “flimsy” and is also not able to withstand the 6x9 oval speakers created for it. The above reasons simply force a motorist who is partial to good and high-quality music to act.
Acoustic podiums: take sound with you on the road!
If you are a true music lover and connoisseur of good sound, then the standard car audio system is unlikely to fully meet your requirements. The quality of sound and the characteristics of its perception depend not only on the design and size of the speakers, but also on their orientation. Quite often one gets the impression that car industry designers are working hard to annoy those who want to enjoy their favorite tracks even on the road. But the problem can be completely corrected by replacing the acoustics. In this case, everything will look as if the speakers were installed at the factory. Acoustic podiums - special devices for tuning car audio - will allow for high-quality installation.
Purpose of automobile podiums and doors (for VAZ, etc.)
Podium is a raised platform designed to display something. In car audio, podiums are seats for speakers. Surely even not very experienced car enthusiasts have noticed that door cards in the same brands and models of cars may differ. Some have only standard speakers, while others have entire systems. All this can be done with the help of acoustic podiums for doors. Therefore, even if the creators of your, for example, VAZ, were initially against enjoying high-quality sound, then the problem can be corrected without much expense.
Door podiums are designed to solve the following problems:
- installing a speaker where there was initially no space for it. Using accessories, installation can be carried out so that visually the acoustics will look like factory ones;
- installation of larger speakers. A good road and your favorite music are pleasures that you should not deprive yourself of under any circumstances. And if, unfortunately, we don’t have much influence on the quality of the roads, then it is quite possible to achieve the desired sound. Select the speakers of the required size and install them in the doors using car podiums;
- sound direction: the sound features depend on the orientation of the speakers. And if yours have taken a wrong turn, then correct the problem with the help of acoustic podiums. They are offered in various modifications;
- imparting rigidity to the structure. The speaker itself is a reactive system. The diffuser, moving, compresses the air in front of it, thereby creating sound waves. This creates counteraction. And if the speaker is not properly secured in the door, it will wobble on its support. Because of this, the sound will become sluggish and extremely unpleasant.
Installing car acoustic podiums will allow you to achieve the desired sound effects while maintaining the aesthetics of the interior.
Assortment of sound podiums in the online car acoustics store Loudness
We are on the same wavelength as those who love speed, good roads and high-quality sound. Therefore, our assortment is represented by such products that allow music lovers to make even any VAZ sound new. In the Loudness online store you can buy the following types of car podiums:
- VAZ 2101-2107: acoustic podiums for 16, 20+16 speakers (horn at the top or bottom). Accessories for Lada are made of high-quality vinyl and are available in various designs. You can upgrade VAZ 2106, VAZ 2108, VAZ 2109 and other models. As a rule, such cars have space for 13 speakers, and their sound is a test for the ears of a music lover;
- VAZ 2110, 2111, 2112: if you are the owner of newer Lada models, this does not mean that when creating them, someone took care of introducing functional car audio. In order not to spoil your trip, we suggest you buy podiums for VAZ, with which you can install speakers 20, 20+16, 20+20. They will allow you to perfectly secure the acoustics, as well as adjust the sound due to the correct direction of the sound;
- VAZ 2113, 2114, 2115: for such Lada models you can buy podiums for speakers 20, 10+16, 16+16. If you have any questions when choosing a product, it is better to check with the seller. Installation of podiums for speakers should be carried out taking into account the features of the door map;
- Niva Chevrolet: podiums for the Niva are also available for sale in our online store. Initially, in this model, the mounting positions for the front and rear speakers are also designed only for 13 cm;
- “Lada Granta”, “Lada Kalina”: you do not have to change all the standard acoustics - you can only add individual elements, changing the sound. To buy podiums for classics, you first need to select suitable speakers so that the mounts will subsequently fit them;
- “Lada Priora”: for owners of such cars, we offer triangles for HF made of fiberglass and black vinyl, as well as acoustic podiums for speakers of different sizes.
It is not difficult to install car podiums on a VAZ or other makes and models of cars yourself.
Manufacturing
Acoustic shelves for VAZ 2114
In principle, there is nothing difficult to make. It will be useful to arm yourself with a little patience (and Moscow was not built right away), follow the instructions correctly, and have the necessary tools and materials at hand.
What is necessary
Acoustic shelves for VAZ 2114
For a successful operation, you need to prepare the following:
- Plywood – a sheet 18 mm wide is suitable;
- A piece of material for reupholstering - the carpet fits perfectly, but if the interior is upholstered in leather or leatherette, then for a harmonious perception we replace the carpet with a piece of the corresponding material.
Note. Carpet is not bad because it is very comfortable to work with. This material is mind-blowingly obedient if you know how to handle it.
- Glue for carpet - the best option is aerosol or Nairit;
- Stain;
- Special staples for an 8 mm stapler (for wood) and the furniture stapler itself;
- Painting tape;
- Several screws.
As for tools, you should have a good jigsaw, a plane and a drill on hand, or, better yet, a screwdriver.
How to install and connect component speakers
In this article, I will tell you how to connect and install component speakers.
After 3 thousand kilometers on the VAZ 2114, I was ready to replace the front speakers and install tweeters on the device panel. I decided after I felt the difference in sound on my own and my father’s 14th, which had mystery tweeters, and my front speakers for 400 rubles began to choke after 5 months of use.
- Throw away the factory wires and install silicone ones with a diameter of at least 1.5 mm.
- For the highest quality sound, it is recommended to solder the wire contacts rather than twist them by hand.
Speaker selection
Kicx PD 5.2 in Grant's tailgate
There is not much space under the rear door trim, so if you purchase a speaker that is too large, you may need to work to remove the standard sound insulation and install new one. Therefore, carefully consider the selection of components, otherwise you risk being subject to a return procedure.
If you choose a pancake that is too powerful, you will need to make spacers. As car audio gurus say, you don’t need a powerful sound from the rear, so I don’t see the point in putting something “very big” in the rear doors.
Therefore, I recommend choosing 13th speakers to create a pleasant background sound, but if you need bass, then you should look at subwoofers. Kicx PD 5.2 speakers are one of the best options according to Grantovodov.
The advantages of the speakers will be:
- installed “usually”;
- play well;
- are inexpensive.
Morel Tempo Coax 5x7 - These speakers also won't require any "locksmith work" on the door.
Speakers Morel Tempo Coax 5x7
Component acoustics - reviews
I still didn’t dare to buy the latest speakers with tweeters, but a month later I went to the store, looked at the selection, and realized that my budget of 1000 rubles only fit into component acoustics.
Having heard about the quality of MYSTERY products, I turned around and went home. I decided to read the reviews for the sake of enthusiasm, and as it turns out, almost everyone responded very positively about this system, and the next day I was already standing near the cash register and trying out the newest speakers. The cost for MYSTERY MJ550 was 952 rubles.
Installing speakers in doors
Installing speakers in doors is a very easy process in itself, if you just need to replace the old speakers with the newest ones. But if this is your first time installing front speakers, then the level of difficulty depends on the presence of wiring in the doors and the availability of space for the speakers. Fortunately, our cars are supplied from the factory with side podiums for speakers with pockets, so this is already minus one problem.
The correct installation of speakers in front doors is that the speakers must be mounted strictly in their own places and the polarities of both the wires and the speakers themselves must be correctly connected. Everyone approaches the issue of installing front speakers in their own way: some simply strengthen the latest speakers, others at the same time make noise and vibration isolation for the highest quality sound.
- We unscrew the 3 screws securing the podiums, unscrew the speaker mounts and remove the connectors.
- We install the newest ones, tighten them tightly and place the podiums.
A short checklist for installing speakers in the front doors of Lada Granta
- Removing the door card.
- Removing standard noise and vibration insulation.
- Removing the stock speaker.
- Installation of speakers (13 cm) Granta liftback. When installing speakers at 16.0 cm, use a metal jigsaw to make a cut in the door contour.
- We connect the blocks with wires.
- We collect the card and replace it in a similar way to the second door.
- To avoid additional manipulations with cutouts and extensions of standard holes in the doorway, install audio speakers with a diameter of 13.0 cm.
- If you want to improve the sound quality, increase the volume, frequency, install speakers in the front doors at 16.0 cm. Be prepared to widen the hole in the door structure. You can do this at a service center or yourself, armed with a metal jigsaw. From a ring with a radius of 6.5 cm, make 8.0 cm.
- When installing speakers of larger diameter, there is a high probability of glass coming into contact with the back of the speaker. As a result, vibrations are possible when lowering the glass to its lowest position.
The sequence of actions is presented very briefly; during installation, many “pitfalls” arise, which are discussed below.
| Name / characteristics / article number | Price, rub.) |
| Comprehensive budget solution | |
| Radio tape recorder PIONEER MVH-150UBG | from 1500 – 1700 |
| Speakers Pioneer TS-1339 (13cm) | from 2000 |
| Speaker trim | from 450 – 500 |
| Additional noise/vibration insulation of doors | from 1200 |
| Consumables, bolts, screws for vinyl (wood) spacers | from 100 – 150 |
| Car radios | |
| Pioneer SPX-HUD01 | from 10000 |
| Pioneer DVH-345UB | from 12000 |
| Sony XAV-65 | From 15000 |
| Pioneer SPH-DA230DAB | —/— |
| Pioneer SPH-DA120 | from 12000 |
| Pioneer MVH-X585BT | —/— |
| Pioneer MVH-X580BT | —/— |
| Pioneer MVH-S300BT | —/— |
| Auto acoustics coaxial | |
| Two-way coaxial acoustics URAL AK-M | from 7000 |
| URAL AK-74 | —/— |
| Coaxial acoustics URAL AS-C6947 | from 5200 |
| URAL AS-C1647 | —/— |
| URAL AS-C1347 | —/— |
| Four-way acoustics German Maestro AC6511 | from 7500 |
| Focal Performance PC 130 | —/— |
| Dragster DCB 5 | —/—7 |
| Dragster DCA 943 | from 6800 |
| Dragster DC 572.2 | —/— |
| Dragster DC 502.2 | —/— |
| Auto acoustics component | |
| 2-component acoustics Dragster DSB 5 | from 4000 |
| URAL AS-C1627K | —/— |
| URAL AS-C1327k | —/— |
| URAL AK-74.C | —/— |
| URAL AK-47.C | —/— |
| Avatar CBR-6.21L | from 5000 |
| German Maestro MB 4.2 FR | —/— |
| German Maestro 2S 6512 | —/— |
| Dragster DSC 592.2 | —/— |
| Dragster DSA 582 | —/— |
| Dragster DS 532.3 | —/— |
| Alphard Machete MC-6.2A | —/— |
| Amplifiers single / multi-channel | |
| Machete MFC-650.1D | from 10000 |
| Taramps DSP 3000 | —/— |
| Taramps TS2000x4 | —/— |
| Taramps TL500 | —/— |
| Taramps TL1800 | —/— |
| Taramps TL1500 | —/— |
| Taramps DS800x4 | —/— |
| Taramps DS800x2 | —/— |
| Taramps DS440x4 | —/— |
Installing tweeters in cars
Tweeters must be installed on the side pillars of the windshield at ear level.
To install the tweeters, we will need to remove the plastic trim of the side pillars.
- Remove the left pillar.
- We push the wiring from below under the panel into the gap that appears.
- We connect the tweeters from above (the wiring can be run one hundred percent under the upholstery, for this you will have to drill an additional hole, or you can run the wires to the windshield and then hide them under the upholstery.
- I fixed the tweeters at ear level, where there was a fastening for the upholstery of the counter. I simply fitted the tweeter and attached it and the upholstery with one screw.
- We do the same on the right side of the car.
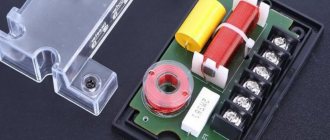
- Next we carry out the wiring from the tweeters to the central dashboard, where we connect the crossovers and connect them to the radio. Everything is carefully described in the annotation, what and how to connect, there were no problems.
- We take the crossover and look: it has one input and two outputs. The outputs have labels: twitter - for connecting tweeters, m-bass - for connecting door speakers. It's simple.
The result amused me completely.
Source: vaz-2114-lada.ru
Car audio! Installation…
Hello everyone;) In today's blog we will install all the good car audio that was purchased earlier) During the installation I encountered many obstacles, since it all started from scratch and I did it for the first time. This is probably the last time I saw my salon clean)
So, in order: First of all, I laid the power wires on the left side under the thresholds, but I did not encounter any difficulties. I threw both “+” and “–” on the battery)
Later I also laid interconnecting wires on the right side.
I hoped that the doors were completely glued, since when buying the car the previous owner said that the front doors were glued with vibration, but after removing the trim I saw the following picture, the driver's door was glued with vibration in 2 layers, it was not even rolled out and came off, the passenger door was noisy in one layer, and the second layer was apparently removed, all the mistakes had to be corrected)
I cleaned up the driver's door and sealed the passenger door with a 2nd layer.
Next, it was time to throw the acoustic wires into the doors, and then I ran into a problem. I couldn’t find the holes where the wires go in the doors, I heard that you need to remove the dashboard to throw the wires, and someone managed to insert these same wires without removing the dashboard . Naturally, I didn’t want to remove the torpedo, and I was a little afraid of it)) But several days of torment and attempts to find these very holes turned out to be a failure for me. And having gathered my thoughts, strength and nerves, it was decided to remove the torpedo.
Installation of front speakers 16 cm in diameter, installation of speakers without cuts and podiums
Installation of front speakers 16 cm in diameter
In the end, I got a radio tape recorder. Cheap radio cassette player SoundMAX SM-CCR3037.
I bought Mystery speakers.
As a friend recommended, I took 16, their sound should be better. But the question is how to install it in the door, because the size is normal for 13 speakers. Now I decided to install it without the help of others. Below is a photo report of the process of installing the front speakers. To remove the trim you will need: a screwdriver and an asterisk wrench. Thanks to AvtoVAZ I will have to take a set of asterisk keys. There are probably many more such pitfalls.
Looking ahead, the plastic, as well as the clips on the Priora doors, are good, a comparison with the former two-piece.
The usual space for speakers is 13. There is audio preparation - it’s true that two wires for the speakers are brought out.
This piece of paper was already included with the speakers, all I had to do was draw a circle in a comfortable place.
For the future, you shouldn’t move the hole as in this picture. The last clip on the trim will touch the speaker. I made a hole on the second door without moving it higher to the side. It was awkward to strengthen, but the cladding of the village was unsurpassed.
For good fastening of the speaker to the door sheet, I used 9mm as a substrate. plywood
So as not to touch the fastening of the clip on the casing, I ground down the edge of the speaker.
Speaker on spacer
Speaker on plywood spacer
There was no suitable material for sound insulation, but one was at hand - foil-coated isolon.
It’s not a masterful thing to say, I agree. But isolon is better than nothing at all.
Everything is ready, you can put on the trim.
Installation of 16 columns in Priora without cutting
The process itself is not easy, I chose the music painstakingly, but not cheaply, I think this option will suit almost everyone.
For the base there was a Pioneer head, which I got from my father when I was still driving a 99. A nice thing with AUX and Bluetooth. I don’t remember the name, and it’s not that important, because at the moment most of the radios play “at the level”, that’s enough for me. The most important incident for me was the purchase of speakers, I walked a lot, listened, and chose. I braked on an Alpine SXE-1750s in front and an SXE-69c2 in the rear. Excellent mids, not crunchy lows + tweeters included (albeit without crossovers, but not a failure, they pull). I read a lot of blogs about installing 16″ speakers in front doors. The vast majority of them in the text seemed to hint that the doors would have to be cut and spacers made. I decided to buy spacers at the car market so as not to suffer and make a mistake. Not a failure, I thought, and armed with patience, equipment and a jigsaw, I went to the dacha.
In analysis, under the noise already, the bottom layer
Having disassembled the car (doors, sills, back seat), I began to make noise on the doors. For one door, a sheet of foil isolon was enough (forgive me if I called this material something wrong, the dealer sold it to me under that name). Then, having tried on the column itself in the standard 13″ space, I was pleasantly surprised that the core is almost one hundred percent hidden in the door and, together with the spacer, reassures the absence of hard metalwork sculptures with Zhiguli alloy.
Shelf, nothing exciting, cut with a jigsaw without any problems, glued together perfectly
Installation of acoustics in VAZ 2114, 2115, 2113
0:7 It all started when the group met and started a normal conversation about this and that. Sergey recently took a VAZ-2114 and, having driven it for about 2000 km, just passed its maintenance. This is not his first car, and he wanted something special in his car. We, of course, supported him and without blinking an eye we suggested, let’s make podiums for 20-centimeter speakers in your doors! There will be normal bass in the front, and for the middle and top we will use two-component acoustics. We’ll install about four amplifiers, and two “stele” subwoofers in the trunk won’t hurt. They offered many options, all different, one more unusual than the other, but it all seemed to be a joke. Sergei listened to our chatter very seriously and in the end, in all seriousness, said that one of the options seemed interesting to him. We were joking, now we had to implement all this.
0:1585
Leaving Sergei alone, especially since he is not very well versed in all the intricacies of car audio, was not comradely, and we offered him our help. I had to do a lot myself, as the most unoccupied student at Orenburg State University. Volodya and Alexey, who work at the car market in the tint box, and Dmitry, a sales consultant at the 12 Volt store, helped a lot not only in word, but also in deed, for which I thank them very much. Thanks to their efforts, in a couple of days we were able to rent a box on the territory of the Orenburg car market. Sergei was warned that he would have to part with his car for about two weeks (it turned out to be three). After that, with the help of Dmitry, we purchased all the components to create the system. Volodya and Alexey were closely involved in work and sported branded Pioneer overalls all the way, I have no idea where they got them for free, I tried for a long time to beg for at least one for themselves - they didn’t give it to me.
0:3364
Sergey bought the Pioneer CD receiver himself, even before our “comic” system was assembled even in words. The most important thing about Pioneer is its technical capabilities for the money paid. Rich equalizer settings, time delays, switching of linear outputs to channel-by-channel amplification mode, and simply excellent playback quality. Therefore, having “finished” the system for Pioneer, we set the filters on the subwoofer to 40 Hz, twenty centimeters of bass in front play from 50 Hz to 2 kHz, and the mids with tweeters work from 1.6 kHz. All crossovers on amplifiers are disabled.
0:1063
We decided to assemble the front using Pioneer TS series acoustics. The coaxial TS-E2096 were chosen for their amazing mid-bass size, and for the rest of the range, the component two-way set TS-E136 was suitable - the tweeters played very well during test listening. In the coaxial “plates” the tweeters and mids were left for the time being, although we thought for a long time whether to cut them off or not. We want to measure the frequency response of the system, the only bad thing is that for this we need to go to Samara. They decided to connect a passive crossover only for the component tweeter; its neighbor in the set is connected directly to the acoustic terminals.
0:2142 0:9 1:514 1:524 2:1029 2:1039 3:1544
The amplifiers for the front speakers were two two-channel Oris, I managed to listen to them, and they have good reviews in various Internet forums. For the subwoofers, we chose an Oris Armada monoblock, for that kind of money and that kind of power - just what is needed for two popular subs from the same company. Deciding not to waste time with the “tens”, we took the “twelfth” size of subs, although the boxes turned out to be quite large, 44 liters in size. The power supply of the installation was strengthened with a pair of 0.5 F buffers. Work on the Shumka and podiums for acoustics began at the same time, while one dries, you can successfully glue the other. The interior of the car was completely disassembled - all door trims, seats, standard floor insulation, and all the “plastic” from the trunk was replaced with classic plywood.
3:2949
Noise and vibration insulation of the interior took place during breaks between the production of podiums; for the work we used Standardplast materials. The doors were sealed very tightly; 1.5 sheets of Vibroplast were used for each one. All technological holes were reinforced with ties and then sealed on top with a Vibroplast + Splen sandwich, the wiring was specially weighted with Bitoplast. The trunk, wheel arches and floor also took a lot of damage; the same materials as on the doors lay almost seamlessly over the entire surface. I glued the floor for the first time and went a little overboard, then I had to work hard to put the seats in place. The edges of the door trims and all small “plastics” are glued with “Bitoplast” against squeaking and rattling.
3:1323
The door podiums, where we wanted to place the “twenties” midbass and mids, were made using the same classic “plywood + polyurethane foam” technology. Having screwed the grill rings to the casing with long self-tapping screws, we roughly outlined where to install the acoustics so that it would not interfere too much with either the driver or the passenger. They decided to keep the “native” pocket. Then the sheathing was carefully wrapped in packaging film so as not to stain it with polyurethane foam, and the rings were replaced with plywood. And here the most difficult thing began - foaming the whole thing, because in order to get it hard, the foam has to be thoroughly kneaded and watered generously with soapy water.
3:2464 3:9 4:514 4:524 5:1029 5:1039 6:1544 6:1554
When the podiums were dry, I cut off the excess foam with a hacksaw, the hardness turned out to be such that the knife could no longer take it. Then sanding and one layer of putty. This was repeated several times over the course of probably three days.
6:1949
The finished podiums were covered with vinyl identical to the original one. At first this task did not seem the most difficult, but when the turn came to pull the vinyl, only with the help of Volodya, Alexey, their industrial hair dryer and a rich vocabulary, they managed to overcome the vinyl.
6:2401
Eloquence (but not correct diction) was added by the wasp, who, apparently, also decided to make fun of us in the only way she knew. I turned out to be the target of the joke: when I was finishing a can of Pepsi in the evening, an evil insect bit me right on the tongue. But I offered a drink to Dmitry, but for some reason he refused. In general, for the rest of the evening I could not speak, although I really wanted to.
6:703
The standard holes in the metal of the doors had to be widened; the magnets of the “twenties” speakers would not fit otherwise. But when they put the casing in place, everything turned out impressive. The vinyl on the podiums looked very good; it created the feeling that the podium and the door trim were one whole.
6:1224 6:1234 7:1739 7:1749 8:2254 8:9 9:514 9:524
The installation of tweeters took place with intermediate listening. First, I installed the squeaker caps on the posts, oriented them and listened to see what would be best. Then he removed the whole thing and filled it with foam. The foam was washed off with water, and after drying, all that was left was to go through it with sandpaper and smooth it out with fiberglass putty in several layers.
9:1145
After the interior was assembled, we began manufacturing the subwoofer enclosures recessed into the wings. First, we decided to make a model from foam plastic and cover it with one layer of fabric impregnated with epoxy resin. For this undertaking, Sergey brought large sheets of foam plastic, from which we cut out the outer contour of the right and left drawer in layers. Each subsequent layer was glued to the previous one so that in the end we got life-size foam subs. To prevent the epoxy from being absorbed, the foam had to be covered with mounting tape.
9:2182
Since I had little experience working with epoxy, I again called Volodya and Alexey for help. The fabric was glued as follows: first, a piece of fabric was placed on the body, then epoxy resin was diluted in a metal can and heated with a hairdryer to speed up the reaction. Then, with a brush dipped in heated epoxy, all pieces of fabric were impregnated one by one directly onto the foam body. When all five walls were covered with rags wet from epoxy, everything was dried with a hairdryer until hardened.
9:969 9:979
10:1484 10:1494
11:1999
For some reason, the fabric with resin turned out to be quite soft, so the walls of the subs were reinforced with sheets of “Shumka”, and wooden plywood inserts were installed on the inside. The final treatment was done with compacted foam, using two and a half cans for each box. We cut out the front walls from chipboard. After assembly, the rigidity of the cases turned out to be so high that they could easily support my weight. The surface was finished with gray carpet.
11:876
The amplifiers are placed between the subwoofers in a custom-made spare wheel well cover. The cover is made of two sheets of plywood, between which all components and buffer capacitors are laid. The upper plywood, which became the new trunk floor, is equipped with windows covered with sheets of plexiglass, and the lower one is covered with a film resembling an aluminum sheet with ridges.
11:1597
Before mounting it into the lid, one of the two-channel Oris was turned inside its own case so that the power terminals of both amplifiers were side by side and the inscription on the case was not upside down. The finished cover with installed backlights is attached to the subwoofer boxes on hinges, which makes it possible to use the spare tire without any problems. The system was invented and made for Sergei, but we would all really like to know how professionals would evaluate this installation. This year we did not have time to get to any competitions and we really hope that next year we will definitely participate in at least one stage. It’s a pity, of course, that no one has held official competitions in Orenburg yet, because we are serious about competing for a prize…
11:3031
Source: Autosound No. 3 2006 My own game. VAZ-2114. Vasily MISHUKOV, Orenburg.
11:136 next article:
Installation and connection of a 2 DIN radio in a standard and Europanel, modification of the ISO connector for VAZ 2113, 2114, 2115
The content of the article:
Modification of the ISO connector for connecting a radio in a VAZ 2114 Installation of a 2 DIN radio in a VAZ
12:1070
Rating 4.50 [1 Vote]
30919
Properties and installation of speaker podiums
The quality of sound in a square depends on the location and method of installing the speakers. And podiums are a fundamental element of acoustic design. And all drivers know that these are useful and comfortable devices. If you choose and install the podiums well, then in combination with the speakers the system will entertain your ears for a long time.
For all brands of cars, you can purchase ready-made elements and simply install them according to the instructions. Or you can create podiums for speakers without the help of others. It's economical and much better. Well, it has long been confirmed: in order to create better acoustics, you cannot trust anyone.
Types and properties of podiums
Depending on the installation location, there are two types of parts: external and internal. Internal ones are installed if you want to preserve the industrial appearance of the interior. For example, when replacing a standard speaker with a diffuser of similar diameter.
The internal parts are one hundred percent hidden under the door or ceiling trim. And it, in turn, must fit very tightly to the column. Otherwise you will get distorted sound. The internal structures are protected from damage and are simple to manufacture. Also, they do not affect the interior design of the cabin.
Speakers on the car door
The outer (external) podium makes it possible to install any speakers in size: 20 cm or 16 cm. The head can be positioned with inclinations in different directions - towards the listeners or parallel to the door. External installation helps reduce vibration due to its tight fit to the door trim.
Making your own podium
If you have decided on the type and location of installation, you can start working. It’s easy to make podiums for speakers with your own hands.
Homemade speakers
Arm yourself with the following materials:
- board (for ring parts);
- fiberglass (for complex parts);
- epoxy;
- nylon or other synthetic fabric (A collection of different and interacting tissues form organs)
; - leather or paint (for decorative work);
- putty;
- mounting tape;
- sandpaper;
- polyurethane foam.
Homemade speakers
In addition to the materials, the following tools will also be useful:
Regardless of the make of the car, be it a Priora or another VAZ model, before starting work you need to remove the inner trim. If an internal installation is being done. Then you need to prepare the space for installation. Cover the selected area with a vibration absorber. The installation template must be cut out of cardboard. Try it on in place and find the fixation points.
The template should be transferred to the material from which the part is being prepared. Cut the workpiece and drill the mounting holes. Place the blank in place and try it on. Also mark holes on the door and drill them. The parts are fastened with stainless steel bolts and washers.
Acoustic speaker for car
All that remains is to connect the speaker, install it and secure it. Place the trim on top and try on its position. If the cutout on the casing is incompatible with the size of the column, adjust the hole on the casing.
Install the paneling to your space. If necessary, add mesh to the speaker. First, covering it with acoustic material. That's all. All that remains is to assemble the door and check the sound properties.
Acoustic speakers for cars
Podiums under 16 cm on VAZ 2114
Armed with all the necessary materials and tools, you can make podiums up to 16 cm. The speakers are not huge and require care.
- Mark circles on plywood.
- Cut out the rings using a jigsaw.
- Cut holes in the finished podiums.
- Screw the rings to the parts through the blocks.
- To make the system as strong as possible, you can cover it with a net.
- Foam, dry, cut off excess.
- Coat the part with putty. Sand it out.
- Cover with nylon. Almost everyone uses regular tights.
- Correct all bulges with putty and cover with leather.
Speaker on the door of a VAZ 2114 car
The same method is used to make podiums under 20 cm. The speakers not only on the Lada Priora, but also on other brands of cars look better if they are inside the trim. In a similar way, you can create integrated podiums with 2 speakers behind and in front. With the external installation method, 2 speakers are installed on the rear parcel shelf behind the seats.
Making podiums for acoustics
VAZ 2114 acoustic podium and its production
Let's look at how to make podiums for doors. As a rule, the standard places on the doors of a VAZ 2114 car are designed to install speakers measuring 13 cm. What should we do if we want to install larger speakers? The most suitable material from which to make good podiums is plywood. And to start the process, you need to cut out circles of a certain size from plywood for the speakers you intend to install.
Advice. When cutting, we recommend using an electric jigsaw. It will save both time and nerves. In extreme cases, you can use a drill.
To adjust the podium to the desired shape, the following materials are used:
- Polyurethane foam.
- Epoxy resin.
- Compoplast.
And now everything is in order.