When you turn on the ignition and after starting the engine, the car begins to live its own life. The lights come on, the electronic control unit starts a pre-launch mode, during which the pump in the power unit, as well as in the automatic transmission, begins to work, and a strange game of pictograms plays out on the dashboard. All the lamps that are responsible for signaling problems with certain options or technical systems flash instantly. Then they go out, and within two seconds the dashboard returns to its usual appearance. What kind of game of color pictures is this and what does it tell the driver?
Failure when pressing the gas pedal: causes and solutions to the problem
Failure when pressing the gas pedal or accelerator pedal is a problem that is rare in modern cars, but a common occurrence in VAZ cars. The problem is that pressing the pedal has no effect. And after a few seconds there is a jerk, the car jerks. A serviceable engine responds quickly to pressing the gas pedal.
If you find such a problem in your car, do not put off fixing the problem until later. You can diagnose the problem yourself, but the best option would be to contact a car service. Mechanics with extensive experience and modern equipment will quickly find the cause of the gas pedal failure.
In winter, especially on slippery roads, sudden acceleration of the car can turn into a serious problem. In case of loss of control, an emergency situation may occur.
Failure while overtaking a passing vehicle on the road does not bode well. You will have to apply sharp braking and return to your lane, but there may be another car there.
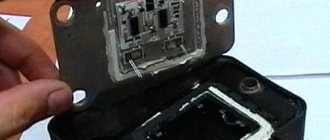
Video “Guide to Replacing the Fuel Filter”
The channel In Sandro's garage, using the example of tenth generation VAZ cars, offers to familiarize yourself with the process of changing the filter device, described in the video.
Do you have any questions? Specialists and readers of the AUTODVIG website will help you ask a question
Was this article helpful?
Thank you for your opinion!
The article was useful. Please share the information with your friends.
Yes (57.14%)
No (42.86%)
X
Please write what is wrong and leave recommendations on the article
Cancel reply
Rate this article: ( 7 votes, average: 4.57 out of 5)
Discuss the article:
What are failures?
Failure when pressing the gas pedal lies in the improper reaction of the engine to this. Thus, when trying to accelerate, the engine does not gain the required speed.
This leads to a drop in speed. It manifests itself with gradual and sudden acceleration. Dips appear when you press the gas pedal in different ways:
- Short-term failures. There is no response to pressing for a couple of seconds.
- Lingering failures. The engine loses speed for 4 to 10 seconds, and it is possible that the car will stall.
- Jerks. Dips up to 1 or 2 seconds. The car seems to be “twitching”.
- A series of jerks. The engine either increases speed or slows down, although the pedal is in the same position.
- The car jerks. Consists of a series of protracted failures.
The car stalls when the clutch is depressed: do-it-yourself repair
As a rule, some of the problems associated with a stalling engine can be solved independently in a regular garage. The owner of many cars can clean the throttle himself, replace the fuel pump, filters, spark plugs, high-voltage spark plug wires, ECM sensors, etc.
Let's look at the most common operations in relation to gasoline cars. These include replacing the idle speed sensor or IAC (idle speed control). Note that on different cars the installation location of these elements may differ, but the replacement itself is almost identical.
- The first step is to remove the terminals from the battery. Next, it is determined where the XX sensor is located. Then a chip with wires snaps off from it, which is secured with a latch. Next, unscrew the screws securing the regulator from the throttle pipe, after which the element is removed.
- Now the new sensor is put in place. During installation, it is important to ensure that the rubber sealing elements on the sensor (if any) fit tightly to the surfaces.
- Now the sensor, after installation and connection, needs to be calibrated. To do this, you need to connect the terminals to the battery and turn on the ignition for 5-15 seconds. Then the ignition is turned off, after which you can test run the internal combustion engine.
After dismantling the unit, the throttle valve and channels should be washed with a cleaning fluid. Please note that you also need to blow out the crankcase ventilation channel (this can be done using a compressor by supplying air under pressure into the channel).
Also, during the process of removing the throttle, you need to carefully inspect the rubber seals of this unit. If the gasket is damaged, deformations, cracks, tears and other defects are noticeable, then the element needs to be replaced.
The throttle position sensor may also need replacement. To replace the TPS, you need to find this element (often it is located on the throttle pipe). The sensor is attached with ordinary screws that can be unscrewed with a screwdriver.
After this, a new sensor is installed in place. Typically, replacing the TPS solves the problem when the car stalls when you press the clutch, when braking the engine, or when you press the brake pedal.
- As for fuel air filters, they also need to be inspected and changed if necessary. Replacing the air filter is not difficult, since you just need to unscrew the cover of the filter housing, remove the old filter element and install a new one. The main thing is to choose the correct size air filter and place it sideways.
Next, you need to find a fuel filter (on different cars it is installed in the engine compartment, in the lower part of the car outside on the bottom, in the area of the gas tank, etc. Often the filter is attached with steel clamps, screwed with screws, etc. Fuel filters are also attached to the filter housing pipes that are removable. Keep in mind that gasoline may leak out of the filter when removed.
When installing a new filter, there should be arrows on the housing that indicate how to correctly position the filter element. The arrows should show the direction of fuel movement from the fuel tank to the engine.
After installing the filter and tightening all the fasteners, turn on the fuel pump by reinstalling the fuse, then you can turn on the ignition for 3-5 seconds so that the fuel pump raises the pressure in the system. After this, the engine can be started.
When the engine is running, you need to again inspect the installation location of the fuel filter. No fuel leaks are allowed at the connection point of the fuel pipes or along the filter housing.
HAVE YOU FOUND YOUR REASON?
Often, failures occur due to a breakdown of the power system. After pressing the gas pedal, the power system increases the volume of fuel supplied to the cylinders. Breakage causes a change in these proportions. Those. The motor just can't do its job.
In addition, it is possible that there may be a breakdown in the ignition system. It occurs much less frequently. It's either spark plugs or ignition wires. The spark plugs must be removed and checked. The presence of carbon deposits or too clean spark plugs indicate a rich or lean fuel mixture, respectively. This indicates that the ignition system is adjusted incorrectly.
To ensure that the fuel mixture ignites at the right time, read the article on how to set the ignition correctly.
What to do if your VAZ-2110 (8-valve injector) doesn’t start well: reasons
There are many reasons why the fuel-injected VAZ-2110 with 8 valves does not start well after an overnight stay. A particularly common situation is when everything was fine in the evening, and in the morning an unpleasant surprise is discovered in the form of a non-working car. Next, we will consider what reasons can lead to difficulties in starting the injection VAZ-2110 and what to do to fix the problem.
To determine why a car has trouble starting, you need to know how it works. A spark is responsible for starting the engine, which, in turn, is completely dependent on the ignition system and the fuel-air mixture, supplied in precisely metered proportions.
If one component of this chain is broken, starting is problematic or completely impossible.
Dips when pressing the gas pedal during acceleration
Determined using computer diagnostics or the steps described below:
- The first thing you need to do is inspect the spark plugs. To do this you need to remove them. The presence of carbon deposits on the spark plugs, poor contact with the wires, or an excessively lean or rich mixture lead to spark plug malfunctions.
- High voltage wires can also cause engine malfunction, as can ignition coils.
- The throttle needs to be checked. If it is clogged, this causes the engine to respond untimely when pressing the gas pedal.
- It is necessary to check the condition of the air, fuel and oil filters. They tend to get clogged, which worsens dynamics, increases fuel consumption and causes pedal failure. They need to be changed constantly, you can do it yourself, they are inexpensive and easy to install.
- The presence of errors in the ECU leads to failures.
- Clogged injectors. If necessary, replace or repair injectors.
The wires, as well as the rubber bands on them, should not be damaged and should not spark when the engine is running. If damage is found, this indicates that the engine is shaking and jerking begins. This may occur due to the age of the car, worn-out or low-quality spare parts, poor contact with the spark plugs, or due to the temperature of the engine.
The resistance of the coils and the temperature change together, as a result of which a gasoline car begins to jerk during acceleration. In diesel cars, jerking cannot be associated with the coils, since they are not present.
Solution
The procedure to correct the problem depends on the type of problem. If the engine stalls when you press the clutch or brake on a car with an injector, you can solve the problem yourself. Let's consider all cases of troubleshooting.
Cleaning the throttle valve
To complete the task, you will need a special cleaning agent; it can be purchased at any automotive store. There are many types of cleaners, you can choose something to suit your budget. The procedure for dismantling the unit depends on the design features of the car; it can be performed in different ways.
Throttle valve before and after cleaning
Let's consider the removal process using the Daewoo Lanos model as an example:
- Open the hood of the car and remove the damper. To do this, loosen the clamps securing the air supply hose and remove it. Disconnect the wiring connectors from the idle speed controller and throttle position control.
- Disconnect the assembly control drive cable.
- Using pliers, pull the clamps off the damper heating hoses. There is no need to disconnect the hoses. Unscrew the expansion tank cap to relieve pressure in the system, then tighten it. Dismantle the pipes one by one to prevent refrigerant leakage from the system, and close the resulting holes. This will require M10 bolts.
- Using a 12 or 13 socket wrench, depending on the size of the bolts, unscrew the parts securing the throttle device. Carefully dismantle the assembly, while trying not to damage the sealing element. Assess its condition. If necessary, the rubber band is replaced with a new one if it is very worn.
- Using a Phillips head screwdriver, remove the two bolts securing the idle speed controller to the throttle body. There is a gasket on the sensor, don't lose it.
- You can now perform rinsing. Take the purchased product and use it to clean the unit, including all channels. You can also wash the idle speed sensor. Clean the air lines, as well as the calibrated positive crankcase ventilation duct. Usually it is its contamination that leads to malfunctions in the operation of the internal combustion engine. To clean it you will need a pin or needle.
- Assemble the device and check how the power unit operates.
1. Cleaning the dismantled damper with a special agent
2. Cleaning the forced crankcase ventilation channel with a needle
Replacing the idle speed sensor
Let's look at the procedure for replacing a device using a VAZ car as an example:
- Turn off the ignition and open the hood of the car. Locate the mounting location of the idle speed sensor. Disconnect the negative terminal from the battery. To find the controller, use the service book for the car.
- When the sensor is found, disconnect the wiring connector from it. The plug is usually attached to the controller using a clamp.
- Unscrew the bolts securing the device to the throttle hose. Dismantle the controller.
- Install a new device instead of the old one. The installation procedure is performed in reverse order. If there are sealing elements on the sensor, treat the rubber bands with motor fluid.
- After installation, calibrate the device. Reconnect the disconnected battery terminal and activate the ignition. There is no need to start the engine. Wait about 10 seconds, then turn off the ignition.
Replacement of TPS
The procedure for replacing the throttle position controller is as follows:
- Check the location of the sensor in the service book for the car. Typically the device is mounted in the engine compartment on the throttle hose.
- Using a screwdriver (usually a Phillips head), remove the two bolts securing the controller to the hose.
- Remove the device and replace it. Clean your contacts. Install the new sensor and connect it. Check functionality.
The video from the channel In Sandro's garage shows the procedure for replacing the idle speed sensor, as well as the throttle position controller using the example of a VAZ car.
Changing the fuel filter
Depending on the vehicle, the fuel filter element can be installed separately from the fuel pump or in conjunction with it. If the manufacturer does not provide for replacing the filter, then the element is mounted in the fuel pump. In other cases, the device may be located in the engine compartment or under the bottom of the car.
How to change the fuel filter if it is installed independently:
- Turn off the ignition.
- Find the fuse box and remove from it the part responsible for the operation of the fuel pump.
- Start the power unit and let it run until it stalls spontaneously. This indicates that the pressure in the fuel line has been released.
- Find the location where the filter will be installed. If you have difficulty finding, use the service book. Filters, which are installed separately from the pump, are made in the form of a cylinder with two fittings. Nozzles are connected to each fitting - one at a time the fuel enters the filter device, and the other it is fed further into the engine. Disconnect both pipes by loosening the clamps securing them in advance.
- Before dismantling, place a container under the filter to allow some of the fuel to drain into it.
- Remove the device. Before installing a new filter, clean the hoses to remove any dirt. When installing, take into account the location of the arrows on the body of the filter device. They should be directed towards the engine from the tank.
- After installation, install the safety device. Start the power unit. During the first attempts, difficulties may arise due to the lack of pressure in the fuel system. When the engine is started, inspect the installation location of the device. Fuel leaks are not allowed. If the fuel leaks, you need to tighten the clamps on the pipes more tightly or change them.
The Auto Repair channel published a video showing the procedure for replacing the filter device in a Chevrolet Lacetti.
If the device is assembled with a fuel pump, the replacement procedure will be slightly different:
- Remove the pump fuse to relieve pressure.
- The pump itself is located in the gas tank. Unscrew the rear seat bolts and remove the lower part.
- Below it you will see a hatch. It is attached using self-tapping screws or bolts. Depending on the type of fastening, use a Phillips screwdriver or a wrench. Remove the hatch.
- Below it is the pump itself. It is necessary to disconnect all connectors with wires connected to the device. Also disconnect the lines connected to the pump, first placing a container under them. Some of the fuel will come out of the hoses.
- Clean the top of the fuel pump from dirt. Otherwise, contaminants may get inside, which will not lead to anything good.
- Dismantle the pump by disconnecting it from its mountings. The types of fasteners may vary depending on the car.
- After removal, the device must be disassembled. The filter element itself is made in the form of a mesh, which allows fuel to pass through and become dirty. Remove the fuel level and pressure sensor, if installed in the pump. Remove the filter and replace it with a new one. There is no point in cleaning the mesh. This will help for a while, but the filter will still have to be changed. Install a new mesh into the pumping device and reassemble it in the reverse order.
- Connect the fuse and start the engine. Evaluate the quality of its work after the repair has been completed.
Dips when pressing the gas pedal at idle
Problems also occur at idle speed; of course, there will be fewer reasons. However, this is also a serious problem and cannot be ignored, because... The car will have difficulty starting and simply stall.
Troubleshooting is performed in the following order:
- The first thing to check is the spark plugs. If the spark plugs are faulty, they should be replaced. We recommend replacing all spark plugs at the same time. Buy spark plugs specifically for your engine. If necessary, adjust the gap; it should be 1 mm for 92 gasoline.
- The fuel filter and fuel pump diagnostics are checked. If a malfunction is identified, fix it.
- The breakdown may be in the idle speed sensor.
- Checking the injectors. If clogged, replacement or cleaning is necessary.
- Diagnostics of the ECU for errors.
- Checking the injector.
Causes of misfires
Now that you suspect a misfire, where should you start looking for the problem? Here are the most common reasons for absences, ranked from most common to least common.
1. Faulty ignition coil or distributor-breaker (distributor)
If you have an older car, this is the most common reason. Some vehicles have a separate ignition coil for each plug, while others have a single coil with ignition cable for each plug.
Older cars have a breaker and in some cases also an ignition coil. If you have separate coils, then disconnect each one to find out which cylinder is misfiring. Replace the faulty ignition coil.
Faulty spark plugs
The second most common cause of misfires is bad spark plugs. Spark plugs ignite the mixture in the cylinders, and they wear out over time. Spark plugs are inexpensive and easy to replace. If you can't remember the last time you changed your spark plugs, it might be time for it.
Intake manifold leaking
Leaks near cylinder heads are also very common when it comes to spark plugs. This problem was common in older cars without steel intake manifold gaskets.
If you have an old engine, you can check this. If you have a new car, check for other signs of leaks around the intake manifold gasket. Check for damaged vacuum hoses.
Low fuel pressure
May be caused by a faulty fuel pressure regulator, faulty fuel pump, or clogged fuel filter. Low fuel pressure will cause the engine to lean, causing misfire in all cylinders. If you have ignition fault codes on all cylinders, check the fuel pressure.
Injectors
Another problem that used to be common was problems with injectors. A faulty fuel injector can cause a misfire.
This is quite difficult to diagnose without checking the injector operation. Injector problems are not common on new cars, so check for other possible causes first.
Low compression/damage inside the engine
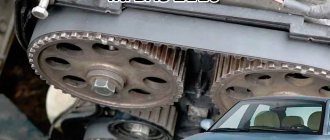
If you've checked everything else, you may have low compression or damage inside the engine. A worn timing belt can also cause low compression - check this first.
Dips when pressing the gas pedal - carburetor
As noted above, the problem occurs in VAZ 2107, 2106, 2109 cars that have a carburetor installed. Mainly problems with the fuel system. It will most likely be clogged. Therefore, to identify the cause, the fuel supply to the carburetor is checked.
As a result of clogging, the operation of the fuel pump decreases, and the carburetor begins to receive less fuel. As a result, the engine starts and idles without problems, but when pressed, failures occur.
If everything is fine with the fuel system, then the fault must be looked for in the carburetor. It is responsible for dosing the supplied fuel into the air flow. If there are violations, failure occurs. However, first you need to check for air leaks. The carburetor may become loose, allowing air to leak through the gap, making the mixture lean.
The filter mesh must also be checked. It is located in the inlet fitting of the pipeline that goes to the fuel pump. If it is contaminated, then this is a consequence of failures.
Dips when pressing the gas pedal on the carburetor:
What is a misfire?
To know what a skip actually is, we first have to start with the basics of how a car engine works.
Here you can see a good illustration of how the pistons and crankshaft move inside the cylinder when the engine is running. The pistons are pushed down by an explosion inside the cylinder. The piston, moving down, rotates the crankshaft. The operation of an engine can be divided into four stages, which is why this type of engine is called a four-stroke engine.
- The piston moves down, filling the cylinder with the air-fuel mixture from the intake.
- The piston goes up, compressing the air-fuel mixture to high pressure.
- A spark from the spark plug ignites the air-fuel mixture and the explosion pushes the piston down, rotating the crankshaft.
- The piston rises up, squeezing the burnt air-fuel mixture through the outlet.
- Repeat the process from step 1.
This is a description of the operation of a four-stroke engine, which is installed in almost all modern cars. There are some older cars that use a 2-stroke engine, but we won't cover them.
A misfire occurs when one or more of these steps are incorrect or missing.
- The air/fuel mixture is too lean or too rich.
- Bad ignition spark, incorrect ignition timing.
- Low compression, accounting for the air-fuel mixture.
- Incorrect timing of intake or release of the air-fuel mixture.
Now you know the basics of how a cylinder works in a car engine and at what stages misfire can occur. With this knowledge it is much easier to find the reason why misfire occurs.
As you can see, in theory there are not many reasons. But when you start diagnosing your car, you'll realize that it's not always that easy to find the problem. Let's continue to learn how to diagnose and how to fix misfires at home.
Dips when pressing the gas pedal - injector
To determine the reasons for the failure of the gas pedal of a raspberry with an injection engine, special equipment is needed, with the help of which diagnostics are carried out. Therefore, to detect a malfunction, you should definitely contact a car service in Moscow.
For the most part, jerking occurs when the fuel supply pressure is low or due to problems with the throttle position sensor.
conclusions
As can be seen from the above, there are quite a few reasons for the machine twitching during its operation.
And you don’t necessarily need to be an expert in automotive matters. Anyone can fix minor breakdowns in their car. If you notice strange behavior of the car, including jerking and jerking, you should definitely seek advice from a car service center or ask automotive professionals who have more than one year of practice behind them.
The pedal falls when the car starts to move
All unpleasant sensations are most often associated with a delayed reaction of the motor to pressing the pedal. Engine stalling often occurs.
The shocks appear when the throttle valve opens, then the sensor gives a signal and the ECU determines at what time to switch from idle to load mode, as well as how much to increase the fuel supply through the injectors. If the pressure is not as high as we would like, and if the injection time is increased, then there will not be enough fuel to move the car.
Also, the cause of jerking may be problems with the electromechanical part of the unit and due to clogging with waste.
The pedal falls when the movement is set
The cause may be a faulty ignition. In this case, diagnostics and repair work are required.
You can try to fix the problem yourself:
- First, you need to look under the hood and inspect everything. Remove the key from the ignition and check whether the ignition coils are securely attached and seated on the spark plugs. Next, start the engine and listen to how it works.
- Replace spark plugs regardless of their condition and how long they last. Check the spark plugs - if they are damaged, engine repair is inevitable.
The gas pedal fails in a VW POLO sedan due to unstable operation of the damper position sensor, which is built into the cover itself. The engine idles intermittently, the engine power is reduced to a minimum - this all indicates that the sensor has failed.
The cover itself cannot be disassembled, so you will have to replace the entire throttle assembly.
Ignition switch malfunctions
The ignition switch on a VAZ 2110 must be replaced if its operation cannot be restored in any way or the key is broken/lost. In other cases, they are usually repaired.
There are two groups of main breakdowns:
- The mechanics are faulty. The most common problem is the breakage of the larva. The keys are made of soft metal, so they are unreliable and can often simply break off. There is also a problem with the steering wheel locking or the key may simply get stuck when in the on position.
- Wear of the contact group. No matter what kind of damage you have, you will still have to dismantle the lock. If the tongue of the blocker is jammed, you will have to work hard to correct the situation. The contact group or larva is quite easy to repair.
The main reason for the breakdown of the contact group (burnout) is overloading the vehicle’s electrical equipment.
In order to check the ignition switch on a VAZ 2110, there are many instructions and methods, we will consider some of them.
Detailed instructions for checking faults in the ignition switch:
- The first thing to do is disconnect the wire from the negative terminal of the battery.
- Remove the plastic cover of the steering column to get to the contacts of the pads, because it is with their help that power is connected to the car's electrical wiring. Next, disconnect the connector of the harness itself from the on-board network and pull it out.
- Next, you need to use an ohmmeter to check the resistance on the contacts themselves, while setting the key in position 1, 2 or 3. When the contacts are working, the resistance on them will be zero, but if it is infinity, then the lock is broken. If they burn slightly, the device will show slight resistance.
- In order to check the serviceability of the backlight, you need to apply a direct current with a voltage of 12V to contacts 2 and 6 of the wiring harness block. In this case, if the lamp lights up, everything is fine with it, but if not, there is a break in the electrical circuit or it simply burned out.
- If you see that contacts 15, 30 and 50 in the ignition switch are faulty, then you need to replace the entire contact group.
DON'T POSTPONE YOUR CAR DIAGNOSIS FOR LATER!
If the failures do not stop, then you should definitely contact a specialist. They will be able to diagnose the computer control and check the fuel supply system and determine the location of the breakdown and carry out corrective measures. Most often, the cost of repairs is low. Therefore, the best advice would be not to do it yourself and entrust your car to professionals. This will be the most reasonable decision rather than wasting time, effort and nerves on troubleshooting yourself.
Didn't find the information you are looking for? on our forum.
How to cure a car?
First you need to diagnose the fuel pump:
- remove the cover from it and carefully inspect visually, paying special attention to the area near the valve;
- If there is no o-ring, take corrective action.
In this case, the fuel pump depressurized and interruptions in the fuel supply began to occur. This is exactly what is causing the car to malfunction. After the seal is restored, the VAZ-21124 (16 valves) will begin to move smoothly along the road again. You can replace the O-ring yourself, the main thing is to find the right ring and tools.
This work takes about 5 minutes in duration. So finding the problem why the VAZ-21124 jerks during acceleration is not so difficult.