03/04/2022 31 225 VAZ 2106
Author: Ivan Baranov
Much depends on the operation of the cylinders, so this unit must always be in working condition. Especially when it comes to old VAZ 2106 cars. In this article you can find out what is the operating order of the VAZ 2106 cylinders and for what reasons they may not work.
[Hide]
Specifics of the work
There is a category of drivers who strive to do all the maintenance and repair work on their car themselves.
This is especially true for owners of domestic cars, and this is commendable.
But such drivers need to realize that a number of works, especially those related to adjustments, require not only theoretical knowledge and experience, but also a kind of “feeling” that comes with time, through trial and error.
Especially such work includes all adjustments carried out on the carburetor, as well as valve adjustment and a number of other adjustments.
Therefore, if you are doing this for the first time, then call a person who has done such work on his car at least 3-5 times, and preferably on the same model as yours.
Also, before carrying out work, check the timing belt tension. It is important.
If you have just arrived at the garage and want to adjust the valves on the same day, then it will take about 5-6 hours for the engine to cool down.
You can immediately begin removing the valve covers and other parts; this will reduce the engine cooling time to 1-2 hours, as the heat exchange between the hot engine and the environment will increase.
It’s better to proceed from the principle: arrive in the evening, carry out the work in the morning.
By the way, don’t forget about the gasket under the valve covers; in 90% of cases it has to be replaced, so you should have a new gasket on hand.
Counting cylinders and valves.
The valves are counted as follows. Stand to the left of the car in the direction it is moving, near the engine. Face the engine.
Cylinders and valves are counted from left to right of the timing chain.
The last will be the 4th cylinder and 7.8 valves, but the adjustment begins with valves No. 6 and 8.
Maintenance Procedure
The classic design of the internal combustion engine allows you to get by with simple steps when servicing the engine:
| Maintenance object | Time or mileage (whichever comes first) |
| Timing belt | replacement after 100,000 km |
| Battery | 1 year/20000 |
| Valve clearance | 2 years/20000 |
| Crankcase ventilation | 2 years/20000 |
| Belts that drive attachments | 2 years/20000 |
| Fuel line and tank cap | 2 years/40000 |
| Engine oil | 1 year/10000 |
| Oil filter | 1 year/10000 |
| Air filter | 1 – 2 years/40000 |
| Fuel filter | 4 years/40000 |
| Heating/Cooling Fittings and Hoses | 2 years/40000 |
| Coolant | 2 years/40000 |
| Oxygen sensor | 100000 |
| Spark plug | 1 – 2 years/20000 |
| Exhaust manifold | 1 year |
As the actual life of the internal combustion engine increases, consumables may be replaced more frequently than specified, or operations for cleaning the carburetor, engine, jets, and other attachments may be added.
Advantages of the VAZ 2106 engine over its contemporary competitors
This unit is very successful compared to its predecessors. Its development was based on then modern technical solutions. The engineers were faced with a difficult task - it was necessary to significantly improve the existing engine models of the VAZ plant.
- Thanks to improved cylinder operation and increased unit volume, overall power has been significantly improved.
- The diameter of the cylinder block structure has changed upward.
- Since the cylinder head remained the same, to change the cylinder diameter it was necessary to introduce other gaskets.
- There are cylindrical holes. Each piston heats up evenly and gradually during operation. Thanks to this, the issue of thermal deformation was resolved. The plates that regulate heat are made of high quality steel.
Servicemen consider this power unit to be less reliable compared to the younger internal combustion engines of the classic series, and also prone to overheating and oil burns. But its power is not much higher. It’s good that at least the cost of repairs and spare parts is as low as its predecessors.
This engine does not like cheap oil, so to replace it it is better to use high-quality semi-synthetic type 5W-40 or 10W-40 and change it at least once every 10,000 km. All the features of the procedure are described in the video below.
The factory manual indicates an engine life of 125,000 kilometers, but the owners claim that in reality it is closer to 200,000 km.
Engine VAZ 2106-1000260. Characteristics of the VAZ 2106 engine.
The engine is four-stroke, carburetor, in-line, with an overhead camshaft. The engine cooling system is liquid, closed type, with forced circulation of liquid. The engine has a combined lubrication system: pressure and splash.
Engine Features.
Engine 2106-1000260 can be used for installation on VAZ 2103, 2106, 2121, 21053, 2107 cars.
The VAZ 2106 engine is the result of modification of the VAZ -2103 engine in order to increase power. The change in engine power was achieved due to the engine displacement by increasing the cylinder diameter to 79mm.
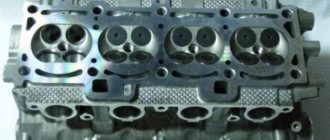
This change led to the appearance of the cylinder block 2106-1002011 with a cylinder diameter of 79 mm. Apart from a different cylinder diameter, the new block is no different from block 2103 (see “Cylinder block”).
Based on manufacturing accuracy, each cylinder, depending on its diameter, is assigned a certain class. Five classes are defined. The difference in size between classes is 0.01 mm. To designate classes, Latin letters are used: A, B, C, D, E. On the lower plane of the cylinder block, next to each cylinder, the designation of its class is applied. The block head remains from model 21011-1005011-10. The change in cylinder diameter required the use of a new head gasket.
On all “classic” engines, the pistons have a similar design, which they inherited from their “Italian ancestors”. The 2106 engine uses pistons from the 21011 engine with a nominal diameter of 79 mm. The model 21011 piston differs from the 2101 piston by the presence of a cylindrical hole on the bottom of the piston and has an increased diameter. During operation, different zones of the piston heat up unevenly. Therefore, to compensate for thermal deformation, the shape of the piston differs from the shape of a regular cylinder. For the same reason, there are steel temperature control plates in the piston bosses. To reduce dynamic loads on the piston, the hole for the piston pin is offset to the right from the central axis by 2 mm. To ensure correct assembly, next to the hole for the piston pin, there is a marking in the form of a “P” symbol. During assembly, all pistons are oriented so that the marks are directed toward the front of the block.
Five classes are defined for piston diameters, with a difference in size of 0.01 mm. Classes are designated in Latin letters, similar to the designation of classes for block cylinders. Pistons, based on the hole for the piston pin, are divided into three size categories - every 0.004 mm (categories are designated - “1”, “2”, “3”). The piston class and piston pin size category are stamped on the bottom of the piston.
Since 1986, two repair sizes for pistons have been determined: with an increase of 0.4 and with an increase of 0.8 mm.
A set of normal size cast iron piston rings is numbered 2106-1000100-10. A special feature of this kit is that the oil scraper ring is chrome plated (unlike kit 2101). Chrome plating is performed to increase the service life of the ring, which was required to be carried out under increased load associated with an increase in engine power. In addition to cast iron piston rings, rings made of steel can be used. The set of steel rings has its own designation - 2106-1004029.
Injection modification
The first in the line of internal combustion engines of the AvtoVAZ manufacturer, the 2106 engine received tuning in the form of distributed injection. At the same time, the owners received a headache:
- intense heating, since the mixture is lean, the manufacturer’s cooling system cannot cope with temperature loads;
- increased fuel consumption up to 13 l/100 km in winter.
A positive feature is the low budget for major repairs within 10,000 rubles.
Adjustment of valves
If knocking, unstable operation, or increased vibration occur, you should pay attention to the valves.
If the valve timing of the gas distribution mechanism is disrupted, they do not operate accurately, that is, the full volume of gas does not enter the working area of the cylinders, complete combustion of the fuel-air mixture in the working chamber does not occur, and the cylinders are not purged. This is all accompanied by the appearance of a shock load on the camshaft cams on the drive lever and the shaft rod. Fuel and engine oil consumption also increases. What happens if you drive with unadjusted valves? Answer: rapid wear of engine parts, increasing cost and repair time.
Rubber oil deflectors, also known as oil deflectors, also burn out due to a burnt valve cap, which leads to increased engine oil consumption. If the wear of engine parts is large, then it may be better and easier to do an engine swap with your own hands or at a service station.
Even if your engine does not have a belt drive, but a chain drive, then if you do not change the chain before its service life expires, the valves will bend on the piston, as, for example, in the sr20det engine manufactured by Nissan.
Causes of failure
Once you have figured out the order of operation of the elements, you can begin diagnosing the motor. As stated above, the failure of one or more components is directly related to the motor tripping, so it is necessary to find out the reasons for its failure.
- Start your VAZ 2106, let it run in neutral gear. Then go to the muffler and listen to how the exhaust pipe works. If there are no interruptions in the functioning of the engine, the exhaust sound will be smooth and soft. If you hear popping noises from time to time, this means that one of the components is not functioning due to a broken spark plug. This may also indicate a lack of spark at the spark plug, excessive oxygen leakage, or an incorrect compression level.
- If the exhaust pipe pops are irregular, that is, they occur from time to time, then this may indicate incorrect operation of the carburetor, failure of the spark plugs, or their wear. This may also indicate a faulty ignition. To fix the problem, you should diagnose the carburetor, ignition system, and replace broken spark plugs.
Non-working car spark plugs
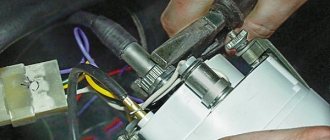
- If popping noises occur regularly in the system, turn off the engine and open the hood. It is advisable to check the condition of the spark plug wires. They must be insulated, and the ends of the wires must not be acidified. If you see that one of the cables is mechanically damaged, then it should be replaced with a new one.
- If the wires are in good condition and no visible signs of damage are found on them, then the distributor cover, as well as the ignition distributor device, should be diagnosed. To do this, you will need to unscrew the bolts securing the cover, and then remove it. Visually inspect it outside and inside. If cracks, carbon deposits are visible on it, the carbon contact is worn out, and damage is visible on the rotor, then the failed elements should be replaced.
- The spark plugs should be unscrewed. To do this, remove the cable ends and unscrew the spark plugs using a wrench. Inspect them: ideally, the gap between the electrodes should not exceed 0.7 mm. Pay attention to the color and condition of the candle: if the element is black from soot and wet, then it needs to be disposed of.
- Now take a working spark plug and fix it on the engine body. Do not install a spark plug on the engine fluid filler neck, on the dipstick for checking the oil level, on the fuel pump, carburetor, or fuel hoses. It is desirable that the threaded part of the component is in contact with the ground. You should connect the spark plug wire from the first cylinder to the working spark plug that was installed on the internal combustion engine. After this, start the engine of your 2106 and listen to the exhaust. If you notice that the “irregularities” have not intensified, then replace the spark plug in the first cylinder with a working one. If the “irregularities” have increased, then repeat the procedure with all components.
Distributor cover VAZ 2106
How to boost a VAZ engine
To enhance engine power, various technologies are used. Boosting the VAZ 2106 engine is done using tuning.
The most effective way is to install a turbo on a VAZ 2106 and remove combustion products through a direct-flow system.
The VAZ 2106 turbo competes on the roads with many famous brands.
The turbine and turbocharging are installed on the improved six for the purpose of its modernization. At the same time, its power increases significantly. Installing special parts inside the power unit does not give the same effect as a turbine.
The VAZ 2106 turbo is used by fans of high speeds. The replaced tuning car has additional equipment that requires additional costs for the care and monitoring of the operation of all systems, for periodic technical inspection. The installation cost reaches half the price of the machine.
Instructions for setting the ignition of the VAZ 2106
Let's look at 3 known methods of adjusting the ignition angle on VAZ engines.
Using a strobe light (by marks)
This method allows you to very accurately set the ignition to the marks, and does not require removing the distributor and valve cover. The entire adjustment process takes 5 minutes. A strobe light can be found at any auto store. The procedure is as follows:
- With the car turned off, loosen the nut securing the distributor, having first made a mark of the initial position on its body;
- We connect the negative wire of the strobe to the engine ground, the positive wire to the ignition coil, and a special clamp to the high-voltage wire of the first cylinder;
- We start the engine and turn on the strobe. The light from its lamp directed at the pulley will show the true position of the ignition timing;
- Slowly turning the distributor body, we achieve alignment of the mark on the crankshaft pulley and the bosses on the front cover;
- We check the engine speed using the tachometer and, if necessary, adjust the idle speed on the carburetor;
- Tighten the distributor fixing nut.
On the front engine cover we find two short and one long marks, clean them of dirt and oil;
The “4” mark on the pulley must be aligned with the mark you need on the cover. Label “1” corresponds to an angle of 10 0, “2” - 5 0, “3” - 0 0
The marks have values of 0 0, 5 0 and 10 0 relative to top dead center (TDC). For proper operation on 92 gasoline, select an advance of 0 degrees.
Installation by light bulb
If you don’t have a strobe handy and you need to set the ignition accurately, it is recommended to use a simple 12-volt car lamp. Two wires with stripped contacts are soldered to it. The settings are made in the following sequence:
- Unscrew the spark plug from the first cylinder;
- Using a ratchet or a suitable wrench, rotate the crankshaft until the compression stroke begins in the first cylinder;
- We combine the marks on the crankshaft pulley with the tides on the cover body, for 92 gasoline we select the middle or last short one;
- Remove the distributor cover, noting the position of the slider on the rotor opposite the first cylinder;
After removing the distributor cover, it is necessary to note the position of the slider on the rotor opposite the first cylinder
Advice! Instead of a signal lamp, use a voltmeter, which is connected in the same way. By rotating the distributor body, we look for a position in which there is no voltage.
We set the ignition by ear
It is possible to quickly adjust the approximate position of the distributor without any instruments. It will take a little patience and good hearing. This method is applicable only if the carburetor and timing belt are in good working order. We proceed this way:
This adjustment by ear requires testing on the road or with a strobe light, but for initial tuning it is the best option.
Video: how to set the ignition on a VAZ 2106
Do-it-yourself adjustment of VAZ 2106 valves
Each owner of a VAZ Six, as a rule, should master certain types of repairs, including adjusting VAZ valves. Considering the level of popularity of cars of the “classic” series, there is absolutely no hope of quickly ousting them from the roads with new products from the automobile industry. We can agree that “old ladies” are not as comfortable and economical, but they have many advantages. The owners of such cars are people with not very large incomes, and they require a minimum of money to repair.
Firstly, Zhiguli spare parts are quite cheap and are presented in a huge assortment in stores. Secondly, the machines have a very simple design and allow the owner to carry out any types of repairs and adjustments himself without visiting a car service center.
Technology requires VAZ valve adjustment
Owners of foreign cars and new domestic cars are completely unfamiliar with many of the procedures that should be carried out with cars designed during the Soviet period. Technology has come a long way. While on classic cars many adjustments have to be made manually, in new cars everything happens automatically.
How to correctly set the ignition on a VAZ 2106
Adjusting and fine-tuning the engines of classic VAZ models brings not only benefits, but also real pleasure to connoisseurs of classics and reliable, simple Togliatti engines. Without the ability to make basic adjustments, a true connoisseur has no moral right to get behind the wheel of classic models, which include the VAZ 2106. If you have some gaps with this, then today we will try to fill them, at least partially. To do this, let's look at adjusting the ignition system of the VAZ 2106.
Content:
Why adjust the ignition?
Correctly set ignition timing affects a lot of engine performance. There are cases that a driver can drive with a faulty ignition for months, without even realizing that it was the cause of increased fuel consumption and decreased dynamics. Hence all the talk about how Fiat engines are outdated, worthless and have long outlived their usefulness. Nothing like this.
Yes, contactless ignition is somewhat more accurate and a little more reliable, and modern engines require a minimum of adjustments. They corrupted the public, who forgot how to perform basic car maintenance operations. Therefore, today we will look at how to correctly set the contact ignition on a VAZ 2106, and if you do everything correctly, you will not recognize your six.
Operating principle of the distributor
To carry out adjustment work we will need the following tools:
- set of adjustment probes;
- flat screwdriver;
- spark plug key;
- crooked starter;
- open-end wrench 12x13;
- patience and 15 minutes of time.
The point of all further work is to ensure that the spark generated at the spark plug jumps precisely at the moment when the piston at the end of the compression stroke is not in the top dead center position, but a little earlier. For each engine this is “a little” different, but according to factory parameters the advance angle for a VAZ 2106 should be 1 degree, and for a penny, for example, 3 degrees. Thus, ignition of the working mixture occurs at the optimal moment and does not interfere with the movement of the piston, promoting complete combustion of the working mixture.
To implement this in each cylinder in turn, an ignition distributor, a distributor, is used, which supplies a spark to the spark plugs, according to the operating order of the cylinders. You need to know the order of operation of the cylinders, like the multiplication table - 1,3,4,2. The main working parts of the distributor are the contacts and the slider. The slider distributes the voltage across the cylinders through the cover, and the contacts, by closing and opening, determine the moment the spark appears. In short, yes.
Conditions for successful ignition adjustment
We can adjust the ignition a thousand times, but if at least one of the points listed below is not fulfilled, we will simply waste time:
- All four spark plugs must be in working order. They must have a visually working appearance, be pierced with a spark plug tester, and have no external damage to the ceramic jacket, otherwise the spark plug will pierce the body and work unstably.
- The breaker contacts have been cleaned and are in perfect condition, the gap between them should be 0.4-0.45 mm.
- High-voltage wires must be intact, without damage, have good contact with the distributor, spark plug caps and ignition coil.
- The vacuum ignition timing drive is connected, its movement is free, without jamming.
Only in this case can you begin to adjust.
Adjusting the ignition timing
Let's assume the most difficult case, when we needed to remove the distributor from the car, and the ignition settings were completely messed up. Without further ado, let's get down to business.
- We unscrew the spark plugs and look for the compression stroke in cylinder 4. To do this, cover the spark plug hole in the cylinder head with a finger or a suitable plug and turn the crankshaft with a crooked starter. The plug popped out, the finger felt the maximum pressure, which means we found the compression stroke on the 4th cylinder.
- Align the long mark on the engine cover with the mark on the crankshaft pulley.
- We insert the distributor into place so that the slider is perpendicular to the cylinder head. After this, we lift the distributor body and throw the slider along with the shaft one tooth clockwise.
After this, you can go three ways, although the result will be the same. The first is to set the ignition timing according to the spark. To do this, insert the spark plug into the cap, place it so as to ensure tight contact with the ground and turn the crankshaft a quarter turn counterclockwise. Then, with the ignition on, smoothly turn the crankshaft until a spark appears. We check the position of the pulley according to the marks, and, if necessary, adjust the position of the distributor so that the spark appears within the middle mark.
The adjustment is carried out in the same way using a light bulb, only the lamp is connected in a gap with the contacts of the breaker.
Adjustment using strobe light
The easiest way to adjust, but in this case you will have to buy a strobe light. It connects to the spark plug cap and two wires go to power the device. The adjustment is carried out at idle speed. To determine the ignition moment, we point the strobe light at the crankshaft pulley, and the strobe light will duplicate the appearance of the spark and should highlight the moment the marks on the cover and on the pulley that we talked about coincide. By rotating the distributor, we ensure that the marks match and fix the distributor. If it is impossible to catch the mark, then the distributor capacitor is faulty or the breaker contacts are poorly cleaned.
With these simple methods we can accurately set the ignition, eliminating detonation, increased fuel consumption and loss of power of the VAZ 2106 engine. I wish you a stable spark, and good luck on the road!
Frequent malfunctions
In addition to the fact that when the timing chain breaks, the piston bends the valve, the classic engine circuit has characteristic malfunctions:
| Defect | Cause | Elimination |
| Knock | 1) the main bearings knock dully, the frequency coincides with the crankshaft speed |
2) the sound of connecting rod bearings is sharper, present at XX
3) the sound of the pistons is dull, observed at low speeds
4) the valves knock less intensely, the shaft rotation is half as frequent
1) adjusting the ignition, checking the oil level, replacing bearings, tightening the flywheel bolts2) replacing bearings, checking lubricant pressure
3) replacement of rings, pistons, cylinder boring
4) replacing springs, adjusting gaps
Low oil pressure on a warm engine1) wear of oil pump gears2) increased clearances of liners and bearings
1) unit repair2) replacement of bearing shells or housings
Increased lubricant consumption1) leakage of seals2) clogging of the ventilation system
3) wear of cylinders/rings
1) replacement of consumables2) cleaning channels
3) installation of repair kit
Increased gasoline consumption1) the throttle opening angle is off2) high resistance to movement
3) ignition timing is off
4) breakdown of the vacuum distributor
1) damper adjustment3) ignition adjustment
4) replacing the regulator
Reduced throttle response and power1) pump failure2) ignition fault
3) the fuel filter is clogged
4) the damper is not fully open
1) pump repair2) ignition check
3) filter replacement
4) damper adjustment
Engine overhaul includes boring cylinders, replacing shafts, piston and crank groups in any combination.