Particular attention should be paid to the place where the wire passes through the wall of the engine compartment. In this case, the amplifier must process signals with different levels. Then it will have to be drilled.
If you have a system focused on SPL results, then each additional draw will reduce the drawdown. The easiest way to connect a passive subwoofer
You will also need a 3.5 mm adapter. The connection to the amplification device is made with short wires. Why do you need an amplifier? The sound quality will depend on how well the connection is made.
Besides, it will save your money.
Connection diagram for a 4-channel amplifier Details Views: Greetings: We continue to study the simplest basics of car audio, and in this article I will tell you how to connect a 4-channel car amplifier in a car yourself, together with a radio, powered by a battery, as a load we will have speakers or subwoofers or both. The resistor connection diagram will look like this: If there are linear outputs, then everything is much simpler.
Review of the installation kit Ural (Ural) 4Ga-BV4KIT. How to connect an amplifier. Subwoofer connections
Connection diagram for amplifier in car
Particular attention should be paid to the place where the wire passes through the wall of the engine compartment.
In this case, the amplifier must process signals with different levels. Then it will have to be drilled. If you have a system focused on SPL results, then each additional draw will reduce the drawdown. What is the easiest way to connect a passive subwoofer? You will also need a 3.5 mm adapter. The connection to the amplification device is made with short wires. Why do you need an amplifier? The sound quality will depend on how well the connection is made. Besides, it will save your money. Connection diagram for a 4-channel amplifier Details Views: Greetings: We continue to study the simplest basics of car audio, and in this article I will tell you how to connect a 4-channel car amplifier in a car yourself, together with a radio, powered by a battery, as a load we will have speakers or subwoofers or both. The resistor connection diagram will look like this: If there are linear outputs, then everything is much simpler. Review of the installation kit Ural (Ural) 4Ga-BV4KIT. How to connect an amplifier. Subwoofer connections
Good nutrition is the key to success
The amplifier connection procedure begins with the power wires. Wiring is the most important element of a car audio system; the volume and sound quality depend on it. Amplifiers need a stable power supply, otherwise the power will not be enough and the sound will become distorted. To understand why you need to pay attention to the quality of wiring and how it affects the sound reproduced by a loudspeaker, you need to know what a music signal is.
Some suggest that it represents a sine wave, however, the musical sinhala is characterized by a large difference between the normal and peak value. If sharp signal bursts are not important for car speakers, then in the case of an amplifier the situation is completely different. If the signal exceeds the permissible power for even a second (or even a millisecond), then these “anomalies” will be audible even to those who cannot boast of a good ear for music.
If the car amplifier is connected properly, the signal will flow through the wires undistorted. Carelessly done work or incorrectly selected wire cross-section will result in the sound being more compressed, rough and sluggish. In some cases, wheezing may also be clearly audible.
How to choose a wire cross-section?
Wire is the most common metal with a certain level of resistance. The thicker the wire, the lower the resistance of the wire. To avoid sound distortion during large voltage fluctuations (for example, when playing powerful bass), you must install the correct gauge wire.
It is worth noting that the cross-section of the positive cable should not be larger than the negative one (the length does not matter).
An amplifier is considered to be a rather electrically intensive device. For its effective operation, high-quality grounding is necessary so that it is possible to receive the necessary energy from the battery. To choose the correct wire cross-section, you need to make some calculations. First, look at the instructions for the amplifier (or directly at the box from the manufacturer, if there is no documentation, use the Internet) and find the rated power value (RMS) there. Rated power is the signal power an amplifier can deliver over an extended period of time to one channel of 4 ohms.
If we consider four-channel amplifiers, they usually have a power of 40 to 150 watts per channel. Let's say that the amplifier you purchased produces 80 watts of power. As a result of simple mathematical operations, we find out that the total power of the amplifier is 320 W. Those. How did we calculate this? It’s very simple to multiply the rated power by the number of channels. If we have a two-channel amplifier with a rated power (RMS) of 60 W, then the total will be 120 W.
After you calculate the power, it is advisable to also determine the length of the wire from the battery to your amplifier and you can safely use the table to select the required wire cross-section. How to use the table? On the left side the power of your amplifier is indicated, on the right you select the length of the wire, go up and find out what cross-section you need.
The table shows the cross-sections of copper wires, remember that a large number of sold wires are made of aluminum coated with copper, these wires are not durable and have more resistance, we recommend using current copper wires.
Fuse selection
In order to secure the connection of the car amplifier, it is necessary to protect the power supply from the battery to the amplifier using a fuse. Fuses should be placed as close to the battery as possible. It is important to distinguish between a fuse that protects the device itself (whether it is an amplifier or a radio) and a fuse installed on the power wire.
The latter is needed in order to protect the cable itself, since a considerable current flows through it. Make sure that the fuse ratings match, since if the wiring fuse rating is too large, the wire may burn out as a result of a short circuit. If the rating, on the contrary, is less, then the fuse can easily burn out at the time of peak loads and then there will be no other choice but to buy a new one. The table below shows the wire cross-section and the required fuse rating.
Amplifier connection
Now let's figure out how to connect a four-channel amplifier.
For this you will need:
1. power wires (+ -),
2. remote wire,
6. RCA interconnect cable,
7. additional insulation (corrugation).
The greater the output power, the thicker the power cable is needed - the positive wire from the battery. We select the fuse in the same way. The fuse should be located no further than 20 cm from the battery. The closer the fuse is to the battery, the safer it is from a fire point of view.
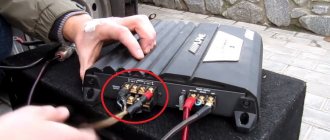
We attach the ground wire (—) to the car body; you can take the “minus” not far from the place where the amplifier will be located, thereby saving the wire. In addition, you can throw another minus from the battery onto the car body, it won’t be superfluous. It is important that all connection points are well cleaned for contact.
In order to output a low-level signal from the linear output of the radio to the linear input of the amplifier, we need an RCA interconnect cable (tulip). The linear output on the head unit can be right or left, as well as the input on the amplifier. Don't get confused, this affects the balance setting.
An important point is that the RCA cable should not be laid in the car together with power cables, this greatly affects the background noise in the speakers! It would be correct to lay them on different sides of the car.
The amplifier is turned on directly using the remote wire - this is a plus. When you turn on the radio, the amplifier turns on. This small wire, usually blue, comes out of the head unit and attaches to the amplifier. It needs to be laid on the same side where we have the power cable.
Additional insulation (corrugation) will be needed to avoid short circuits. Do not neglect this moment, it leads to tragic consequences. Pay special attention to those places where the wire comes into contact with the car body.
Installation
First of all, you need to understand how to properly install a four-channel amplifier without thereby spoiling the interior of the car and the amplifier itself. The amplifier should be easy to access to adjust the sound of the speakers. Let's look at the sedan body model and where the amplifier can be installed.
· Trunk
Rear seat back
· Space under the rear, front seat
Trunk lid
· Subwoofer housing
The trunk is one of the most convenient places, since the amplifier needs cooling for normal operation, it does not like confined spaces! You can install it on the right, on the left, to the bottom of the trunk through the podium, making sure that nothing damages our amplifier. We securely fasten the amplifier inside, the consequences can be sad, so do not neglect this important fact.
The rear seat back is also not a bad option. Well ventilated place, easy access, does not affect the interior. The downside is that if the back is frequently bent, the wires become broken and damaged over time.
The space under the front seat is not the best option. Cooling is poor, not aesthetically pleasing from an interior perspective and poor protection from external threats. There is little space under the rear seat, which will cause the amplifier to overheat.
The trunk lid is a bad option; you can quickly break the wires.
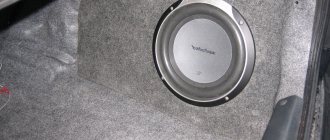
There is strong vibration on the subwoofer housing, the contacts will constantly weaken. Vibration also has a detrimental effect on the amplifier itself.
How to setup
On the front panel of the 4-channel amplifier there are controls and switches that set various parameters. You must make sure that the power indicator is on and the protection alarm is not on before setting up the amplifier. Otherwise, the problem is detected and corrected.
The first stage of setting up a bridge amplifier is to adjust the input level necessary to match the radio. This indicator is set using a regulator or switch. If the radio is connected to high-level inputs, then this control is first set to the 6 V position. Then the lowest input level is set at which the sound remains undistorted when the volume control of the radio is in the high position. After this, the amplifier is configured for all other parameters.
If a subwoofer is connected to the device, you must turn on the low-pass filter, if it is provided for in the amplifier design. The cutoff frequency is initially set at 65-85 Hz and then adjusted more subtly by ear to achieve the desired sound quality depending on the size of the subwoofer and where it is installed.
Some devices have additional controls for more precise adjustments. For example, using an ultra-low-pass filter, you can filter out sounds below 20 Hz to reduce unnecessary load on all speakers and thereby optimize the power consumption of the amplifier.
Setup Instructions
The amplifier is configured in accordance with the recommendations set out in the operating instructions. To adjust the parameters, buttons and rotary switches are used, covered with a protective panel. Rotating correctors are recessed into the body, which reduces the likelihood of accidental position changes. To rotate the element, it is recommended to use a flat blade screwdriver.
A control diode of the power supply is installed on the equipment case; further adjustment of the device is allowed only when the green lamp is turned on. When using standard factory settings of the equipment, the sound picture is blurry. Adjusting the parameters allows you to highlight low and high frequencies, as well as reduce sound distortion.
Amplifier setup for four speakers without subwoofer
After completing the connection of the four-channel amplifier and checking the operation of the electrical circuits, you need to configure the acoustics according to the following method:
- Turn the knob labeled Gain or Level to its minimum position.
- When using standard door speakers, you need to turn the HP filter control to the maximum position (indicated on the body as Full). If the car has small-sized acoustics with a diameter of up to 100 mm (in the instrument panel or front pillars), then it is necessary to set the corrector to the position corresponding to 120 Hz.
- Turn off the bass boost function and turn off the graphic equalizer.
- If you connected a 4-channel amplifier with channel separation, then you need to activate the HP and LP filters (for high-frequency speakers and mid-range speakers, respectively). The controls are set to the position corresponding to 4 kHz.
- The design of the amplifier unit has a HiLow Level switch, the position of which depends on the type of connection of the equipment to the head unit. When a signal is fed through speaker cords, the Hi position is set. If you connect the equipment to the linear outputs of the radio, the switch is moved to the Low position.
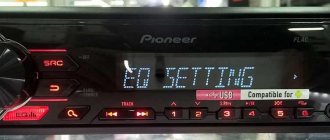
- Turn on the head unit, which contains a laser disc with musical compositions; you can install a removable drive with recordings in MP3 format (with a high bitrate). Check the position of the loudness selector (should be off), and then smoothly turn the volume control until wheezing appears in the sound picture. Carefully turn the corrector back, determining the boundary of the appearance of interference.
- Then the user adjusts the position of the Gain or Level control, the adjustment is made in the same way as adjusting the sound volume.
- Determine the broadcast volume for the rear channels, comparing the settings with the parameters of the front speakers. If the car owner has difficulty adjusting the acoustic equipment, it is recommended to contact a specialized service center.
Setting up an amplifier for a subwoofer and speakers
The adjustment is made by analogy with the adjustment of a system with standard acoustics. To ensure an improved sound picture, it is recommended to relieve the speakers from broadcasting low frequencies. This action allows the diffuser stroke to be reduced and improves the reproduction of mid frequencies. The HPF corrector is used for adjustment; the position of the potentiometer is determined by the user by ear. Some car owners do not turn on the HPF adjustment due to distortion of the sound picture.
The use of bass boost for a subwoofer is not recommended since it affects the band above 40 Hz. When using a subwoofer with a bass reflex, the subsonic filter is turned on, which is adjusted to a frequency 2-5 Hz below the bass reflex value (indicated on the equipment).
Many car owners without technical education do not know how to connect an amplifier to a car radio - for them it seems like too much of a time-consuming task. In fact, you shouldn’t rush to contact a car service center, since installing a car amplifier is not so difficult.
Maintenance by specialists will be expensive, so in order to save money, it is worth trying to understand the connection procedure, which this article will help with.
For high-quality operation of the amplifier you need:
- Give him good food;
- Give a signal from the radio. We looked at how to properly connect the radio here;
- Connect speakers or subwoofer.
More details on how to connect the amplifier can be found below.
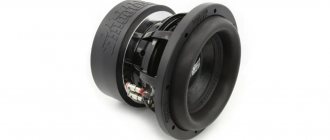
Connection diagram for a passive subwoofer to a 4-channel amplifier
To connect this type of speaker to a 4-channel amplifier, you will have to use a standard circuit.
Connection diagram for 4 channel amplifier and subwoofer
- First, the subwoofer and other speakers are connected to the amplifier.
- Then the amplifier is connected to the car radio.
- Having received the signal directly from the car radio, the amplifier distributes it. Part of the signal is sent to the sub, and part to the tweeters.
Brief top
| Place | Model | Price | |
| 1 | ACV LX-4.100 | from 5,800 rub. | Look |
| 2 | SWAT M-4.100 | from 5,500 rub. | Look |
| 3 | Kicx SP 4.80AB | from 4,500 rub. | Look |
| 4 | Ural BV 4.70 | from 4,700 rub. | |
| 5 | SWAT M-4.65 | from 4,270 rub. | |
| 6 | ACV LX-4.60 | from 3,600 rub. |
Connection diagram
The connection diagram for a 4-channel amplifier requires reliable power supply, which is supplied from the positive terminal of the battery. The cables are connected through a fuse insert; the rating of the protective element is 5-10% higher than the ratings of the factory fuses in the amplifier housing. The cable cross-section is selected according to the table depending on the power consumption. When using a thin cable, overheating and destruction of the insulation occurs, leading to a short circuit and ignition of the structure or vehicle.
The negative signal is supplied through a connection to the ground bolt welded to the car body panels. A lug is put on the cable, which is then pressed with a nut. On used domestically produced cars, it is recommended to remove power from the negative terminal of the battery, since corrosion on the surface of the bolt increases the contact resistance and degrades the power supply to the equipment.
To automatically turn on the amplifier, a copper cable (with a cross-section of up to 1 mm²) is used, coming from the REM connector of the head unit. After turning on the radio, a control signal is supplied to the amplifier, activating the power circuits. To transmit the audio signal, RCA standard cables are used, equipped with a screen to protect against interference. Special metal tips are placed on the ends of the cords to ensure reliable contact. Interconnect cables must not be laid near power wiring due to interference.
Are you a car driver?! Then you can take this simple test and find out. Go to test »
The head unit is equipped with a separate power circuit; a red-insulated cable is routed through the ignition switch or switch, which forcibly breaks the circuit. The radio's power supply is provided with an additional cable equipped with a yellow protective layer.
The cord is connected to the positive terminal of the battery, which ensures the maintenance of the built-in memory in the radio (for storing settings or frequencies of radio stations).
It is possible to use an active subwoofer, which is connected to the linear output on the radio. The second linear channel is used for switching an external amplifier module; a Y-type splitter is used for connection. The transmitted signal is automatically divided by the microprocessor control unit into 4 channels (2 rear and 2 front).
A 1-channel amplifier is designed to switch a low-frequency speaker; by reducing the number of outputs, the power of the equipment is increased. The products allow you to connect subwoofers with a resistance below 4 Ohms; the design includes frequency filters with manual adjustment. It is possible to connect a 1-channel amplifier together with a 4-channel device.
4 speakers and 4 channel amplifier
To connect 4 speakers to an amplifier, you need to route the cables coming from the speakers to the installation location for additional equipment. From each loudspeaker there are 2 cords used to transmit a positive and negative signal. The cables are connected to the corresponding terminals of the front and rear channels. During installation, it is important not to confuse the location of the speaker and the type of channel; if installed incorrectly, a blurred sound picture will be formed.
It is allowed to connect 4 loudspeakers to the front channels; the elements are connected in a parallel circuit in pairs. The output connects to a chain of speakers located on the left or right side of the car. Before making connections, you must make sure that the amplifier unit can be operated with a load of 2 Ohms per channel. The remaining rear channels are intended for bridging a subwoofer.
Grounding
This point is of great importance for the reliable operation of an amplifier connected in bridge mode. The ground connection can be made directly at the installation site of the device. To do this, take a short piece of thick insulated wire. A common bare braided cable will do.
One end of the wire is connected to the negative terminal of the car amplifier, and the other is inserted between the bracket or bar securing the device and the floor of the body.
To avoid interference in the speakers, the body of the device should not be allowed to come into contact with the body of the car. Otherwise, ground loops will form, which will lead to unpleasant interference. To isolate the housing from the car body, you can place a strip of rubber under the mounting bracket.
Adviсe
Let's give some advice.
- In addition to calculating the load on the equipment in a specific connection, it is important to correctly select the wires that match the resistance in the circuit. Preference can be given to acoustic wires, which give the purest sound at the output, or to ordinary wires with R not lower than 4 ohms.
- To avoid damage and short circuit, the polarity of the contacts + to - should be strictly observed.
- When you turn on the radio for the first time to check, the volume should be minimal. If the sound is distorted, the equipment should be turned off immediately. This effect occurs when the polarity of the connections is not observed, which will have to be corrected.
Frequency differences
As you know, there are three types of bass: low, mid and high. Combining them in one speaker is simply impossible. Therefore, if the presence of all of them is necessary, then various parts are used for this. For HF, special tweeters are used that can even reproduce ultrasound. But the bass and midrange sound good only when using speakers with solid bass. Installing speakers to reproduce high and low frequencies is not a problem. During the work process, a minimum of questions may arise, so anyone can cope with this task. But installing a subwoofer is a simple matter.
The main difficulty in installation is its placement. After all, speakers for low frequencies are usually quite large, so it is difficult to find a suitable place for it. Problems may also arise during the sound adjustment process.
Parallel connection diagram
When connected in parallel, the load resistance drops and the output power increases in proportion to the number of speakers. Here you should pay attention to the maximum permissible load on the amplifier and the number of channels.
Most models are designed for a load of 2 ohms, less often 1 ohm, but for high-quality sound and longevity of the equipment, it is advisable to create an optimal load for the device. So, for example, when connecting two speakers with R = 4 Ohms and two speakers with R = 8 Ohms to an amplifier with R = 8 Ohms, we get the permissible resistance of all speakers (4+4+8+8=24 - total; 24_4= 6 - total resistance per device).
- The negative channel of speaker 1 and speaker 2 is connected to the positive terminal of the device.
- Positive - to the negative contact of the same channel.
- All others are connected according to the same principle.
Why do you need a subwoofer
Sub is a very important element of any. Of course, the acoustics sound good without it, but with it the sound improves several times. With its help, the sound of low frequencies goes to another level. The use of such a device is relevant for those who love big bass. But it is not recommended to install an unsuitable buffer in the machine, as this can lead to various consequences. For example, due to constant rattling, windows will become less resistant to external influences.
Location of the amplifier and wires to the amplifier
Having decided on the type, you need to know how to properly connect the amplifier, taking into account its location, since the length of the installation wires depends on this. For example, when installing an amplifier in the trunk of a car, additional connecting wires may be needed (connecting the radio to an amplification device and a subwoofer).
The place where the amplifier is mounted must have normal air circulation (the amplifier tends to heat up). Several possible options for installing a power amplifier:
- car trunk (disadvantage: large number of connecting wires, advantage: free space);
- center or front part of the car interior (good connection with the load and a wide range of transition frequency levels);
- rear parcel shelf in coupe or sedan cars;
- under the driver or passenger seat (the advantage of this location is free access to the device if necessary, saving connecting wires and improving sound quality).
The wires to the amplifier and fuse themselves are an important element. Interblock wires (interconnection wires) and power supply are selected according to the parameters (power) of the amplifier device, while adding another 30% due to low efficiency.
- With the sound volume at maximum, the power consumption of 2-channel amplifiers with a total power of 200 W will be about 260 W;
- Based on Ohm's law and taking into account that the battery voltage is 12V, we obtain a current strength of 21.6A. The cross-section of the connecting wire depends on the current strength.
Let us also add that an important element in the connection diagram is a fuse (in the event of a short circuit, it prevents a fire). An element rated 50A is installed near the car battery. There are different types of fuses: AGU, ANL, etc.
Basic minimum requirements for selecting an interconnect cable:
- not a thin cable, with continuous shielding;
- cable with strong insulation and a good central core;
- high quality RGA connector.
Goal setting
Connoisseurs can talk for days about car audio, good and different, and the chickens will get it too. At the same time, speakers do not always really understand what they are arguing about so passionately on forums. The development of modern technologies allows you to assemble an acoustic system of any quality in your car - if only you have the desire, and most importantly, the opportunity.
Location of the amplifier in the car
At the same time, it is completely unnecessary to spend thousands to achieve a completely acceptable sound - the quality of modern devices allows you to connect an amplifier without a radio, using a phone as the head unit.
Owners of car audio systems are conventionally divided into four categories:
- “He’s playing and it’s okay.” This is a very large category of users. They don’t chase “bass” and “treble” and other bells and whistles. The sound system in their car usually consists of a car radio, most often a standard one, and a standard set of speakers.
- Music lovers. With music lovers, everything is clear - people with manias are usually treated, sometimes with radical methods, or left alone if their manias are not dangerous to others. Fans of “good sound” understand not only the difference between high and low frequencies, but can also hear (or say they can) distinguish the numerical difference in harmonic distortion coefficient.
Stylish design
The new Ground Zero Reference 4XS Class AB, high-performance, full-range amplifier is small, incredibly beautiful, and very powerful. These characteristics are achieved through the use of integrated Burr Brown circuitry, Elna and Mundorf MCap capacitors and new SMD technology.
This model was created for Sound Quality - car audio competitions.
- amplifier dimensions - 305 x 194 x 47 mm;
- power per load 4 ohms - 120 x 4 W;
- rated load power 2 Ohm - 220 x 4 W;
- new powerful built-in power supply;
- built-in new filters;
- updated ultra-efficient cooling system.