The VAZ-2114 was produced by the AvtoVAZ plant as a modernized version of the Lada Samara - VAZ 2109. The changes in appearance immediately attract attention. The car has become more modern, getting rid of the rough outlines of the hood of the “nine”. But the main thing that interested car enthusiasts was what’s under the hood of the VAZ 2114? After all, it is the technical characteristics that determine how successful the use of the car will be.
VAZ 2114
Another video with an example of replacement
The VAZ-2114 car uses a hidden engine cooling circuit with an injector. It is highly complex and includes 28 elements. Traditionally, the assembly of the cooling system of this car is not of high quality. Therefore, throughout the entire period of operation, it requires constant monitoring, regular maintenance and repair. In this regard, many owners of this car are interested in the nuances associated with independent maintenance, repair and operation of the cooling system, among which the most common questions are:
- 1. How to properly replace the coolant mixture?
- 2. How to flush the cooling system?
- 3. How to remove air from the VAZ-2114 cooling system?
- 4. How to properly replace the cooling system pipes?
Repair at the service center
Repairing a VAZ 2114 with your own hands is a difficult task that requires certain knowledge and skills. The car manufacturer, in the official document “VAZ 2114 Operating Manual,” urges car owners not to try to fix malfunctions on their own every time. Only at the service center will technicians be able to connect the diagnostic connector and read the VAZ 2114 error codes.
The error codes from the dashboard do not match the professional ones. The fault code for the coolant temperature sensor on the dashboard is 15, and on a professional computer it is 0115. Before going to the service, you should read the fault codes from the car’s on-board computer and compare them with professional ones. To read the codes on the dashboard, do the following:
- Without inserting the key into the ignition, press and hold the odometer reset button;
- insert the key into the lock, turn it to position 1, release the button, at this moment testing of the devices will begin;
- Press and release the button again - the software version will be displayed on the monitor;
- Press and release the odometer button again, then a fault code will appear. If two errors occur, the sum of their codes is reflected.
A more in-depth diagnosis will be carried out by professionals. The manufacturer leaves little for the car owner to do independently. Judging by the typical set of spare parts, these are only two points (the repair manual describes them): installing a spare wheel and replacing fuses.
For a VAZ 2114 car, repairs and maintenance are often best performed at a service facility.
The history of the creation of the VAZ-2114 car
The first VAZ-2114 appeared in 2001, and mass production began in 2003 and continued until 2013. The main manufacturer of the car is the Volzhsky Automobile Plant.
VAZ-2114 belongs to the family of small class passenger cars. Its restyled model VAZ-2109, produced since 1984, was a continuation of the family of front-wheel drive cars. The car, successful in its layout, transmission and engine, became the first AvtoVAZ line not related to technical borrowing from the FIAT-124.
The interior of the VAZ-2114 was equipped with a new instrument panel (the so-called “European panel”), a height-adjustable steering column, a steering wheel from the VAZ-2110, central door locking, an upgraded heater, and front electric windows.
On the territory of the USSR, the car was given the name “Sputnik” and only on export cars the name “Lada Samara” was used. After the collapse of the USSR, the Russian Federation decided to officially call the entire line of front-wheel drive cars “Lada Samara”.
Pros and cons of the VAZ-2114
The period of the early 2000s was marked by the appearance of the VAZ-2114 on the market and during this period, approximately until 2006, it was considered prestigious to buy this car not only in Russia, but also in foreign countries. After six years and a massive influx of imported cars into the trade, the car that had taken the first step in the development of the domestic automobile industry began to be casually called a “scraper,” or even more roughly, a “pelvis.” The good news is that the percentage of such people is very small and the “hard worker” car continues to work to this day and helps out all segments of the population.
A huge plus about this car is that it can withstand all aggressive attacks both from its operation on poor-quality road surfaces and from natural conditions.
As with any machine, even a very expensive one, minor repairs are inevitable and maintenance is also necessary, but the price of these costs is offset by the honest return of all its energy. The VAZ-2114 car is reliable and there is nothing in its components that can break down critically; it can be repaired both in the city and in the wilderness, being far from super car services.
Device
An injector engine consists of several main elements. As in any car, fuel comes from the tank through the fuel line. Along the way, the combustible mixture goes through several stages of purification: a fine filter and a coarse filter. There is no strainer, such as was located on the carburetor inlet.
In general, on a VAZ car with an injector engine, instead of carburetor throttle valves, a throttle assembly is used. Its circuit is directly connected to the adsorber of the electromagnetic valves. It is he who regulates the fuel supply to the injectors.
As far as everyone knows, the correct operation of the engine directly depended on the amount of combustible mixture. It was controlled by the volume of the primary and secondary carburetor chambers, and the jets. In the version with an injector, a combination of three valves is used: two-way, safety and gravity. It is they who control that there is no overflow of the spark plug, or, conversely, a lack of fuel in the combustion chamber.
Fuel pressure control
In order for the engine to produce normal power and have synchronous operation of the valves, a fuel pressure regulator is installed in front of the injectors. With increased or decreased pressure, the regulator is activated, ensuring further operation of the piston.
Well, the last element of the device is the nozzles. They regulate injection into the combustion chamber. Since fuel is supplied to the injectors under constant pressure, they almost never clog. That is why the service life of a VAZ 2114 engine with an injector, without outside intervention, is much longer than with a carburetor.
In the period from 1999 to 2011, VAZ 2114 models with an injector engine were produced in two versions, which differed in engine capacity: 1500 and 1600 cm/cc. Their design was slightly different, not the circuit itself, but some components not related to the fuel system.
For example, the ignition system on a one and a half thousand engine has an ignition module, while on a 1600 cc engine a coil was installed.
Also, in addition to the above positive qualities of the injector, I would also like to note the reduced fuel consumption. For example, if a carburetor type engine consumed 10 liters per hundred, then the injector will take 8.5 - 9 liters. Therefore, if you have such an opportunity, then it is better to choose this type of engine. It may be more expensive, but remember: you are paying for personal comfort.
Engine tuning
For naturally aspirated engines, the following type of tuning is usually used:
- receiver complete with 54 mm throttle body at the inlet;
- straight-through spider 4/2/1 at the outlet;
- camshaft Nuzhdin 10.93 or Dynamics 118 instead of the factory equipment.
The dynamics of the internal combustion engine will improve, the power will increase to 85 - 90 hp. With. Next is just lightening the crankshaft, modifying the intake manifold and milling the cylinder head.
For 16 valve engines, tuning has the same principles, since chipping it does not make sense. To achieve 120 l. With. You can increase the damper to 56 mm, use a direct-flow type exhaust, Nuzhdin 8.85 or Stolnikov 8.9 280 camshaft.
Thus, only one engine, modification 21126, bends the valves on the VAZ 2114. All other engines are considered safe and provide a real service life of about 270,000 km.
Fuel system
It consists of many components: a fuel pump, a fuel pressure regulator, a fuel filter, a fuel line, injectors and a ramp, thanks to which fuel enters the engine. The ramp is a strip on which the injectors and fuel pressure regulator are located, and is attached with two bolts to the intake pipe. The injectors are mounted on the fuel rail, its function is to supply fuel to the engine. An injector is an electromagnetic valve that opens and sprays fuel under pressure in a thin stream after it receives a corresponding impulse from the ECU. Upon contact with the heaters, the fuel evaporates and is fed through the needle pin into the combustion chamber.
Before you go
Those who nevertheless studied at a driving school and remember the teachings of the teachers know what to do before driving a car. This is especially true for our domestic models, which do not have an abundance of sensors and a computer that monitors all indicators.
Check the levels of working fluids, oil, coolant in the radiator, even in the washer - these minor checks will give you the opportunity to never find out how a car radiator is repaired, and you will not be repairing the car yourself, much less find out how much a major repair costs jammed engine.
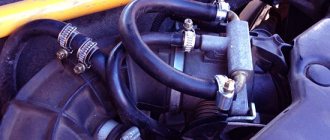
Engine compartment of VAZ 2114
Also, look under the car more often, since most breakdowns begin with minor leaks, which an attentive owner will definitely notice in time.
Driving technique
Gear shifting and clutch operation are those nuances that are definitely worth paying attention to, since the ability to change gears in time and smoothly release the clutch greatly affects ride comfort.
VAZ 2114 clutch design
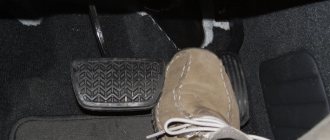
In order to notice in time that a car is behaving somehow wrong, it is not necessary to thoroughly know its design, but every driver simply must know how a car’s clutch works. VAZ cars mostly have a permanently closed clutch, which means that when you press the pedal, you release the pressure and driven discs from the frictional engagement.
Clutch pedal operation
Among the nuances of operation, it is worth noting that if the clutch is not fully released, trying to pull the car up a steep climb, it is easy to burn the friction linings on the driven disk. This will entail forced repair of the clutch unit. So if you want your clutch to work happily for a long time, try to keep it less fully depressed or released, of course, without sacrificing ride comfort.
Modifications
The VAZ 2115 manufacturer offers consumers a choice of several configurations, on which their cost depends:
- One and a half liter carburetor engine. In this case, the car is marked as VAZ 2115-01.
- An engine with the same volume, characterized by the presence of a distributor fuel injection system. In addition, the car is also equipped with electronic control and is labeled as VAZ 2115-20.
Dimensions of the “fifteenth” Lada
Car electrical equipment
VAZ 2115 injectors or carburetors use a single-wire electrical circuit. In this case, the negative terminal of the power supplies is connected to the minus, and the positive terminal itself is supplied with a separate wire.
As a result of the fact that the VAZ 2115 carburetor and injector have certain differences, there is also a difference in the design features of the wiring:
- In injection versions, the wiring harnesses are slightly larger in size as a result of the fact that the system is equipped with additional regulators and other electrical equipment.
- As a result of the change in the circuit, changes were made to the design of some electrical circuits.
- In addition, the layout of some of the electrical components as a whole was changed.
Wiring diagram on the “fifteenth” Lada On VAZ 2115 cars, as on its predecessors, the process of repairing the electrical wiring diagram and equipment usually leads to damage to the fixing clips. In any case, if these elements are damaged, they must be replaced, otherwise the electrical wiring may be very close to the hot motor, which will damage it.
Machine electrical protection
The electrical circuit, in particular, the power circuits in these car models are protected from various damages using fuses. The cost of these elements in stores is minimal, but they play a very important role and must always be in working order.
Fuses do not protect only:
- car battery charging diagram;
- ignition circuit;
- electrical circuit for powering the generator and starter.
Electrical equipment is protected by a block in which all fuses are collected, and this block is located in the engine compartment. Electrical equipment such as a starter, windshield wipers, as well as optics are connected to the general circuit via a relay. The relay is also installed in the block. In general, the electrical circuit of the wiper motor and optics is protected by bimetallic reusable elements.
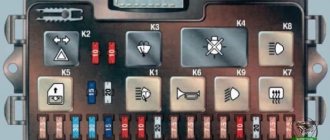
Injector relay block
So, how is electrical equipment protected on domestic cars:
- fuses on the block, which are designed to protect various elements of equipment, are marked as F1-F20;
- K1 is a device that protects the optical cleaner circuit;
- K2 - is responsible for the functionality of the light alarm, as well as turn signals;
- K3 - the element ensures the functionality of the windshield wipers;
- K4 - the device protects the electrical circuit of optics, in particular, incandescent light bulbs;
- K5 - if the car is equipped with electric window regulators, then this relay is responsible for their performance;
- K6 - car steering horn;
- K7 — rear window heating system device;
- K8 - long-range vehicle lighting;
- K9 - low-beam vehicle lighting.
It should be noted that the lamps for the fog lights in the rear headlights are protected separately. For this purpose, a fuse is used, installed in the vehicle interior under the center console. It is located in the wiring harness, next to the optics power button.
Wiring diagram VAZ-2114 for old models
Electrical diagram of car 2114: 1 - headlight; 2 [Installed on a part of the car] - fog lamp; 3 — ambient air temperature sensor; 4 — electric engine radiator fan; 5 — block for connection to the wiring harness of the engine control system; 6 — engine compartment lamp switch; 7 [Installed on a part of the car] - reserve block for connecting an audio signal with one terminal (the negative terminal is connected to the body); 8 — sound signal; 9 — liquid level sensor in the windshield washer reservoir; 10 [Installed on a part of the car] - brake pad wear sensor; 11 — low oil level sensor; 12 - generator; 13 [Installed on a part of the car] - engine compartment lamp; 14 — temperature indicator sensor; 15 — starter; 16 — battery; 17 [Installed on a part of the car] - relay for turning on fog lights; 18 — coolant level sensor in the expansion tank; 19 — sensor of insufficient brake fluid level; 20 — reversing light switch; 21 — windshield wiper gear motor; 22 — emergency oil pressure sensor; 23 — rear window washer electric pump; 24 — electric pump for windshield washer; 25 — instrument panel; 26 — mounting block of fuses and relays; 27 — brake signal switch; 28 — ignition relay; 29 - ignition switch (lock); 30 — glove box lighting lamp; 31 — switch for the glove compartment lighting lamp; 32 — rear window heating switch; 33 — rear fog light switch; 34 [Installed on a part of the car] - fog light switch; 35 - combined switch for side lights and headlights; 36 — alarm switch; 37 — steering column switches; 38 — brightness control for instrument lighting; 39 — illumination lamp for the headlight hydraulic adjustment control handle; 40 — socket for connecting a portable lamp; 41 — side direction indicator; 42 — interior lighting switch (front door open sensor); 43 — interior lamp; 44 — electric fan of the ventilation and heating system; 45 — additional resistor of the electric fan of the ventilation and heating system; 46 — switch for operating modes of the electric fan of the ventilation and heating system; 47 — illumination lamp for the handle of the operating mode switch of the electric fan of the ventilation and heating system; 48 — backlight lamp for the heater control unit; 49 — display unit of the on-board control system; 50 [Installed on part of the car] - trip computer; 51 — interior lighting switch (rear door open sensor); 52 [Installed on a part of the car] - block for connecting a clock; 53 — fuel module; 54 — ashtray illumination lamp; 55 — cigarette lighter; 56 — interior lamp; 57 — switch for the parking brake warning lamp; 58 — rear light; 59 — license plate light; 60 — additional brake light; 61 — heating element for heating the rear window; 62 — rear window wiper gear motor; A - numbers of pins in connecting blocks.
How to change the engine on a VAZ 2114
The VAZ 2114 engine changed throughout the entire production period of this car. The first models of the VAZ 2114 or “Samara-2” (as it began to be called by analogy with its predecessor) rolled off the production line with an engine from the VAZ 2109. It was an eight-valve injection engine with a relatively small volume - only one and a half liters. This engine did not differ in terms of developed power, which was 78 horsepower.
Since 2007, VAZ 21114 engines began to be installed on cars, with an increased volume of 1.596 liters and a maximum power of 80-84 hp. With. This engine complied with the Euro-3 environmental standard.
And since 2010, a model with a 16-valve engine has been produced. It's also a four-cylinder engine, but instead of two valves per cylinder there are four. The 16-valve engine has more power - 98 horsepower, faster acceleration, but is more susceptible to breakdowns than the eight-valve engine.
Thus, under the hood of the VAZ 2114 there are key mechanisms, the main one of which is the engine. Its operation is based on a distributed fuel injection system, which is regulated by an electronic control unit.
Latest comments:
- Igor: I don’t have a fitting, the throttle is electronic, what should I do?
- Denis: Hello everyone. On the ventilators, what should the wires be attached to?
- Vova: I did everything as in the picture, except I didn’t install a new cigarette lighter.
- Mukhtar: Guys, salamaleikum to everyone, I have this problem: arrows on the panel and I have
- Vitaly: Hello, I have a VAZ 2115. I recently encountered the following problem:
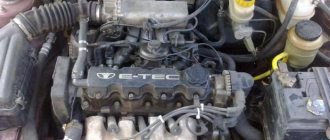
What is under the hood of the VAZ 2114
Under the hood of the VAZ 2114 its key mechanisms are located. First of all, this is an engine - four-cylinder, single-row, with 8 or 16 valves. From the receiver, compressed air enters it and passes through the air filter (to the right of the engine).
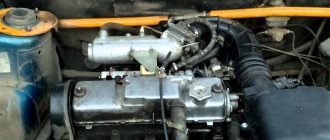
VAZ 2114 engine
In addition, under the hood of the 2114 there are:
- The windshield washer reservoir is to the left of the engine.
- The hydraulic tank for the brake system is just above the air filter.
- The battery is in the lower right corner.
- The cooling system expansion tank is on the right, above the battery.
- Fuel system adsorber - between the hydraulic drive reservoir and the expansion tank of the cooling system.
- The gearbox is under the engine, on the right side.
The adsorber on the VAZ 2114 appeared in order to comply with Euro-2 and Euro-3 environmental standards. It is designed to capture spent fuel vapors that have not liquefied. With the help of an adsorbent (usually activated carbon), the vapors are absorbed. A malfunction of the device is indicated by a characteristic hissing sound when opening the fuel tank, and a drop in engine speed at idle.
Peculiarities
VAZ 2114 cars have many innovations compared to 2109, in particular, this concerns electrical wiring.
Whether it is an injector or a carburetor, the wiring diagram for the VAZ 2114 is located in:
- vehicle interior;
- in the engine compartment;
- behind the car body.
It should be noted that carburetor VAZ 2114 were produced only from 1997 to 2000, then they were equipped with carburetors from the VAZ 2108.
But new engines have a more powerful ignition system; accordingly, the electrical control circuit is also characterized by certain features, for example:
- There is a new harness for connecting to the ignition module terminal. This component sends signals to the spark plugs through high-voltage wires.
- Another harness was added to allow mounting of the switch.
- Additional wiring has appeared to connect the adsorber valve to the injection system controller.
Wiring and equipment diagram 2114 Many VAZ 2114 car owners mistakenly believe that thanks to the ignition module, they don’t have to use a coil.
In fact, this device is equipped with two coils and two switches. One of the coils transmits the signal to the first and fourth cylinders, and the second - to the second and third. The equipment system of VAZ 2114 cars with an injector engine has undergone certain innovations not only due to the addition of new electrical equipment, but also as a result of modernization of the car as a whole:
- it is possible to install a heated side mirror device;
- you can connect the front seat heating system;
- VAZ 2114 car owners can install PTF, etc.
Engine compartment
So that a VAZ 2114 with an injector engine can operate on a lean combustible mixture, the car is equipped with:
- forced gasoline injection system into each individual cylinder;
- connecting an improved ignition system characterized by higher power;
- added ECM - injection engine control system.
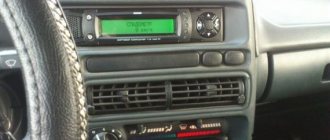
BC display on a car dashboard
As is known, to ignite a lean combustible mixture there must be a more powerful spark transmitted through high-voltage explosive wires. A spark is transmitted through the explosives of the VAZ 2114 injector when the piston is located at top dead center. This control and connection scheme via high-voltage wires was implemented thanks to the installation of the module.
The operating principle of the device is as follows:
- a generator is used to generate alternating electric current;
- the current passes to the control unit, where it is converted into direct current;
- further, the current flows to the windings of the coils in accordance with the control circuit;
- the secondary winding begins to generate high voltage for transmission through high-voltage explosive wires;
- then, through the same high-voltage explosive wires, the voltage passes to the spark plugs.
Salon
As for the interior, the manufacturer replaced the center console in the VAZ 2114, which has certain differences:
- there is no longer a glove compartment in the upper part, it is installed lower;
- the dashboard was replaced;
- an on-board computer appeared in the VAZ 2114.
Diagnostics of resistance with a multimeter
As a result of such changes and the replacement of old elements with new ones in the VAZ 2114 with an injector engine, the control and wiring diagram also changed:
- another harness appeared for connecting the on-board computer;
- a sensor for monitoring the temperature level outside the window has been added, which is mounted in front of the radiator;
- A voltmeter relay has been added.
In addition, another block of wires was added to the control circuit to control the power windows.
Chassis design features
The VAZ-2114 car is front-wheel drive. The power unit and gearbox are located in the engine compartment. Clutch drive is cable, mechanical. The gears in the box are controlled by a handle located in the cabin through a rocker mechanism.
Front suspension type: independent, telescopic. The front suspension struts are the main supporting elements in which the rotating elements are assembled. The strut assembly includes a spring that rests on the upper and lower support cups. The upper part of the rack is attached to the body with three bolts, and the lower part is attached to a brace, attached to the body spar by two brackets.
At the bottom of the strut, the bracket connects to the hub steering knuckle.
The wheel is turned by a steering rod connected to the steering rack. The rod turns the strut assembly, while at the top it turns on a support bearing, and at the bottom - on a ball joint. The anti-roll bar links the suspension on both sides and ensures its synchronous operation.
What do the tidy indicators do?
The control panel on the VAZ 2115 is located in the center console directly in front of the driver.
Descriptions of instrument cluster symbols are given below:
- Coolant temperature sensor, if the controller arrow moves into the red zone, this indicates that the power unit is overheating.
- A tachometer informs the driver about the crankshaft rotation speed; if the arrow falls into the red zone, it is necessary to reduce the engine speed.
- Left turn signal.
- Right turn signal.
- A speedometer that tells you how fast a vehicle is moving.
- Fuel level sensor in the tank.
- The light indicator, made in the form of a gas pump, usually lights up if there is no more than 7 liters of fuel left in the gas tank.
- Optics indicator, activated when the side lights are turned on.
- In accordance with the instructions, an indicator in the form of an exclamation mark lights up on the instrument panel if the brake fluid level has dropped and reached a minimum.
- High beam activation indicator light.
- This is a button designed to reset the daily mileage on the odometer and set the clock.
- An odometer that records the mileage of a vehicle.
- Light alarm, when turned on, this indicator will blink.
- The icons include one important indicator - Check Engine. This symbol always flashes when the engine starts, but disappears after it starts. The indicator may appear if the control unit detects certain problems in the operation of the power unit.
- The display showing the outside temperature and time is switched using button 11.
- The battery icon appears when the ignition is turned on; if it is constantly on, then most likely the on-board computer has detected problems related to the battery charge. But if it occurs, the problem may also be caused by a malfunction of the generator, loosening of the strap, or breakdown of the unit.
- The letter P in a circle - the indicator appears when the car is setting the parking brake.
- This symbol lights up when the engine fluid pressure is too low.
- Reserve indicator (the author of the video about tuning the control panel at home is the Studio Pandora channel).
Camshaft position sensor
This mechanism is located near the cylinder block. The main task is to transmit data to the ECU regarding the current operating cycle. Among specialists, the mechanism is called a Hall sensor. The operation of the device is based on the following principle: in accordance with the location of the crankshaft, the position of the gas distribution mechanism is determined. The data received by the sensor is reported to the electronic unit. Fuel is injected and the mixture is subsequently ignited.
The engine compartment of the VAZ 2114, what awaits you there?
- Upper rack support;
- Washer reservoir;
- Receiver;
- Engine;
- Mass air flow sensor;
- Air filter housing;
- Brake system hydraulic reservoir;
- Adsorber;
- Accumulator battery;
- Cooling system expansion tank;
- Upper rack support.
In the center there is a motor, into which air flows through the receiver from the air filter, which is to the right of the engine. To the left of the engine is the windshield washer reservoir. The brake system hydraulic reservoir is located near the air duct above the air filter. The battery is in the lower right corner. The engine cooling system tank is installed slightly higher. The gearbox is located under the engine, under the right side.
In the on-board vehicle, I did not talk about the amount of work done in the engine compartment, namely, the so-called “shaving”. The purpose of all this was the complete visual absence of wiring under the hood, the absence of tanks, absorber, battery, and other things that are not aesthetically pleasing.
Actually, so that only the engine remains visible. At the time of the start, there were no examples of similar work with domestic cars. Therefore, I was guided only by photographs of works by foreign masters. Well, that’s more interesting) In the previous bulletin boards there were photos of the “underhood” already prepared for painting, but there were no details. I will try to remember most of the work carried out (this was back in 2010) and will describe them in the list:
- — Extension of motor wiring.
- — Lengthening and moving under the wing (an example was the Golf mk1 with “shaving”), front end wiring.
- — Relocation of the “rough road sensor” bracket.
- — Removing the battery platform.
- — Shaving (cooking) 123x! extra holes in the body.
- — Shaving of amplifiers between the “glasses” and the soft part.
- — Shaving of the TV and the attachment points for the “ski” with the shortened muzzle 2108. (yes, yes, there are still these stampings in the stock)
- — Shaving the side members.
- — Shaving the “houses” of the lever mountings.
- — Shaving of the engine shield.
- — Shaving soft parts (or internal mudguards).
- — Transfer of the coolant tank.
- — Relocation of the washer fluid reservoir.
- — I threw out the absorber.
- — Replacement of the engine cooling radiator with a radiator from AUDI.
- — Replacing the standard cooling fan with another one installed on the back side of the engine compartment.
- — I even shortened the headlight adjustment bolts.
And many many others…
I’ll probably describe the work on the engine in a subsequent bulletin board, if you’re interested.
I decided to pay a little attention to the engine compartment and show how things are going there at the moment. There should be order everywhere in the car.
1. Initially, I really didn’t like the quality of the coating of parts, such as the bracket for the receiver, generator, ignition module, they quickly began to corrode, but sandblasting and powder painting corrects this defect.
2.Extra tanks have been removed.
3. Cleaned the cylinder head cover. I didn’t polish it much, I brought the skins down to about 1000-1500
4. I installed the zero gear, and then only because of the aluminum pipe, so that it would, so to speak, be in harmony with the cylinder head cover.
5. The pride of the entire structure is the polished distributor plug)
6. And finally, very important details - stainless steel fasteners. I just can’t stand rusty bolts, but now everything seems neat.
It’s hard to say what will happen next under the hood.
Thank you for your attention and see you soon!
Wiring diagram VAZ-2114 new models
The updated engine has a new injection scheme, so it was necessary to use some new devices, as well as replace the ignition coil with a more efficient one and adapted to Euro 3 conditions. In order to comply with them, the engine had to minimize the amount of CO at start-up. And for this it was necessary to lean the mixture. Since a lean mixture ignites worse, it needed a more powerful spark to spark. This explains the use of a coil of increased power.
- block headlights;
- gearmotors for headlight cleaners*;
- fog lights*;
- ambient temperature sensor;
- sound signals;
- engine compartment light switch;
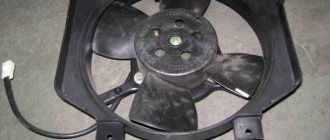
- engine cooling fan electric motor;
- generator VAZ-2114;
- low oil level indicator sensor;
- washer fluid level sensor;
- front brake pad wear sensor;
- wire ends connected to the common windshield washer pump**;
- windshield washer pump;
- headlight washer pump*;
- wire ends for connecting to the rear window washer pump on VAZ-2113 and VAZ-2114 cars;
- low oil pressure indicator sensor;
- engine compartment lamp;
- wire lug for connecting to the engine management system wiring harness;
- windshield wiper gear motor;
- starter VAZ-2114;
- block connected to the wiring harness of the ignition system on carburetor cars;
- coolant temperature indicator sensor;
- reverse light switch;
- low brake fluid level indicator sensor;
- accumulator battery;
- low coolant level indicator sensor;
- relay for turning on fog lights;
- mounting block;
- brake light switch;
- plug socket for a portable lamp;
- hydrocorrector scale illumination lamp;
- parking brake indicator lamp switch;
- block for connecting a backlight lamp;
- switch for instrument lighting lamps;
- Understeering's shifter;
- hazard switch;
- front seat heating element relay;
- ignition switch;
- rear fog lamp circuit fuse;
- front seat heating elements circuit fuse;
- door lock circuit fuse;
- front ashtray illumination lamp;
- ignition relay;
- cigarette lighter VAZ-2114;
- glove box lighting lamp;
- glove compartment light switch;
- heater fan motor;
- additional heater motor resistor;
- heater fan switch;
- heater switch illumination lamp;
- heater lever illumination lamp;
- gear motors for electric windows of the front doors;
- right front door ESP switch (located in the right door);
- gear motors for locking front door locks;
- wires for connecting to the right front speaker;
- gear motors for locking rear doors;
- wires for connecting to the right rear speaker;
- door lock control unit;
- wires for connecting to radio equipment;
- headlight wiper switch*;
- rear window heating element switch;
- rear fog light relay;
- block for connection to the heating element of the right front seat;
- rear fog light switch;
- right front seat heating element switch;
- fog light switch*;
- switch for external lighting lamps;
- left front seat heating element switch;
- block for connection to the heating element of the left front seat;
- wires for connecting to the left front speaker;
- left front door power window switch (located in the left door);
- right front door power window switch (located in the left door);
- wires for connecting to the left rear speaker;
- side direction indicators;
- dome light switches on the front door pillars;
- dome light switches on the rear door pillars;
- lampshade VAZ 2114;
- individual interior lighting lamp;
- block for connecting to the wiring harness of the electric fuel pump;
- trunk light switch;
- instrument cluster;
- trunk light;
- on-board control system display unit;
- trip computer*;
- block for connecting the wiring harness of the engine management system;
- rear exterior lights;
- rear interior lights;
- pads for connecting to the rear window heating element;
- license plate lights;
- additional brake signal located on the spoiler.
How does the VAZ 2114 engine work?
The base design of the VAZ fourteenth series engine is an injection system. It is based on distributed fuel injection into the cylinders through electromagnetic injectors - injectors equipped with sprayers. The composition of the fuel-air mixture is regulated by an electronic controller that receives information from the vehicle's sensors.
VAZ 2114 engine structure
1 – generator drive pulley; 2 – oil pump; 3 – timing belt; 4 – toothed pulley of the coolant pump; 5 – front cover of the timing mechanism drive; 6 – tension roller; 7 – camshaft toothed pulley; 8 – rear cover of the camshaft drive; 9 – camshaft oil seal; 10 – cylinder head cover; 11 – camshaft; 12 – front cover of camshaft bearings; 13 – pusher; 14 – valve guide; 15 – oil separator mesh for the crankcase ventilation system; 16 – exhaust valve; 17 – inlet valve; 18 – rear cover of camshaft bearings; 19 – fuel pump; 20 – housing of auxiliary units; 21 – ignition distributor sensor; 22 – outlet pipe of the cooling jacket; 23 – cylinder head; 24 – spark plug; 25 – crankcase ventilation hose; 26 – flywheel; 27 – crankshaft rear oil seal holder; 28 – rear crankshaft oil seal; 29 – cylinder block; 30 – oil pan; 31 – oil level indicator (oil dipstick); 32 – crankshaft; 33 – piston; 34 – connecting rod cover; 35 – connecting rod; 36 – crankshaft main bearing cover; 37 – front crankshaft oil seal; 38 – crankshaft toothed pulley.
The engine operating cycle consists of the following stages:
- When the ignition is turned on, the injection system controller starts the fuel pump using a relay.
- From the pump, the fuel passes through a fine filter, fuel lines, and is supplied to the fuel rail, which is mounted on the intake manifold.
- The fuel pressure regulator, which is located on the ramp, bleeds “excess” fuel back into the tank. This is necessary for accurate dosing of fuel injection.
- From the ramp, through the sprayer on the injectors, fuel is supplied to the intake manifold of the engine cylinders.
- Next, the spent fuel vapors are captured by a separator, from where the vapors condensed into liquid are drained back into the tank. The air passes through the air filter and enters the throttle body intake hose. If the car is equipped with an adsorber, then part of the vapor is absorbed by activated carbon.
Sectional view of the Samara 2 engine
Thus, the necessary elements for the operation of the VAZ 2114 injection engine are:
- fuel pump – electric, submersible type, with a working pressure of at least 3.2 bar;
- electronic fuel injection system controller;
- pressure control fitting and fuel pressure regulator, which are attached to the fuel rail;
- electromagnetic valves – injectors;
- cleaning filter system and throttle assembly.
Crankshaft position sensor
You can often hear drivers with many years of experience calling this mechanism nothing other than a synchronization sensor. This name comes from the principle of operation of the device. The tasks of the DPKV are to synchronize the operation of the electronic unit and the gas distribution mechanism.
The VAZ-2114 is equipped with an inductive type DPKV. The cost of such a sensor is relatively small. If a vital controller for a car fails, most drivers prefer to immediately replace the device with a new one.
If the DPKV breaks down, further operation of the vehicle will become impossible. Without this mechanism, the fuel supply system will stop working, because the ECU will not receive information about when it is necessary to give a command to inject fuel into the cylinders. The location of the DPKV is in close proximity to the camshaft.
Electronics are responsible for fuel delivery in the VAZ-2114 car system. Without TPS, the control unit will not be able to determine the optimal time to supply gasoline. Deviations from the correct operation of the TPS lead to an increase in the amount of fuel consumed. The operation of many other car systems depends on the angle at which the remote control is located: cooling, fuel supply.
see also
The TPS is located near the idle speed sensor. In the “fourteenth” system, the work of these two devices is closely linked.
When the TPS breaks down, the car begins to twitch in a certain position of the damper, and instability of engine operation is also noted. All VAZ-2114 8 valve sensors are interconnected in their operation, so two different devices sometimes exhibit the same symptoms of malfunction. If symptoms of a breakdown occur, it is necessary to take a comprehensive approach to checking all controllers.
Technical characteristics of VAZ 2113
| Engine | 1.6l, 8-cl. (Euro-3) | 1.6l, 8-cl. (Euro-2) |
| Length, mm | 4122 | 4122 |
| Width, mm | 1650 | 1650 |
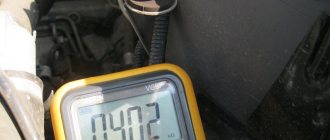
| Height, mm | 1402 | 1402 |
| Base, mm | 2460 | 2460 |
| Front wheel track, mm | 1400 | 1400 |
| Rear wheel track, mm | 1370 | 1370 |
| Luggage compartment volume, dm3 | 330 | 330 |
| Weight in running order, kg | 975 | 975 |
| Gross vehicle weight, kg | 1400 | 1400 |
| Permissible total weight of a towed trailer with brakes, kg | 750 | 750 |
| Permissible total weight of the lettered trailer without brakes, kg | 300 | 300 |
| Wheel formula/drive wheels | 4x2/front | |
| Car layout diagram | front-wheel drive, front engine, transverse | |
| Body type/number of doors | hatchback /3 | |
| engine's type | gasoline, four-stroke | |
| Supply system | Electronically controlled distributed injection | |
| Number and arrangement of cylinders | 4, in-line | |
| Engine displacement, cm3 | 1596 | 1596 |
| Maximum power, kW/rpm | 59,5/5200 | 59,5/5200 |
| Maximum torque, Nm at rpm | 120 / 2700 | 120 / 2700 |
| Fuel | unleaded gasoline AI-92 (min) | |
| Fuel consumption by driving cycle, l/100 km | 7,6 | 7,6 |
| Maximum speed, km/h | 160 | 160 |
| Transmission | With manual control | |
| Number of gears | 5 forward, 1 reverse | |
| Main gear ratio | 3.7 or 3.9 | 3.7 or 3.9 |
| Steering | safety, rack and pinion type, without amplifier | |
| Tires | 175/70R13-80T, 82(T, N); 165/70R13-70 (S, T) | |
| Fuel tank capacity | 43 | 43 |
What to do if the radiator leaks
Old VAZ models still had copper radiators installed, but now not every elite model can have such a miracle, but on domestic cars the aluminum radiator has firmly secured its position. Everything is clear here, it’s a matter of the price of metal, but now how can those who don’t have a propane torch repair a car radiator with their own hands? Everything is quite simple, and many chemical plants producing various polymers have made sure that repairing a car radiator with their own hands is accessible to everyone.
You will learn how to work with vinyl stickers on cars in the article.
You will learn what tuning is in Dagestan in our material at https://avtopolza.ru/tyuning-russkix-avto/dagestanskij-avtotyuning/ link.
Naturally, breakdowns of car radiators can be very different, and if it is a small leak, then the old folk method will cope with it - pour mustard into the coolant, which will penetrate and clog the small crack. After a head-on car collision, you will most likely have to buy a new radiator, since restoring the old one will cost a much larger amount. But this type of repair should be treated very carefully; it is preferable to eliminate the cause from the outside, so as not to clog the cooling and heating system with mustard or any other additives.
Layout of the new hatchback
The car received front-wheel drive, common for that time. The three-door body allows comfortable seating for passengers and has a spacious interior. The front of the car has changed noticeably. New optics were installed on it, the hood also looks different, and the bumper and fenders took on a more modern look. External parameters were also noticeably changed, and the length of the VAZ-2113 reached 4 meters, which is uncharacteristic for this model range. The width of the VAZ 2113 is 1.65 meters with a height of 1.4 meters and a wheelbase of 2.46 meters. The front track is 1.4 m and, when compared, differs by five centimeters from the rear.
Exhaust system repair
The performance of the exhaust system is often overlooked, considering that it is at the very end of the fuel combustion process and does not in any way affect the operation of the system as a whole. But this opinion is erroneous, since any obstacles at the exit of exhaust gases can catastrophically reduce engine power until it stops. In addition, in modern systems, fuel is burned, which improves environmental performance and, accordingly, removes the unpleasant smell of exhaust.
Lambda probe
Of the entire exhaust system, there are several elements that fail most often. Let's start with the electronic filling of the exhaust system, and the first we will have is the lambda probe. This exhaust gas analysis sensor in modern engines regulates the composition of the air-fuel mixture to ensure ideal fuel combustion.
Lambda probe VAZ 2114
There is nothing to break here, but it has a warranty period of usually 100,000 km, after which the metals that are responsible for the sensor’s ability to analyze gases simply lose their abilities. This repair is simple: the contacts are removed from the sensor, after which it is unscrewed with a spark plug wrench, and a new sensor is put in its place, the contact terminals are connected back.
Corrugation and pants
A corrugation is a flexible hose that connects the elements of the exhaust system. Thanks to its elasticity, vibrations from the engine are not transmitted further, but, taking all the vibrations upon itself, it most often fails, and if it breaks, it is replaced.
The so-called “pants”, that is, the muffler and resonator, can burn out, but this only happens with exhaust systems made of low-quality and thin stainless steel. If desired, burnt metal can be welded with special electrodes, but such repairs are short-lived, so it is better to replace them.
Connecting parts
In addition to the main elements, there are many gaskets between them, which also lose their properties and need to be replaced. Clear signs of a faulty exhaust system are loud exhaust noise and vibration when the engine is running. In addition, if the lambda probe on the car's display panel fails, the engine will light up yellow, however, only an on-board computer or a multifunctional station in a specialized service station will be able to determine the exact breakdown.
Engine diagram and structure
General view of the engine
Before we begin to consider the issue of the engine design and description of the characteristics, it is necessary to consider the design of the components and parts that are located directly in the main power unit and outside.
Diagram and design of the Samara-2 engine
1 – generator drive pulley; 2 – oil pump; 3 – timing belt; 4 – toothed pulley of the coolant pump; 5 – front cover of the timing mechanism drive; 6 – tension roller; 7 – camshaft toothed pulley; 8 – rear cover of the camshaft drive; 9 – camshaft oil seal; 10 – cylinder head cover; 11 – camshaft; 12 – front cover of camshaft bearings; 13 – pusher; 14 – valve guide; 15 – oil separator mesh for the crankcase ventilation system; 16 – exhaust valve; 17 – inlet valve; 18 – rear cover of camshaft bearings; 19 – fuel pump; 20 – housing of auxiliary units; 21 – ignition distributor sensor; 22 – outlet pipe of the cooling jacket; 23 – cylinder head; 24 – spark plug; 25 – crankcase ventilation hose; 26 – flywheel; 27 – crankshaft rear oil seal holder; 28 – rear crankshaft oil seal; 29 – cylinder block; 30 – oil pan; 31 – oil level indicator (oil dipstick); 32 – crankshaft; 33 – piston; 34 – connecting rod cover; 35 – connecting rod; 36 – crankshaft main bearing cover; 37 – front crankshaft oil seal; 38 – crankshaft toothed pulley.
Also, it’s worth looking at a cross-section of the VAZ-2114 engine:
Cross section of the Samara engine
1 – oil pan drain plug; 2 – oil pan; 3 – oil filter; 4 – coolant pump; 5 – exhaust manifold; 6 – intake manifold; 7 – carburetor; 8 – fuel pump; 9 – cylinder head cover; 10 – camshaft bearing cover; 11 – camshaft; 12 – crankcase ventilation hose; 13 – valve adjusting washer; 14 – pusher; 15 – valve cotters; 16 – valve springs; 17 – oil scraper cap; 18 – valve guide; 19 – valve; 20 – cylinder head; 21 – spark plug; 22 – piston; 23 – compression piston rings; 24 – oil scraper ring; 25 – piston pin; 26 – cylinder block; 27 – connecting rod; 28 – crankshaft; 29 – connecting rod cover; 30 – oil level indicator; 31 – oil pump receiver
Characteristics of an 8-valve engine
Many motorists remember how at the end of the 90s of the 20th century and the beginning of the 2000s, the VAZ 2108-09, which was also called “Samara,” was popular on the roads of the CIS. These cars became legendary in that era. Due to the high popularity, the AvtoVAZ plant decided to resume production of these models with some modifications.
VAZ-2114 engine under the hood
Firstly, the VAZ-2114 received a modified engine. In essence, this is an injection version of the Samara. Although it received some features from modern engines. If we consider in more detail, the Samara-2 engine (this is the type installed on the VAZ-2114) is a mixture of two engine options into one: from the VAZ 2108 and VAZ 2110.
When the basic information has been reviewed, you can proceed directly to considering the characteristics of the motor.
Table of main characteristics of the Samara-2 engine 8 valves:
| Name | Characteristic |
| engine's type | In-line, longitudinal type, 4-cylinder, 8-valves |
| Fuel type | Gasoline (installation of gas equipment is possible) |
| Cylinder arrangement | 1-4-3-2 |
| Injection system | Distribution, injection type |
| Control | Bosch, "January" or GM |
| Camshaft location | Upper |
| Drive unit | Front |
| Piston and ring diameter | 82 – nominal (tolerances by group: A – 82.00-82.01, B – 82.01-82.02, C – 82.02-82.03, D – 82.03-82.04, E – 82.04-82.05) |
| Crankshaft | Cast iron |
| Cylinder block | Cast iron |
| Timing system | Belt and roller |
Disassembly and repair: basic facts
Let's consider this paragraph of the article as reference information, because if we talk about engine repair, then each individual component and unit is repaired separately. When operating the power unit, it may be necessary to dismantle it. In this case, you can consider replacing the power unit from a foreign car.
Therefore, let’s consider the main operations aimed at removing the engine from the car:
A major overhaul of the power unit will require more in-depth knowledge of the design and operating principle of the engine, but if desired, every motorist is able to understand this and carry out these operations with his own hands.
Operation of the VAZ 2114 - from adjusting the suspension to repairing the radiator
Despite the fact that a lot of jokes and anecdotes have already been made up around the domestic automobile industry, so far not a single pragmatist has abandoned VAZ models.
If we take the VAZ 2114 as an example, it is a very good and improved example of domestic technology. And even if it is not as comfortable as foreign cars, and during operation it requires a lot of attention, but a much larger number of citizens of our country can buy it. In order for a car to travel hundreds of thousands of kilometers, it must be used correctly. All comments about the loud exhaust noise of the engine and a lot of squeaks arise from those machines that were either used incorrectly or were not given attention at all.
conclusions
The design of the 8-valve injection engine VAZ-2114 is quite similar to the first generations of this engine - “Samara”. Of course, the designers made many changes to the features of the power unit, but in many ways they remained similar. Repair and maintenance of this engine must be carried out regularly, which will not only extend its life, but also reduce wear on the parts located inside.
A whole complex of devices combined into one fuel system is responsible for supplying fuel to the VAZ 2114 engine. This article is dedicated to it, by studying which you will learn what the power supply system of the VAZ 2114 injector consists of, what is the principle of its operation, and what preventive measures must be taken in order for the system to work out its resource to the fullest.
The fuel supply system is the main artery of the car
Knock sensor, DTOZH, speed and others
In addition to the above mechanisms, other very important devices can be found in various corners of the engine compartment. The location of the VAZ-2114 injector sensors is quite chaotic, some are located directly on the power unit, others in other places - the gearbox, on electrical circuits.
Some equally important mechanisms include:
- The knock sensor is sensitive to various engine vibrations. Based on the received pulses, the ECU determines the qualitative composition of the mixture. Located on the cylinder block.
Engine temperature sensor - the only and simple, but extremely important task assigned to this device is to monitor the coolant temperature.
Speed sensor – from the name itself it is clear that this controller is necessary to measure the speed of a car. The DS transmits impulses to the ECU, which processes them and determines the speed of the car; the resulting result is displayed on the instrument panel by the speedometer.
Idling speed – not only reads information, but also corrects engine operation. DXH, using a special needle, controls the pipe - closes and opens. Due to this, the amount of oxygen supplied to the throttle assembly changes.
Mass air flow sensor - reads the data and transmits it to the control unit, which, based on the information received, determines the optimal ratio of the various components of the fuel-air mixture. A breakdown of the air flow sensor leads to the fact that the car significantly loses power, and the driver begins to feel a significant increase in the amount of gasoline consumed by the car.