Heating and ventilation UAZ 3151 Bukhanka
- Additional stove in UAZ Bukhanka
- One of the stoves on the UAZ Bukhanka does not work
- Pattern of a muzzle for a loaf
- Picture of stove 3741 and connection diagram for additional stove
- On the issue of heating the interior of the UAZ Bukhanka
The UAZ 315* family and general questions on heating and ventilation of the car interior
- Interior heating
- Modification of the standard UAZ 3151 stove
- Additional stove
- Refinement of the stove air intake
- Removable deflector
- Installation of body ventilation grilles
- Where does the exhaust smell come from in the cabin?
- Controlling the heater tap from the cabin
- How to warm up a UAZ in the Arctic?
- Gazelle electric pump for the stove
- Making a miracle stove
- Example of installation of the EMS (Interior Heater Control System)
See also:
- Body, cabin, interior. Thermal insulation, sound insulation;
- Engine cooling system;
Reasons for replacing the heater
Before you start removing the stove from the UAZ Bukhanka, you should figure out exactly why such manipulations are carried out, and whether they make sense. Some motorists and experienced owners of this car recommend removing and installing a new stove even when the old standard system is working normally. And if forced replacement is required, then it is even better to dismantle the old equipment and install a more efficient and modern system. In total, experts identify several main reasons for replacing the heater:
- Performance. The standard system demonstrates performance of only 4 kW. This is quite small for a car of this size and volume of internal space. It can provide warmth to the driver and front passenger, but rear passengers may experience a heating deficiency;
- Air flow. The maximum air flow rate in a standard system is 150 m3. With OUR this value is 3 times higher, that is, equal to 450 m3 per hour of operation. Therefore, heating will be carried out faster and more efficiently;
- Cabin filter. The standard equipment installed on the Bukhanka from the factory simply does not have a cabin air filter. This forces people inside the car to breathe dirty, unpurified air. The new heater has a filter;
- Noisy. If we compare the factory system and the new interior and body heater, the low noise level during operation also speaks in favor of the latter. This is an additional plus for comfort;
- Recirculation mode. A pleasure that the factory heater does not have. Due to the recirculation of cabin air, the stove will work better and with fresh air.
These reasons are more than enough to start removing the old stove from your UAZ Bukhanka and install new NAMI equipment.
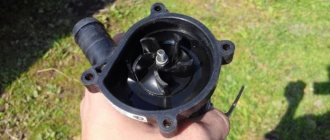
Radiator and cooling fan
When the liquid in the cooling system of the UAZ “Loaf” passes through the engine, it will heat up. It must cool down to cool. A radiator is used for this. On these cars, the manufacturer installs mainly copper 3-row radiators. However, owners prefer to install aluminum solutions instead. As reviews note, with them the engine is cooled much more efficiently.
The radiator in the system acts as a cooler. It is cooled by the oncoming air flow when moving. When the car is stationary or moving at low speeds, the air flow is weak and cannot sufficiently blow over the radiator. Then the fan comes into play. In this car it is of a forced type. The element rotates when the engine is running, regardless of the coolant temperature. Thus, it is very difficult to overheat the engine.
Dismantling works
You should start with how to remove the stove on a UAZ Bukhanka. The procedure is not the simplest, but many car enthusiasts do an excellent job with their own hands. Here you will need to adhere to a certain sequence, act carefully and simply take your time. Otherwise, you risk breaking something that will be useful to you on your Loaf.
- The first step is to get rid of the existing antifreeze or antifreeze in the stove. To do this, at the bottom point of the bracket for fixing the pipes leading to the stove, you need to unscrew the drain plug. Prepare an empty container for draining in advance;
- The remaining coolant is drained through the cooling system. On modern radiators installed on the Bukhanka, there may be no drain valve. Then you will have to drain it by disconnecting the lower pipe on the radiator. Also place a container under it;
- The standard loaf heater is fixed by using 4 M6 bolts. To unscrew them you will need a regular size 10 wrench;
- The designers have not thought everything out perfectly, so unscrewing these bolts yourself will be problematic. They obviously saved money on the cage nuts. Therefore, you need to hold it on one side and twist it on the other. The solution may be the help of a friend, or the use of a handy device to protect against rotation;
- When you manage to unscrew the mounting bolts of the standard heater, you can also remove the buttons on the additional panel. In principle, remove the panel itself, since everything you need comes with the new stove. Plus, during the reinstallation process it will interfere. Even if you plan to install the same panel, it is better to temporarily dismantle it;
- The connector responsible for power supply should be disconnected from the heater. Additional resistance is also removed, since it will not be needed in the future;
- Disconnect all cooling fluid supply pipes, after which the standard heater can finally be completely removed from the Loaf;
- Don't forget to also remove the device that controls your air intake. Get rid of the flaps in the same way.
At this point, the dismantling stage of work on replacing and connecting a new stove for the UAZ Bukhanka can be considered completed. Next, you will have to install new equipment to create a more efficient heating system inside the car. Before you start, we recommend that you additionally clean all accessible areas from possible contaminants, treat metal surfaces with anti-corrosion compounds, and remove rust where it has already appeared. Preventive maintenance will only extend the life of not only the heating, but also the entire car.
General device
These cargo-passenger cars with carriage layout use closed-type liquid cooling. The coolant circulates in the system forcibly under the influence of a centrifugal pump. The manufacturer recommends using domestic Tosol as coolant. However, in emergency cases, you can fill the cooling system of the UAZ “Loaf” with ordinary water. The volume, including not only the cooling system circuits, but also the heater, on most models ranges from 13.2 to 15.3 liters.
Modernization of new equipment
Now comes the turn of installing a new heating system suitable for Soviet and domestic Bukhanka. We will consider installation using NAMI as an example. This design will weigh a total of about 7.6 kilograms. At the same time, standard equipment with much lower performance and characteristics weighs almost 9 kilograms. The NAMI heater is designed to use a plastic housing. The main weight comes from the engine and radiator of the heating system. Before starting installation, it is worth performing certain upgrades. The thing is that for some reason they decided to use a sealant made from foam rubber on the new stove from NAMI. This is an extremely short-lived material that can soon wear out, lose its characteristics and simply collapse. Plus, foam rubber instantly absorbs water, and getting rid of it will be problematic. Instead of foam rubber, it is best to use technical polyurethane foam. Refinement involves performing the following procedures:
- All foam rubber used by the manufacturer should be removed from the heater;
- a blank from more practical and effective polyurethane foam is cut to the size of the old seal;
- a new seal is glued using waterproof glue;
- depending on the thickness of the polyurethane foam sheet itself, 1 or 2 layers may be required;
- if another layer is needed, glue it on top of the first after it has had time to set.
Thermostat
This is the most delicate component in the system. It fails most often - modern spare parts are not of very high quality. The function of the thermostat is to control the flow of coolant through the engine. The ZMZ-402 unit, like many others, has two coolant circulation circles - large and, accordingly, small.
When the driver starts the engine and it warms up a little, the liquid in the cooling system of the UAZ “Loaf” circulates only in a small circle. This allows the engine to warm up faster. When the temperature reaches approximately 70 degrees, the thermostat will work and coolant will flow through the cooling radiator in a large circle. Operating temperatures for the 402 engine range from 82 to 90 degrees. If the engine does not warm up to these temperatures, this indicates that the thermostat is faulty. Often, due to wear, it jams and does not open.
Installation process
In practice, dismantling and removing is always much easier than installing. Therefore, this process should be approached as responsibly and carefully as possible. In fact, drainage is a must. But it's better with him than without him. If you decide to go the no-drain route, then the first step is to install an air intake flap. It is much easier to tighten it while the stove is removed. The complete installation process will be considered, including the organization of the drainage system.
- Make a mark for drilling a hole in the body to install a drain pipe. The holes should be immediately treated with anti-corrosion compounds so as not to create a hotbed for the spread of rust throughout the body with your own hands;
- The new heater is screwed into its rightful place in the Loaf;
- Cut out a small tube. One end will need to be flared to obtain a wide enough base that looks like a funnel. To do this, you can take a metal rod, the diameter of which is slightly larger than the diameter of the tube, heat it and insert it;
- Automotive sealant is applied around the hole. The tube is installed with a funnel in the upward direction, and the joint is again coated with another layer of sealing compound. On the reverse side you will also need to secure the tube with sealant;
- After hardening, the sealing agent polymerizes, that is, it becomes durable and resistant to mechanical stress. Plus everything will be quite sealed;
- The NAMI stove comes with a pair of aluminum plates. They are needed due to the fact that you dismantled the air intake control system at the previous stage. Therefore, the air intake itself will be rigidly fixed on these plates. When the stove is installed, this will not be very convenient, but it is possible;
- The installation should be carried out in such a way that there is space in the form of a small gap around the perimeter between the edges of the car body and the hatch of your air intake. A gap of 1 centimeter will be more than enough. This gap will allow oncoming air to enter the interior of the Loaf;
- This is not the most optimal option, since in such a situation the outside air will actually not be able to flow by gravity. The way out of the situation would be to modernize the air intake flap. Or you will have to constantly turn on the stove motor;
- Now you can lay a line to supply coolant to the heater. The problem with the Bukhanka is that it was created as a car for army needs, and therefore all the comfort is provided only for those sitting in the cabin. And residual heat enters the cabin;
- This modernization needs to ensure comfort for the driver and front passenger. Here you will need to route the hoses accordingly;
- First, a hose is led from the engine to the lower pipe on the front heater. A stove valve is also installed here, blocking the flow of moving cooling liquid. The faucet used is a standard one, but you can also install some kind of swivel type tap. The crane itself is first dismantled and transferred to the cabin in order to be able to control its operation without leaving the car;
- When installing the faucet, consider the location of the control levers. When you turn the lever to the right, the tap should open;
- The upper tube, which removes coolant from the Bukhanka cabin heater, is connected to the lower pipe of the cabin heater. Since we will eventually get the highest point in the line in this way, to eliminate air from the system we will need to additionally install a valve to release excess air;
- A similar tap should be installed at the outlet of the interior heater. This will be the second highest point in the system. It is better for such purposes to use an outlet valve such as a tee of the cooling system. GAZ produces excellent faucets suitable for these tasks;
- The inlet of the engine pump will need to be connected to the upper pipe of the interior heater.
The installation is almost complete. But the work is not finished yet, since the electrical component remains.
Electrical work
To finally install the system, you will need to make a connection, providing power to the new heating.
- First of all, connect the ground. It is always marked with a black wire, so it will be difficult to confuse it;
- The mass is fixed to any metal part of the car body. It is optimal to secure it somewhere under the Loaf's torpedo. But here you can choose another option;
- It is recommended to enclose the positive wire in a sheath of corrugated material and extend it to the left side of the machine, where the fuse box (fuse block) is located;
- In total, the block provides for the presence of 4 fuses. The fourth of them is distinguished by the fact that it is under constant voltage. And the first 3 are controlled through the ignition switch;
- Since the heating equipment has its own fuse, it can be connected with a positive wire to any of the first 3 terminals on the block. But it is imperative that the connection be from above, that is, to the standard loaf fuse;
- Start the ignition to check the functionality of the heater motor. If everything is functioning, then you can install the panel;
- Do not forget to first connect the rod for controlling the stove faucet directly to the faucet itself;
- Once connected, check operation. When the tap lever is positioned to the left, it should be open, and when turned to the right, it should close. If this is not the case for you, you will have to turn the faucet over;
- Try on the panel and choose the best way to place it. The best solution here would be to make 3 holes in the panel from the new stove for additional buttons. Moreover, it is recommended to place the holes slightly below the middle of the panel so that they do not rest against the heating system motor;
- Make two holes in the bottom of the dashboard and a couple more holes in the floor tunnel of the Loaf. This will be required to fix the new panel;
- Connect the stove rod control unit to your panel, fix it in its new place with self-tapping screws;
- Now you need to install the rheostat of the stove motor control system, put plastic covers on the control levers and insert all the buttons.
Air has entered the engine cooling system: the main signs of airing
For a better understanding, let's start with the general operating principles. While the engine is cold, the liquid circulates only through the cooling jacket (special channels in the cylinder block and cylinder head), without entering the radiator. Circulation is provided by a water pump.
After the coolant temperature reaches a certain value, the thermostat is activated, which opens a large circle (the liquid passes through the radiator). If cooling the coolant when driving in a large circle is not enough, then the engine cooling fan (air cooling) is automatically switched on.
Please note that these malfunctions can occur for various reasons, that is, the engine begins to overheat not only due to air locks, but this possibility should also not be excluded.
As with any closed fluid system, air pockets can cause the system to stop operating normally. In this case, the risk of engine overheating also increases significantly, and the stove stops working normally.
- The main sign of air lock formation is engine overheating. In other words, the temperature rises above normal, the temperature gauge may rise to the red zone. In this case, when checking the coolant level in the expansion tank, no deviations may be detected.
- Also, during the cold season, the driver may notice that practically no warm air enters the cabin, although the engine is normally warmed up. This also indicates that there may be air in the cooling system.
One way or another, the air lock does not allow coolant to circulate normally through the channels of the cooling system. As a result of impaired circulation, certain problems arise. As part of diagnosing the engine cooling system, you should check the coolant level in the expansion tank, and also carefully inspect individual areas of the system.
We also note that air can enter through subtle cracks in the rubber pipes, but there may not be intense leaks through these cracks. Usually such cracks are not immediately visible, but a detailed inspection or injection of air into the system under pressure for testing can reveal problem areas. Also, during the check, you should pay attention to the pump, check the operation of the thermostat and cooling fan.
If everything is normal, then there is a high probability that the stove is not working and the motor is overheating precisely because of air locks. In this case, it is necessary to take measures and “drive” such a plug from the cooling system.
Diagram of the UAZ Bukhanka heating system
The embodied diagram of the UAZ Bukhanka heating system attracts special attention from the owners of this car when upgrading the car’s interior. After all, all car owners understand that the interior of this off-road car is very far from its foreign counterparts in terms of comfort, although this model was originally designed for use by special services, and what can one expect for such an affordable price.
Possible options for tuning the UAZ Bukhanka interior
As already indicated, the UAZ 452 car was created to meet the high requirements of specialized transport for the Ministry of Emergency Situations, military and medical services. True, this fact is absolutely not a statement that the performance of this car can be considered impeccable. That is why, when tuning the interior of the Loaf, not only the heating system is modernized, but also many other parts and elements.
First of all, when modifying the interior of the UAZ Bukhanka, most car owners replace the standard hard seats with more modern and soft analogues, since the basic seats can shake out the soul when moving, which is especially typical for off-road driving. Moreover, some craftsmen even integrate heated and electric chairs, for which the existing electrical equipment connection diagram is adjusted.
At the next stage, attention is paid to soundproofing the interior of the UAZ 452 and fixing the elements of the dashboard, however, before fastening the elements, the heating system of the Bukhanka is modernized, which will be discussed further. In terms of style, the interior can be decorated with leather, the dashboard can be decorated with wooden inserts or wood-look details.
Often, a variety of additional accessories appear in the interior of the UAZ Bukhanka, including shelves, glove compartments and ashtrays. The steering wheel is often replaced with a modern imported analogue with soft upholstery made of leather or other material.
Of course, there are other options for modifying the interior of this car, which depends on the imagination of the car owner, but one of the key aspects of tuning the interior is still the upgraded circuit of the Bukhanka heating system, since the standard heater simply cannot cope with its immediate responsibilities.
How Bukhanka's heating system can be upgraded
When the UAZ Bukhanka heating system diagram is being finalized, the following aspects must be taken into account.
The heater radiator should be located below the level of coolant present in the cooling system, so that this substance is pumped through it more efficiently and is always present in it. To do this, you can make the cooling system closed by integrating an atmospheric valve in the expansion tank cap. In this case, in the latter, the coolant level should always be higher than the installed heater radiator.
Air must be pumped with a less noisy centrifugal fan, which should be located along the air flow to the radiator. This approach will further reduce the noise level.
The air flow through the radiator must pass solely due to the pressure generated by the fan, and not through kinetic energy. In this case, the fan nozzle should not blow directly into the radiator honeycomb, since the air will pass unevenly through the radiator.
The temperature of the discharge air should be regulated by a damper that mixes cold and hot air flows, and not by a tap. When using a tap, the temperature will greatly depend on the operating mode of the power unit, and the damper can be used to regulate the ratio of both air flows.
The driver and passenger of the UAZ 452 will feel more comfortable when a higher temperature develops in the legs and lumbar region, and colder air should be present at face level to prevent drowsiness. To do this, the heating system circuit must be constructed in such a way that hot air is forcedly supplied to the feet and glass, and colder air must flow to the face, which can be achieved by additional selection of cold air masses between the radiator and the fan, as well as by means of an adjustable air mixing damper streams.
One of the options for modernizing the heating system of the Loaf could be the following sequence of actions, which consists in integrating a pair of snails onto a standard stove body:
- one snail is taken from the Bukhanka salon stove, the body of the second must be borrowed from the MTZ-82, and the fan and motor are installed from another UAZ stove;
- you need to stick a turbine from the Volga into the snail, since the standard one is very small and does not inspire confidence;
- then hoses are connected to the volute, for which a plate with a pair of holes is simply made, which is the easiest solution;
- after this you need to take ordinary sewer bends with a dimension of 50 * 45, which are attached to the plate. Mounting them is also very simple. It is necessary to take plugs from the 50 pipes and make holes in them to form a ring with a side. The entire structure is then inserted into the plate;
- To rotate the outlet, you need to put a pair of rubber rings on it, which can be borrowed from tractor hydraulics. Then the entire structure is applied to the snail, and as a result you need to get a similar design with the second snail. Don't forget about integrating diffusers;
- The work is completed by fastening the snail to the plate using bolts, rivets and welding, after which the product is painted. It is important to remember that the heater body cannot be removed without first draining the antifreeze and disconnecting the hoses from the radiator.
Conclusion
Concluding our discussion of our topic, we note that if you invest certain funds and effort into the Loaf, you can get an SUV that is quite comfortable for movement. At the same time, the design of the UAZ Bukhanka heating system must be modernized without fail, since the basic heater is unlikely to live up to its name in the cold season.
Site about SUVs UAZ, GAZ, SUV, CUV, crossovers, all-terrain vehicles
Cooling and heating system for wagon-mounted vehicles UAZ-374195, UAZ-396295, UAZ-396255, UAZ-390995, UAZ-390945, UAZ-220695, UAZ-330395, UAZ-330365, with injection engines ZMZ-4091 Euro-3 and ZMZ -40911 Euro-4, liquid, closed, with forced circulation of coolant.
Cooling and heating system of UAZ wagon layout with ZMZ-4091 Euro-3 and ZMZ-40911 Euro-4 engines.
The cooling system of carriage-type vehicles UAZ-374195, UAZ-396295, UAZ-396255, UAZ-390995, UAZ-390945, UAZ-220695, UAZ-330395, UAZ-330365 includes:
— Channels for the passage of coolant in the cylinder head. — Intercylinder channels for the passage of coolant in the cylinder block. — Radiator of the cooling system. - Water pump. — Cooling system fan. — Fluid coupling for the cooling system fan drive. - Expansion tank. — Two-valve thermostat. — Coolant temperature indicator sensor. — Engine control unit coolant temperature sensor. — Radiator drain plug. — Drain valve or cylinder block plug. — Throttle device heating hoses. — Connecting pipes and hoses.
Diagram of the cooling and heating system for UAZ wagon-mounted vehicles with a ZMZ-4091 Euro-3 engine.
Diagram of the cooling and heating system for UAZ wagon-mounted vehicles with a ZMZ-40911 Euro-4 engine.
The cooling system of UAZ wagon-mounted vehicles with ZMZ-4091 Euro-3 and ZMZ-40911 Euro-4 engines, according to the operating manual, must be filled year-round with low-freezing coolant TOSOL-A40M or OZh-40 “Lena”. When the ambient temperature is below minus 40 degrees, the cooling system should use low-freezing liquid TOSOL-A65M or OZH-65 “Lena”.
The capacity of the cooling system of the ZMZ-4091 Euro-3 and ZMZ-40911 Euro-4 engines, including the heating system, is:
— For UAZ-374195 and UAZ-330395 cars: 12.7 liters. — For cars UAZ-396295, UAZ-396255, UAZ-390995, UAZ-220695: 13.7 liters. — For UAZ-330365 and UAZ-390945 cars: 13.6 liters.
The operating temperature of the coolant in the cooling system should be between 80-105 degrees. Short-term, no more than five minutes, operation of the ZMZ-4091 Euro-3 and ZMZ-40911 Euro-4 engines is allowed when the coolant temperature rises to 109 degrees. If the coolant overheating indicator light comes on, the cause of the overheating must be immediately determined and eliminated.
UAZ heating system of carriage layout with ZMZ-4091 Euro-3 and ZMZ-40911 Euro-4 engines.
The liquid heating system of UAZ-374195, UAZ-396295, UAZ-396255, UAZ-390995, UAZ-390945, UAZ-220695, UAZ-330395, UAZ-330365 vehicles, combined with the engine cooling system, includes:
— Cabin heater radiator. — Interior heater radiator, except for UAZ-374195, UAZ-330395, UAZ-330365 vehicles. — Additional pump for the heating system. — Connection for supplying coolant to the interior heater. — Heater valve with remote control. — Drain valve or plug of the heating system.
The heating system on cars with a ZMZ-4091 Euro-3 engine differs from the heating system of cars with a ZMZ-40911 Euro-4 engine in the location of the additional electric pump of the system. In the first case, it is included in the cabin heater radiator line, and in the second case, in the cabin heater radiator line.
For normal operation of the cabin and interior heaters, the temperature of the coolant in the engine cooling system must be at least 80 degrees. To turn both heaters into operation, you need to open the heater switch remotely from the cabin or manually and, if necessary, turn on the additional heating system pump.
To increase the heating intensity of the cabin and interior, both heaters are equipped with 25-watt ME236 electric motors with a blade fan. They are turned on and off using separate switches on the instrument panel. The strength of the external air flow passing through the cab heater radiator can be adjusted by changing the position of the front end ventilation flap cover.
At low air temperatures, you can install insulation on the car, which is attached to the radiator trim with screws. In this case, it will be possible to regulate the temperature of the liquid in the engine cooling and heating system by closing or opening the insulation valve.
Source
Heating diagram UAZ 452
Heater UAZ "Loaf"
A car consists of many components. Each of them requires increased attention. Therefore, drivers must monitor the condition of their “iron horse”. The issue of preparing the car for the winter period is especially important.
Here, the presence of a well-thought-out heating system plays a vital role. Let's talk about it in the UAZ "Loaf".
Meaning:
This system is important, first of all, for maintaining normal temperature in the cabin at any time of the year, for ventilation of the air inside the car.
Most “loaf” models are equipped with a high-power heater “N-1” produced by NAMI.
Design:
The heater includes the following elements:
- Radiator.
- Fan.
- Special device for air distribution.
There are two main operating modes:
- When fresh air comes in.
- When recirculating flows.
The second mode implies increased temperature in the cabin. To do this, you need to close the air intake and then open the damper. In the first mode, the actions are performed in the reverse order.
A special unit controls the entire system. A tap is used for adjustment. A new design based on increased flow circulation and the use of fluid in the radiator allows the interior to warm up faster.
It is important to remember about glass blowing. Otherwise, this will lead to icing or fogging. The driver and passengers will feel discomfort.
If moisture gets in, it is removed through the air intake. A docking device is used here.
Breaking
Often, car enthusiasts are faced with cases when the heater (stove) does not perform its direct functions and does not heat. What could be the reasons?
- There is damage in the channels through which air passes.
- Antifreeze is leaking.
- The system is dirty, therefore the temperature is insufficient.
- The faucet on the stove was leaking.
- The valve responsible for protecting the engine has burnt out.
Shall we update?
How to replace a used stove with your own hands? What will you need for this? Everything can be done using the following algorithm.
- We drain all the antifreeze and disconnect all wiring.
- Disconnect the console from the shield. We remove the heating unit, the air intake hatch, remove the seal, and then clean the recesses.
- We try on the air filter, drill holes no more than 3.2 mm in diameter.
- Apply a large layer of sealant to the installation site. We install the housing and fix it. We return the filters from the cabin to their place.
- We install a new heater in the cabin, securing it with studs and M-6 nuts. We fix the node, then install the block console. We fix the entire structure with self-tapping screws.
- Next, we connect the control rod and secure it. We connect the pipes containing the antifreeze to the unit and secure them with special clamps. Then we install blowing channels for the glass.
- Finally, we connect the electrics, fill the system and check how it works. If problems occur, the entire system must be rechecked.
Finally
The heating system of the UAZ “Bukhanka” car is very simple in design. If you do not check its operation in time, eventually the owner will have to spend money on a car service.
UAZ cars at one time became the standard of reliability, operating flawlessly even in the most difficult situations. However, man has not yet invented eternal mechanisms, which means that the owners of these SUVs from time to time have to purchase spare parts for a UAZ car.
And, if you were looking for the most complete catalog of UAZ spare parts, then you have come to the right place - our range is impressive both by the standards of the regions and Moscow. Our online store AvtoALL sells the widest range of UAZ auto parts: from us you can buy literally everything, from the screw for securing the visor to the engine.
Please note that our store sells UAZ spare parts not only in Moscow, so you should pay attention to the special field in the description of each product, indicating the places where the required spare part is available. However, nothing prevents you from ordering delivery, which can be carried out almost anywhere in the Russian Federation.
Even today, among domestic motorists, the UAZ brand is synonymous with reliability and unpretentiousness. However, these SUVs, even despite the ingenious simplicity of their design, still fail from time to time. And carrying out truly large-scale repairs is impossible with the help of repair kits alone; you have to look for where to buy UAZ spare parts.
We are glad that the answer to this question was a visit to our UAZ auto parts store. In the presented catalog you can find everything you need, from large components like an engine to small but extremely necessary parts, such as all kinds of plugs, linings, seals, hinges, etc. We can offer not only really low prices for UAZ spare parts, but also guarantee the quality of all products, which is achieved through established cooperation with official manufacturers.
What else separates you from your first order of UAZ auto parts? Perhaps you are having problems finding the necessary components? Just contact our online consultant - and the required part will be found in the blink of an eye.
Full or partial use of any materials or their copying is permitted only with the written consent of the site administration.
How to remove an air lock from an engine cooling system
So, let's start with simple cars (old foreign cars, domestic auto industry). On such cars, air is removed from the cooling system as follows:
- All you have to do is drive the car onto the overpass. This must be done in such a way that the front part is slightly raised.
- Next, you need to unscrew a special cap on the radiator, after which the engine can be started.
- After several minutes of operation at idle, the air is bled from the engine cooling system.
However, this method will not help solve the problem on more modern cars. On such vehicles, the cooling system is of a completely closed type, that is, to de-air the air must be “expelled”. To do this, you can go in two ways.
If this method does not help, then the upper pipe that comes from the stove is weakened. You need to be prepared for the fact that the antifreeze itself will begin to leak. Next, the engine starts, and you need to monitor when air bubbles disappear from the leaking coolant. Their disappearance will indicate that the air lock has been successfully removed from the system. Let's look at this method in more detail using the VAZ Kalina model as an example.
Before starting work, you should prepare the keys for dismantling the plastic protective elements. You will also need a screwdriver to loosen and then tighten the clamps.
- So, the first step is to remove the plastic protection. This protection on the specified vehicle model is attached to the body using studs that have rubber seals.
- Next, you need to remove the clamp from the upper or lower pipe. Now you should unscrew the cap of the expansion tank. If the engine is hot, be careful as hot coolant may splash out of the reservoir!
- Then cover the neck of the tank with a clean rag. Next, a suitable rubber tube should be pulled over the neck. After this, you need to supply some air to the tank by blowing into the tube. It is advisable to do this using a compressor.
- After air is supplied to the tank, antifreeze should begin to flow out of the pipe from which the clamp was previously removed. After this, you need to make sure that there are no air bubbles in the leaking coolant, then quickly put the pipe over the fitting, put the clamp in place and tighten it. At this stage, the deaeration process can be considered complete.
- Next, you will need to bring the coolant level to normal (usually “on cold” it is poured 4-5 mm higher than o, since after warming up the internal combustion engine, the liquid will increase in volume and rise to o).
- After this, the engine can be started and warmed up. In some cases, this procedure requires slightly screwing on the expansion tank cap without tightening it. Then you should let the power plant idle, periodically raising the speed. This method will allow you to remove excess air that could have formed when adding liquid.
- If everything is in order, you can tighten the cap more tightly, but do not try to tighten it too much.