Hello dear readers of the blog RtiIvaz.ru. Today I want to continue the conversation about the auto radiator pipes of the cooling system of the VAZ Lada 2110 “ten”, Lada 2111 “eleventh” and 2112 Lada “twelfth”.
In the previous auto article, we looked at the radiator hoses of the cooling system of the VAZ 2108, 2109, 21099, 2113, 2114, 2115. We looked at the video and photos and found out what the sets of pipes of the “eight”, “nine”, “ninety-nine”, “thirteenth” are , the “fourteenth” and “fifteenth” Lada models differ from each other.
We determined the “upper” supply and also found out which “lower” coolant outlet was a thick rubber hose. You have found out where which rubber tubes fit, today we will continue to look at the video of the Lada 2110, 2111, 2112 pipes.
The cooling system pipes are such a thing that they always seem to be in good condition, but they make themselves felt when you don’t expect them.
You've probably seen cars on the road more than once with their hoods open in a cloud of steam.
So the coolant floats, falling on the burning engine parts (exhaust manifold), escaping in a fountain through a burst rubber pipe.
Therefore, guys, be vigilant if you haven’t changed rubber hoses for a long time. Don’t tempt fate—guessing whether you’ll be lucky or not will be unlucky—but replace all the rubber hoses of your car in advance.
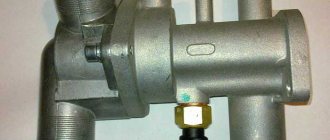
Look at the photo on the left, numbered -1, the rubber tube supplying coolant is the “upper” one, and numbered -2, the rubber tube is taking out the “lower” coolant. Numbered -3; -4 “shorts”, one of which is a bypass from the block head to the water pump, and the other “short” is a connecting coupling.
The considered pipes on the left are suitable for VAZ cars of the “tenth” family with carburetor and injection engines.
- 2110-1303025 radiator supply hose, number -1 (see photo)
- 2110-1303010 radiator outlet hose, number -2 (see photo)
- 2108 -1303092Р coupling connecting the thermostat and water pump, as well as the bypass “short”, numbers -3; -4 (see photo)
Next, look at the photo on the right under number -5 for the coolant supply pipe on the “top”, and at number -6 for the outlet pipe. cool liquid "bottom". You see number -7, the so-called “long corner” bypass pipe. cool liquids.
Diagnostics and identification of supply pipe faults
A malfunction of the cooling system associated with an antifreeze leak is manifested by a decrease in its level in the expansion tank and a critical reading of the temperature sensor.
Mechanical damage to the supply pipe or its depressurization in the area of attachment to the pump or engine block may be accompanied by:
- The release of steam in the engine compartment due to coolant entering the “pants” of the manifold.
- The appearance of a stain from leaked antifreeze where the car is parked, VAZ 2110, VAZ 2112, VAZ 2114 and Priora - in the area of the front part, VAZ 2109 - between the engine and the passenger compartment.
Regularly topping up antifreeze and adding additives to eliminate coolant leaks is not a solution to the situation. Replacing the pump supply pipe with a new one will not take a lot of time and money to purchase parts and gaskets.
Standard pipes with union connector
Standard
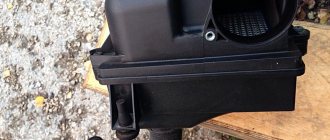
If such hoses are present, dismantling them is carried out as follows:
- Elements of this type are usually mounted using clamps. Just check what kind of clamps they are - disposable twist type or standard worm clamps. If they are disposable, we highly recommend replacing them with worm driven items. They are more practical and reliable;
- Armed with a screwdriver, loosen the clamp slightly and move it along the pipe. This way you can completely release the fitting;
- The hose is carefully, without unnecessary or sudden movements, removed from the receiver, that is, the fitting. Quite new pipes that have not yet worn out are easy to remove, but old ones can “stick”;
- If the element does not want to be removed just like that, twist it on the receiver, pry it with some sharp object, and pull it. You just can’t put in a lot of effort, because the pipes are very fragile. If the situation is really sad, just cut the hose with a knife. It is simpler, easier, although it will require large financial costs;
- When installing new hoses, clamps are first put on and then pulled onto the cooling system receivers;
- If you previously used a twist-type clamp, be sure to remove it. As an alternative, both a screw clamp and a worm clamp are suitable. There is no big difference in price, but the level of reliability is significantly higher;
- If you have difficulty fitting the elastic pipe onto the fitting, slightly wet the latter with soapy water. Another option is to warm the ends of the hoses in warm water;
- To facilitate installation, never use lubricants containing oils;
- Pull the ends of the hoses onto the fitting, check the correct installation and laying in the engine compartment;
- Now move the clamp to the required position and tighten, thereby ensuring a strong fastening of the new element of the cooling system;
- Follow the procedure to fill the system with coolant;
- Turn on the power unit and watch for signs of coolant leakage. It is quite possible that the clamp was not tensioned tightly enough, or there is a defect on the pipe itself. Although such things should be checked before purchasing.
Replacing the supply pipe on a VAZ 2110
The pipe, gaskets and hose for the radiator must be purchased from a trusted dealer. Cheap counterfeits cannot withstand the high temperature and pressure of the coolant.
To carry out the replacement procedure, you must:
- Drain the antifreeze from the engine block (work on a “hot” engine is prohibited) into a previously prepared container.
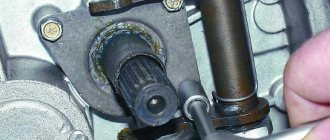
- Unscrew 2 bolts securing the pump and 2 from the engine block.
- Remove the pipe from the engine compartment.
Before installing a new supply pipe, apply a thin layer of automotive sealant to the gaskets. Reassemble in reverse order. Fill with coolant and check for leaks. If you suspect the integrity of the rubber hose of the expansion tank, replace it.
Preparation
Silicone
It is necessary to remove the pipes only when the car engine has completely cooled down. Therefore, if you have just stopped by your garage for procedures, do not rush. It is better to leave the car overnight and return to work tomorrow morning.
- Make sure that the pipes are actually damaged and need to be replaced.
- Be sure to drain the coolant from the system. If you recently changed it, there is no need to dispose of the liquid. Just use a clean container to drain so you can refill it later.
- The order in which you perform the work depends on what hoses are used on your vehicle.
Air lock formation
Replacing the pump supply pipe and draining the antifreeze associated with the work can lead to the formation of an air lock in the cooling system.
There are 2 ways to fix the problem:
- With the engine warm, remove one of the 2 throttle body hoses for 5-10 seconds. A small amount of antifreeze may leak out, which must be added through the expansion tank.
- The car is installed on a rise (overpass) so that the radiator is higher than the engine. The expansion tank cap is removed and the engine is started. After removing the plug, coolant is added.
Maintaining the cooling system in good condition ensures high-quality operation of the car engine. When replacing the supply pipe of the coolant pump on a car with high mileage, it is recommended to simultaneously replace the used antifreeze and flush the entire system.
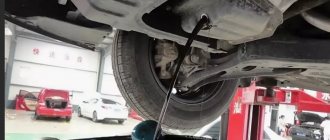
Leak search
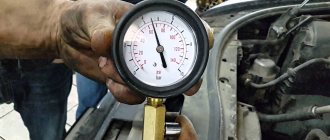
Finding out the reason for this state of affairs is not always easy. To do this, the driver will have to carefully examine the situation under the hood. Usually you can only notice a wet pan. In this case, it is worth checking the coolant level in the system. Most likely, there has clearly been a decline.
The cause and location of the leak is not easy to recognize. It is useful to “drive” the car at idle for some time so that the thermostat opens. And only when the optimal pressure is reached will the source of the leaks reveal itself. Most likely, one of the connections of the pipes is leaking, often it can be the pipes for supplying antifreeze to the heater radiator; if this is the case, we proceed to replacement.
Article: 2110-1303010/25/92, additional articles: 09-13-83bM, 2110-1303010
Order code: 158420
- Buy with this product
- show more
- Passenger cars / VAZ / VAZ-21104 drawings
- » href=»/catalog/vaz-3/legkovye_avtomobili-30/vaz_2110-10/nasos_vodyanoiy_i_truboprovody-140/#part41196″>Coupling Cooling system / Water pump and pipelines
- » href=»/catalog/vaz-3/legkovye_avtomobili-30/vaz_2110-10/nasos_vodyanoiy_i_truboprovody-140/#part41194″>Supply hoseCooling system / Water pump and pipelines
- » href=»/catalog/vaz-3/legkovye_avtomobili-30/vaz_2110-10/nasos_vodyanoiy_i_truboprovody-140/#part41192″>Exhaust hose Cooling system / Water pump and pipelines
- » href=»/catalog/vaz-3/legkovye_avtomobili-30/vaz_2110-10/nasos_vodyanoiy_i_truboprovody-140/#part41197″>Connection hoseCooling system / Water pump and pipelines
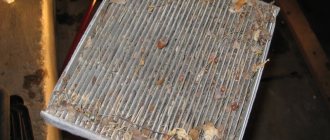
Cleaning or replacing the radiator
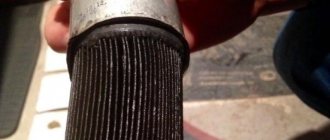
The radiator, located in the front of the car, absorbs the main flow of dust and dirt. For its effective operation, timely prevention and cleaning is necessary. The radiator can become dirty both inside and outside.
An indicator of internal cleanliness is the condition of the coolant. Manufacturers recommend changing antifreeze every 75,000 km or every 5 years. However, a change in the color of the liquid, severe darkening, discoloration, or the presence of rust requires urgent replacement of the coolant. It is recommended to change antifreeze at least every 40,000 km.
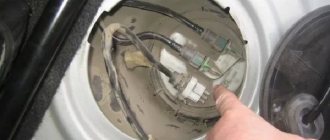
To carry out internal cleaning of the cooling system of VAZ 2110, 2114, 2115, it is necessary to drain the liquid. Sequencing:
- open the expansion tank cap;
- place a container to drain the antifreeze;
- Unscrew the drain plug from the cylinder block;
- drain the refrigerant;
- unscrew the radiator drain plug (located at the lowest point);
- drain the remaining antifreeze (antifreeze);
- tighten all the plugs.
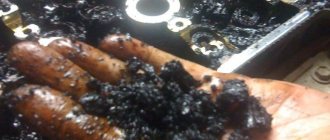
To clean, pour distilled water into the system and start the engine for about 20 minutes. Ordinary water contains many impurities and forms scale, so its use is undesirable. The liquid is drained several times until clean water flows out. This method is ineffective as it removes a small amount of deposits.
For more effective washing, it is advisable to use special chemical additives. The detergent components included in their composition allow you to dissolve deposits and remove various types of contaminants. The mixture of water and vinegar used by many motorists is less effective. It does not remove all deposits. After using chemicals, the cooling system is washed with distillate.
After cleaning the entire SOD of the VAZ 2110, 2114, 2115, an additional internal flushing of the radiator is carried out. To do this, you need to detach the hoses from the base and the upper and upper tank. Liquid is poured into the radiator through the upper pipe using a garden hose. Flushing is carried out until clean water flows from the lower pipe.
The removed radiator can be externally cleaned to remove dirt, insects, and sand from the cooler honeycomb. Cleaning is carried out with a soap solution or special devices that create a strong flow of water or air, for example a Karcher vacuum cleaner. The procedure should be carried out carefully so as not to bend the radiator honeycombs.
If damaged or heavily soiled, the radiator should be replaced.
Replacing the thermostat
If the thermostat valve does not operate correctly, the coolant does not circulate throughout the large circle of the ODS. The lower pipe remains cold even after the refrigerant is heated to 90°C. The top pipe may be hot due to steam escaping. The thermostat can also get stuck in the open position; in this case, the engine does not warm up to the required temperature or takes too long to warm up.
The principle of operation of the cooling system
As soon as you start the engine, the cooling system starts working. Of course, when starting, the main task is to heat the air in the cabin and achieve the operating temperature of the engine parts (approximately 90 degrees). However, the circulation of the cooling system of the VAZ 2110 is forced, that is, it is constant and is ensured by the operation of the pump, so it is impossible to influence its on/off.
The system is represented by small and large circles, in which liquid circulates depending on the temperature of the working parts and the engine. At the beginning of operation, the antifreeze moves in a small circle, which does not include the cooling radiator. As soon as the liquid reaches a temperature of 85-90 degrees, the main thermostat valve opens and antifreeze enters a large circle that connects the cooling radiator.
If the air flow passing through the radiator grille is strong, then the liquid is cooled well, but if you move slowly, the antifreeze cools slowly and the temperature gradually rises, then the temperature sensor is triggered and the fan turns on, which helps cool the liquid.