In this article we will analyze the reasons for the malfunction of the cigarette lighter on Kalina, as well as its diagnosis and replacement. For smoking drivers and passengers, the cigarette lighter is a very important thing in the car, but it can also serve as power for the compressor, power strip or charger. If you find that your cigarette lighter has stopped working, there may be several reasons for this.
Reasons why the cigarette lighter does not work on Kalina
This device on the car may break down over time. The main causes of cigarette lighter malfunctions are:
- Short circuit in the VAZ Kalina wiring circuit. A short circuit can appear due to various nuances: incorrect connection of the alarm system, faulty battery, “fatigue” wiring or moisture on the contacts. The fuse trips.
- Overheating of the heating element itself. The spiral may burst.
- The cigarette lighter on Kalina sometimes does not work due to poor contact in the socket itself.
- When connecting additional devices, the cigarette lighter fuse may blow. You need to disassemble the front panel and get to the block to check the serviceability of the circuit.
Other reasons and their solutions
A rare cause of cigarette lighter failure is the activation of the fire protection. In this case, the new fuse fails immediately after installation. This occurs when the button is accidentally held down for a long time when the driver is trying to get something from under the seat. In this case, you need to change the fusible element. When the fire protection is activated, the socket itself may fail. It needs to be taken out. After this, remove the nut from the supply terminal and remove the fusible jumper. The missing washer is made from lead-tin solder and the block is assembled.
Replacing the cigarette lighter on Kalina 1st or 2nd generation
The repair process is practically the same for these Lada models. It is also relevant for the Grant or Priora family. To replace the cigarette lighter with your own hands on Kalina 1st or 2nd generation, just follow the following procedure.
- Open the hood, find the battery and disconnect the negative terminal from it. It is recommended to remove it, because the mass is powered through the car body. If you turn off the plus, it will touch the body.
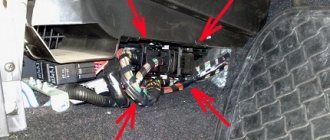
- We unscrew the three mounting bolts around the parking brake handle, which is located on top of the central tunnel. We dismantle the hand brake limit switch.
- We unscrew the rear fastening screw and additional screws on the sides.
- Remove the cover from the gear lever, and then lift the tunnel cover. Now you can remove the Kalina cigarette lighter itself.
- We disconnect the power plug coming to the electrical wiring circuit.
- We press the special latches that hold the cigarette lighter. After it pops out, it can be replaced.
- We install a new part on the Lada Kalina. After replacement, we carry out the assembly process. We perform all steps in reverse order.
Repair and replacement instructions
If the reason is not the fuse and the antenna, then the device may not work. In this case, it needs to be replaced. Replacement is complicated by dismantling the plastic floor tunnel.
1. The process of unscrewing three bolts
2. Disconnecting the power plug
3. Car cigarette lighter
The replacement procedure for the Lada Kalan and Lada Granta Liftback is similar and consists of a sequence of actions:
- First of all, you need to remove the battery terminal.
- Then unscrew the three mounting bolts that hold the plastic handbrake lining.
- Next you need to unscrew the handbrake switch.
- At the back of the tunnel there is a self-tapping screw, which we unscrew in the next step.
- Then we unscrew the fastenings of the floor tunnel from the side.
- Next, remove the cover from the gear shift knob.
- Now you can lift the tunnel and begin replacing the cigarette lighter.
- Before replacing, you must disconnect the power.
- Next, press the latches that hold the cigarette lighter, and you can remove it.
- We insert a new part and perform the reverse assembly steps.
Replacing a broken cigarette lighter is simple; any car enthusiast can handle this procedure.
Do you use a cigarette lighter to connect electronic devices?
Survey
- Yes
- No
Loading …
Replacing the socket in the Kalina cigarette lighter
The device may not work due to a faulty seat. You should replace the socket of a broken cigarette lighter on a Lada Kalina by following the same procedure.
- Disconnect the terminals from the battery.
- Remove the gearshift lever casing and the central tunnel cover by unscrewing the screws holding the decorative plastic.
- Disconnect the contact chip and then remove the socket.
- Replace the part with a new one.
- Reassemble in reverse order.
Detailed step-by-step instructions are presented in the profile video.
Just like that, somehow.
Images
| 1806534.jpeg (37.5 Kb, ) |
| laser |
| View profile |
| Send a private message to laser |
| Find more posts by laser |
| View downloads |
As an option, for connecting different consumers, a pump, a 12V mini washer, etc.
Power source - flashlight - Berkut SMART POWER SP-4L https://emporia-auto.ru/auto/show25176.html
| Alex73 |
| View profile |
| Send a private message to Alex73 |
| Find more posts by Alex73 |
| View downloads |
| denvoy1506 |
| View profile |
| Find more posts by denvoy1506 |
I also had a problem with this infection. The antenna shorted to ground when I inserted the adapter from the recorder, and this antenna burned to the body and when I tried to change the fuse, the new fuse immediately burned out. What’s unpleasant is that the dashboard and immobilizer are powered from the same fuse, so it’s impossible to start the engine (forward to the designers). I picked out this unfortunate tendril and that’s it. By the way, in the service department for replacing the cigarette lighter (the antenna was broken off, it was torn apart) they broke it as much as 5 pieces - they say to disassemble the dashboard and drain the antifreeze.
This cigarette lighter, by the way, is called “Euro”. They do everything through F, however.
| MypmypkuH |
| View profile |
| Send a private message to MypmypkuH |
| Find more posts by MypmypkuH |
The green ring should sit on the backlight fuse. If the cigarette lighter fuse is not in order, then the instrument panel would not light up - it’s immediately noticeable.
I wanted to create a topic, but I'll ask for advice on this one. I needed a permanent plus in the salon. I sat over the cigarette lighter for 1.5 hours, but was still unable to pull its socket out of the panel. I tried to reach inside with my hand and press harder, to grab it from the outside, to turn it in some direction - nothing helped. I couldn't find any similar topics. Somewhere on the Internet I came across information that you need to bend some kind of clamp inside the socket. I tried it - I shortened the plus and minus, burned the fuse, tore apart some internal petal in the cigarette lighter - but it still sits in its place. In this regard, 2 questions - how to remove the cigarette lighter socket and which cars have the same sockets as the Grant? Kalina, Priora, Ten or the same everywhere?
| STAS.kz |
| View profile |
| Send a private message to STAS.kz |
| Find more posts from STAS.kz |
The green ring should sit on the backlight fuse. If the cigarette lighter fuse is not in order, then the instrument panel would not light up - it’s immediately noticeable.
I wanted to create a topic, but I'll ask for advice on this one. I needed a permanent plus in the salon. I sat over the cigarette lighter for 1.5 hours, but was still unable to pull its socket out of the panel. I tried to reach inside with my hand and press harder, to grab it from the outside, to turn it in some direction - nothing helped. I couldn't find any similar topics. Somewhere on the Internet I came across information that you need to bend some kind of clamp inside the socket. I tried it - I shortened the plus and minus, burned the fuse, tore apart some internal petal in the cigarette lighter - but it still sits in its place. In this regard, 2 questions - how to remove the cigarette lighter socket and which cars have the same sockets as the Grant? Kalina, Priora, Ten or the same everywhere?
| MypmypkuH |
| View profile |
| Send a private message to MypmypkuH |
| Find more posts by MypmypkuH |
| SpaceNavigator |
| View profile |
| Send a private message to SpaceNavigator |
| Find more posts by SpaceNavigator |
I removed the cigarette lighter from Granta without disassembling the center console. I can tell right away that this is a pain in the ass, you’ll almost have to lie in the car with cancer. I only figured it out on the 2nd try. It didn't work on the first try either. the principle of its fastening was not known. In general, to pull it out you need a thin screwdriver “-“, patience and a set of swear words - there really is no other way. In general, the trick is that you need to squeeze out the 2 antennae that hold the cigarette lighter in the socket. It is impossible to compress them at the same time because they are located opposite each other in the depths of the cigarette lighter (at the same time, you must also try not to short-circuit the cigarette lighter, otherwise neither the buzzer nor the display will work), so I picked out one place where the antenna sits (the cartridge in which the cigarette lighter sits is plastic green), and only then Somehow he gave in to me. If I'm not mistaken, Kalinas and Priors have the same cigarette lighter. In general, I somehow overcame it, I also had to take it + I lit a cigarette, after that I didn’t even bother to snap it into place, suddenly I’ll have to take it off again - and again I don’t want to lie half-canceled.
How to change the Kalina cigarette lighter lamp
The heating element itself has additional lighting around the socket. The backlight sometimes burns out when the fuse trips. Therefore, it is necessary to replace the cigarette lighter bulb on Kalina. The order of procedures begins in a similar way.
- Remove the contacts from the battery.
- We get to the fuse block, where we take out number F20.
- We unscrew all the screws holding the gearbox housing and lift it. It will be most convenient to put the box in 4th gear.
- We hook the device by the green filter and pull it out along with it.
- Turn it clockwise to disconnect the clamps.
- We dismantle the metal base.
- We take out the plastic green case.
- We find a cartridge with a paw. We take it out and replace it with a new one.
- We assemble in reverse order.
The video will help you replace the Kalina lamp.
The principle of installing piston rings on a VAZ 2107 car
When all the steps are completed and the connecting rod along with the piston are removed, it is necessary to clean them of carbon deposits and dirt.
After a preliminary inspection, you need to remove the piston rings. It should be noted here that the rings will have to be replaced, so you should not be afraid of breaking the parts that came off. Now installing new rings, you need to start with the oil scraper ring. First of all, install the expansion ring, which is made in the form of a flexible spring with a rod or an octagon-shaped plate. When a new ring is installed on the piston, you should gradually push it through and periodically measure the gap, because it must be a certain distance.
If at the extreme point the gap is more than 0.4 mm, then the ring must be changed, and if it is less than 0.25 mm, then the whole problem is in the lock and it should be sharpened. If the gap size is normal, then install the ring. Moreover, it should be taken into account that the locks should not coincide, but rather have a difference of 90 degrees between themselves. This procedure should be performed with all rings on all pistons.
When the replacement is complete, before installing everything back, pay attention to the gaskets and also clean the engine. These operations will improve engine performance
If compression is insufficient, the VAZ 2106 engine loses power and begins to consume excessively not only gasoline, but also oil. In the best case, you can get by with a simple replacement of the piston rings, in the worst case, a complete overhaul of the engine, starting from turning the cylinders, replacing the piston group and ending with repairing the car’s crankshaft.
If you decide to change the rings yourself, there should not be any special problems when performing this repair. Of course, you will need a considerable list of tools to do this as quickly and conveniently as possible. And also, it is necessary to perform a number of preparatory work to get to the pistons:
- Remove the cylinder head of the VAZ 2106
- Remove the pan to gain access to the crankshaft and connecting rod mountings
Personally, I carried out this procedure with the engine removed, since the car was almost completely disassembled. But everything can be done even with the engine installed, but then it is most convenient to carry out repairs on a pit or a lift.
So, after the pan cover is removed, you can take a 14mm socket with a wrench and unscrew the two nuts securing the connecting rod cover. This is shown more clearly below:
When both nuts are unscrewed, you can remove the cover by hand; it can usually be easily removed without any problems:
Then, with a certain force, you need to press the connecting rod bolt with your hand or even with the handle of a hammer:
Until the piston comes out from the back of the cylinder. It will roughly look like this:
This should be done quite carefully so as not to damage either the piston itself or the cylinder walls:
Next, you can begin to remove and replace the piston rings if the cylinders are not yet worn out. To do this, carefully pry the edge of the ring with your fingernail or finger and remove it from the piston groove:
And carefully turn the ring until it is completely free from the groove:
After all the rings, both compression and oil control, have been removed, you can measure the clearance by inserting them into the cylinder and inserting a feeler gauge into the hole between the two edges:
If the values exceed the nominal values, we replace the rings with new ones. After which you can install all the parts in the reverse order of removal.
It is worth paying special attention that when installing the rings, their locks should be directed in different directions for greater tightness of the cylinder
Cigarette lighter repair
If the device on a Kalina car does not work, this is not always evidence of a breakdown of the part itself. Therefore, before replacing the cigarette lighter, it is necessary to check the most common locations of other faults. It is worth making sure that the appropriate fuse is intact or that there is constant contact with the ignition. These places should be checked before proceeding with replacement or full repair.
Frequent malfunctions
There are certain reasons why the Kalina device may not work. The most common of them.
- Burnt fuse. The block with it is located under the front panel. We are interested in the fuse element number F20.
- Broken filament.
- Triggered fuse protection against overheating and fire.
- Corroded contacts responsible for the terminals and ground connections.
Cigarette lighter splitter: types and connection
Sometimes it becomes necessary to connect 2-3 devices to the cigarette lighter, which cannot be done without a splitter, and, given the design features, it is not always possible to connect even a telephone charger normally. Well, since Lada Kalina does not provide other alternatives, it is better to use this one.
The most common type of splitter has 3 sockets plus one USB port. By connecting an inverter (converter of on-board current to 220 V), you can easily charge devices such as an e-reader, tablet computer or laptop on the road. The price of the device in question ranges from 170 to 300 rubles. Buying a power strip is much cheaper and easier than replacing a cigarette lighter.
You can, of course, connect the necessary devices to the ignition without touching the cigarette lighter. But here you cannot do without the hands and knowledge of an experienced auto electrician, and installation will take more time. There will be a lot of extra wires and additional fuses will be needed. However, some car owners consider this method more reliable for Lada Kalina.
It is, of course, better to use an inverter with direct wiring. But without it, a high-quality splitter will be enough. The only question is to find a really high-quality device. The splitters are structurally similar to any extension cords used in everyday life for sockets. But there are differences between different models, which do not always have a good effect on both their operation and the condition of the Lada Kalina’s electrics. Cigarette lighter socket splitters can be divided into three types:
- those in which the block with sockets is made in a single housing with a central plug;
- those in which the plug and socket are connected by a flexible connection;
- connected via a power cord.
Installing an additional cigarette lighter (12 V) in Kalina
This is a convenient device. It is often used to connect various chargers for mobile gadgets or laptops. There are even splitters with USB connectors. Therefore, installing an additional cigarette lighter is a popular procedure. Already now there are devices on the market with a standard socket input, but with an output for several connections.
The cost of such devices for Kalina is 1 – 1.5 thousand rubles. When replacing, you need to remember that you do not need to overload the car’s wiring by connecting several devices at once - the fuse will blow under increased load. Some “craftsmen” solve the problem differently. A more powerful fuse is placed, but this is dangerous due to wiring burnout and fire. Therefore, everything should be done according to the instructions.
New cars > Cigarette lighter >
Did you like the material? Share with your friends:
Have questions about car repairs? Ask them in the consultation section, to do this, click on the link below.
auto mechanic
Complete information on the electrical equipment of the Lada Kalina car, including the following modifications: VAZ 1118 - 5-door sedan (2004 to 2011), VAZ 1119 - hatchback (since 2006) and VAZ 1117 - station wagon. Also reviewed is the Lada Kalina Sport, a sporty version of the hatchback produced since 2008. There are diagrams of all blocks, including the location of relays and fuses, which allows you to carry out minor repairs of auto electronics and replace burnt-out elements yourself. At the end of the reference book there is a link to a PDF album of schemes.
Installation recommendations
A good splitter will have a built-in fuse, and only such models are worth paying attention to. The tip of the central plug is preferable to a conical one: this will definitely not cause problems. Let's imagine the ordinary everyday situation of the owner of a Lada Kalina. Suddenly it turned out that the cigarette lighter was not working.
What to do? It is the cigarette lighter itself (from which the cigarette is lit) that often stops heating to the desired temperature. In this case, you need to remove the cigarette lighter fuse and move the socket contacts further away. Quite often, in the case of a non-working cigarette lighter, it is enough to simply change the fuse. This is done like this:
- carefully open the fuse box (the cover of the block on the Lada Kalina is made under the side light switch);
- there is a hint on the cover with a diagram of the location of the fuses; We find the one we need, take it out with plastic tongs and insert a new one.
The cigarette lighter fuse in Kalina is located on the 2nd row in the 7th place of the block. You can even install an additional cigarette lighter; on the VAZ 2119 it is powered by the glove compartment light bulb. When performing this procedure, you should be careful when pulling the necessary wires and not mix up the polarity of the contacts. The light bulb has a permanent plus, which simplifies the matter. The socket from it must be removed, first disconnecting the battery.
General diagram of VAZ-1117, VAZ-1118, VAZ-1119
Elements of the instrument panel harness connection diagram
1, 3, 4, 5 — blocks of the tidy wire bundle to the front harness; 2, 8 - the same for the rear “pigtail” of wires; 6, 7, 9, 10 - continuation of the direction to the assembly unit; 11 — power supply for the lighting control device; 12 — set of instruments; 13 — toggle switch for the electric motor of the stove; 14 — power supply to the air supply box; 15 — ignition switch Lada Kalina; 16 — immobilizer block; 17 — block of the dashboard wiring harness to the ignition system wire bundle; 18 — cigarette lighter power supply; 19 — alarm switch; 20 — rear window heating switch; 21 — brake light switch; 22 — alarm light breaker; 23 — adjustment of computer modes ; 24 — windshield wiper control; 25 — VAZ horn switch ; 26, 27 — heating and ventilation control lighting lamps; 28 — glove box lighting; 29 — power supply to the on/off button in the glove compartment; 30, 31 — pinout for the standard radio; 32 — power supply to the electric motor of the stove; 33 — heater resistor network; 34 - electric amplifier control unit.
Selection of piston for VAZ Zhiguli cylinder
- Repair manuals
- Repair manual for VAZ 2107 (Zhiguli) 1982+.
- Selection of piston to cylinder
The calculated gap between the piston and cylinder (for new parts) is 0.05–0.07 mm. It is determined by measuring the cylinders and pistons and is ensured by installing pistons of the same class as the cylinders. The maximum permissible gap (if parts are worn) is 0.15 mm.
| Rice. 3–25. Main dimensions of piston, connecting rod, piston pin and piston rings |
NOTE The piston diameter is measured in a plane perpendicular to the piston pin, at a distance of 52.4 mm from the piston crown (see Fig.
).According to the outer diameter, the pistons are divided into five classes (A, B, C, D, E) every 0.01 mm, and according to the diameter of the piston pin hole - into three categories every 0.004 mm. The piston class (letter) and the piston pin hole category (number) are stamped on the piston bottom
If a used engine has a gap exceeding 0.15 mm, then it is necessary to re-select the pistons to the cylinders so that the gap is as close as possible to the calculated one.
Spare parts include pistons of classes A, C, E. These classes are sufficient to select a piston for any cylinder, since pistons and cylinders are divided into classes with some overlapping sizes.
↓ Comments ↓
1. Vehicle operation and maintenance
1.0 Operation and maintenance of the vehicle 1.1. Vehicle operation 1.2 Vehicle maintenance
2. General information
2.0 General data 2.1 Technical characteristics of vehicles 2.2 Controls and monitoring devices 2.3. Ventilation control and interior heating
3. Engine
3.0 Engine 3.1 Removal and installation of the engine 3.2 Disassembling the engine 3.3 Possible engine malfunctions, their causes and methods of elimination 3.4 Engine assembly 3.5 Bench tests of the engine 3.6 Checking the engine on a car 3.7. Cylinder block 3.8. Pistons and connecting rods 3.9. Crankshaft and flywheel 3.10. Cylinder head and valve mechanism 3.11. Camshaft and its drive 3.12. Cooling system 3.13. Lubrication system 3.14. Supply system
4. Transmission
4.0 Transmission 4.1. Clutch 4.2. Gearbox 4.3. Cardan transmission 4.4. Rear axle
5. Chassis
5.0 Chassis 5.1. Front suspension 5.2. Rear suspension 5.3. Shock absorbers
6. Steering
6.0 Steering 6.1. Inspection, check and adjustment of steering 6.2. Steering mechanism 6.3. Steering rods and ball joints 6.4. Swing arm bracket
7. Brakes
7.0 Brakes 7.1. Checking and adjusting the brakes 7.2 Possible malfunctions of the brakes, their causes and methods of elimination 7.3 Bracket for the clutch and brake pedals 7.4. Vacuum booster 7.5. Brake master cylinder 7.6. Front brakes 7.7. Rear brakes 7.8. Rear brake pressure regulator 7.9. Parking brake
8. Electrical equipment
8.0 Electrical equipment 8.1 Electrical equipment diagram 8.2. Battery 8.3. Generator 8.4. Starter 8.5. Ignition system 8.6. Lighting and light signaling 8.7. Sound signals 8.8. Windshield cleaner 8.9 Headlight cleaner 8.10. Heater electric motor 8.12. Control devices
9. Body
9.0 Body 9.1. Doors 9.2 Possible body malfunctions, their causes and methods of elimination 9.3. Hood, trunk lid, bumpers 9.4. Body glazing 9.5. Windshield and headlight glass washers 9.6. Instrument panel 9.7. Seats 9.8. Heater and ventilation of the body interior 9.9. Body frame repair 9.10. Paint and varnish coatings 9.11. Anti-corrosion protection of the body
10. Modification and equipment of VAZ-2107 cars
10.0 Modification and equipment of VAZ-2107 vehicles 10.1. Car VAZ-21072 10.2 Car VAZ-21074 10.3. Car VAZ-21073-40
11. Applications
11.0 Appendices 11.1 Appendix 1. Tightening torques for threaded connections* 11.2 Appendix 2. Tools for repair and maintenance* 11.3 Appendix 3. Used fuels and lubricants and operating fluids 11.4 Appendix 4. Basic data for adjustment and control 11.5 Scheme
Detailed electrical diagrams of car components
Instrument panel wiring harness wiring diagram
Electrical connection diagram for the wiring harness of the ignition system Lada Kalina 11174, 11184, 11194
Electrical connection diagram of the front VAZ-11184 wiring harness
Electrical connection diagram for rear wiring harness VAZ-11184
Useful: Connection diagram and pinout of the VAZ power window button
Diagram of electrical connections of the additional rear wiring harness (tailgate wiring harness) and the wiring harness of the license plate lights of the LADA KALINA 11174 car.
Electrical connection diagram for rear wiring harness VAZ-11174
Electrical connection diagram of the front VAZ-11174 wiring harness
Electrical connection diagram for rear wiring harness VAZ-11194
Wiring diagram for fog lights
1 - fuse in the assembly block; 2 — immobilizer output; 4 — rear fog lights; 4— external optics control unit; 5 — ignition switch; A - to power supplies.
prikur
Pay attention to the different installation heights of the ground contact. Pay attention to the different installation heights of the ground contact
YOU CAN IF YOU ARE CAREFUL ENOUGH
1. If you decide to connect additional equipment to the cigarette lighter or socket (and the instruction manual does not object to this), estimate the current consumed by it: it should not exceed 10 A at 12 V, which corresponds to a power of 120 W. 220 V voltage converters or adapters for laptops, vacuum cleaners, coffee makers, seat heaters, compressors, mini-washers, and polishers can become dangerous. Be sure to read the documentation that comes with them.
2. Chargers for mobile phones, ionizers, adapters for navigators, miniature TVs in good condition consume obviously less current. To ensure that this happens, do not buy illegal products from roadside peddlers - there is a high probability of stumbling upon devices of poor quality. Save pennies - you may lose your car. By God, it’s safer not to be greedy and make a purchase in a dealer’s company showroom or a reputable store.
3. The plug must be held tightly in the socket (or socket) and should not shoot out of it at the slightest wobble. It’s a good idea to repeat this check on the road, especially if the road is bumpy. In addition, when you touch the plug, you can feel overheating. It is good if an additional fuse is installed inside the electrical consumer (look for instructions about this in the instructions for the device).
4. The coiled wire of the connected device should not be too tight. If you cannot relieve the tension by moving the electrical consumer, try to stretch the wire with your hands; It will work better if you heat it up with a hairdryer. The springing effect will weaken and the wire will no longer pull the plug.
5. Do not leave the car unattended with the equipment connected, especially if the cigarette lighter (or socket) does not turn off when you remove the key from the ignition. This is perhaps the most important thing to control in order to prevent a fire.
Is a cigarette lighter dangerous?
Lada Kalina fuse and relay diagram
The main mounting block for the vehicle's relays and fuses is located on the left side, behind the exterior lighting control panel. By pulling the tab on the left side of the instrument panel, we open the cover of the mounting block.
| 1 | 10 | Instrument cluster, immobilizer (APS-6), reverse lamp switch, direction indicators, automatic climate control system controller (luxury) |
| 2 | 30 | Window lifters Lada |
| 3 | 10 | Ignition switch (terminal 30), hazard warning switch |
| 4 | 20 | Wiper switch, wiper relay, front wiper motor, rear window defroster switch, airbag control unit, rear wiper, heated seat relay coil |
| 5 | 25 | Heater, electric power steering control unit, windshield wiper switch (window washer) |
| 6 | 20 | Sound signal |
| 7 | 10 | Brake light switch, interior lighting, on-board computer (instrument cluster), light control module (LCM), immobilizer (APS-6) |
| 8 | 20 | Heated rear window relay |
| 9 | 5 | Side lights on the right side, glove compartment lighting, immobilizer (APS-6) |
| 10 | 5 | Left side parking lights, license plate light, parking light indicator |
| 11 | 7,5 | Rear fog lamp, immobilizer (APS-6) |
| 12 | 7,5 | Right low beam, right light corrector gear motor, light switch, immobilizer (APS-6), light control module (LCM) |
| 13 | 7,5 | Left low beam, left light corrector gear motor, light switch, immobilizer (APS-6), light control module (LCM) |
| 14 | 10 | Right low beam, high beam indicator |
| 15 | 10 | Left high beam VAZ |
| 16 | 10 | Right fog lamp |
| 17 | 10 | Left fog lamp, light control module |
| 18 | 15 | Seat heating relay |
| 19 | 10 | ABS, light control module (LCM) |
| 20 | 15 | Cigarette lighter VAZ 1117/1118/1119 |
| 21 | 10 | Reverse lockout solenoid |
| 22 | 15 | Electrical package control unit, anti-theft system |
| 23 | — | — |
| 24 | 7.5 | A/C compressor clutch relay |
| 25 | 30 | Electrical package control unit |
| 26 | 25 | ABS |
| 27 | 5 | Spare |
| 28 | 7,5 | Spare |
| 29 | 10 | Spare |
| 30 | 20 | Spare |
| 31 | 50 | Electric power steering |
| 32 | 40 | ABS |
| Car relay | ||
| R1 | headlight washer | |
| R2 | Window lifters | |
| R3 | Starter VAZ 1117/1118/1119 | |
| R4 | Auxiliary relay (rear window defroster, heater, wiper and washer switch) | |
| R5 | Hazard warning and direction indicators | |
| R6 | Wiper | |
| R7 | High beam | |
| R8 | Sound signal | |
| R9 | Fog lights | |
| R10 | Heated rear window | |
| R11 | Heated seats | |
| R12 | Air conditioning compressor |
The engine control systems fuse box is located in the center console - under the protective cover.
- Diagnostic connector.
- 15 A. Main relay circuits (winding of the cooling system electric fan relay, canister purge valve, air flow sensor, speed sensor, oxygen concentration sensor, ignition coil).
- 15 A. Fuel pump, fuel pump fuse.
- 15 A. Constant power supply circuits of the controller (ECU).
The relays are located in the lower right part of the console, where the fuses for the electric fan of the Lada Kalina cooling system are attached.
Before replacing the fuse, the cause of the blown must be determined and eliminated. To avoid failure of engine control system elements, do not install fuses with an increased current rating or homemade bugs. Sometimes the fuse thread remains intact, while the connection inside the fuse is broken. It is impossible to determine such a malfunction by eye, and then you can assess the condition of the fuse using an ohmmeter.
You can download a PDF with color diagrams of the Lada Kalina in high quality using the link
AvtoVAZ
Version 24.10.16 beta
| Car reference book |
Moving the site to a new domain.
General diagram of the electrical equipment of the VAZ 1117/1118/1119 Lada Kalina General diagram of the electrical equipment of the VAZ 1117/1118/1119 Lada Kalina
Description of the ELECTRICAL DIAGRAM
Note. This diagram does not show the connection points and wiring harness terminals. Along with the letter designation of the color of the wires, the designation of the number of the circuit element to which the given wire is directed is used, for example “6”.
Features of the first mounting block
Once you know where the blocks are, you can talk about their features. Another significant difference between the Lada Grant and representatives of previous generations is its numerical composition. Now it is equal to 32 units. For a detailed understanding, you will need to carefully familiarize yourself with the block diagram. For example, fuse F1 has a function to protect the circuits of such current collectors:
- ignition coils;
- nozzles;
- motor and fan control unit.
Element F2 is responsible for the safety of the electrical power window mechanism circuits.
F3 and F4 respectively “monitor” the safety of circuits belonging to:
- hazard warning lights and windshield wipers;
- airbag.
Elements F9 and F10 are “entrusted” with controlling the wiring to the side lights.
It is important to remember that each safety element has a current limit that it can withstand
- F8, “standing guard” of the rear window heating circuit, is designed for a maximum of 30 Amps;
- F6, which controls the operation of the reversing light, can only withstand 7.5 A.
It is easy to guess that these values of this parameter are directly dependent on the required electrical consumption of a particular pantograph.
Why doesn't the cigarette lighter work?
Perhaps the fuse was blown due to too much load from the compressor, charger or cigarette lighter splitter. This is one of the most common and easily fixed problems in Lada Kalina. You will need to open the fuse compartment cover to the left of the steering wheel and replace the blown one. Typically used before. 15 or 20A regular flag.
Another common reason for the cigarette lighter not to work is the unbending of the metal contacts inside it. For example, you often use a charger or power strip. Because of this, the contacts inside the cigarette lighter are unbent. In order for it to work again, you just need to bend them. This must be done carefully using a thin flat-head screwdriver without shorting the contacts, otherwise the fuse will be blown out.
If you decide to completely replace the cigarette lighter, you will need to dismantle the console from the handbrake to the instrument panel with the gearbox cover, only then can you remove the device.
Design and purpose of the cigarette lighter
The device is designed simply:
- metal cartridge with a nichrome spiral;
- button;
- plastic handle.
There is a special socket on the dashboard into which the cigarette lighter is inserted. When you press the handle, the device connects to the vehicle's on-board network. A current passes through the nichrome spiral and it heats up. As soon as the temperature reaches its maximum, the thermostat is activated, a click occurs, and the cigarette lighter returns to its original position.
Heated coil for lighting
In the first car models, the device was used directly for lighting cigarettes, but with the development of technology its use has expanded significantly. Currently, all external electronic devices are connected through it: vacuum cleaners, navigators, chargers, radar detectors, mobile phones.
Today, the 12-volt socket of a car has become indispensable; its breakdown immediately causes a number of inconveniences.
Where is the cigarette lighter fuse located?
A common reason why a device stops working is a burnt-out protective element. The current strength in the circuit itself is precisely fixed, and its value should not exceed 15 amperes. When connecting powerful devices or a short circuit, the fuse blows, causing the VAZ cigarette lighter to stop working.
The fact that this particular element needs to be changed will be indicated by indirect reasons. The fuse is responsible for:
- sound signal;
- trunk lock;
- immobilizer, this means that if it fails, the owner will not start the car.
To change a non-working cigarette lighter fuse, you need to get to the mounting block. It is located in the cabin under the decorative panel, to the left of the steering column. The cigarette lighter fuse is held in place by five plastic clips.
- We disconnect them and get to the rear space.
- We take out the plug that attaches to the luggage compartment opening button. Now you can completely remove the panel.
- We gain access to the mounting block, where tweezers are also located, allowing you to quickly pull out the protective elements.
The Lada Granta model has two versions of the fuse box - old and new. If the car is from the first years of production, then you will need to replace the element number F20. The mounting block diagram of newer models of the cigarette lighter fuse differs from its predecessor. Here you should change element F27.
The fuse must be rated 15 amps. When installing a protective element with high resistance, problems may arise. If the current in the circuit exceeds the maximum permissible value, the cables will melt, which can result in a short circuit or fire in the wiring and a blown fuse.
Reasons for failure of the cigarette lighter on the Lada Grant
A malfunction can occur due to various circumstances. Among the most common reasons why the cigarette lighter on a Lada Granta car does not work are:
- Blown fuse. This happens due to connecting a large number of devices to the connector. The total power of connected devices should not exceed 180 Watts (15*12=180). Otherwise the cigarette lighter fuse will blow. AvtoVAZ models have different protective elements (Granta - F20/F27, Kalina - F18, Priora - F13). The fuse rating must correspond to the value specified by the manufacturer.
- Poor contact. Over time, oxides or rust develop on the tendrils of the metal cartridge, resulting in a poor connection. To correct the situation, it is enough to remove the cigarette lighter, inspect the condition of its contacts, and treat them with a file to remove rust or oxides.
- Broken wiring. Three wires come to the device, the soldering of which disappears over time. To identify the malfunction, you will need a multitester.
In the latter case, you need to call three contacts.
- Red cable. Plus, responsible for heating the element. Comes to the battery through a 15 amp fuse.
- Yellow. Plus, it is responsible for the cigarette lighter light bulb.
- Black. Minus coming to the car body.
Other causes of cigarette lighter failure.
- Burnt out metal spiral. There is a nichrome spiral inside the cigarette lighter, which can burn out and trigger the fuse. If there is voltage in the connector and current flows to the contacts, but heating does not occur, then the reason lies here. It is treated by replacing the cigarette lighter with a new part.
- Failed backlight lamp. There is a light filter around the seat. Over time, the light bulb may burn out. The malfunction is eliminated by installing a working element.

