Published: 09/05/2016
Rating:
Tags:VAZ 2108/2109/21099Adjusting headlights
A considerable number of VAZ owners are faced with a situation where the turn signals and emergency lights do not work on the VAZ 2110 or other models, and the problem often takes them by surprise. The most common reason why turn signals on a VAZ 2109 do not work is that the car's electrical system has failed.
By the way, most VAZs are equipped with similar electrical circuits that are repaired in the same way, so the advice is relevant both for the 2109 model and for other VAZ models.
Diagram for switching on direction indicators and hazard warning lights
See also:
Tail lights for VAZ 2108, 2109, 21099
Problems with turn signals: main reasons
Drivers often encounter the problem that turn signals do not work for certain reasons.
This article will examine the causes of such problems using the example of VAZ cars: 2108, 2109, 21099, 2113, 2115. Each of these cars belongs to the SAMARA family, and therefore has similar electronics. In almost all cases, sign repair is an easy job. The most important thing is to determine the root cause of the malfunction. Heading 2: Turn indicators do not blink If the turn signals on a VAZ 2114 do not work - more precisely, they do not blink - then the cause of the breakdown is the indicator relay. To fix this problem, in most cases it is enough to knock on the relay or replace it. This is usually caused by poor contact or large amounts of water getting inside. If even after replacement they do not function properly, then it is worth inspecting the contacts and fuse box. If the VAZ 2114 turn signals do not work, then you should know: the relay is located in the block. It is marked K2. It is imperative to check fuse F12, as well as inspect its contacts with the unit itself. The cause of the breakdown may also be hidden in the emergency button or switch.
The left steering column switch is faulty
The connection diagram for the direction indicators (turn signals) of the VAZ 21093 will help you understand what is happening. It shows that the direction indicators are turned on by the left steering column switch. Intermittent voltage is supplied to its terminal “49a” from the interrupter relay and is then distributed either to the left or to the starboard side. At the same time, the same wire supplies voltage to the hazard warning switch.
Turn indicators (turn signals) for VAZ 21093, 21083 injector, europanel, connection diagram
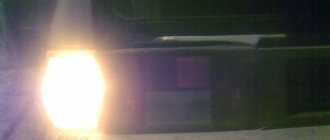
Therefore, if the emergency lights are working, then the current-supplying blue-red wire and the breaker relay are working, and the problem lies in this very pin “49a” of the left steering column switch. Or rather, in the switch itself, which, for some reason known only to it, does not want to transmit voltage to the turn signal lamps. See photo at the beginning of the article.
In such a situation, the easiest way is to buy a new left steering column switch or find a used one, but in good working order, and replace it.
Turn indicators do not turn on
If the VAZ 2109 turn signals do not work or one of them has stopped functioning, then there may be several reasons. It is recommended to consider each of them separately: 1. First of all, you need to check the lamp for operability. If necessary, it will need to be replaced with a new one; 2. Then you should check whether the connection contacts are working. It is recommended to pay special attention to the connections of the block, switches, and, last but not least, the indicators themselves; 3. Check if the switches are working properly; 4. Check the functionality of the relays, replace them and fuses. In the case when the turn signals and emergency lights of the VAZ 2114 do not work, the reason for this is almost always hidden in the relay. Heading 2: What to do if the turn signal does not turn off? If the indicators do not turn off on their own when turning the steering wheel, then the switch itself needs to be replaced. Heading 2: Fast Flashing If they blink too quickly, the cause is a burnt out light bulb. It is worth inspecting them and replacing them if necessary. Another factor in frequent blinking may be oxidation of the chips located on the taillights. Much less often, the cause of such blinking is the unsuitability of the tracks located in the additional block.
H4 bulbs
Considering the fact that the H4 optics does not change its essence (two filaments), at the moment this lamp has all kinds of modifications and design changes. Various models of this device are aimed at a specific buyer with their own distinctive features. The components of the gas in the flask, the material and shape of the electrode holders, the spiral - all this affects the technical performance of the lamp. Also, the quality of the luminous flux is reflected in certain technological secrets of various manufacturing companies and methods of assembling lamps. The fact that products from different companies may have their own characteristics is indicated by various tests.
Dim burning
If the turn signals on a VAZ 2115 do not work or the light bulbs are dim, then you need to: 1. Check the light bulbs for compliance with their power; 2. Clean the mass. Heading 2: Clicking of the turn signal relay If you encounter frequent clicking of the indicators, then you should look for the problem in the additional unit, or even more precisely, in the relay contacts. They could oxidize over time and become unusable, or simply not fit tightly. Perhaps the relay turned out to be defective. In this case, it is recommended to install a factory relay.
DRL connection diagrams
Since DRL can be mounted at your discretion, there are many connection schemes that allow you to configure the optics in the most convenient way for the driver. Let's look at the most popular of them.
Option 1 (to speed sensors)
This connection of running lights through a relay, the diagram of which is shown below, is considered one of the simplest. In this case, the DRLs will turn on depending on the operation of the speed sensor. In order to implement this scheme, it is necessary to connect contacts K1.1 to the circuit section (into the wiring break) from the low beam switch button to contact 85. In this case, you can use any relay with an opening pair, but experts recommend using a product with a TC code.
If you want the dipped lights to work while the engine is on, rather than the side lights, then the contacts must be “paralleled.”
Option 2 (to the oil sensor)
Another scheme for connecting daytime running lights via a relay uses an oil sensor. You should immediately check that it is in good working order, since if the regulator provides incorrect information about the fluid pressure, then the operation of the entire system will be disrupted.
With this installation of DRLs, the lights will turn on when the engine starts, and will be turned off by the dimensions. As optics, you can also use low beam or fog lights.
Option 3
It will be a little more difficult to connect the DRLs so that they turn on when the engine starts and turn off when it stops. In this case, the running lights will turn on together with the low beam headlights. This will require two low-power diodes (for example, 1A + KD10), which must be connected in series. After this, wires about 400 mm long are soldered to the light bulbs and connected. Don't forget that they are polar.
At the next stage:
- Dismantle and disassemble the dashboard of the car and connect the “blank” to X1 (most often the yellow wire).
- Remove the button through which the optics will be turned on.
- Plug the other end of the wire into the connector.
- Reinstall the button and check its functionality.
Option 4 (connecting running lights from the generator)
To implement such a project, you can use one of three schemes.
The first one is suitable if only the handbrake and the engine are used.
The second scheme for connecting running lights from the generator will require the use of an additional resistor, which is responsible for turning off the daylight when the side lights or headlights are activated.
The third scheme will allow you to deactivate the running lights:
- When you raise the handbrake, during the start of the internal combustion engine or during the automatic start of the engine along with the alarm.
- When the lights are turned on (in this case, it is necessary that the headlights or fog lights operate normally).
Roughly speaking, this type of connection “cancels” the automatic start of the DRL simultaneously with the ignition of the generator.
Healthy! It is this scheme that is “working” when passing the GTO.
Before connecting the running lights from the generator, it is recommended to watch the video at the end of the article. The fact is that there is more than one or two ways to activate the DRL. However, the connection will be much easier if you purchased a ready-made set of running lights.
Option 5 (connection of a ready-made kit)
In order not to rack your brains over how to install running lights on a car yourself, the easiest way is to buy a ready-made control unit to automatically turn off and turn on the DRLs. To install this module you need:
- Connect the black wire to the negative of the battery, and the red wire to the positive.
- The orange wire (if included) must be connected to the headlights or low beam. If the wire is not connected, the lights will not deactivate when the low beam or side lights are turned on.
After installing the DRL using any of the schemes described above, it is necessary to check that the installed elements are working correctly. To do this, start the engine and see if the light on the control panel is functioning, if the running lights are activated, and so on.
Troubleshooting if turns do not work, even if you do not have special knowledge.
Checking the serviceability of the turn relay.
And so let’s look at what to do if the turns of a front-wheel drive VAZ, except for the 2170 Priora, do not work. The operation and troubleshooting of which was discussed in the article “Prior Turning Relay”.
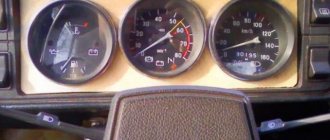
First, make sure that the measuring instruments and control lamps on the instrument panel are working. If they do not work, then check the fuse.
If the devices are working properly, turn on the hazard warning button and check that all the lamps in the direction indicators are blinking. This will allow you to divide the circuit into two parts and speed up troubleshooting.
If the alarm does not work when turned on, then it is necessary to check the serviceability of the turn and alarm relay and the presence of power at its terminal 49. The pin designation is marked on the bottom of the relay, next to the contact legs.
We remove the relay, which is marked in the form of a triangle on the top of the case, from the mounting block, and in the vacated socket, using a test paw, check for the presence of a plus on pin 49. We connect the test lamp to the ground or minus of the battery, and with the other end we touch pin 49, when If the hazard warning button is on, you do not need to turn on the ignition. Lack of power indicates a faulty fuse, alarm button or broken wires, contact tracks of the mounting block and poor contact in the connectors.
General recommendations
When the first signs of a malfunction in the turn signal and hazard warning systems appear, you must immediately take measures to eliminate them.
Always keep turn signal and turn signal lamps in the repair kit.
While driving, periodically pay attention to the operation of the turn indicators on the dashboard. Video - the reason why the emergency lights and turn signals on the Toyota Corolla stopped working:
Video - the reason why the emergency lights and turn signals on the Toyota Corolla stopped working:
May be of interest:
Choose a DVR: an indispensable gadget for the driver
Scanner for self-diagnosis of a car
Select any auto chemicals for your car
Some drivers prefer a DVR in the form of a mirror
When turning on the turns, the fuse blows.
Another malfunction of the direction indicators is the fuse blowing when the indicators of one of the sides are turned on. To quickly identify a malfunction, turn on the hazard warning lights. The signal lamp in a circuit that has a short circuit will not light up or will burn at full intensity. A sign of a short circuit in the signal lamp circuit can be a buzzing sound from the turn signal relay when the indicators are turned on. To facilitate troubleshooting when the VAZ direction indicators do not work, use the diagrams below.
What to do
In a situation where the dimensions do not blink when the alarm is turned on/off, start with simple actions, and then move on to more serious steps.
Make sure the light bulbs are working
First, check that the turn signals are blinking at all, even without turning the alarm on/off. To do this, turn on the ignition and move the turn signal knob up or down. At the same time, look whether the turning lights are blinking or not. If the light bulbs burn out, they need to be replaced. But first, figure out what is the reason for this situation. The problem may have arisen due to increased voltage in the on-board network or a wiring fault. If you do not fix the problem, the lamps will burn out again the next time you turn them on.
Check fuses
A common reason why the turn signals stop blinking when the alarm is set is damage to the fuses through which the light bulbs are powered. This is a common problem, so take the diagram and find the location of the required fuse insert. After that, check it for integrity using a multimeter, and if there is no circuit, replace the part. In the next step, immediately check whether the lamps blink when turned on or not.
Inspect the relay
In a situation where the turn signals do not flash when the alarm is set, damage to the relay cannot be ruled out. Most often this is due to a short circuit or burnt contact group. In both cases, the cause must be identified and eliminated. If possible, a damaged switching relay should be replaced, and if the contacts are damaged, at least clean this group.
Check the on-board network for a short circuit
If the light alarm on the car does not work and the turn signals do not blink, check the on-board circuit for short circuits. Such a malfunction often reveals itself as other problems, for example, lack of response to commands, constant light, etc. To check, you must have basic knowledge of the operation of the car's electrical circuit and have a multimeter with you. It would be helpful to have an assistant who will speed up the checking of various elements.
When calling, pay attention to all alarm contacts that give the command to turn on. Find the ones that go to the turn signals
After this, activate the alarm and measure the voltage that is supplied by pulses. In this case, you can quickly determine what exactly the problem is - with the wiring or the relay.
Inspect the limit switches
A common reason why headlights stop flashing when setting the alarm when the security system is turned on is damage to one or more limit switches. Missing contact on any of the doors, hood or trunk may cause the warning lights to not work properly. At the same time, the turn signals do not blink or, on the contrary, do so more often than usual. Check each limit switch in turn and make sure that the contact closes and opens when opening/closing respectively.
Carry out ECU diagnostics
To identify the reason why the headlights stopped flashing when the alarm went off, you can scan the car's control unit and read the errors. Perhaps your “head” will contain useful information on faults. This method will help if there is any problem with the central locking or other systems associated with the security system.
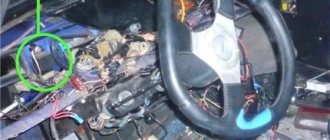
Find twists near the block
Disassemble the panel under the knees and try to find the control unit. It can also be located behind the instrument panel or mounted on the passenger side
Pay attention to the wiring twists. The problems may have arisen due to deterioration in quality
Correct the problem or perform soldering.
Replace the security system
In the most difficult cases, the reason why the turn signals do not blink when the alarm is turned on is a failure in the security system. Troubleshooting may require assistance from service center employees. If the device cannot be repaired, it may need to be replaced with a different model. You're lucky if you got it from a dealer, then you can count on a warranty. But installation not at a dealer can create problems.
Now you know why the turn signals do not blink when the alarm is turned on, and what to do to restore their operation
Start by checking the bulbs and fuses, pay attention to the relays, test the circuit and inspect the limit switches. In most cases, the problem lies on the surface, and you don’t need to go anywhere to solve it.
The right rear turn signal of the VAZ 2109 does not work
The rear turn signal on the right side of the rear light does not work, could it be due to the weight? Replacing the light bulb didn't help. The rest of the turns work. 21099
- How to fix turn signals and hazard lights? – 2 answers
- Rear turn off 21099 – 2 answers
- Turn signals just light up and don't blink - 2 answers
- The right turn signals of VAZ 21099 do not blink - 2 answers
- The turns and hazard lights of the VAZ 2108 are blinking dimly – 2 answers
Maybe a lot, but the rest of the lamps in this headlight are on? Clean the cartridge contacts until they shine; oxidized surfaces may not allow 12 volts to pass through. Check with a tester whether the plus reaches this wire.
Subscribe
to our channel in
Index.Zen
Even more useful tips in a convenient format
Turn signals do not work on VAZ 2109
How to fix turn signals and hazard lights?
The front right turn signal in the VAZ 2108 does not work
The turns and hazard lights of the VAZ 2108 are blinking dimly
A considerable number of VAZ owners are faced with a situation where the turn signals and emergency lights do not work on the VAZ 2110 or other models, and the problem often takes them by surprise. The most common reason why turn signals on a VAZ 2109 do not work is that the car's electrical system has failed.
By the way, most VAZs are equipped with similar electrical circuits that are repaired in the same way, so the advice is relevant both for the 2109 model and for other VAZ models.
Osram
A fairly well-known German company, which is one of the leaders in the production of xenon lamps. The products of this company are popular and highly trusted among domestic car enthusiasts, who eagerly purchase headlight lamps for cars of this brand. The manufacturer regularly improves manufacturing technology and has a significant number of patented developments and innovations to its credit.
Supporters of Japanese quality and reliability can recommend lamps from the manufacturer IPF. It is worth noting that the price of this company’s products is quite significant. This is due to the use of the latest technological developments in terms of design and materials used, as well as production features.
Causes of failure
To prevent a situation where the turn signals and hazard lights do not function, determine the reason why they broke. The most common causes of electrical breakdowns in a car include:
- depressurization. This causes water and dirt to enter the electrical system;
- oxidation. This occurs at the terminals and results in loss of contact. It’s easy to see: when the turn signal turns off and you disassemble the optics, you will see a green coating. To remove it, clean it with a rag and try to energize the contact;
- fuse failure. To avoid getting into a situation where the emergency lighting stops functioning, find the fuse responsible for turns (for example, K2). Next you just need to replace it. In addition to the failure of the fuse, you may encounter the problem of replacing its contacts;
Do-it-yourself diagnostics
In a situation where the emergency lights and (or) turn signals do not work, it is advisable to immediately begin troubleshooting. Checking all possible causes is quite simple, and therefore nothing prevents you from doing everything yourself. Accurate identification of symptoms will help you with this. Let's look at the most common ones.
The turn signal does not work, but the lights work. All this clearly indicates a faulty relay. Moreover, it immediately becomes clear that the problem arose due to the failure of its electromagnetic component. Most likely, a short circuit occurred, which led to the immobilization of the anchor.
The next option is that the turn signals on the VAZ-2114 work quite well, but they either blink very slowly or, on the contrary, at an excessively high speed. And this symptom indicates that the relay is not functioning properly, but the root cause is most likely the lamps. If you have recently changed them, then take a look at them. Most likely, the denomination does not correspond to the required one.
Moving the lever does nothing. Here, not only the turn signals themselves (hazard warning lights) do not want to work, but sometimes the dashboard display responsible for them also stops lighting up. An additional symptom is the absence of clicks indicating that the function in question is enabled. There are several reasons:
- control element failure;
- open circuit;
- fuse failure.
How to fix
When the turn signals, hazard lights, and electrics in the car do not work, most often the relay responsible for supplying voltage is at fault.
To prevent this problem from occurring in the future, follow these steps:
- find out where the relay is located. The layout of its placement is indicated in the instructions supplied with the car;
- tap the relay. Often the reason lies in a banal “sticking”, and a slight blow resumes the operation of the optics;
- if the measures did not help, and your lighting devices are still not functioning, replace the relay, because the product is inexpensive.
Either one turn signal (“turn signal”) or two may not work, or all at once, etc., in different combinations.
Causes of turn signal failure
1. One turn signal (front or rear) does not work.
Burnt out light bulb
When a bulb burns out in one or more direction indicators on VAZ 2108, 2109, 21099 vehicles, the remaining ones begin to blink at double frequency. We visually determine where the light bulb has burned out, turning on the direction indicators one by one. We replace the light bulb with a working one.
Light bulb socket oxidized
We turn the light bulb in the socket several times to restore contact.
Wire connections are oxidized or loose
We check the cartridges and blocks of the front turn signals (in the front headlights and on the wings) and the connecting blocks of the rear lights of the car.
“culprits” of the failure of the “turn signal” on the wing of the VAZ 2108 (2109, 21099)
The “mass” is missing
All lights and lamps of VAZ 2108, 2109, 21099 cars have a negative wire, so you should check its contact with ground.
Burnt out track in the rear light circuit boards
In this case, it is necessary to remove and “ring” the traces of the rear light boards going to the turn signal lamps. Read more: “Checking the rear light board of VAZ 2108, 2109, 21099 cars.”
direction indicator in the front headlight of VAZ 2108, 2109, 21099 cars
2. Two rear repeaters or two front repeaters do not work.
Four first reasons
The light bulbs burned out, their sockets oxidized, the contacts in the connecting blocks of the direction indicators oxidized (on the headlight unit and the turn signals on the wings), and the “ground” was lost.
Break in the wires going from the mounting block to the rear lights
Check the circuit for an open circuit. Or the block of this wiring harness has come off in the mounting block, under the panel on the driver’s side - Ш9 (Х9 in block 2114), the outermost one across the mounting block.
Break in the wires to the front turn signals
The block has come off (W6 (X6) – the far right one at the bottom of the mounting block under the hood).
3. All turn signal indicators do not work, or they work in pairs - the right or left side of the car.
Previous reasons
Fuse blown
In the old-style mounting block 17.3722 this is fuse No. 5, in the new blocks 2114 - F16. The cause of a blown fuse can be different, but most likely it is a short circuit in the wiring. Therefore, when you detect a blown fuse, you should pay attention to finding the cause of the burnout.
The turn signal relay in the mounting block has failed
Replace the relay with a known good one. Before replacing, it is worth checking whether electric current flows to the input terminal of the breaker relay at all. We pull the relay out of the mounting block and, using a test lamp or a tester, check for the presence of current in the hole for the 49th pin.
The steering column turn signal switch is faulty or its connecting block has been removed
A break in the connecting wires or a loose fit in the mounting block of connecting blocks Ш 3 (Х 3), Ш 1 (Х 1)
Notes and additions
— A more thorough search for the causes of the malfunction - the turn signals do not work on VAZ 2108, 2109, 21099 vehicles, is possible using the turn signal wiring diagram. On our website this is the article “Connection diagram for direction indicators on VAZ 2108, 2109, 21099”.
— In some cases, at the same time, all direction indicators can be lit with a constant light without blinking. In this case, it is necessary to replace the turn signal breaker relay in the mounting block.
The contact in the connecting block has oxidized or it has fallen off
The connecting block on the left steering column switch may move slightly due to vibration when the car is moving. The contact in it and contact “49a” on the switch will open, and voltage will not flow through it into the electrical circuit for turning on the turn signals. But it will continue to go to the emergency light switch, since the wire is double. Her turn signal circuit will work.
A similar situation can arise when the contacts in the block are oxidized.
In this situation, it is necessary to remove the steering column trim and check the contacts and position of the connecting block of wires to the left steering column switch, as well as terminals “49a”, “49aR”, “49aL” of the left steering column switch. In most cases, it will be enough to simply remove and put the block on the switch several times to restore contact.
General information about turn signals
If you read the history of the creation of cars, then initially this part was not included in the package, and drivers installed it additionally for a fee. In modern cars, turn indicators are often placed on the headlight unit or next to it if they are front ones. The rear turn signal is mounted near the headlight. Repeaters of this necessary part can be placed on wings and mirrors. There is a technology for duplicating mirrors using diode lamps. This is now considered the most progressive.
The turn signal consists of the following parts:
- mechanical drive (for starting and shutting down);
- switch (to connect the lamps to the power source);
- relay, for closing and opening a circuit after a certain time.
Some cars have a very good functional solution - triple flashing when touched quickly; drivers really like this quality.
If you don’t have one, you can install a device that will increase the number of signals.
When the turn signal is activated, you hear a characteristic sound. In modern cars it can be changed to a more pleasant one. This car part gives a bright yellow, sometimes mixed with orange, glow. On American models, they are sometimes made red, which leads to an increase in emergency situations on the road, as they are confused with stop signals.
Traditionally, they are included as an indicator of breakdown - “emergency mode”. A turn signal is a kind of language of communication between drivers on the roads. They can be shown the undesirability of overtaking and other circumstances.
Turn signals fired on time are an indicator of your ability to drive a car and control the situation on the road.
Dependence on the headlight itself
In order for the lighting to be of high quality and look beautiful, you need to focus not only on the characteristics of the h4 lamp - these are halogens that are installed at fourteenths, but also on the headlight unit itself. If the unit has an average reflector and diffuser, your brightest lamp is worthless. And such blocks are supplied from manufacturers of two brands: BOSCH and Kirzhach. For objective reasons, the first of the second wins:
- The reflector from Kirzhach is narrow and elongated, contains an internal partition, and does not have an upper wall.
- The BOSCH company, on the contrary, has a wide and short reflector, with full walls on all sides.
Turn signals do not work on VAZ-2114
Problems with turn signals can occur both in VAZs with a carburetor engine and in models with an 8-valve injector. It gives more power to the engine and other benefits, while making troubleshooting more difficult.
A turn signal may not work well most often due to burnt out electrical contacts or if the integrity is damaged (a problem with the sealant). The instrument panel may indicate that there is a problem. You will notice a discrepancy between the signal and the turn button: the presence of a flashing headlight.
This malfunction is considered simple, but relatively common. If you figure out why this happened, then carry out the repair yourself and without any problems. The electronics here are simple and accessible to any driver who is minimally familiar with the operation of electrical circuits and has attended physics classes at school.
Let's look at the main causes of the malfunction and how to eliminate them:
- If there is no turn indicator signal, then in 90% of cases you need to replace the electrical relay or check how the contacts are connected to it. The relay is indicated by the symbol K1. Possible depressurization and liquid ingress. If after replacing the relay with a new one, the malfunction remains, then you need to carefully inspect the fuses. Perhaps one of them has burned out and needs to be replaced; it is better to check the entire unit.
- Don't forget to check the quality of fuse F12, as well as how it functions with everyone. Check the functionality of the switch itself, there may well be a malfunction there.
- Sometimes the emergency warning button fails. If this is the case, we can easily replace it with another one that works normally.
- If the turn signal lamp does not turn on, check the functionality of the device. She could simply burn out.
- If it is impossible to turn off the turn signal, a simple action is taken: the switch is replaced.
- Frequent blinking indicates problems with the lamp; it is better to replace it. If after replacement the result is the same, then the contacts have probably deteriorated (oxidized) and need to be replaced or cleaned. Sometimes it is a matter of failure of the tracks on the block.
- Dim glow. There are several reasons for this phenomenon: a mismatch in the power of the lamp required for a given turn signal. In this case, it is enough to purchase a lamp with the required parameters and replace it.
- Atypical relay sounds. With such a malfunction, the turn signals do not turn on according to your wishes. In such a situation, as a rule, the electrical relay should be replaced. It would be ideal if you purchase an original car from the factory that matches the model, so you will achieve long-term good performance.
- If the right turn signal does not work, then you need to carefully examine the right headlight. Its electrical board often malfunctions due to oxidation, therefore, the supply of electric current is disrupted. As a result, problems are possible with both the relays and fuses, and accordingly the turn signals stop working.
Turn signal problems are problems with your vehicle's electrical wiring and electronics. Therefore, if you are not strong in this matter, if problems of this kind arise, contact either a service station or an auto electrician.
Other malfunctions affecting the illumination of the rear lights
The reversing lights may not light due to a faulty switch. To troubleshoot, you need to do the following:
- disconnect the connector;
- unscrew the switch with a 21 key;
- remove the switch and replace it with a new one.
A malfunction of the car's lights may be caused by problems with the hydraulic corrector. With its help, you can change the angle at which the headlights are tilted (this is due to the different load levels of the car). The hydraulic corrector consists of a master cylinder, which is mounted on the dashboard, actuator cylinders of the headlights and connection tubes. It cannot be disassembled and cannot be repaired. The assembly part should be replaced. Removal and installation of the main cylinder of the headlight hydraulic corrector occurs in stages:
- remove the handle and cylinder lining by prying it off with a screwdriver;
- unscrew the nut with a 22" head;
- remove the hydraulic corrector.
The trunk light may also need replacing. In this case you need:
- Disconnect the cable and terminal of the negative battery;
- disconnect the rear light from the block with wires by opening the trunk lid;
- press the fastener parts and remove the holder with lamps from the flashlight body;
- unfasten the lamp by unscrewing two nuts;
- loosen the three nuts that secure the decorative trim of the luggage lid and unscrew the nut closest to the lamp;
- lift the cover and remove the lamp;
- The new lamp is installed in the opposite order to that described above.
Many cars of the VAZ family, including the VAZ 2110, have a problem that affects safety and also causes a lot of trouble for drivers. The rear light board is a thin strip with conductive tracks. You have to change this tape quite often, and with it the burnt out light bulbs. You can use the option of inserting iron cartridges from the VAZ 2101. So, to do this, you need to:
- remove and disassemble the rear lights, removing the board and the tape from them;
- buy single cartridges for stops and dimensions;
- purchase copper wire with a cross-section of 2.5 mm, connectors, M3 bolts;
- mark the places for the cartridges and drill them, finishing the holes with a file;
- to modify the cartridges for clearance and brake lights, turn the tip terminals 180 degrees;
- completely cut out the cartridges from the turn signals;
- secure the cartridges to the plastic with bolts and nuts;
- connect all the cartridges, laying the pluses on the turn signal, stops and dimensions;
- extend the connector block and install everything on the car.
Assembly instructions
LED lamps are semiconductor elements that glow when exposed to electric current. The main element in them is silicon. Depending on what impurities are used, the color of the light bulbs changes.
Tools and materials
To make a running turn signal with your own hands, you will need the following tools:
- soldering iron;
- side cutters or pliers;
- soldering iron and soldering material;
- tester.
You need to prepare fiberglass laminate from consumables. It is needed for the manufacture of a printed circuit board on which the semiconductor element will be placed. The required LEDs are selected. Depending on the characteristics of the LEDs and the current and voltage values of the on-board network, the characteristics of the protective resistors are calculated. Using calculations, the remaining components of the network are selected (the author of the video is Evgeny Zadvornov).
Work sequence
Before making turn signals, you need to choose a suitable scheme.
Scheme for manufacturing running turn signals
Then, based on the diagram, make a printed circuit board and apply markings on it to place future elements.
The assembly consists of a sequence of actions:
- First, you should turn off the power to the car by disconnecting the negative terminal from the battery.
- Next, you need to remove the old turn signals and carefully disassemble them.
- Old light bulbs should be unscrewed.
- The joints should be cleaned of glue, degreased, washed and allowed to dry.
- In place of each old element, a new running light turn signal is installed.
- Next, assembly and installation of the lights is done in the reverse order.
- After installation, the wires are connected.
At the next stage, an additional stabilized power source is connected to the network. Its input receives power from the intermediate relay, and the output is connected to a diode. It is better to place it in the instrument panel.
Flexible LED DRL strips
Types of problems and troubleshooting methods
The turn signal works correctly if the following indicators are met:
- the presence of the ignition on ensures the operating mode;
- moving the steering column switch up and down must be accompanied by turning on the turn signal on the corresponding side;
- The turn signal should flash at a rate of 60 cycles per minute.
Flashing at a certain frequency
Any other turn signal behavior indicates a problem. The most common causes of malfunctions include:
Non-blinking turn signal. The problem requires familiarity with the basic principle of relay operation: the current passing through the lamps leads to heating of the measuring resistor - an element that determines whether a particular lamp needs to be turned on. Consequently, the lamp resistance, different from the nominal one, changes the time the turn signal is turned on: it begins to blink. In this situation, it is recommended to lightly tap the relay (this helps if there is a weak connection or moisture). If you have replaced the relay, but the turn signal does not blink, but is constantly on, then there is poor contact with the fuse block. Replacing a fuse that was found to have a resistance value that does not correspond to the nominal value can also help.
Fuse box in the passenger compartment of VAZ-2170, -2171, -2172
The fuse box in Priora is located at the bottom of the dashboard, on the left side of the steering wheel. To get to it, you need to open the cover, which is held on by three latches. Rotate each locking knob 90 degrees and pull the lid down and it will snap open.
Fuses in the interior mounting block
F1 (25 A) - radiator cooling fan. If your fan does not work, check its motor by applying 12 V directly to it from the battery. If the engine is working properly, then most likely the problem is in the wiring or connectors. Check the serviceability of relay K1.
The fan in the Priora usually turns on at a temperature of 105-110 degrees. Do not allow the engine to overheat, watch the arrow of the temperature sensor.